Diagonal Ripple DIY (Do It Yourself) Judith F. Russell, 2013
use of modern colors and yarns, this vintage pattern becomes very up-to-date I have taken several patterns and suggestions to create a Do-It-Yourself set of instructions for the Diagonal Ripple DIY so that a user can modify the pattern for size, color, and yarn type. If you would rather follow the vintage pattern, it can be found by joining Yahoo Groups, where a copyright version is loaded at the group called “Celt's Vintage Crochet."” This version has the original photo and a very helpful chart, similar to the one below. If you have done diagonal work before, you are familiar with the shaping of the fabric by increases for each row and then decreases. The fabric can either be a square (where you increase and decrease equally for the horizontal/short and long/vertical), or a rectangle (where you stop decreasing on the short/horizontal side before you do the same on the vertical/long side). Figure 2 is an example from a diagonal striped pattern and shows the increases and decreases, starting at the lower left. In Figure 2 the blocks indicate clusters instead of individual rows, but I hope this will give you a visual idea of how the increases and decreases work.
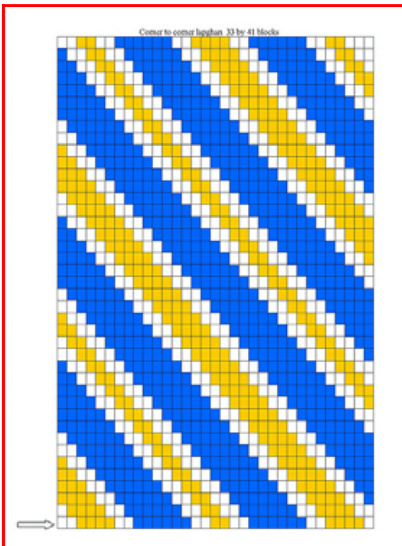
Figure 2 Example of Diagonal Increases and Decreases
BEGINNING
NOTE: MARK the center stitch of each ch 3 cluster as you go along. Beginning at lower left corner, ch 33. 1st row: 3 sc in 2nd st from hook, 1 sc in each of the next 14 sts (always take up both threads of the st below), skip 2 sts on chain (corner), 1 sc in each of the next 14 sts, 3 sc in last st of chain. 2nd row: ch 1, turn, 1 sc in first st, 3 sc in next st, 1 sc in each of 14 sts, skip 2 sts, 1 sc in each of 14 sts, 3 sc in next st, 1 sc in last st. 3rd row: ch 1, turn, 1 sc in each ofthe first 2 sts, 3 sc in next st, 1 sc in each of 14 sts, skip 2 sts, 1 sc in each of 14 sts, 3 sc in next st, 1 sc in each of the last 2 sts. 4th row: ch 1, turn, 1 sc in each of the first 3 sts, 3 sc in next st, 1 sc in each of 14 sts, skip 2 sts, 1 sc in each of 14 sts, 3 sc in next st, 1 sc in each of the last 3 sts. 5th row: ch 1, turn, 1 sc in each of the first 4 sts, 3 sc in next st, 1 sc in each of 14 sts, skip 2 sts, 1 sc in each of 14 sts, 3 sc in next st, 1 sc in each of the last 4 sts; break off beginning color and draw end through loop on hook ("fasten off"). Change colors every 3, 4, or 5 rows. Continue in the fashion until you get to 14 sc on each side of the 3st at point, fasten off.
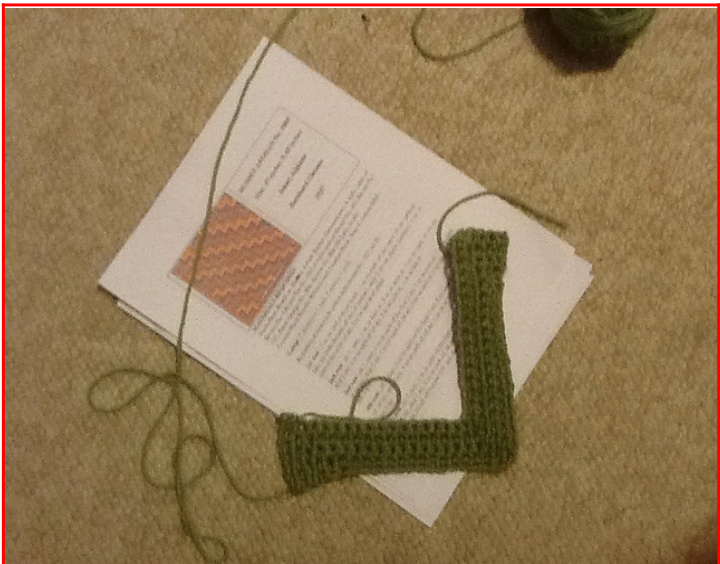
Figure 3 Beginning Rows
MIDDLE: ADDING width and length to sides
16th row which adds length with a chained extension at either end of the row: new color in last st , ch 17, 3 sc in 2nd st from hook, 1 sc in each of the next 14 sts on chain, skip the last st of chain and also the first st of last old color row, 1 sc in each of the next 14 sts, 3 sc in next st, 1 sc in each of 14 sts, skip the next 2 sts, 1 sc in each of 14 sts, 3 sc in next st, 1 sc in each of the last 14 sts of old color row, leave the last st of row free and drop old yarn. Fasten a separate 10-inch new color strand in last st and with it ch 16, break off the extra strand, pick up the dropped new color strand, skip the last st of last old color row and the first st of chain, work 1 sc in each of 14 sts, then 3 sc in last st of chain. 17th row: ch 1, turn, 1 sc in first st, 3 sc in next st, \* 1 sc in each of 14 sts, skip 2 sts, 1 sc in each of 14 sts, 3 sc in next st; repeat from \* twice, 1 sc in last st of row. Work more rows with new colors of choice, in every row having 1 more st at beginning and at end than in preceding row; (4 points in row).
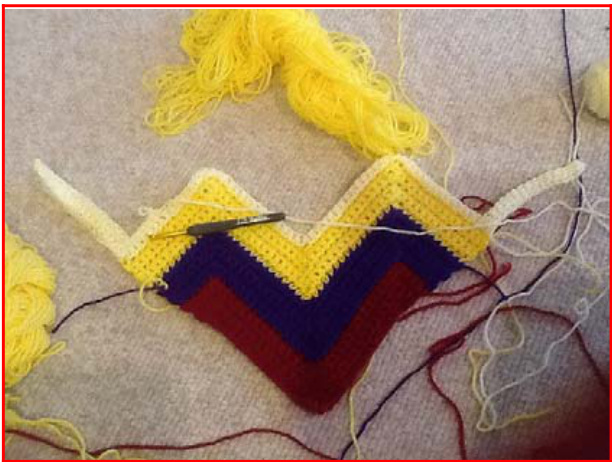
Figure 4 Adding Rows ADDING other sets of width and length stitches. Add the additional sets of stitches as you wish, whenever your sc count is 14 from the last point to the end of the line. Here are the instructions again: Join new color in last st of last old color row, ch 17, 3 sc in 2nd st of chain , 1 sc in each of the next 14 sts, skip last st of chain and also the last s c of last old color row, \* 1 sc in each of the next 14 sts of old color row, 3 sc in next st (point), 1 sc in each of the next 14 sts, skip 2 sts; repeat from \* twice, 1 sc in each of 14 sts, 3 sc in next st, 1 sc in each of 14 sts, drop yarn; fasten an extra strand of new color in next st (last st of row). A full sized afghan made of Super Saver Yarn would consist of about 5 extensions on the narrow side and 7 extensions on the longer side.
WHEN YOUWANT TOSTARTDECREASING
Stop your line of stitches and turn your work directly over the last stitch of the last line. Do this first for the shorter side and then later for the longer side.
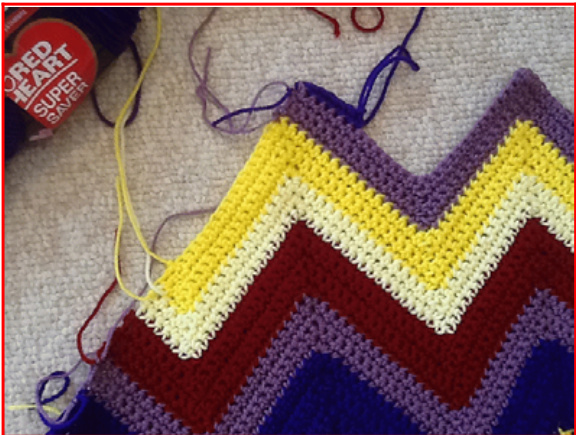
Figure 5 The new dark purple row does not round the corner. Stop and turn directly over the stitch in the previous row.
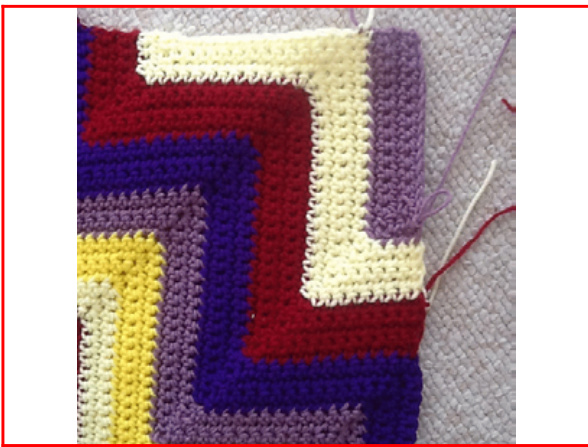
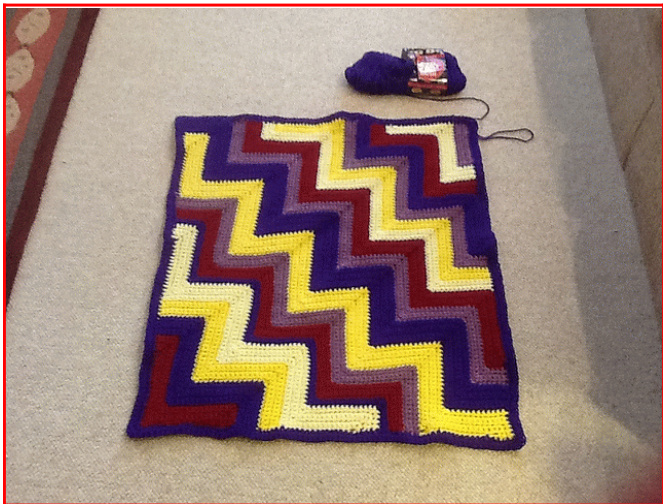
Figure 7 Final corner
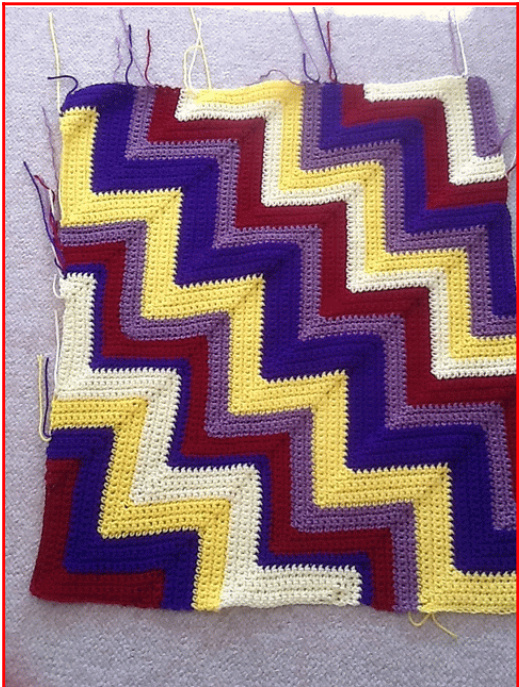
Figure 6 Blanket complete, inner portion
BORDER
A good sized (4 or 5 row) border will take almost a complete skein of Super Saver. With first color, work a row of sc around the entire afghan, 1 sc in each st, or row, 3 sc in corner sts; join with a slip st at end of round. 2nd round: ch 1, turn, working in opposite direction, make 1 sc in each st, 3 sc in corner sts; join at end of round and fasten off. 3rd round: turn, with next and working in opposite direction, make 1 sc in each st, 3 sc in corner sts; join at end of round and fasten off. You may want to work more rounds same as 3rd round, but using other colors. A possible embellishment would be a reverse sc border with the last color used.
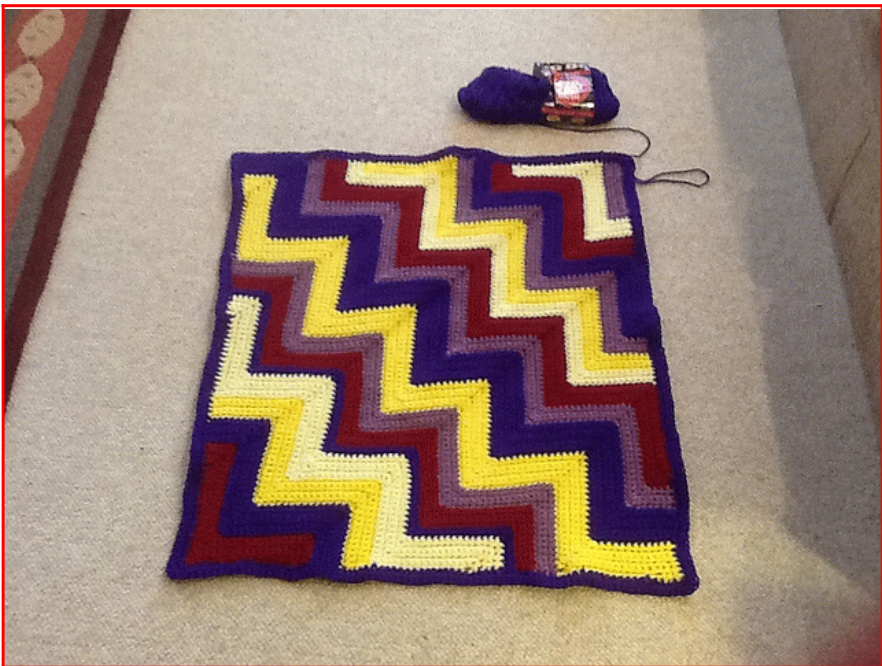
Figure 8 Two rows of border sc, with second row done in reverse from the first.


