Miss Ears...and mr. too!
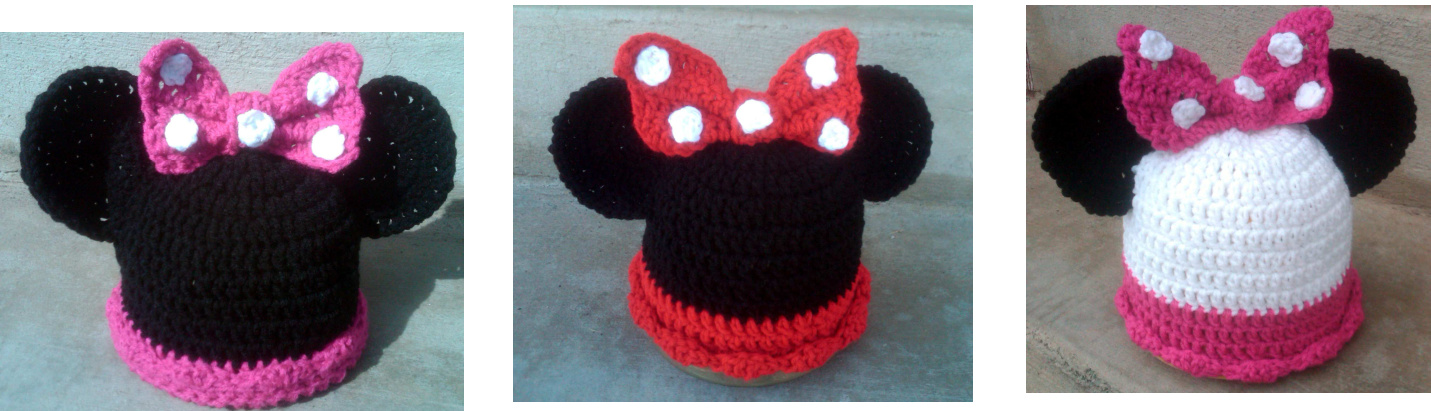
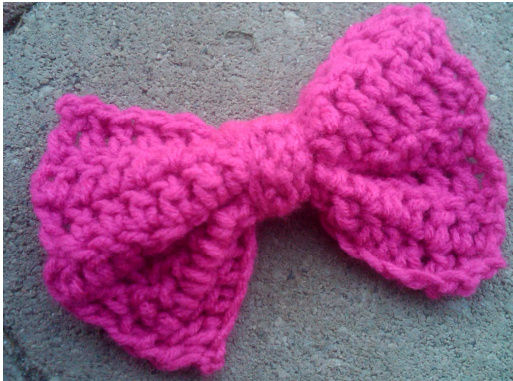
Materials: Worsted weight yarn Hooks: G hook (4.0mm), H hook (4.5mm), I hook (5.0mm) Yarn needle For smaller sizes, an F hook may be used for the polka dots. Finished length: Newborn: 5-5.5": 3-6 mths: 6.5": 6-12 mths: 7": 12-24 mths: 7.5": Child/preteen: 7.5": Adult: 8.5" (or longer if desired) Directions for all sizes: Follow increases until desired size, as listed at the end of the row, then skip to "for all sizes" and continue. Note: Do not join at the end of each round, unless stated. This hat is worked in a continuous round to avoid a "seam" look. With H hook and yarn, Ch 6 (or magic loop), join and pull closed. 1. 2sc in each stitch around (12sts). 2. \*sc 1, 2 sc in next sc\*, repeat to end of round. (18sts) 3. \*sc 2, 2 sc in next sc\*, repeat to end of round. (24sts) 4. \*sc 3, 2 sc in next sc\*, repeat to end of round. (30sts) newborn 5. \*sc 4, 2 sc in next sc\*, repeat to end of round. (36sts) 3-6 mths 6. \*sc 5, 2 sc in next sc\*, repeat to end of round. (42sts) 6-12 mths 7. \*sc 6, 2 sc in next sc\*, repeat to end of round. (48sts) 12-24 mths 8. \*sc 7, 2 sc in next sc\*, repeat to end of round. (54sts) Child/preteen 9. \*sc 8, 2 sc in next sc\*, repeat to end of round. (60sts) Teen/Adult 10. \*sc 9, 2 sc in next sc\*, repeat to end of round. (66sts) Large adult Remove marker and hdc each stitch until hat is 2" shorter than "finished length" as listed above. End current row with an sc in next st, then sl st in next. Attach contrasting color and hdc each stitch around for 2", or longer, until desired length is reached. Scallop edge (optional): \*sk 1 st, 4 dc in next st, sk 1 st, sl st in next\*, repeat to end of round. Finish off. Bow: Using an H hook and ww yarn, ch 15. \*Dc in 3rd ch from hook and across. Ch 2, turn\*, repeat for a total of 7 rows. Finish off. Center strip: Ch 5, \*sc in 2nd ch from hook and across. Ch 1, turn\* repeat until strip is long enough to barely wrap around center of bow. Fasten off, leaving an 8" tail. Wrap strip around center of bow and using the tail and yarn needle, sew short ends of strip together. Finish off. Note: for larger bows use an I or J hook.
Polka Dots (make 5): With G hook and white yarn, Ch 5 (or magic loop), join and pull closed. Finish off, leaving a long tail for attaching to bow. With a yarn needle and long tail from dots, sew into place with a few stitches. No need to go all the way around the outside edge because they are so small. Ears (make 2): With I hook and black yarn, Ch 6 (or magic loop), join and pull closed. Note: Crochet ears fairly tight, helping them to stand up. For smaller size hats you might want to use an H hook. If you would like bigger ears use a J hook. \*hdc 1, 2 hdc in next st\*, repeat to end of round. (18sts) \*hdc 2, 2 hdc in next st\*, repeat to end of round. (24sts) \*hdc 3, 2 hdc in next sc\*, repeat to end of round. (30sts) Turn, sl st 3 sts, sc 1, hdc 22, sc 1, sl st to end, finish off, leaving long tail for sewing to head. Tips for sewing ears in place: first, take a deep breath. Fold hat in half and figure out where the ears should be. Place the sl st section of ear along edge of hat. Too low and they willook like a deformed monkey: too far forward and the ears will flop forward...which they still tend to a litle. Pin in place to make it easier when sewing. If you have a rounded bowl similar in size, slip the hat over the top to see if the ears are in the right place and even. Use the rounds to judge distance from center. Be careful not to stretch the bottom of ear when stitching. Using a yarn needle and tail yarn, sew ear in place. If the ear is the same color as the hat it is much easier because the sewing will blend in and can't be seen. After ears are in place, sew bow in front at center. MAGIC LOOP: This is THEE best way to start a circle. Please google or youtube "magic loop" or "adjustable loop" for help. You will be so happy you did. I can never get a regular joined chain to close completely. If you have any questions, comments or suggestions please email me at snappytots@hotmail.com. This pattern has been tested, but it is very important to me that information is easy to understand and accurate. I would appreciate knowing any errors found so they could be fixed. Thank you in advance.this pattern is copyrighted to snappytots and may not be copied for resale in part or whole. Items created from this pattern MAY be sold. Please include a link to snappy-tots.com if selling online


