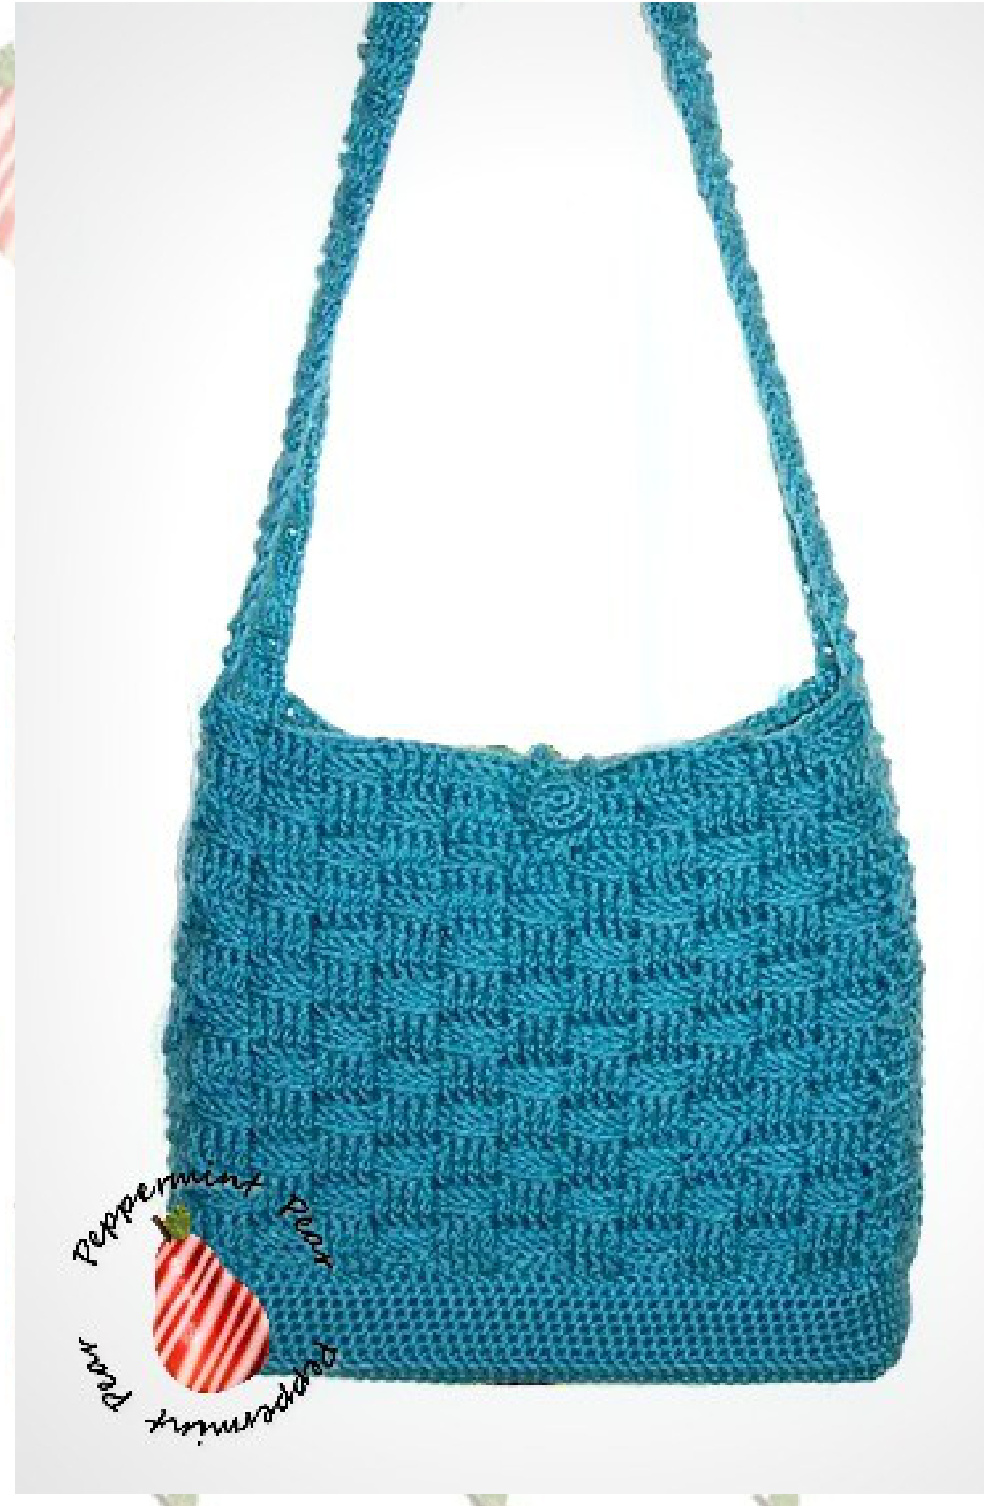
Basket Weave Bag
Designed by Stacey Chaffee of Peppermint Pear
peppermintpear.blogspot.com
This pattern is protected by Copyright Law. You may not copy, redistribute, sell, or represent this pattern or these photos as your own. Feel free to sell finished items made from this pattern! Copyright Stacey Chaffee, 2010.
Materials:
Size H/8 crochet hook (5.00MM) Yarn needle 512 yds./ 468 m. worsted weight yarn (the bag pictured is made from Red Heart Soft yarn in Seafoam (2 skeins)
Abbreviations:
bpdc - back post double crochet mc - magic circle st - stitch ch - chain rnd - round yo - yarn over (wrap yarn over dc - double crochet slpst - slip stitch fpdc - front post double crochet sp(s) - spaces
Notes:
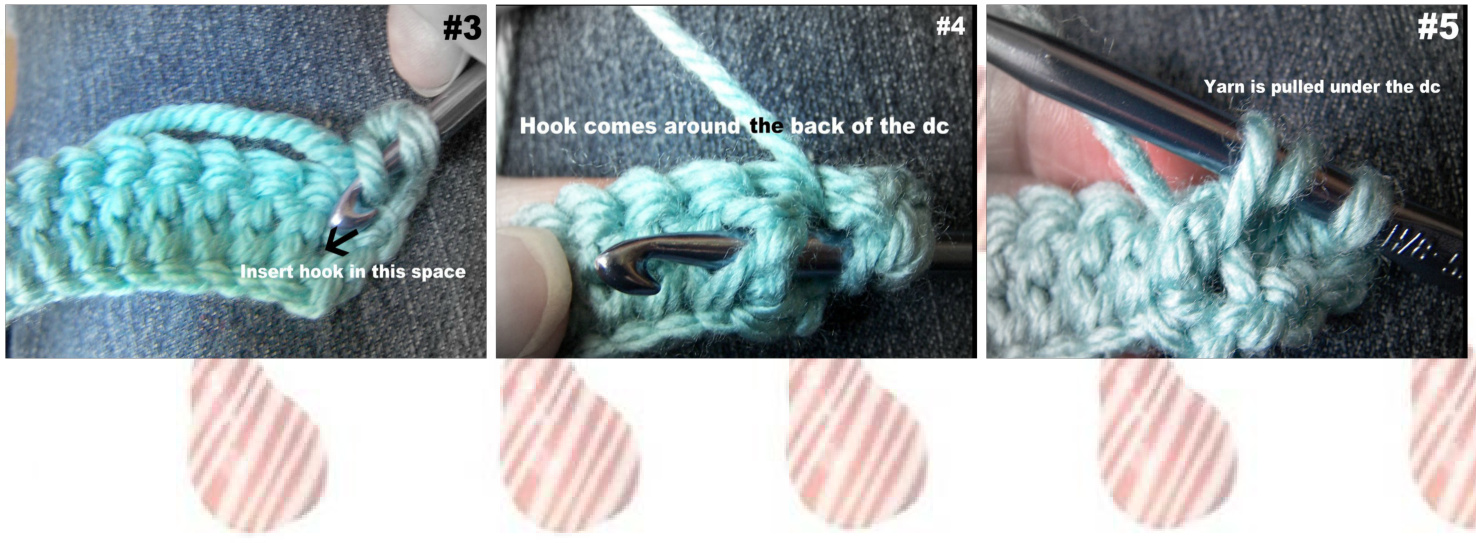
This bag is made forming a double crochet foundation chain instead of the traditional chain stitch. Trust me it is a lot easier then it sounds. Follow the directions below and you'll see ;o) Front Post Double Crochet (fpdc): yo, coming from the front to back insert hook between last two dc on previous row, wrap hook around back of dc and insert hook back up between the following two dc (see pictures #3, #4), yo, pull yarn back through the space behind the dc (see picture #5), yo, pull through two loops on hook, yo, pull through last two loops on hook.
peppermintpear.blogspot.com
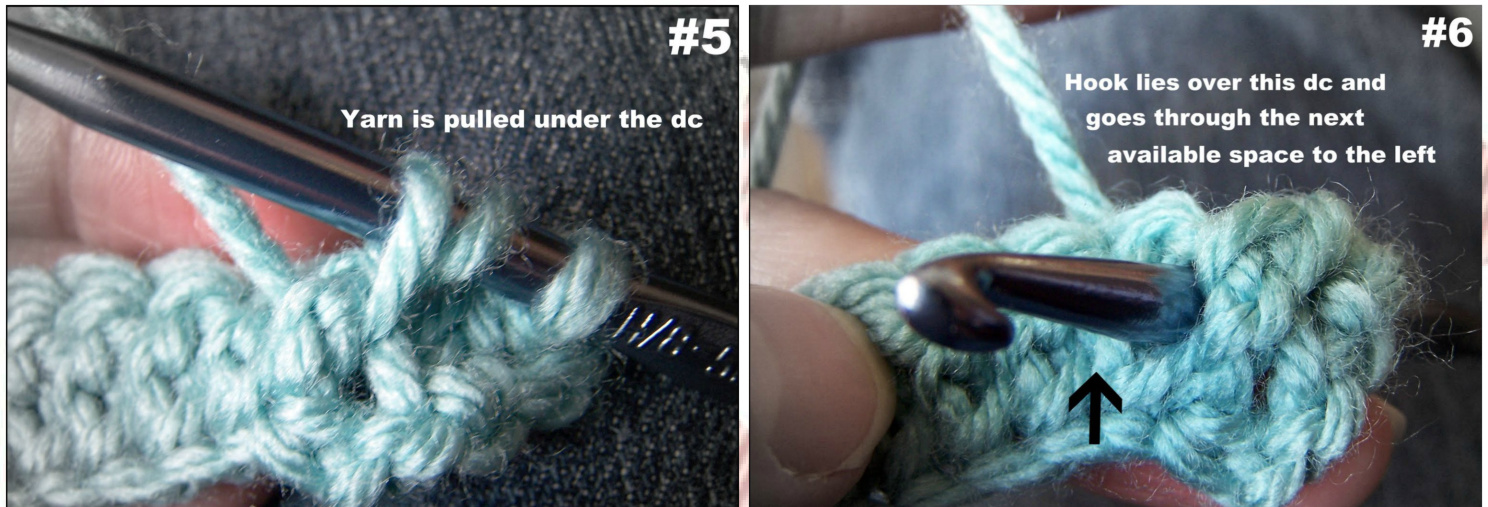
This pattern is protected by Copyright Law. You may not copy, redistribute, sell, or represent this pattern or these photos as your own. Feel free to sell finished items made from this pattern! Copyright @ Stacey Chaffee, 2010. Back Post Double Crochet (bpdc): yo, coming from the back to the front insert hook between the next two dc on previous row, lay hook over dc and insert into the space between the following two dc (see picture #6), yo, pull yarn through the space over the dc (similar to picture #5), yo, pull through two loops on, yo, pull through last two loops on hook.
Magic Circle (MC): completely wrap yarn around left pinky finger one time leaving tail of yarn hanging toward floor, bring yarn up and over the back of the next three fingers, pull yarn down and wrap around your two middle fingers two times (this will look like you have three loops on your two middle fingers), insert hook under the two loops closest to your finger tips on your middle fingers, hook the yarn that looks like a third loop on your middle fingers and pull under the first two loops, snug the yarn around your hook and create a slip stitch, continue your crochet by creating your stitches in the loop, do this by inserting the hook in the loop and making your stitch, once your stitches are finished pull on the tail of yarn slowly, you will see one of the loops shrinking, grab the loop that is shrinking and pull on it until the other loop disappears, once the first loop disappears then pull on the tail of yarn again until the second loop disappears, snug up the tail of yarn until everything is taught, continue your crochet as instructed.
peppermintpear.blogspot.com
This pattern is protected by Copyright Law. You may not copy, redistribute, sell, or represent this pattern or these photos as your own. Feel free to sell finished items made from this pattern! Copyright Stacey Chaffee, 2010.
Bag Front & Back: (Make 2)
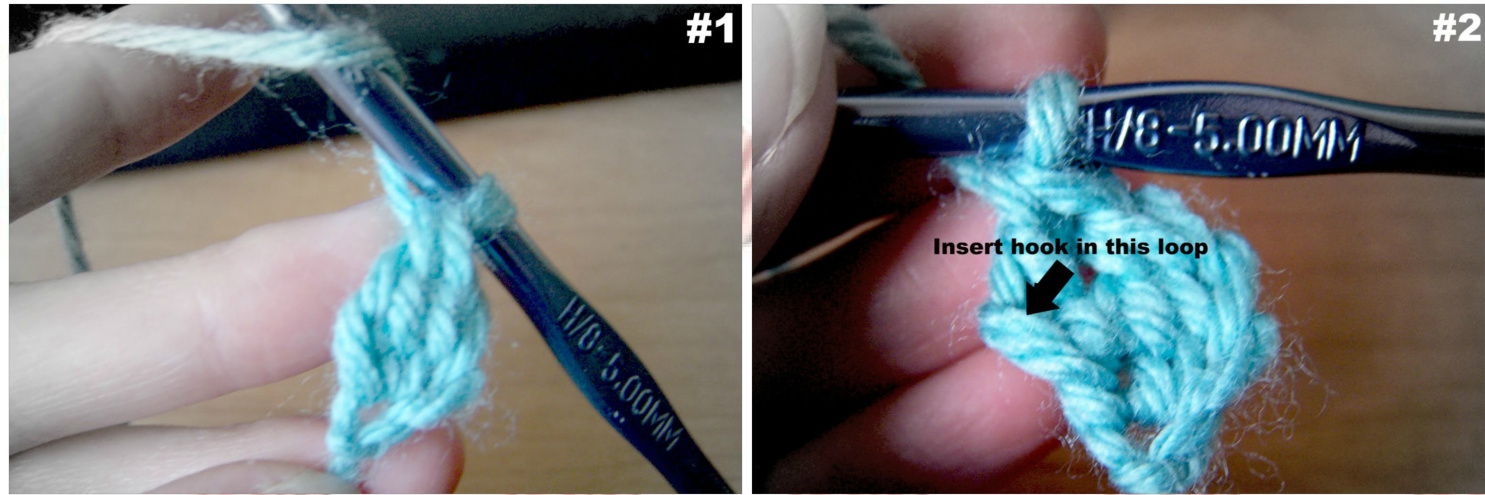
Beginning DC Foundation Chain: Ch 3, yo, insert hook in first ch, yo, pull up a loop, yo and draw through one loop on hook, yo and draw through two loops on hook, yo and draw through last two loops on hook. You just created your first ch 2 plus dc! This will count as two dc in the pattern. You will need to make 48 dc so lets continue. \*Yo, insert hook in the second stitch from the hook on the left side (see picture #1), yo, pull up a loop, yo, pull through first loop on hook, yo, pull through two loops on hook, yo, pull through last two loops on hook\*. You've now created your next dc. (See picture #2 to see where to insert hook next, It will look the same for the rest of the dcs made) Follow the pattern \*to\* until you reach 48 dc.
Row 2: ch 2, turn, fpdc around second dc on previous row, bpdc around next four dc, \*fpdc around next four dc, bpdc around next four dc\*, repeat from \*to\* until the last two dc, fpdc around next dc, dc in last dc Row 3: ch 2, turn, bpdc around next dc, fpdc around next four dc, \*bpdc around next four dc, fpdc around next four dc\*, repeat from \* to \* until last two dc, bpdc around next dc, dc in last dc Rows 4 - 5: Repeat row 3, repeat row 2 Rows 6 - 7: Repeat row 2, repeat row 3 Repeat rows 4 - 7 until piece measures 11 1/4" (28.58 cm) x 8 3/4" (22.23 cm)
peppermintpear.blogspot.com
This pattern is protected by Copyright Law. You may not copy, redistribute, sell, or represent this pattern or these photos as your own. Feel free to sell finished items made from this pattern! Copyright @ Stacey Chaffee, 2010.
Bag Bottom:
Row 1: ch 2, insert hook in second chain from hook, yo, pull up a loop, yo, pull hook through first loop on hook, yo, pull through both loops on hook (this is your sc foundation chain without the basic chain stitch), \*insert hook in the stitch closest to the hook, yo, pull up a loop, yo, pull hook through first loop on hook, yo, pull through both loops on hook\*, repeat from \*to\* until you reach 48 ch. Rows 2 - 8: ch 1, turn, sc in each sc across (48 sc) Now build the sides of the bottom of the bag, you'll be working in rounds, DO NOT join rounds unless otherwise stated. Round 1: sc in each stitch around, you should have 48 on each of the long sides and 8 on each of the short sides. You'll end up putting two scs in each corner to achieve this. (112 sc) Round 2: sc in front loops only of each sc around (112 sc) Rounds 3 - 7: sc in both loops of each sc around (112 sc) join with a slpst to finish off round 7, be sure to leave a LONG tail to sew the pieces together. Handle Strap & Sides: Row 1: Make a double crochet foundation chain 8 stitches wide. (see bag front & back) Row 2: Turn, ch 2, fpdc around next three dc, bpdc around next three dc, dc in last dc (10 dc)μ Row 3: Turn, ch 2, bpdc around next three dc, fpdc around next three dc, dc in last dc (10 dc) Row 4: Repeat row 3, repeat row 2 Row 5: Repeat row 2, repeat row 3 nue rows 4 and 5 until strap measures approximately 47 inche:
peppermintpear.blogspot.com
This pattern is protected by Copyright Law. You may not copy, redistribute, sell, or represent this pattern or these photos as your own. Feel free to sell finished items made from this pattern! Copyright @ Stacey Chaffee, 2010. Sc evenly around the entire strap making sure to place two sc in each corner, finish off leaving a long tail to sew to the bag front.
Finishing:
Place strap end to bottom corner of bag front and sew the side of the strap and side of bag front together. Do the same with the other end of the strap on the other side of the bag front and then sew the strap to the bag back in the same manner. Now sew the bottom of the bag to the bottom of the body of the bag. Make sure you line up the sides, front and back so you don't get a wonky looking bag. Turn the bag inside out so the seams aren't seen.
Button:
Rnd 1: Create a MC with 6 sc, join with slpst to first sc (6 sc) Rnd 2: ch 1, sc two times in same space and in each sc around, join rnd with slpst to first sc (12 sc) Rnd 3: ch 1, sc in same space and in each sc around, join rnd with slpst (12 sc) Rnd 4: ch 1, insert hook in same space, pull up a loop, insert hook in next space, pull up a loop, yo, pull through all three loops on hook, \*insert hook in next space, pull up a loop, insert hook in next space, pull up a loop, yo, pull through allthree loops on hook\*, repeat from \*to\* around (6 sc) Cut a long tail and sew together the remaining hole, attach button to front top of bag approximately one inch down from top edge.
Button Hole Loop:
Make a chain 9" long (40 ch), slpst in second chain from hook and in each chain across, securely attach both ends of loop (1" each end) to the inside back of bag directly across from the button. Your bag should now be complete!
peppermintpear.blogspot.com
This pattern is protected by Copyright Law. You may not copy, redistribute, sell, or represent this pattern or these photos as your own. Feel free to sell finished items made from this pattern! Copyright @ Stacey Chaffee, 2010.


