
Nail Polish Amigurumi
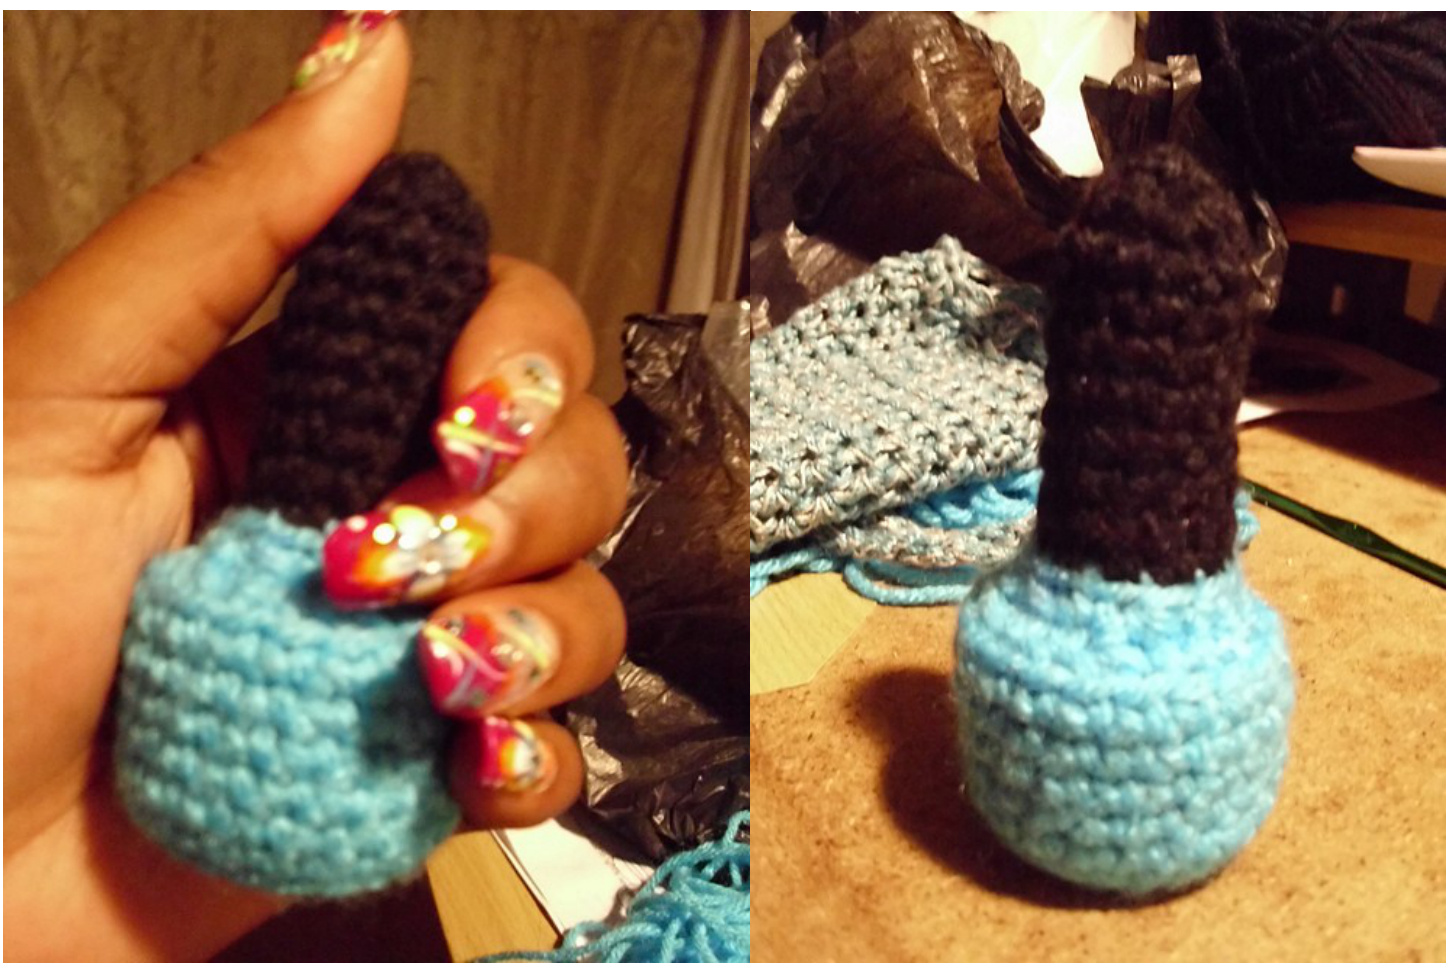
I made this for my nail technician Judy... she always hooks me up (as you can see my nails in the picture :P) and I wanted to make her a lil plushie to show my appreciation. What better than a little toy to show off at her station? I looked and couldn't find a pattern, So out came my trust-dusty F hook and 20 minutes later... a prototype! The prototype didn't past muster, so I set back to work, slightly tweaked and--- well, here's the pattern so you can make one yourself! This is another great beginner amigurumi project. It's seamless (no pieces to put together!) and works up quick. An excellent way to use up leftover bits of yarn---I used less than 20 yards total to make this.
You'll need:
·Size F (3.75mm) Hook small amount of solid colored worsted weight yarn. I used Premier Dreams (acrylic). It's my favorite yarn to make amigurumi with-the stitch definition is awesome, it's soft, and it's cheap! Black worsted weight yarn for the brush applicator (what do you call that part of the bottle?? You get it...) Polyfill stuffing Bean bag fill [I highly recommend filling at least half the base of the polish with this so it can stand properly. You can just use fiberfill, but it'll be wobbly] · Stitch marker (for crochet of course) Pattern notes: This is worked in a continuous spiral. DO NOT JOIN ROUNDS!!! The numbers in parenthesis denote the correct number of stitches that should have been completed in that row. Instructions enclosed within stars $(^{\star}\ldots^{\star})$ are to be repeated all around until the end of the row. Abbreviations: $s c=$ single crochet; ino $\because$ increase; IBLO= in back loops only (instead of crocheting under the "v" of the stitch, you're using only the "back leg" of the v to complete the stitch): dec= decrease
Pattern:
1. Using the magic circle method, sc 7, tighten circle (7) Place stitch marker in first stitch and remember to replace the marker as you go through the pattern! It really helps :D 2. Increase all (14) 3. \* sc 1, inc $1^{\star}$ (21) 4. IBLO, sc around (21) 5. sc around (21) 6. Repeat row 5 (21) 7. Repeat row 5 (21) 8. Repeat row 5 (21) 9. Repeat row 5 (21) 10. Repeat row 5 (21) (you can add another row or two if you want a longer bottle.) 11. IBLO, \* sc 1, dec $1^{\star}$ (16) [don't be alarmed when you end up following the pattern and end up with a lonely sc. It's supposed to happen :)] Stop and stuff here. I used half bean bag fill, half polyfill for my base. You can add a face if you want; I was too lazy to do so. I'd use 6mm safety eyes or smaller... 12. \* sc 1, dec $1^{\star}$ (11) [yes, another lonely sc here too...] The last stitch of this row should be where you attach the black yarn. You can cut the base color yarn (leave a tail about an inch) and tuck the end in the bottle. You won't have to weave it since we're continuing onwards... 13. IBLO, sc around. (11) You can do as many black rounds as you like to adjust the applicator length. I did 8 rounds of black. After getting the desired length, hard pack the fiberfill in the narrow tube you've just crocheted. You want the applicator to be firm to the touch. 14. Dec all around (6) 15. Dec all around, weave in end. That's it! You're finished! Hope you enjoyed the pattern! :D


