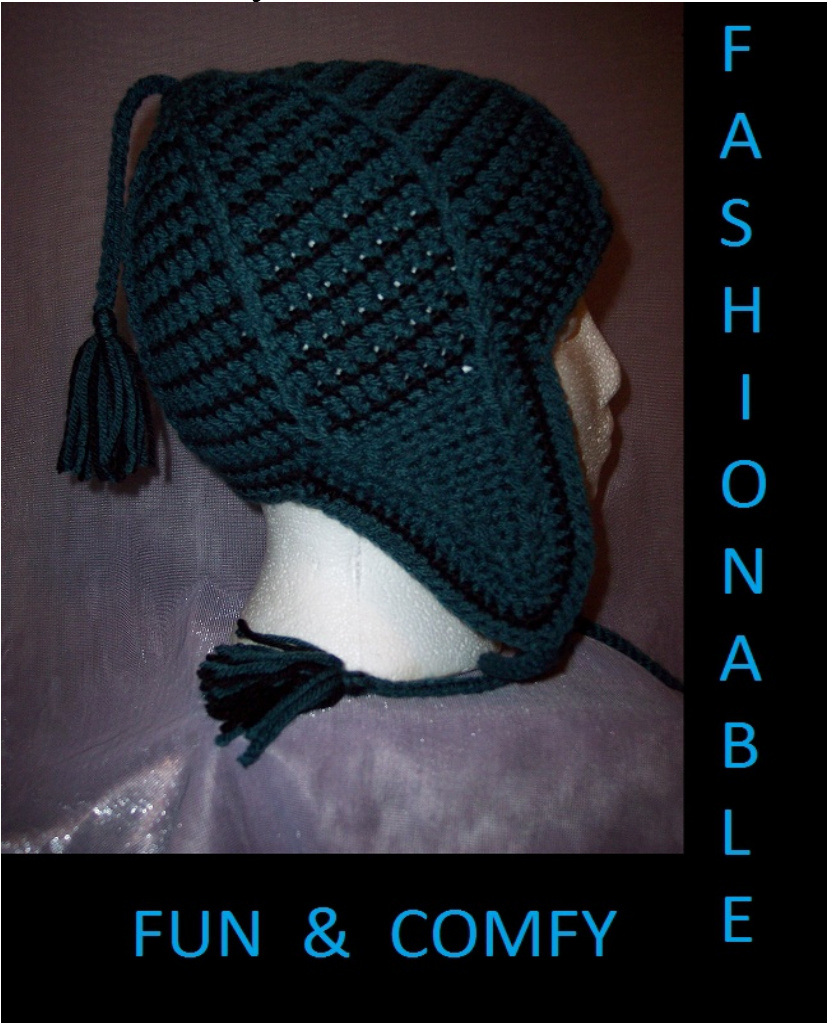
Fun and Fabulous Ski Hat AdultMediumSize By Julee A. Reeves
Level of Difficulty- Advanced Beginner
Materials: Approx. 3 ounces Worsted weight yarn of choice main color (MC) Approx.2 ounces Worsted weight yarn of contrasting color (CC) "H"' crochet hook (for smaller size use “G" hook) Tapestry Needle for weaving in ends 7 Stitch Markers or small scrap pieces of yarn Gauge: First two rounds of hat, 1 3/4 inches across. Crochet Terms to Know: FPDC- Front Post Double Crochet Beg- beginning Sl St = Slip Stitch Dec- Decrease Ch = Chain Tog- Together Sc = Single Crochet CC- Contrasting Color Hdc= Half Double Crochet MC- Main Color St = Stitch(es) Hk- Hook Rnd- Round Special Sts: 2sctog : (Put hook in specified st, yarn over, pull through) 2 times, Yarn over, Pull through 3 loops on hook. 3sctog: (Put hook in specified st, yarn over, pull through) 3 times, Yarn over, Pull through 4 loops on hook. FPDC/Sc Dec1: Yarn over, insert hook behind post of next stitch (from right to left), Yarn over, pull through, Yarn over, pull through 2 loops, insert hook into next stitch, Yarn over, pull through, Yarn over, pull through 3 loops on hook. FPDC/Sc Dec2: Insert hook into next stitch, Yarn over, pull through, Yarn over, insert hook behind post of next stitch (from right to left), Yarn over, pull through, Yarn over, pull through 2 loops, Yarn over, pull through 3 loops on hook. FPDC Dec: (Yarn over, insert hook behind post of next stitch (from right to left), Yarn over, pull through, Yarn over, pull through 2 loops) 2 times, Yarn over, pull through 3 loops on hook. Pattern Notes: Do not do your first Hdc or 2 in the same st as the sl st, make the Hdc or 2, in the next st. Work your last Hdc or 2 in the sl st instead. This makes for a nice, harder to see, seam. Ch1 doesn't count as a hdc. Each Hdc Rnd will be worked in MC. Each Sc Rnd will be worked in CC. You will be carrying each color used. Do not cut yarn until told to do otherwise. If you crochet tight I suggest you go up a hook size (l/9 Hook). Changes in instructions for larger size are in parenthesis. Instructions: With MC- Ch3 and join with sl st to form ring (or start a ring in your preferred method). Rnd 1: Ch1, work 7 Hdc in ring, sl st to first Hdc. (7 Hdc) Rnd 2: Ch1, 2 Hdc in next st, and in each st around, Sl St in top of first Hdc.(14 Hdc) Rnd 3: Ch1, \*2 Hdc in next st, Hdc in next st\*, Repeat from \* to \* around, Sl St in top of first Hdc. (21 Hdc) Note: Place I marker around the second stitch of each increase in this round. Rnd 4:Ch1, \*2 Hdc in next st, Hdc in next 2 sts\*, Repeat from \* to \* around, sl st to first Hdc pulling through CC instead of MC. (28 Hdc) Rnd 5: with CC, Ch1, Sc in same st as Sl St, 2 Sc in next st, \*Sc in next 3 sts, 2 Sc in next st\*, Repeat from \* to\* around, Sc in last 2 sts, Sl St in top of beg Sc pulling through MC instead of CC. (35 Sc) Note: Remove markers as you go. Rnd 6: With Mc, Ch1, Hdc in next 2 sts, FPDC around post of marked Hdc below, \*Hdc in next 5 sts, FPDC around post of marked Hdc below\*, Repeat from \*to\* around, Hdc in last 3 sts, sl st to first hdc pulling through CC instead of MC. (35 Hdc, 7 FPDC) Rnd 7: with CC, Ch1, Sc in same st as Sl St, and in each st around, Sl St in top of first Sc pulling through MC instead of CC. (42 Sc) Rnd 8: With MC, Ch1, Hdc in next 2 sts, FPDC around post of FPDC below, \*Hdc in next 6 sts, FPDC around post of FPDC below\*, Repeat from \* to\* around, Hdc in last 4 sts, Sl St in top of first Hdc, pulling through CC instead of MC. (42 Hdc, 7 FPDC) Rnd 9: Repeat Rnd 7. (49 Sc) Rnd 10: With MC, Ch1, Hdc in next 2 sts, FPDC around post of FPDC below, \*Hdc in next 7 sts, FPDC around post of FPDC below\*, Repeat from \* to\* around, Hdc in last 5 sts, Sl St in top of first Hdc, pulling through CC instead of MC. (49 Hdc, 7 FPDC) Rnd 11: Repeat Rnd 7. (56 Sc) Rnd 12: With MC, Ch1, Hdc in next 2 sts, FPDC around post of FPDC below, \*Hdc in next 8 sts, FPDC around post of FPDC below\*, Repeat from \* to\* around, Hdc in last 6 sts, Sl St in top of first Hdc, pulling through CC instead of MC. (56 Hdc, 7 FPDC) Rnd 13: Repeat Rnd 7.(63 Sc) Rnd 14: With MC, Ch1, Hdc in next 2 sts, FPDC around post of FPDC below, \*Hdc in next 9 sts, FPDC around post of FPDC below\*, Repeat from \* to \* around, Hdc in last 7 sts, Sl St in top of first Hdc, pulling through CC instead of MC. (63 Hdc, 7 FPDC) Rnd 15: Repeat Rnd 7. (70 Sc) Rnd 16: With MC, Ch1, Hdc in next st, Skip next Sc, FPDC around post of FPDC below, \*Hdc in next 9 sts, Skip next Sc, FPDC around post of FPDC below\*, Repeat from \* to \* around, Hdc in last 8 sts, sl st to first Hdc, pulling through CC instead of MC. (63 Hdc, 7 FPDC) Rnds 17: Repeat rnds 15. Rnd 18: With MC, Ch1, Skip next Sc, FPDC around post of FPDC below, \*Hdc in next 9 sts, Skip next Sc, FPDC around post of FPDC below\*, Repeat from \* to \* around, Hdc in last 9 sts, sl st to first FPDC, pulling through CC instead of MC. (63 Hdc, 7 FPDC) Rnd 19: Repeat Rnd 15. Rnd 2O: With MC, Ch1, +Hdc in next 9 sts, Skip next Sc, FPDC around post of FPDC below\*, Repeat from \* to \* around to last 1O sts, Hdc in last 9 sts, Skip last st, FPDC around post of FPDC below, sl st to first Hdc, pulling through CC instead of MC. (63 Hdc, 7 FPDC) Rnd 21: Repeat Rnd 15. Rnd 22: With MC, Ch1, Hdc in next 8 sts, Skip next Sc, FPDC around post of FPDC below, \*Hdc in next 9 sts, Skip next Sc, FPDC around post of FPDC below\*, Repeat from \* to \* around, Hdc in last sts, sl st to first Hdc, pulling through CC instead of MC. (63 Hdc, 7 FPDC) Rnd 23: Repeat Rnd 7 marking 9th st and 49th st. (70 Sc) Remove hook from loop. Do Not Cut yarn. Note: You'll be using 3 new stitches in the ear flaps so be sure and read through Special Stitches before continuing with ear flaps. Ear Flaps: Ear flaps will start with right side of hat facing you. With MC pick up a loop in your first Marked st and Ch1. Row 1: Sc in same st as Ch1, Skip next Sc, work FPDC/Sc Dec1, Sc in next 6 Sts, work FPDC/Sc Dec2, Sc in next Sc. (8 Sc, 2 FPDC/Sc Dec) Row 2: Ch1, Sc in each St across. (10 Sc) Row 3: Ch1, Sc in first Sc, Skip next Sc, work FPDC/Sc Dec1, Sc in next 5 Sc, work FPDC/Sc Dec2, Sc in next Sc. (7 Sc, 2 FPDC/Sc Dec) Row 4: Ch1, Sc in each Sc across. (9 Sc) Row 5: Ch1, Sc in first Sc, Skip next Sc, work FPDC/Sc Dec1, Sc in next 4 Sc, work FPDC/Sc Dec2, Sc in next Sc. (6 Sc, 2 FPDC/Sc Dec) Row 6: Ch1, Sc in each Sc across. (8 Sc) Row 7: Ch1, Sc in first Sc, Skip next Sc, work FPDC/Sc Dec1, Sc in next 3 Sc, work FPDC/Sc Dec2, Sc in next Sc. (5 Sc, 2 FPDC/Sc Dec) Row 8: Ch1, Sc in each Sc across. (7 Sc) Row 9: Ch1, Sc in first Sc, Skip next Sc, work FPDC/Sc Dec1, Sc in next 2 Sc, work FPDC/Sc Dec2, Sc in next Sc. (4 Sc, 2 FPDC/Sc Dec) Row 1o: Ch1, Sc in each Sc across. (6 Sc) Row 11: Ch1, Sc in first Sc, Skip next Sc, work FPDC/Sc Dec1, Sc in next Sc, work FPDC/Sc Dec2, Sc in next Sc. (3 Sc, 2 FPDC/Sc Dec) Row 12: Ch1, Sc in each Sc across. (5 Sc) Row 13: Ch1, Sc in first Sc, Skip next Sc, Work FPDC/Sc Dec1, Work FPDC/Sc Dec2, Sc in next Sc. (2 Sc, 2 FPDC/Sc Dec) Row 14: Ch1, Sc in each Sc across. (4 Sc) Row 15: Ch1, Sc in first Sc, Skip next 2 Sc, FPDC Dec, Sc in last Sc. Fasten Off. weave in ends. Repeat instructions for ear flap starting at the second Marked st. Edging and Ties: Go back to end of rnd 23 and pick up dropped Ip-MC. Rnd 1: Ch1, Sc in same st as Sl St, and in next 6 sts, \*working in the next Sc and in the base Sc of Row 1 of Ear Flap, Sc2tog, Sc in end of next 15 rows (15 Sc), Hdc in next st, Dc in next st, Hdc in next st, Sc in end of next 15 rows (15 Sc), Working in the base of last Sc of Ear Flap and next Sc, Sc2tog \*, Sc in next 27 sts, Repeat from \* to \* 1 time, Sc in last 10 sts, Sl St in top of first Sc pulling through CC instead of MC. Fasten off MC. (108 Sc, 4 Hdc, 2 Dc) NOTE: To make ties longer just chain to the length you want and continue on with instructions. Rnd 2: Ch1, Sc in same st as Sl St, and in next 6 sts, \*2sctog, Sc in next 15 sts, 3 Sc in next st, Sc in next 15 sts, 2sctog\*, Sc in next 27, Repeat from \* to \* 1 time, Sc in last 10 Sc, Sl St in top of first Sc. (114Sc) Rnd 3: Ch1, Sc in same st as Sl St and in next 5 sts, \*3sctog, Sc in next 16 sts, Ch 41, Sl St in 2nd chain from hk and in each chain across, Sc in same st as last Sc (before chaining 41) and in next 16 sts, Sc next 3 Sc tog\*, Sc in next 25 sts, Repeat from \* to \* one time, Sc in next 9 sts, Sl St in top of first Sc. (1o8 Sc) Fasten off. Weave in all ends. You can add tassels to the ends of your ties if you'd like. Just make 2 tassels in the size you like best and sew one to the end of each tie. weave in ends. For a top tassel make a chain about 4' long then Sl St back down it. Make a slightly larger tassel and sew it too the end of the of the cord with out the ends. Take the ends and sew the cord and tassel to the top of the hat and weave in ends very securely. This Pattern is copyrighted to Julee Reeves, January 26th, 2011. Pattern is for personal (gifts and that sort of thing) and charity use only. If you would like to sell the finished item please contact me for permission (1 won't bite). If permission to sell the finished item is granted it may not be sold online (only at craft fairs, farmers markets, Etc. ). Thank you! Julee Reeves (J.R. Designs)


