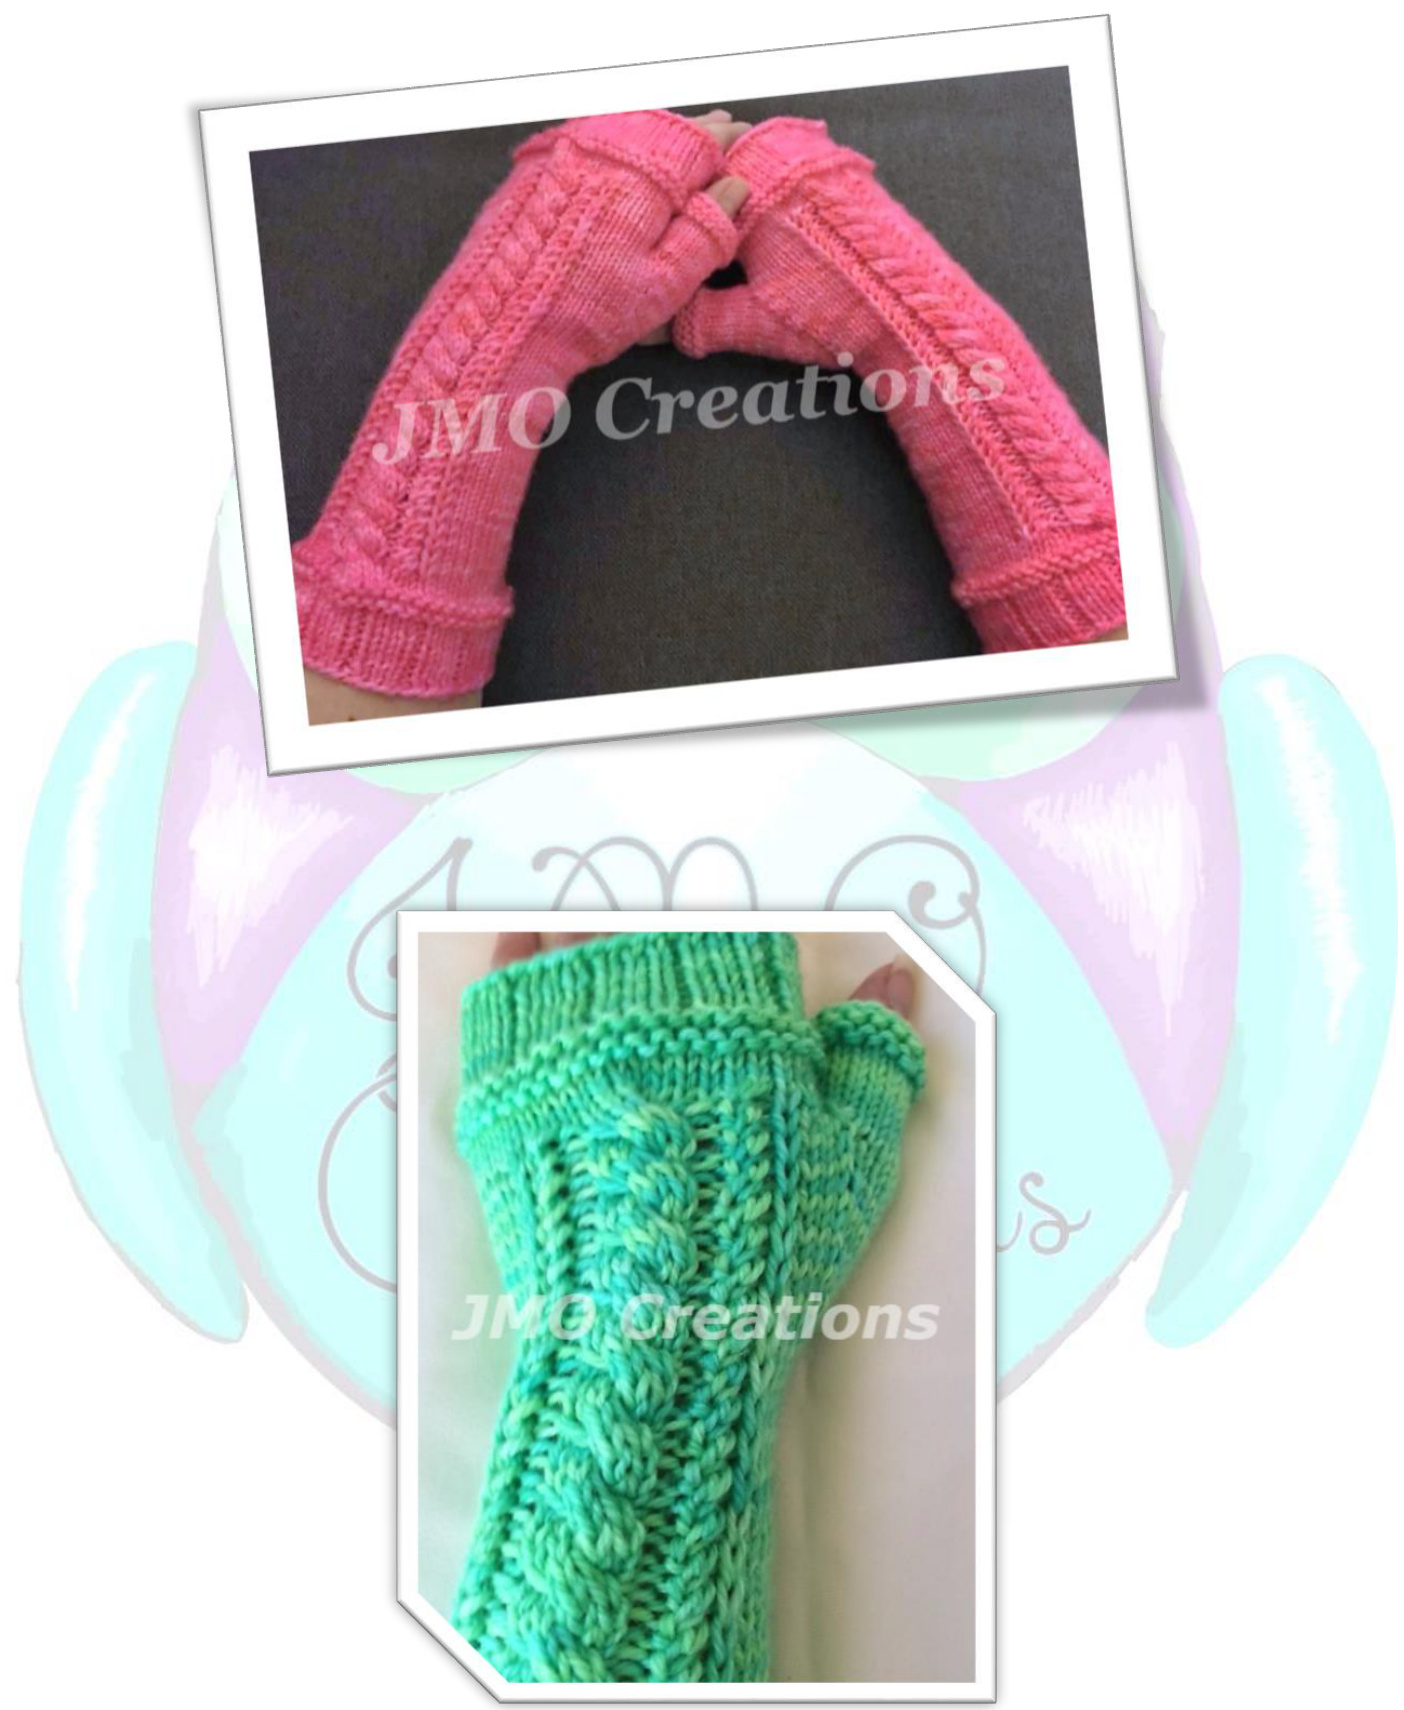
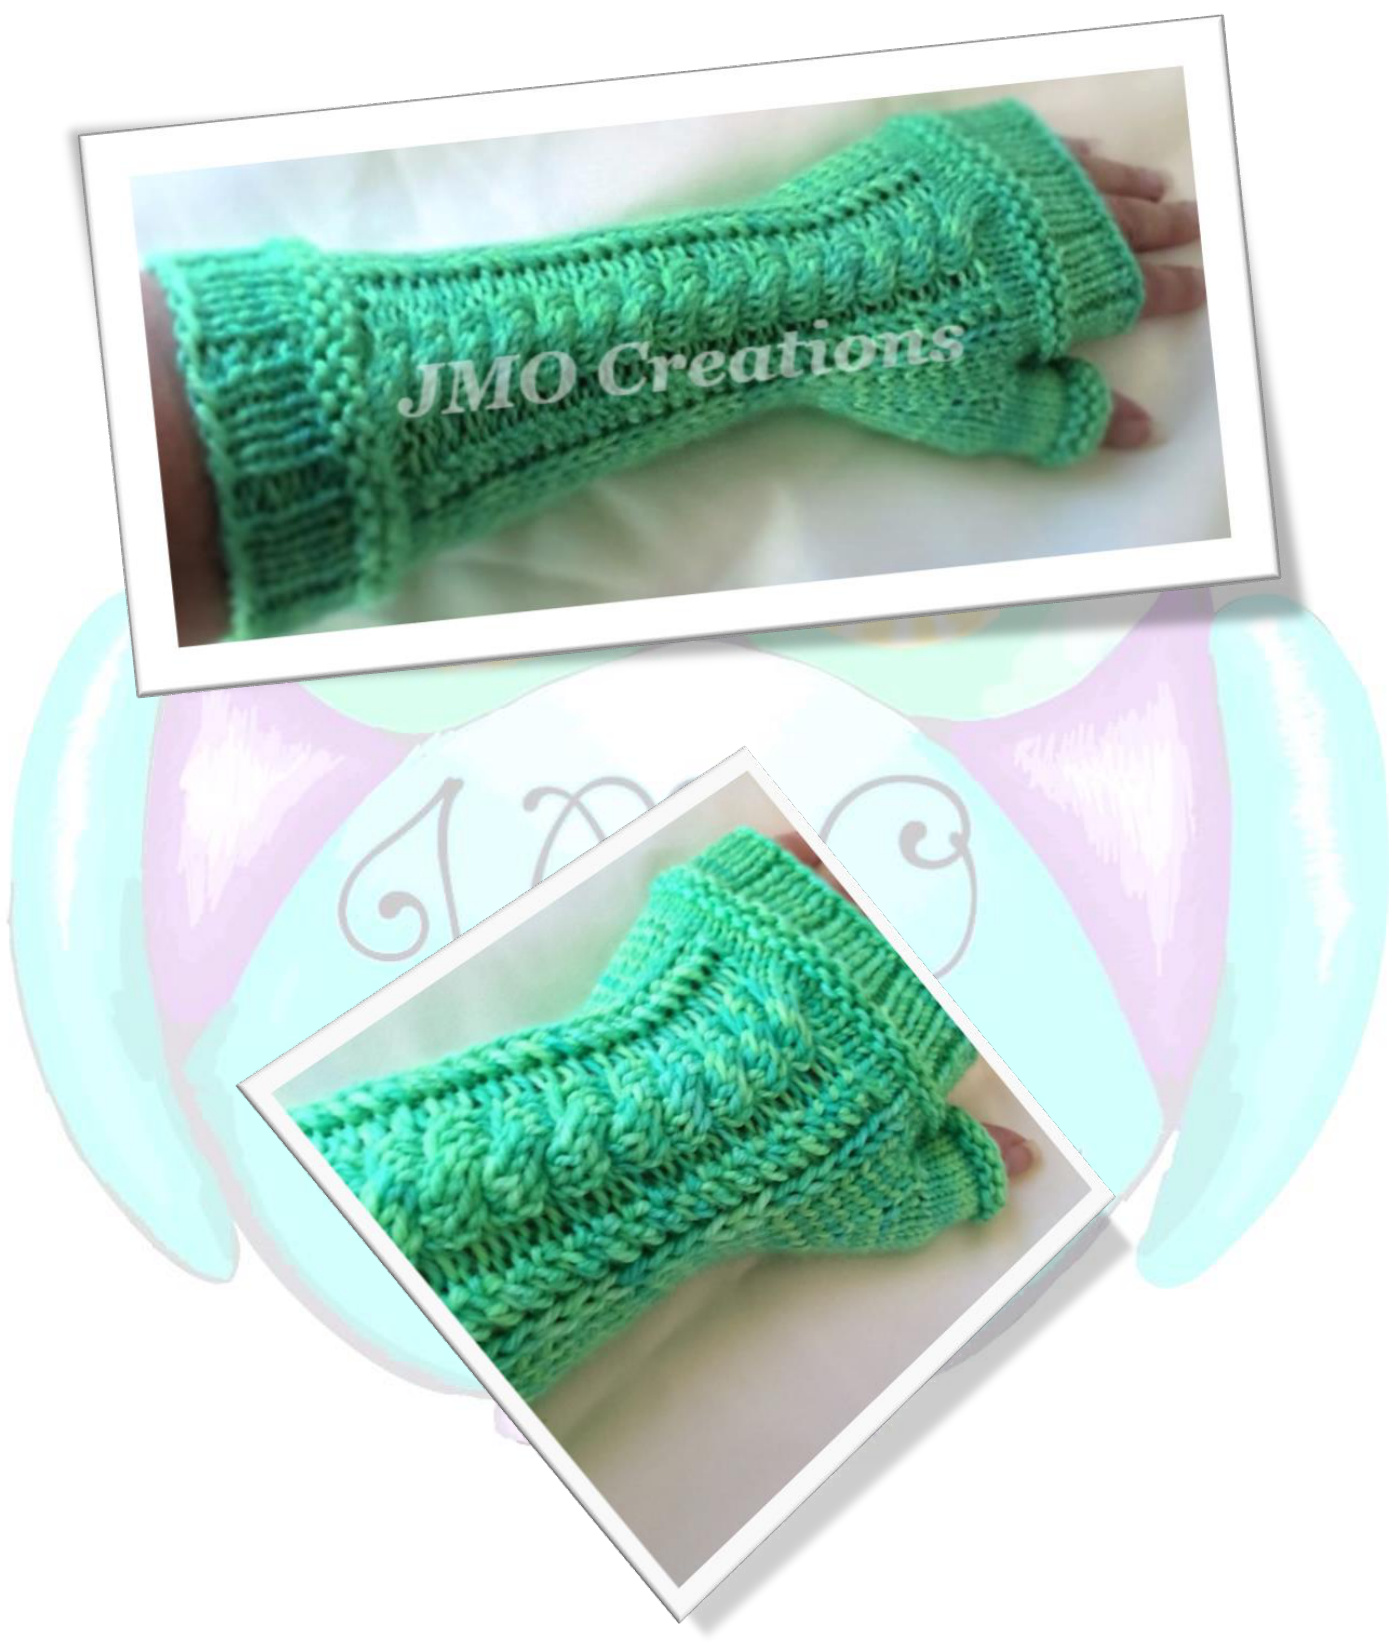
Carved Cables Fingerless Mitts
By Jessica M Oliveira JMO Creations

Materials:
DK weight yarn (I used Toomuc Valley Yarns 100% Australian merino superwash wool in Guppy Green 100g/200m and Pink Strawberry: juicy fruits range 100% Australian merino superwash wool100g/200m ) approx. 75-78g for small, 80-90g for medium, 100g-105g for large (note: pictures of both yarn can be found at end of pattern as well as the Etsy store for Toomuc Valley Yarns) Dk weight yarns (I used Naturally NZ in Harmony Colour Tweed 100% Pure NZ extra fine merino DK/8ply in color 37 and 40 50g/140m each hank) approx. 75-78g for small, 80-90g for medium, 100-105g for large Size Us 5/3.75mm circular needles at least 32" (or size to obtain gauge) Cable needle Stitch markers Darning needle Stitch holder or scrap yarn Measuring tape This pattern is written for circular needles to keep the cable sections together. You can use either one circular magic loop style or use 2 circulars Gauge: 7sts x 10 rows = 1" Pattern is worked on both sides to simplify placement of thumbs. Note: pattern checklist for cable pattern and thumb increases can be found after the written instructions. ound hand right where hand and thumb separate to find diameter, Medium 7-8" hand diameter Large. 8-9" han

Instructions are written for size small with the changes for stitch counts for medium and large in parenthesis (). You may find it helpful to circle your size on the pattern.
Stitch Abbreviations
K- knit P- purl Sl 1- Slip one stitch purl wise RTS - Right twisted stitch. Insert your needle to knit the next 2 stitches together leaving both stitches on the needle, next insert your needle into the first of the 2 stitches and knit that stitch. You can now remove both stitches from the left needle. This creates a right twisted stitch. C6F- cable 6 front- slip the next 3 stitches to a cable needle and hold in front of your work. Knit the next 3 stitches and then knit the 3 stitches from the cable needle M1- Make 1 stitch. Insert your needle from front to back into the bar between the stitches where you need to increase. Lift the bar to your left needle and then knit that stitch through the back loop. One increase made. Note: instructions that say "knit to end" or "knit to end of needle" means to knit to the end of the current needle or side you are currently working on. Only time end of round means end of both needles is in the thumb sections as the thumb increases are done in the true end of the round. IE: front needle or back needle when using magic loop method.
Cable Pattern:
You repeat this pattern for both sides of work.
1: K 3(5)(7), sl 1 purlwise, RTS (right twist stitch), p1, C6F, p1, RTS, sl 1 purlwise, k 3(5)(7) 2: knit to the 1st purl st, p1, k6, p1, knit to end of needle 3: k 3(5)(7), sl 1, RTS, p1, k6, p1, RTS, sl 1, k 3(5)(7) 4: k to purl, p1, k6, p1, knit to end
Instructions:
Cast on 40 (48) (56) stitches using the long tail cast on. You will be working in the round on circular needles. Join to work in the round making sure not to twist your stitches Work in k3, p1 ribbing for 8 rounds Round 9: Knit Round 10: Purl Round 11: Knit Knit for 4 rounds more
Work cable pattern for a total of 40 rounds
(Use Cable pattern checklist to keep your place)

Cable Pattern:
You repeat this pattern for both sides of work. 1: K 3(5)(7), sl 1 purl wise, RTS (right twist stitch), p1, C6F, p1, RTS, sl 1 purl wise, k 3(5)(7) 2: knit to the 1st purl st, p1, k6, p1, knit to end 3: k 3(5)(7), sl 1, RTS, p1, k6, p1, RTS, sl 1, k 3(5)(7) 4: k to 1st purl, p1, k6, p1, knit to end
Thumb increases
Tip: use the thumb pattern checklist to keep place in cable pattern (end of round mean the end of both needles and actual end of round) 1: Work round 1 of cable pattern to the last stitch of the round.(this means both needles) Place marker, m1, k1, m1 2: work rounds 2 of cable pattern, knit to end slipping marker 3: work round 3 of cable pattern, knit to end slipping marker 4: work round 4 of cable pattern as normal to marker. Sm, m1, k to end of round, m1 Repeat rounds 2-4 of increase pattern while also keeping with the cable patterning 3(4)(5) more times for a total of 11(13)(15) thumb stitches Work next round of cable pattern to marker. Place the next 11(13)(15) thumb stitches on a stich holder or scrap yarn. Small- you work round 2 of cable pattern Medium- you work round 1 of cable pattern Large- you work round 4 of the cable patterr

Cast on 1 stitch and work the cable pattern that comes next for your size. (Check the thumb increase checklist to keep your place in cable pattern). Small- work round 3 of cable Medium- work round 2 of cable Large- work 1-4 of cable pattern unds of the cable pattern for your size so that you end or Small- work round 4 of cable Medium- work round 3 &4 Large- skip this step
All sizes
Work round 1 of cable pattern
Round 1-4: knit
5: Purl 6: Knit 7: Purl 8: Knit Work 8 rounds of k3, p1 ribbing. Bo loosely in pattern
Thumb:
Note: thumb can be worked on dpns or circulars
Pick up and knit 5 stitches along the edge of thumb opening and transfer the remaining 11(13)(15) sts to needles. Adjust your stitches t0 work in the round. 16(18)(20) sts total 11: Purl Bo loosely using favorite stretchy bind off
Cable Pattern
| 1 | K 3(5)(7), sl 1 , RTS (right twist stitch), p1, C6F, p1, RTS, sl 1, k 3(5)(7) | ||
| 2 | knit to the 1st purl st, p1, k6, p1, knit to end of needle | ||
| 3 | k 3(5)(7), sl 1, RTS, p1, k6, p1, RTS, sl 1, k 3(5)(7) | ||
| 4 | knit to the 1st purl st, p1, k6, p1, knit to end of needle | ||
| 5 | Round 1 of cable pattern | ||
| 6 | Round 2 of cable pattern | ||
| 7 | Round 3 of cable pattern | ||
| 8 | Round 4 of cable pattern | ||
| 9 | Round 1 of cable pattern | ||
| 10 | Round 2 of cable pattern | ||
| 11 | Round 3 of cable pattern | ||
| 12 | Round 4 of cable pattern | ||
| 13 | Round 1 of cable pattern | ||
| 14 | Round 2 of cable pattern | ||
| 15 | Round 3 of cable pattern | ||
| 16 | Round 4 of cable pattern | ||
| 17 | Round 1 ofcablepattern | ||
| 18 | Round 2 of cable pattern | ||
| 19 | Round 3 of cable pattern | ||
| 20 | Round4ofcablepattern | ||
| 21 | Round 1 of cable pattern | ||
| 22 | Round 2 of cable pattern | ||
| 23 | Round 3 ofcable pattern | ||
| 24 | |||
| Round 4 of cable pattern | |||
| 25 | Round 1 of cable pattern | |||
| 26 | Round 2 of cable pattern | |||
| 27 | Round 3 of cable pattern | |||
| 28 | Round 4 of cable pattern | |||
| 29 | Round 1 of cable pattern | |||
| 30 | Round 2 of cable pattern | |||
| 31 | Round 3 of cable pattern | |||
| 32 | Round 4 of cable pattern | |||
| 33 | Round 1 of cable pattern | |||
| 34 | Round 2 of cable pattern | |||
| 35 | Round 3 of cable pattern | |||
| 36 | Round 4 of cable pattern | |||
| 37 | Round 1 of cable pattern | |||
| 38 | Round 2 of cable pattern | |||
| 39 | Round 3 of cable pattern | |||
| 40 | Round 4 of cable pattern | |||
Reminders for cable and thumb increase patterns
Cable Pattern: You repeat this pattern for both sides of work. 1: K 3(5)(7), sl 1 purl wise, RTS (right twist stitch), p1, C6F, p1, RTS, sl 1 purl wise, k 3(5)(7) 2: knit to the 1st purl st, p1, k6, p1, knit to end 3: k 3(5)(7), sl 1, RTS, p1, k6, p1, RTS, sl 1, k 3(5)(7) 4: k to 1st purl, p1, k6, p1, knit to end
Thumb increase instructions:
Thumb increases
Tip: use the thumb pattern checklist to keep place in cable pattern (end of round mean the end of both needles and actual end of round) 1: Work round 1 of cable pattern to the last stitch of the round.(this means both needles) Place marker, m1, k1, m1 2: work rounds 2 of cable pattern, knit to end slipping marker 3: work round 3 of cable pattern, knit to end slipping marker 4: work round 4 of cable pattern as normal to marker. Sm, m1, k to end of round, m1 Repeat rounds 2-4 of increase pattern while also keeping with the cable patterning 3(4)(5) more times for a total of 11(13)(15) thumb stitches
Thumb Increases and cable pattern
| 1 | Round 1 of cable pattern. thumb increase +2 sts (3) | ||
| 2 | Round 2 cable pattern knit remaining stitches | ||
| 3 | Round 3 cable pattern knit remaining stitches | ||
| 4 | Round 4 cable pattern, thumb increase +2 sts (5) | ||
| 2 | Round 1 cable pattern, knit remaining stitches | ||
| 3 | Round 2 cable pattern, knit remaining stitches | ||
| 4 | Round 3 cable pattern, thumb increase +2 sts (7) | ||
| 2 | Round 4 cable pattern, knit remaining stitches | ||
| 3 | Round 1 cable pattern, knit remaining stitches | ||
| 4 | Round 2 cable pattern, thumb increase +2 sts (9) | ||
| 2 | Round 3 cable pattern, knit remaining stitches |
| 3 | |
| Round 4 cable pattern, knit remaining stitches Round 1 cable pattern, thumb increase +2 sts (11) | |
| 4 2 | Go to next step for small Round 2 cable pattern, knit remaining stitches |
| 3 | Round 3 cable pattern, knit remaining stitches |
| 4 | Round 4 cable pattern, thumb increase +2 sts (13) |
| 2 | Go to next step for Medium Round 1 cable pattern, knit remaining stitches |
| 3 | Round 2 cable pattern, knit remaining stitches |
| 4 | Round 3 cable pattern, thumb increase +2 sts (15) |
| Go to next step for Large | |


Toomuc Valley Yarns
Toomuc Valley Yarns Etsy Store
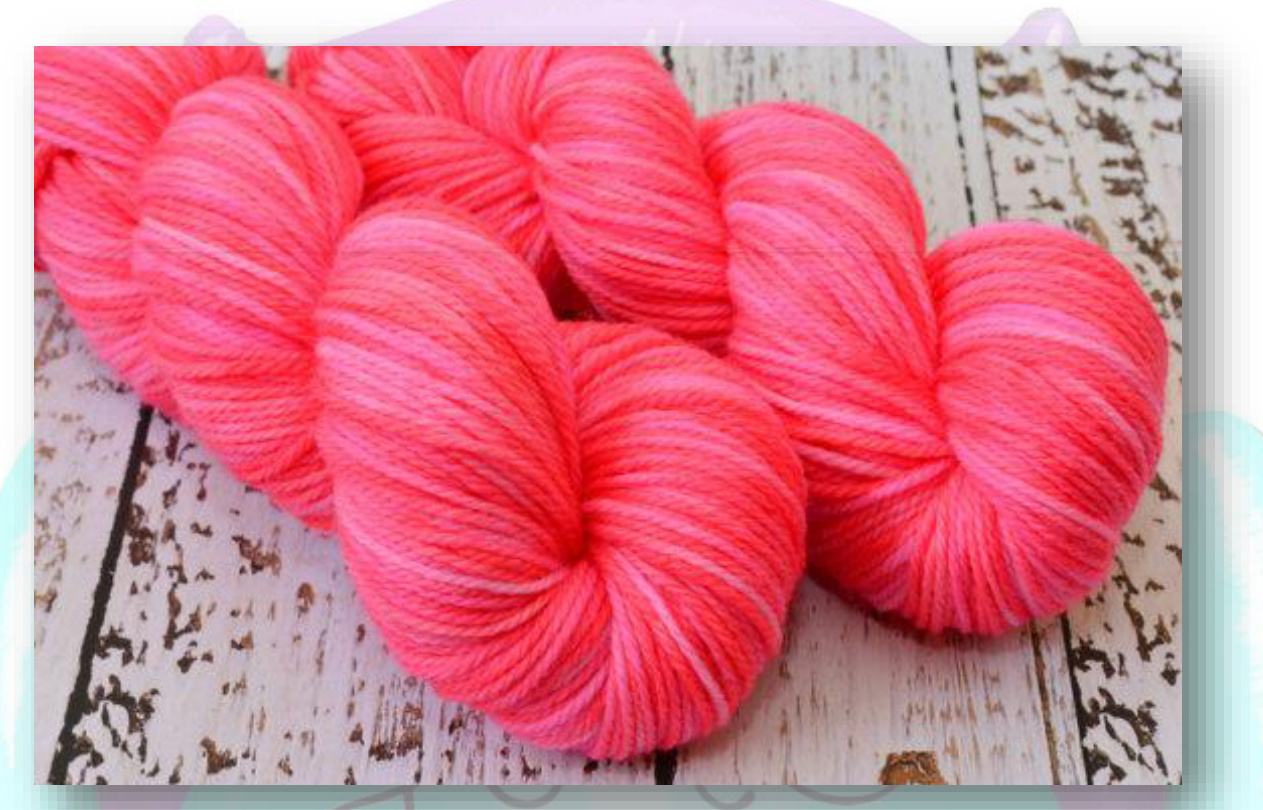
Pink Strawberry (Juicy Fruits line) 100% Australian Superwash Wool Green gloves done in Guppy Green Toomuc Valley Yarns are very color saturated and are extremely lovely to work with. The yarns are very squishy and soft. Toomuc Valley yarns is located in Australia and can be found on Etsy and Facebook JMo Creations All of my patterns whether paid or free are my designs. I do not mind if you sell whatever item you make from my patterns, as your finished works are yours to do as you please. I do ask that you do not sell my patterns and please give credit where it is due. I enjoy making designs that others can easily make themselves. It is my passion. If for any reason you have any questions or need any help; please do not hesitate to send me an email. I will gladly answer any questions and offer whatever help I can pertaining the pattern. Thank you for choosing and I wish you all a great day!