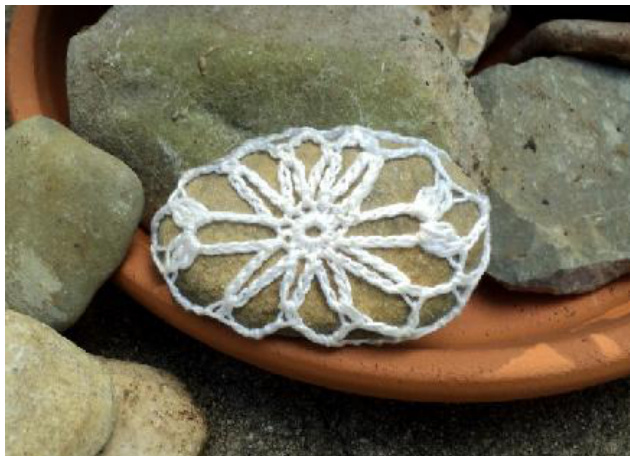
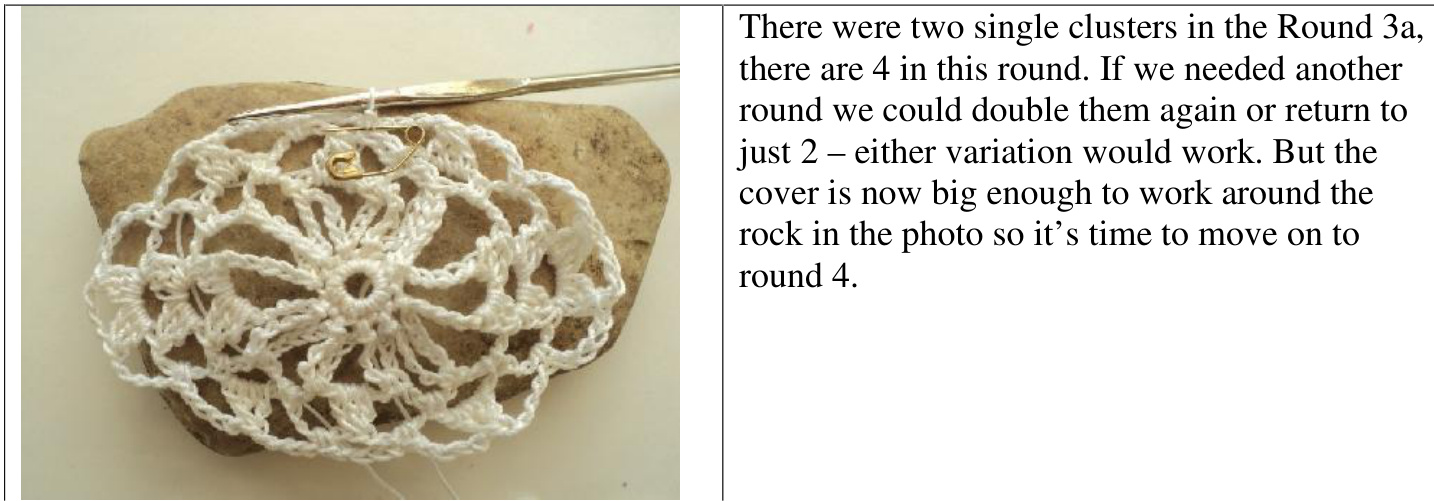
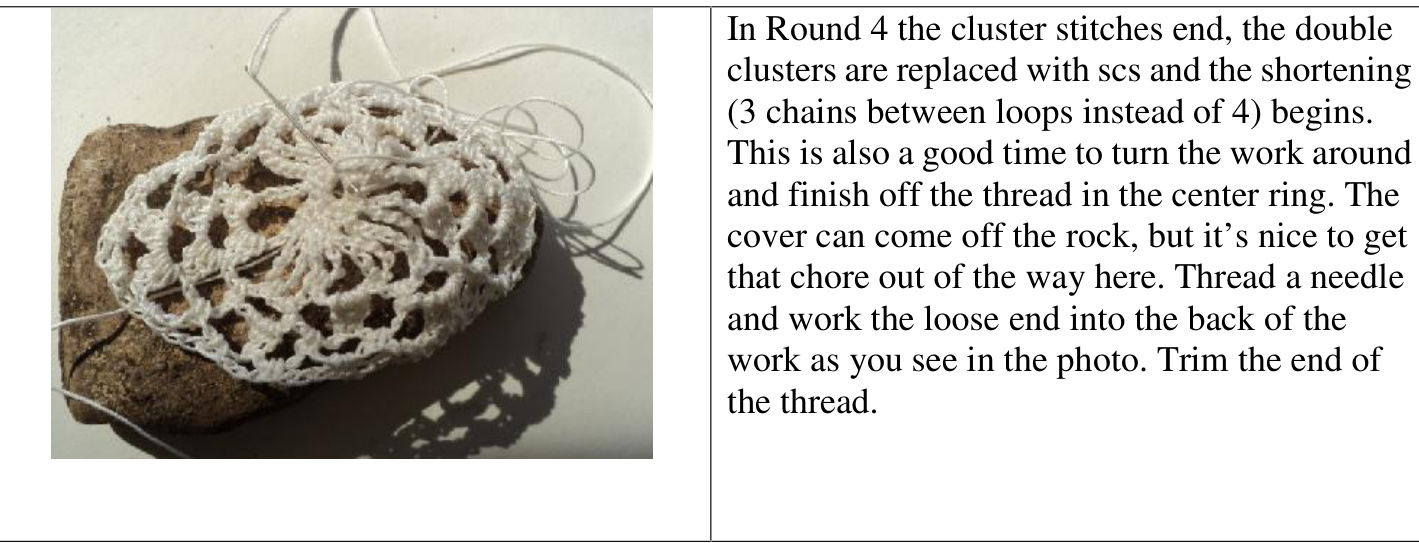
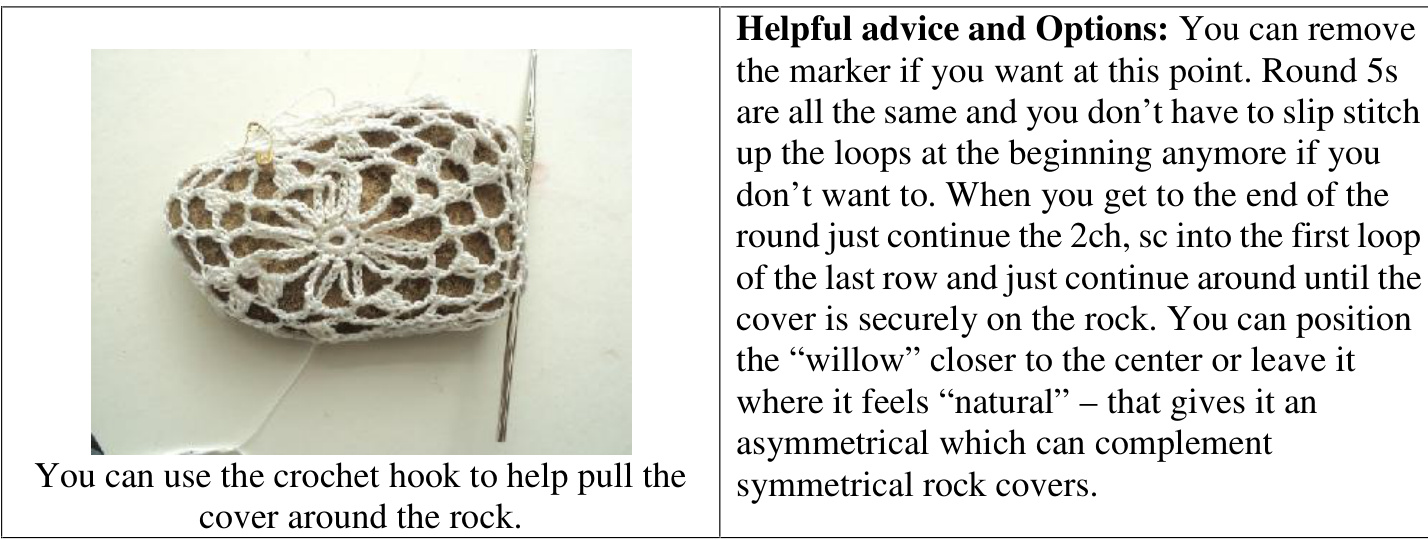
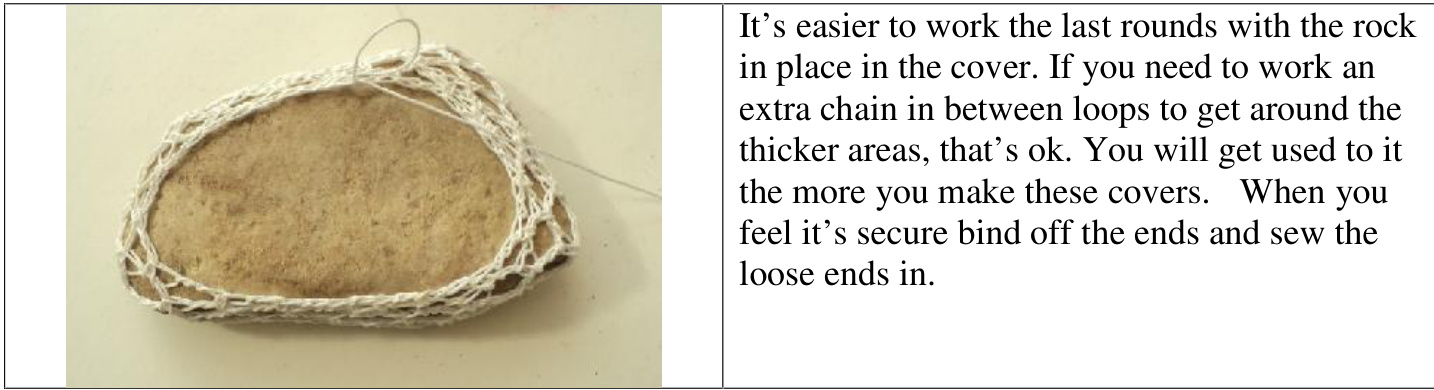
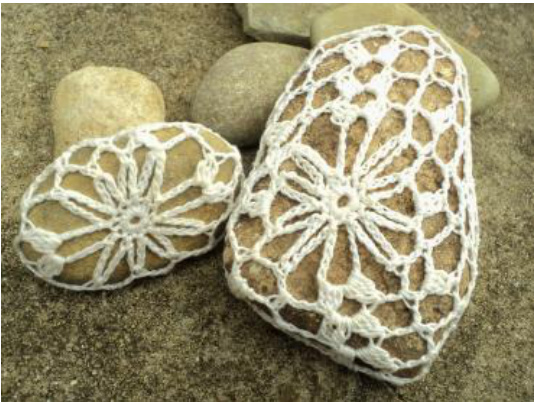
Willow Rocks: Crochet Lace Covered River Rocks & Small Spaces Zen Garden
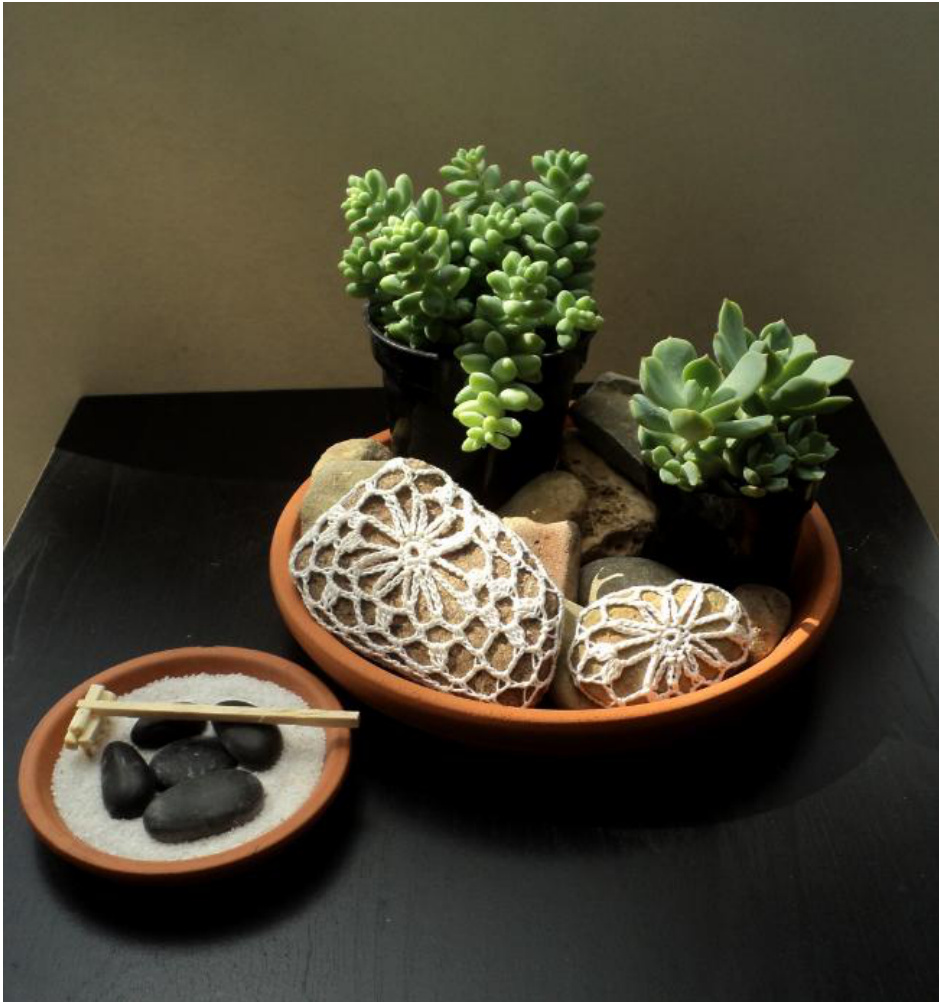
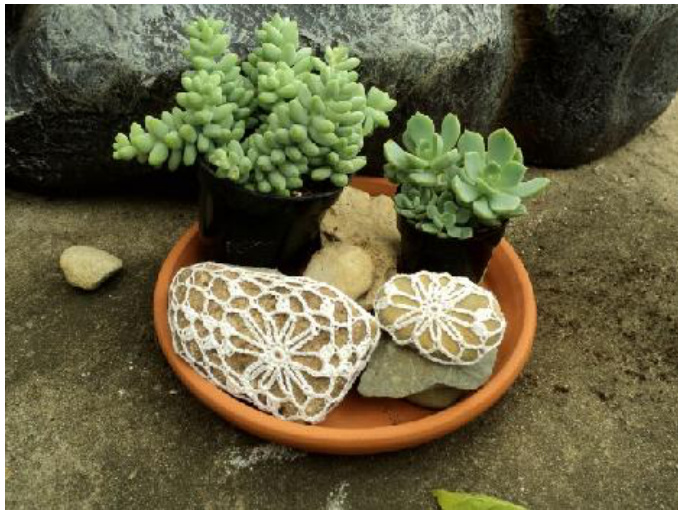
River Rock Garden:
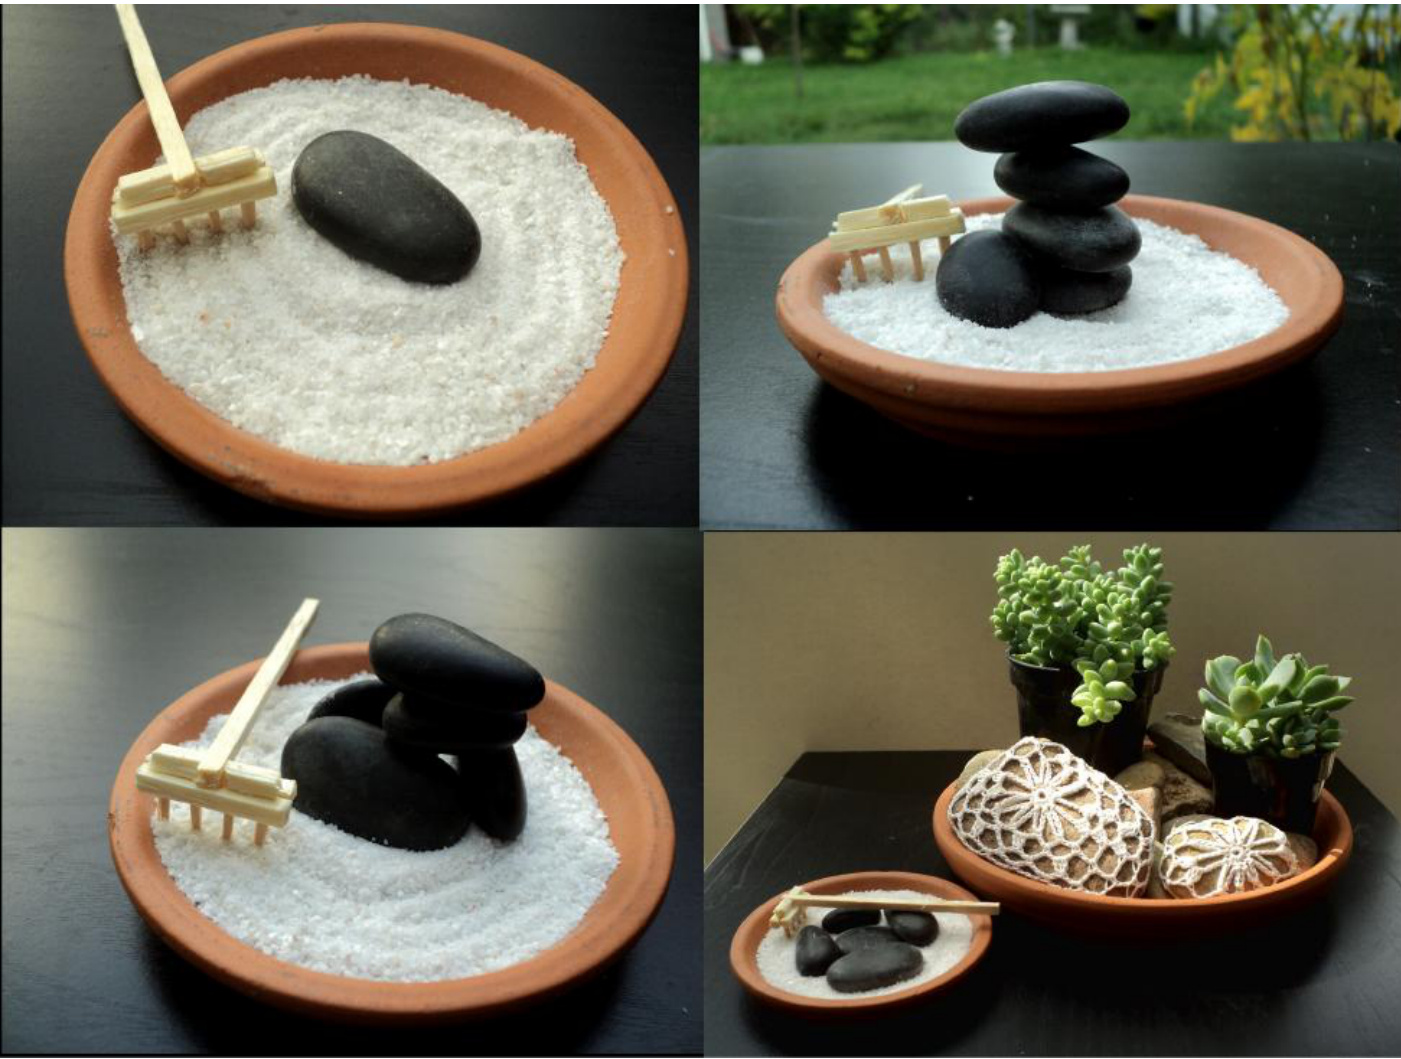
Gift Ideas: These make great paper weights, as well as center pieces for your garden or table.
Garden materials:
7' Terra Cotta plant pot saucer River Rocks Succulents - the ones above are Donkey Tail "Burrito” and Graptoveria “Tituubans"
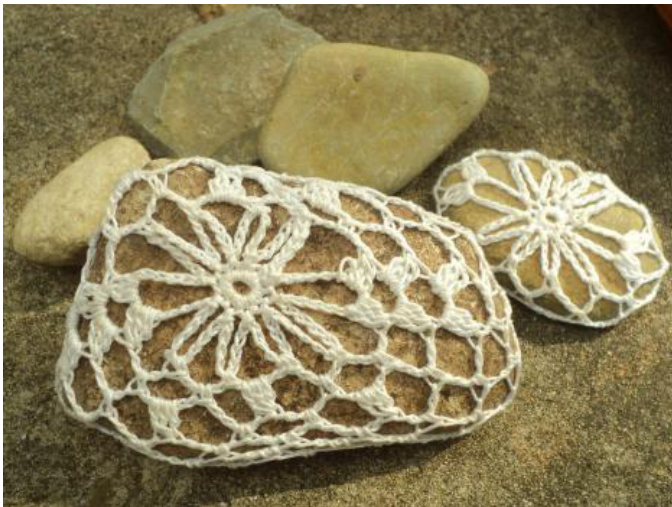
River Rock Dimensions:
Small Rock: 2 1/2 “ x 1 1/2 “ x 1/2 “ Large Rock: 4" x 2 12 " x 34" (at thickest point)
Materials:
Crochet Hook Size: 5 (steel hook) USA 1 skein Aunt Lydia's Crochet Thread #10 White Gauge: You can adjust a smaller or larger gauge by changing hook size. Different sizes will give different looks for your rock. .
This pattern is a variation of a Crochet Willow Block. Normally the Willow has long loops that are all the same length. For the oblong rocks some loops will be longer than others. The smaller rock is easier. In the instructions for the larger rock there are notes on how to figure out how many rows are necessary to get around a rock.
Stitch notes: Cluster Stitch
Step 1: Yo, insert hook into the loop indicated by the needle, yo, draw through loop,
Step 2: Yo, draw through 2 loops on hook,
Step 3: Yo, insert hook into same loop, yo, draw through
Step 4: Yo, draw through 2 loops on hook
Step 5: Repeat steps 3 and 4 again, yo, draw through 4 loops on hook.
Small Rock Instructions
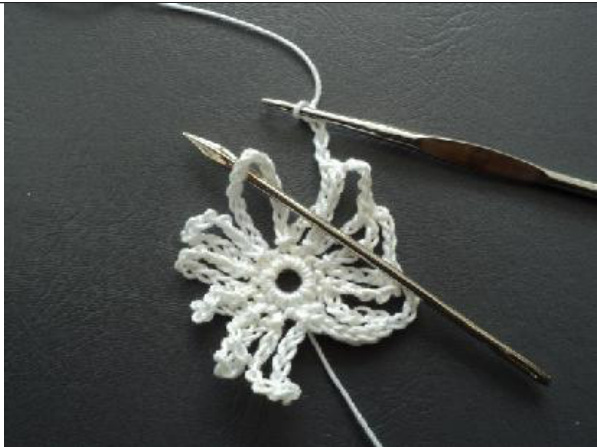
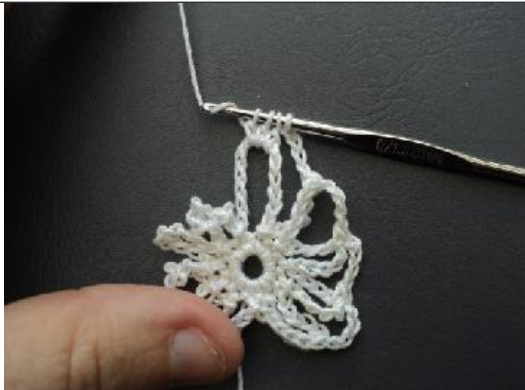
Make a Magic Circle (If you don't know what this is you can search for a tutorial on the Internet or simply chain 5, slip stitch into the first chain to form a ring). Round 1: 1ch, 11sc into the ring Round 2: \*9ch, slip stitch into next sc, 7ch, slip stitch into next ring, 7ch, slip stitch into next ring, 9ch, slip stitch into next ring, 11ch, slip stitch into next ring\* , repeat \* to \* once more. Round 3: slip stitch to middle of next loop (5 ch of a 9ch loop - see photos below)
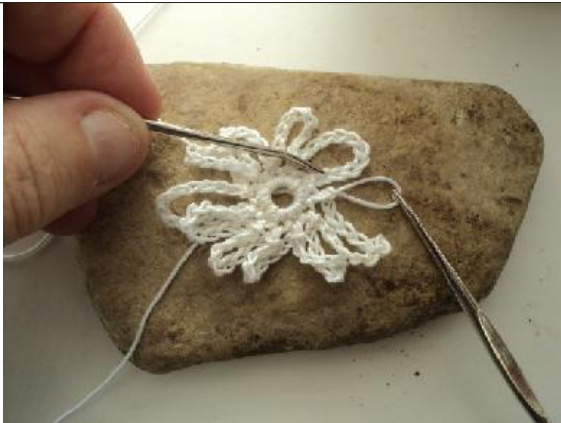
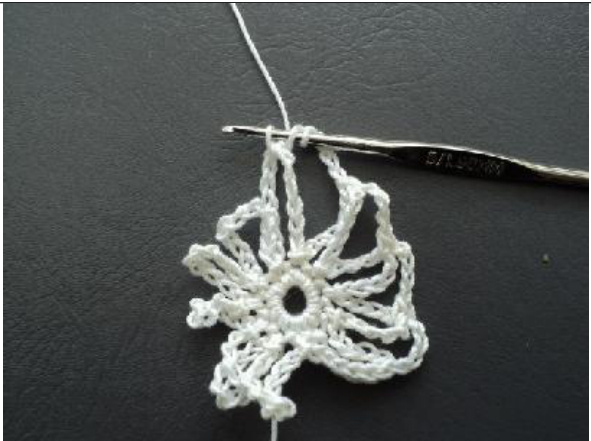
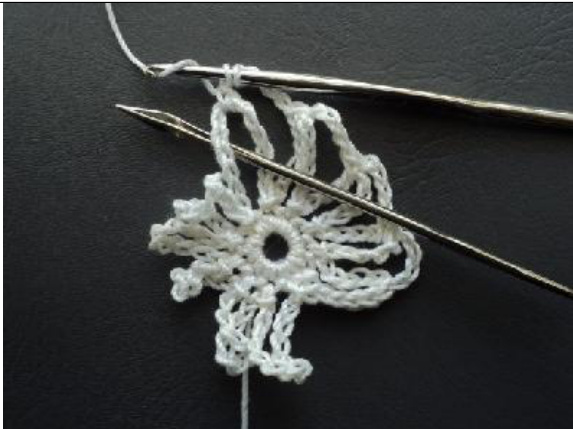
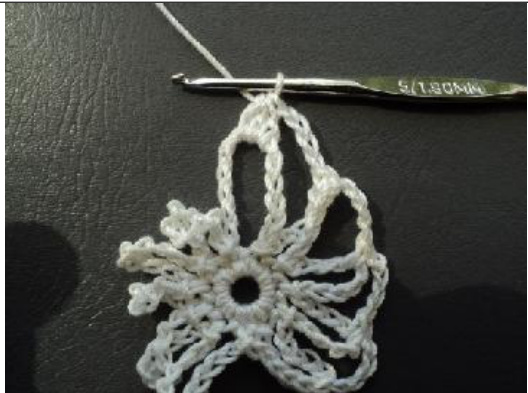
The photo above is the larger rock, but the instructions here are the same for all. Slip stitch up the next loop, starting where the needle indicates.
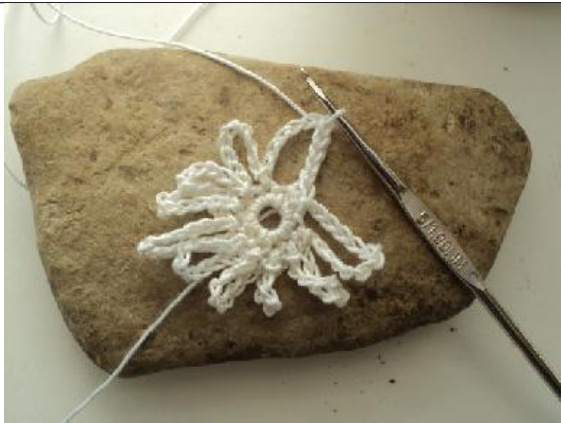
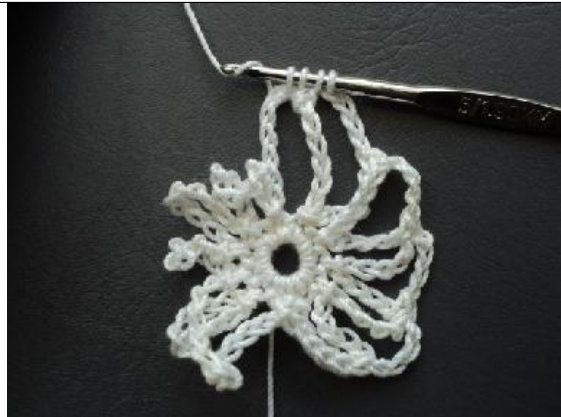
When you are halfway up the loop you are ready to start the next stitch (which will be 4 chain). \*4ch, sc into next loop\*, repeat \* to \* 2 more times, 4ch, (cluster stitch, 4ch, cluster stitch) in next loop, \*4ch, sc into next loop\*, repeat \* to \* 2 more times, 4ch, (cluster stitch, 4ch, cluster stitch) in next loop, slip stitch in top ch of loop the round began in. Round 4: slip stitch to middle of next loop, \*3ch, sc into next loop\*, repeat \* to \* around, slip stitch into first slip stitch. If the rock is a little wider than the one in the picture you may want to repeat round 4. It's easier to work the last round with the rock in the cover. There are more notes about this for the larger rock in the next section. Round 5: slip stitch to middle of next loop, \*2ch, sc into next loop\*, repeat \* to \* around, slip stitch into first slip stitch.
Large Rock Instructions
a Magic Circle (or simply chain 5, slip stitch into the first chain to form a ring Round 1: 1ch, 11sc into the ring Round 2: \*11ch, slip stitch into next sc, 9ch, slip stitch into next ring, 9ch, slip stitch into next ring, 11ch, slip stitch into next ring, 13ch, slip stitch into next ring\* , repeat \* to \* once more. Round 3: slip stitch to middle of next loop, \*4ch, sc into next loop\*, repeat \* to \* 2 more times, 4ch, (cluster stitch, 4ch, cluster stitch) in next loop, \*4ch, sc into next loop\*, repeat \* to \* 2 more times, 4ch, (cluster stitch, 4ch, cluster stitch) in next loop, 4ch, slip stitch in top ch of loop the round began in.
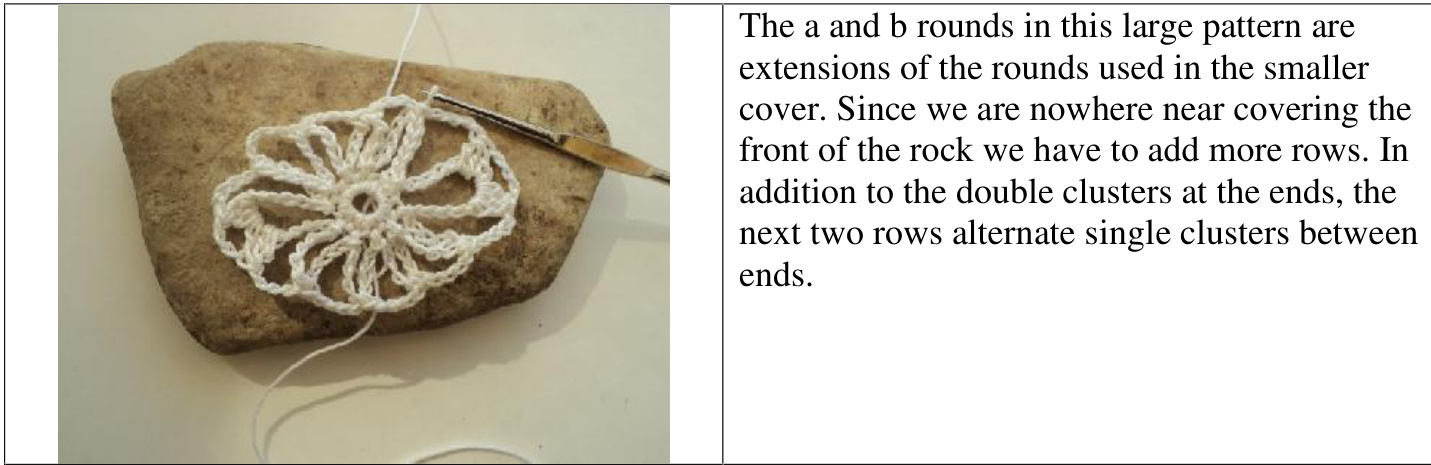
Round 3a: slip stitch to middle of next loop, 4ch, cluster into next loop, (4ch, sc into next loop) 2 times, 4ch, (cluster stitch, 4c, cluster stitch) in next loop, (4ch, sc into next loop) 2 times ,4ch, cluster into next loop, (4ch, sc into next loop) 2 times, 4ch, (cluster stitch, 4c, cluster stitch) in next loop, 4ch, sc into next loop, 4ch, slip stitch in middle of loop the round began in.
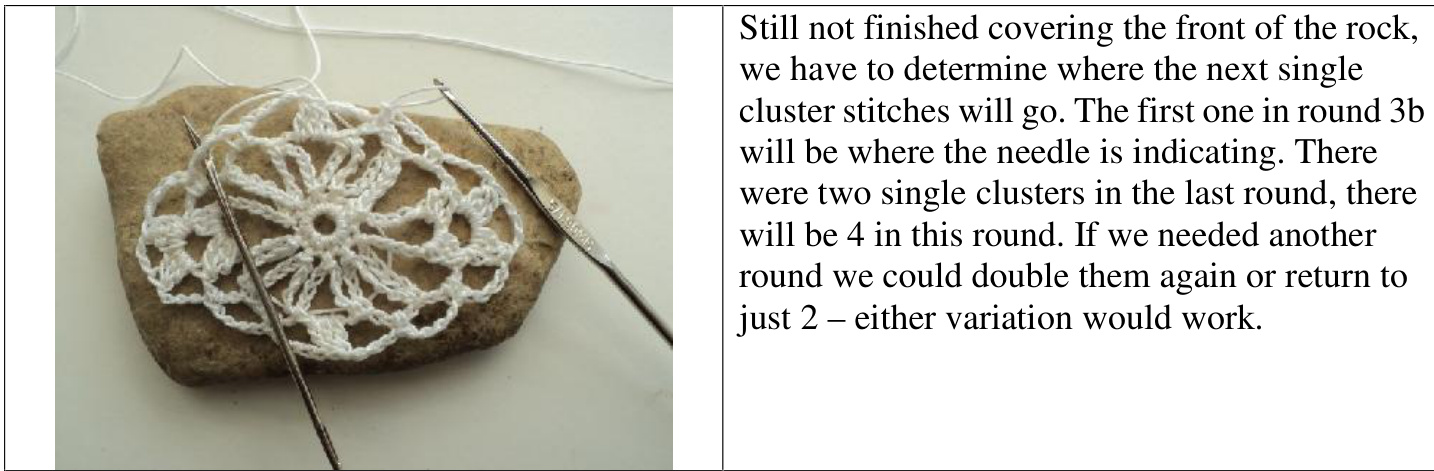
Round 3b: slip stitch to middle of next loop, 4ch, sc into next loop, 4ch, cluster into next loop, 4ch, sc into next loop, 4ch, (cluster stitch, 4c, cluster stitch) in next loop, \* 4ch, sc into next loop, 4ch, cluster into next loop, (4ch, sc into next loop) twice, 4ch, cluster into next loop, 4ch, sc into next loop, 4ch, cluster into next loop, 4ch, sc into next loop, 4ch, (cluster stitch, 4c, cluster stitch) in next loop, 4ch, sc into next loop, 4ch, cluster into next stitch, 4ch, slip stitch in middle of loop the round began in.
Round 4: slip stitch to middle of next loop, (3ch, sc into next loop) repeat until you reach the 2 cluster stiches then (sc, 3c, sc) in 4ch loop between the 2 cluster stitches, (3ch, sc in next loop) until you reach the opposite end (again between the cluster stitches on the previous row) then (sc, 3c, sc) in the 4ch loop between the 2 cluster stitches, (3ch, sc into next loop) repeat until you reach loop before the beginning, 3ch, slip stitch in top ch of loop the round began in.
Round 4a: slip stitch to middle of next loop, \*3ch, sc into next loop\*, repeat \* to \* until you reach the loop before the beginning of the round, 3ch, slip stitch in top ch of loop the round began in. If you are still having trouble getting the cover to fit around the edge of the rock then it may be wider than the one I used. Repeat Round 4a to get over the edge.
Round 5: slip stitch to middle of next loop, \*2ch, sc into next loop\*, repeat \* to \* until you reach the loop before the beginning, 2ch, slip stitch in top ch of loop the round began in.
Round 5a: Repeat Round 5.
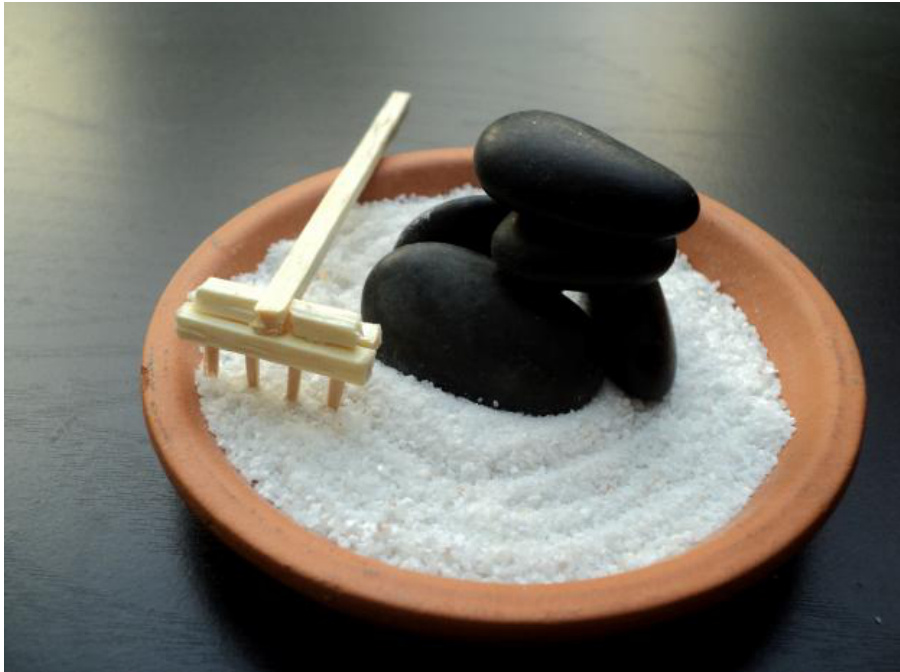
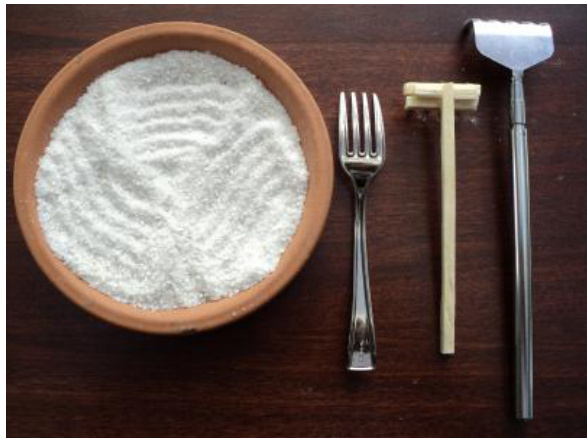
Small Spaces Zen Garden
Materials List for Small Zen Garden
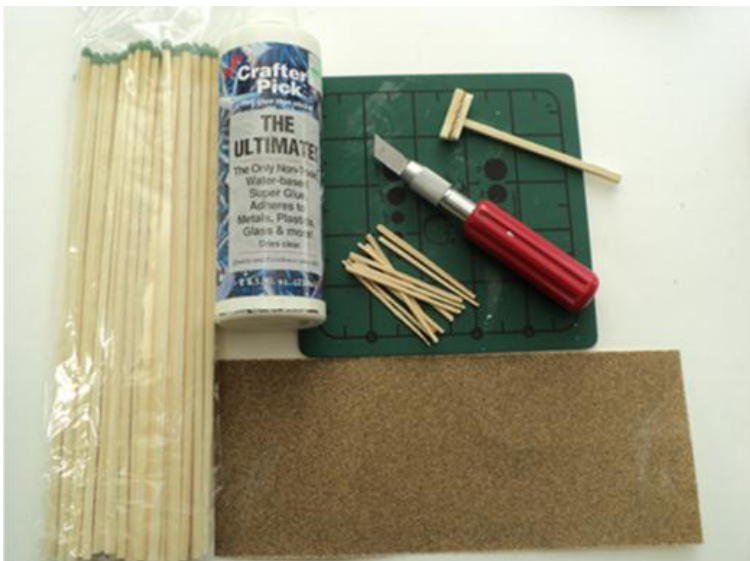
Materials List for Matchstick Zen Rake:
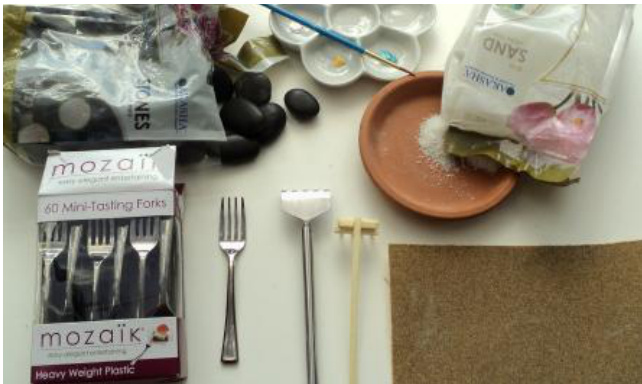
Garden materials:
4" Terra Cotta plant pot saucer 1/4 to 1/3 cup white decorative sand Black decorative rocks Paint - if you want to decorate the rocks Zen Rake - You can use a small back scratcher (bottom right) as a rake or you can use a small fork (plastic - bottom right) or you can make your own matchstick rake (bottom -- center). Long Fireplace Matchsticks (Diamond) Toothpicks Craft knife or sharp scissors Glue - any wood glue will work, and while the photo shows Crafter's Pick, I found E6000 was the best. It bonded all the parts firmly. Cutting board- If you are using the knife you will want to protect your working surface. Sandpaper (optional) - to smooth rough edges, though it can stay rough looking if you like.
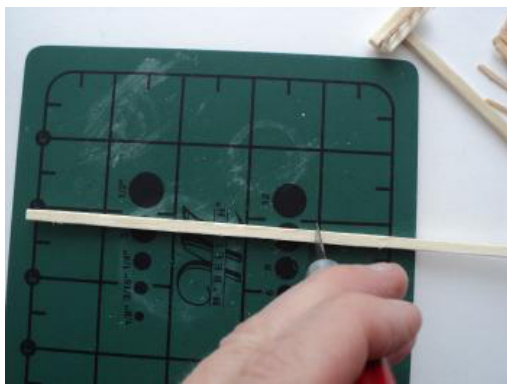
Step 1: Using a craft knife or sharp scissors cut or score a four inch section of a large matchstick. The advantage of using matchsticks over dowels or other types of craft wood is that you have flat sides to glue your pieces together. You may have to break the pieces apart if your knife or scissors aren't sharp enough. That will leave a rough edge that you can sandpaper.
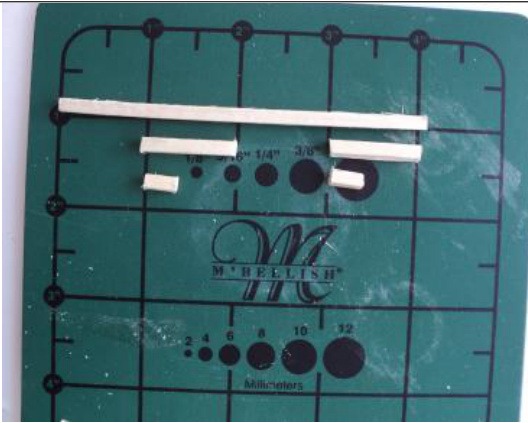
Step 2: Cut four more pieces off the matchstick. Two should measure an inch long and 2 should be about 5/16 inch. If the smaller pieces fall apart then use another matchstick until you have two small pieces about the same size. The smallest pieces are to hide the seam with the teeth so they do not bear any weight or tension.

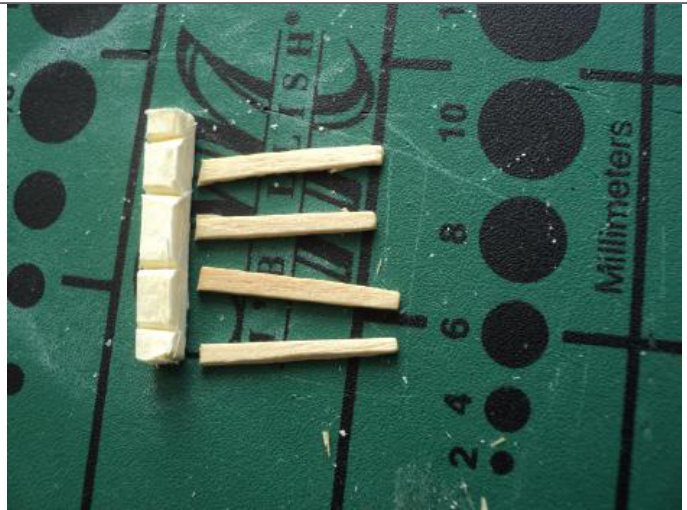
Step 4: Take one of the 1 inch matchstick pieces and score it where you want the teeth to match up. This is mostly to mark where you want the teeth. It is not necessary, but you can carve the spaces larger so that the gap is smaller when you place the teeth on this piece and cover it with the other 1 inch matchstick piece. Graph starts here and each row is read right to left
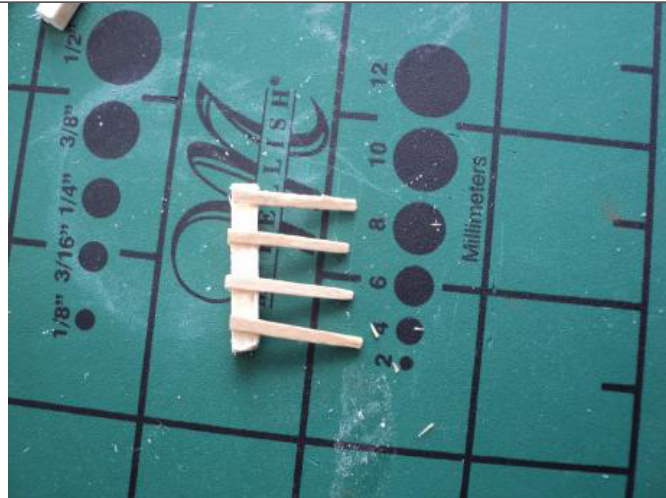
Step 5: Glue the teeth to the 1 inch matchstick piece. Then glue the second 1 inch piece over the top. You may have to straighten out the teeth after you put this part together. Let it dry before going to the next step.
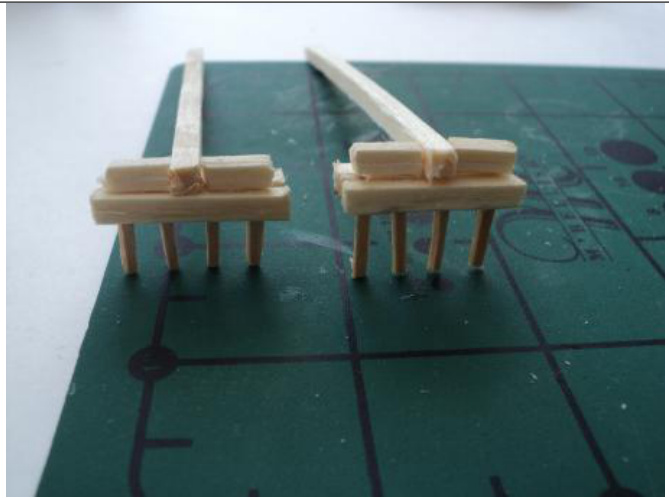
Step 6: Glue the long handle across the center as pictured above and glue the small pieces to cover the gap on either side. Let dry. The new rake on the right has longer teeth than the left. You can trim them down, but that is up to you. Also the first rake was glued with E6000, while the one on the right stayed together, but the teeth continued to shift. E6000 is the better glue for this project.