lastique Recreations handmade fashionable and functional plasticyarn designs
Lazy \*P' Pop/Pull Tab Plarn Bracelet
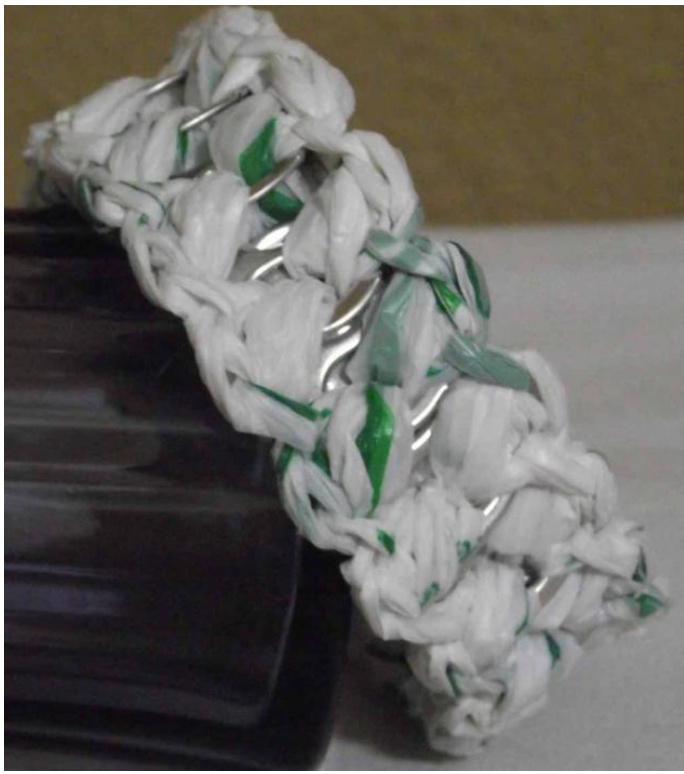
Pop Tab bracelets are the fun and firty jewely accessory thatcan be w ornwith any type of outft- casual or dress.
SKILL LEVEL: Easy
MATERIALS:
Crochet Hook-SizeG ?Plastic Yarn: Approximately 2 standard size plasic grocery bags (width of strip - approx %") Approx 18-22 Pop/Pull Tabs (clean & consistent in size). The # needed will be determined by size of wrist (optional) Craft Needle for weaving in ends Important Note: Notall plastic is made the same. When using plarn, achieving the desired size or gauge is dependent on the texture, thickness and strip width of the plastic yarn. This pattern is for your personal use only. Purchase of this pattern does not transfer copyright. This pattern may not be sold, published, reproduced-mechanically or electronicall, or by any other means, including photocopying from any website(s) or electronic mailing lists, etc... Please do not offer, sell or distribute this pattern in any way to anyone else. Lazy ‘P' Pop/Pull Tab Plarn Bracelet Copy right@ 2011 Plastique Recreations Designer, Teresa Wooley Email: plastiquerecreations@yahoo.com
Helpful Tips:
| ABBREVIATIONS | |
| ch(s) =chain(s) | po=p plarnover |
| sl=slip | st(s)= stitch(es) |
·See‘Tutorials’ for instructions on how-to: O Double LoopCuting and Looping method Plastic in general is susceptible to ripping/tearing due to its very nature. 0 Weaving in ends -itis best to maneuver your craft needle behind a puff st and not through the stitch to avoid spliting the plasticyam. The edged hole of the pop tab will be always be placed behind a non-edged hole.
Special Stitch:
Puff Stitch: Po, insert hook in pop tab, po, pull hrough and bring plarn up higher than normal (3 loops on hook), po, insert hook in same pop tab, po, pullthrough and bring plarn up to height of rest of stches (5 loops on hook), \*po, insert hook once again into the same pop tab, po, pull through and bring plarn up to height of rest of sitches (7 loops on hook),[IMPORTANT NOTE: For more puff, repeat from \* until enough puff is achieved.J po, pull plarn through ALL loops on hook.
Instructions:
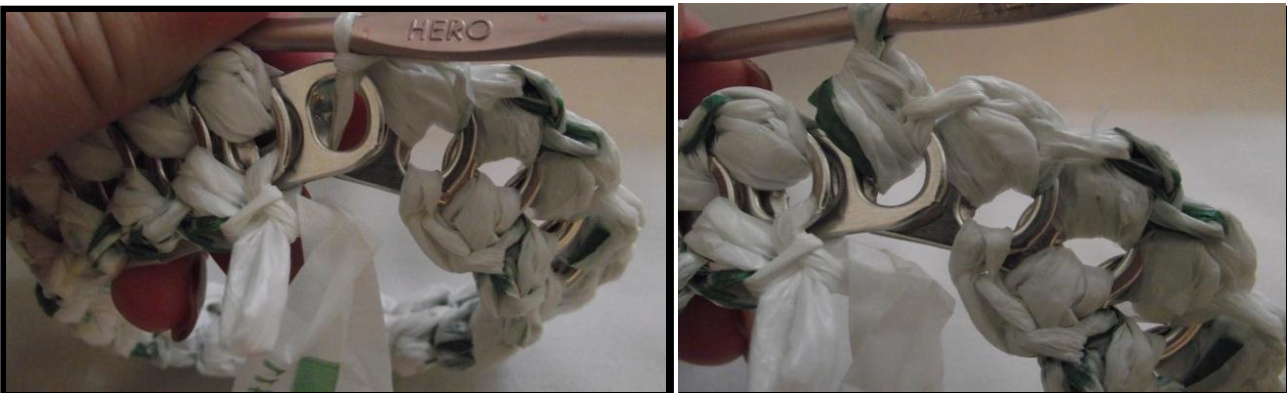
With 2 pop tabs overlapped, join plarn with a sl st in overlapped hole, ch 1, place a new pop tab under previous pop tab, make a puff st in that hole.

\*Place another pop tab under the previous pop tab, in new overlapped hole make a sl st, ch1 and Puff
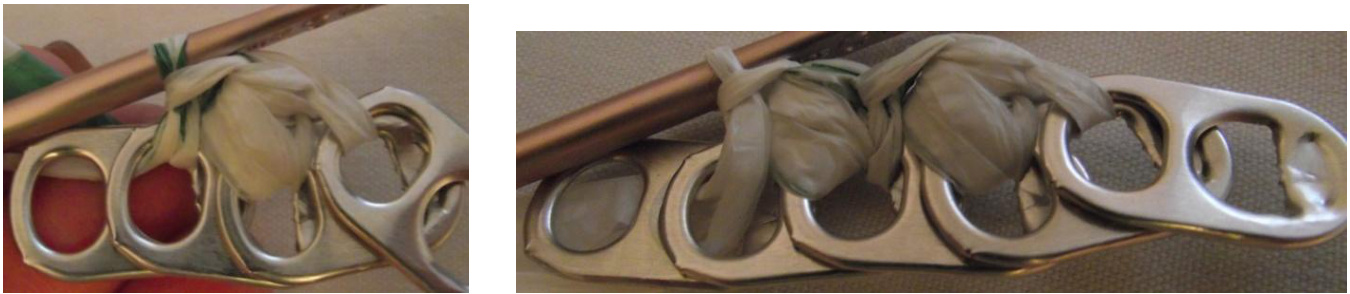
Plastique Recreations ..handmadefashionableandfunctionalplasticyarndesigns
\*Continue overlapping patern untl desired length is achieved ending in last overlapped hole.
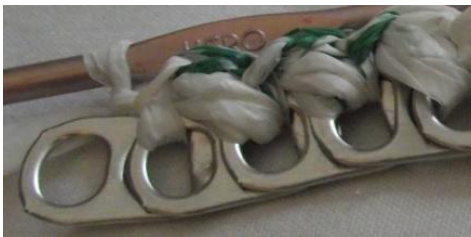
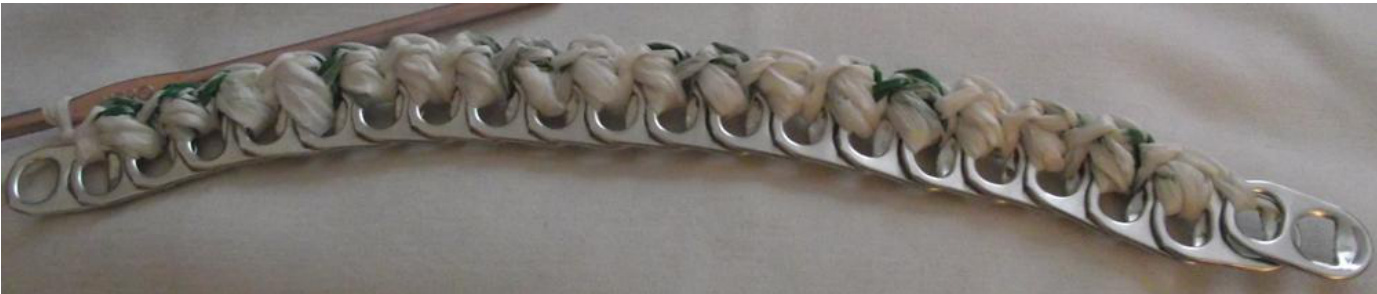
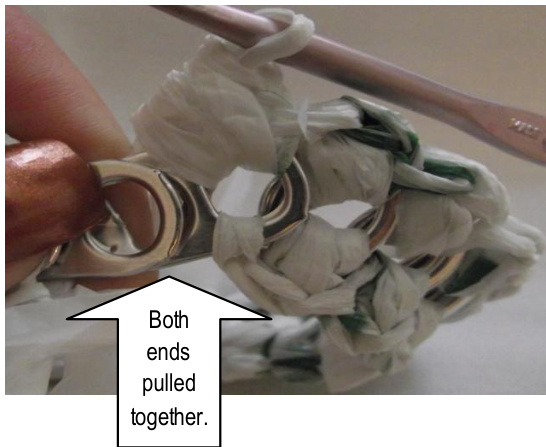
Continue until bracelet is long enough to fit around wrist [Fitting Tip- wrap bracelet around wrist overlapping the first and last pop tab. There is some stretch so no additional tabs are needed to maneuver finished bracelet over hand.] Remove hook from st (make a big enough loop so completed work doesn't come out because you'll be coming back to it) Working on opposite side, in 1st overlapped hole join with a \*sl st, ch 1 and Puff st. \*Repeat pattern in each overlapped hole to

Form Circle - Overlap the ends together to form a circle.
Lazy ‘P' Pop/Pull Tab Plarn Bracelet Copy right@ 2011 Plastique Recreations Designer, Teresa Wooley Email: plastiquerecreations@yahoo.com
Plastique Recreations handmadefashionableandfunctionalplasticyarndesigns
\*Work patern ofslst, ch1 and puffstin this hole. Finish by making asl st in 1st pufst Fasten of, weave in ends behind the puff St
\*Repeat patern on opposite side.
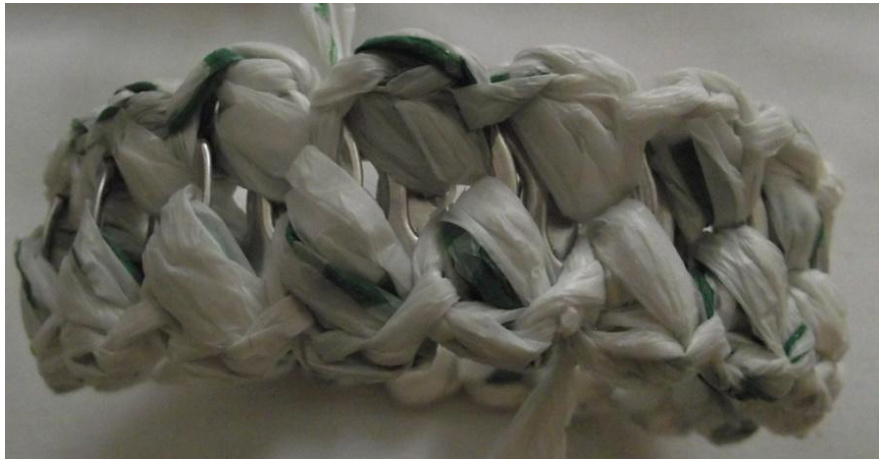
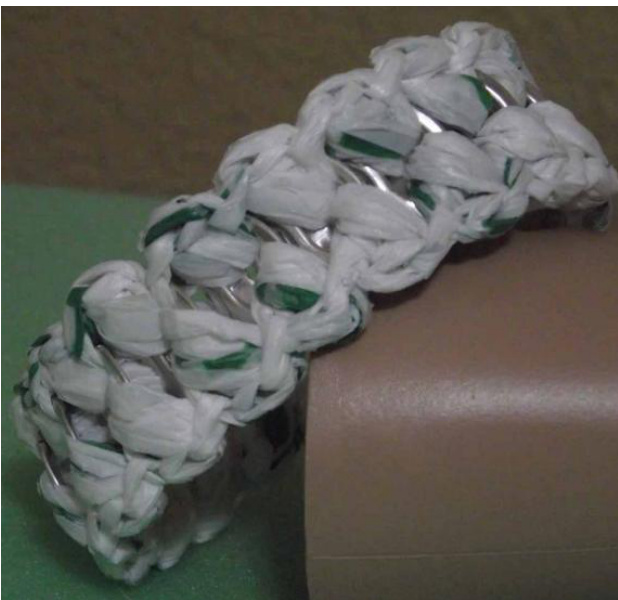
ENJOYYOURNEWFASHIONACCESSORY!!
Please email me if you have any questions about this pattern. Copy right? 2011 Plastique Recreations Designer, Teresa Wooley Email: plastiquerecreations@yahoo.com
Plastique Recreations .handmadefashionableandfunctionalplasticyarndesigns
TUTORIALS
Double Strand Cutting and Looping:
Cuting Strips: Lay the plastic bag outfat straightening outhe straps.Fold bag inhalf(folding botomup evenwith the top matching up the handles. Do this a couple more times foreasiercuting. Cuthandles offathe base.Cutbotom seam off. Justa sliver is all thatis needed. Begin cuting strips the width necessary to meetyour project/patern needs. (Typicaly, strips are cut notless than 1". 1 %2" to 2" are standardcut sizes.)

Looping Strips Together: Hang 2 strips from yourhand. Using your opposite hand, reach through the middle of 1st strip and grab the bottom ofthe 2nd strip. Pul the 2nd strip through the middle of 1st strip. Drop the 1st strip from yourhand. You now have whatlookslike a'T' as the 1st strip is hanging on top of2nd strip.

Whichever hand you prefer, pull a strip through the center ofstrip on other hand. (In the picture below, the let hand w ent through the middle of strip in right hand.)) Grab the strip thatwas pulled through and letgo ofother strip. Looking at the picture below, the right hand drops the strip itis currently holding and it willay on top ofthe lefthand. The righthand grabs the strip from the left hand. Using the available hand, grab the bottom strip and pul to make a knot. Your primary objective is to make as small knot as possible without breaking the strip. Breaking the strip is inevitable ifyou pul the strips too tight.

he existing strip. NOTE: The new strip will alwaysbe pulled through the middle ofthe existing strip allowing the existing strip to )s: ?Make the knotas small as it will go. But remember, ify ou plltoo ight, one of the strips wil break. Make sure the 2-strand strips are even. There'snothing more inconvenientwhen crocheting or kniting with plasic yarn then to have to work w ith extra plastic on one of the strips. When adding a new strip, on Step#7-grab the previous knotmade when pulling the new strip with the opposite hand to make the knot. This will helpkeep the 2-strands even.
Forming the Ball
The easiestway Ihave found to makea ballis put togetheryour pointerand middle fingers. Placethe plastic yarn tail between the fingers and begin Wrapping the plastic yarn aroundboth fingers about5 times. Pulthe wrap ofthe fingers thenbeginwrapping the plastic yarn around to starforming the bll. Note: To avoid tangles, start making the ballafter a small ile forms from loping the strips together. Copy right@ 2011 Plastique Recreations Designer, Teresa Wooley Email: plastiquerecreations@yahoo.com


