thefibreworks
FREE PATTERN by SJ Grifin - htp://thefibreworkscom - on Ravelry: SZZzn1225 1-845-382-97:
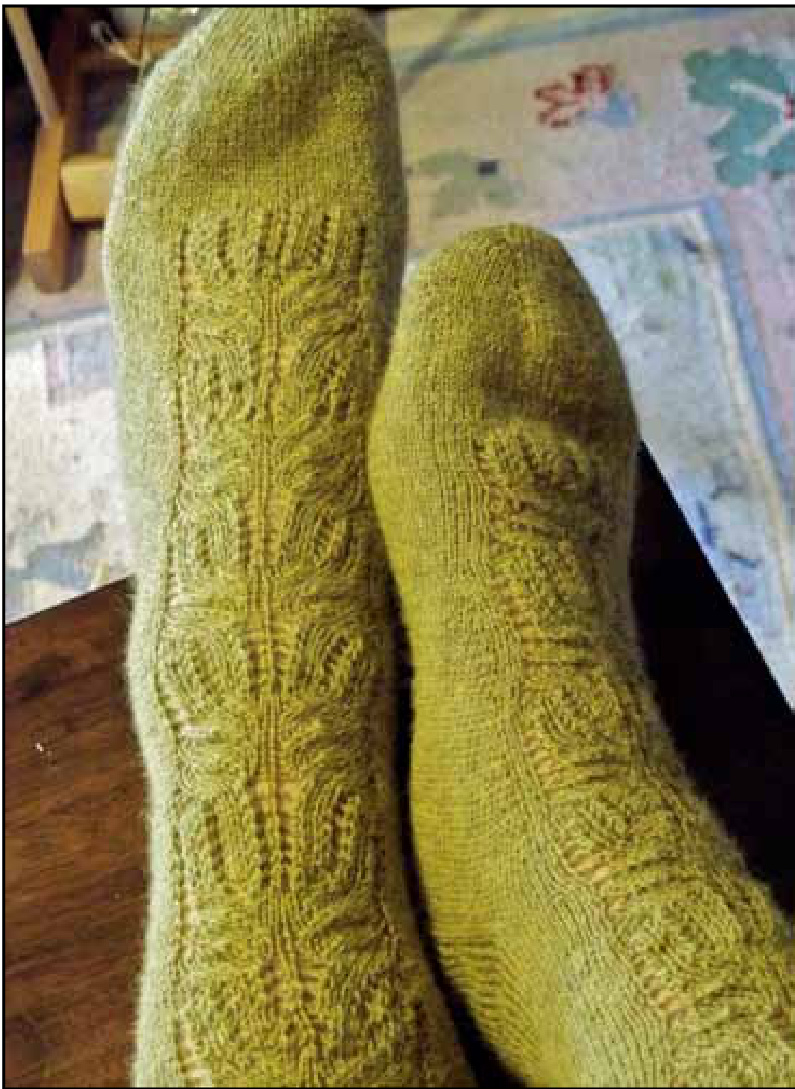
frosted lace socks
toe-up, lace inset socks based on Barbara Walker's "Frost Flowers"
notes
Works & SJ Grifin Allrights reserved. Not to be produced To work this pattern you should be familiar with circular knitting on double pointed needles, increases and decreases, and how to do a yarnover. The lace pattern is both charted and written out. The pattern is written for four needles (the sock on 3 and knitting with the fourth), you'll need an extra needle or two during the heel tun. SkillI Level: Intermediate or advanced beginner. Knit from the toe up. I recommend knitting both socks at the same time. This requires an extra set of needles, BUT if you've knitted 1 sock at a time you may have already ended up with 2 socks of slightly (or greatly) differing sizes.... or may have ended up with 3/4 of a pair of socks because you got sick and tired of knitting the same thing all over again... the latter was my problem until I adopted the two-atthe-same-time method. Please read through the entire pattern before you begin kniting to make sure you understand the instructions. If you have a question, comment, or correction please contact me through Ravelry at user: szzn1225 You can also call 10-5pmEST 1-845-382-9722 or email at: szzn1225@gmail.com The lace pattern is based on "Frost Flowers" from Barbara Walkers first Treasury of Knitting Patterns (www.schoolhousepress.com). I've simplified it a bit by eliminating a few yarn overs and knit-2-togethers. The method of increasing for the instep is a simplified version of Cat Bordhi's "Upstream" sock from her book "New Pathways for Sock Knitters." The increase occurs on each side of the lace panel along the top of the foot, and starts sooner than a normal gusset which is increased every other round... this sock has gusset increases that occur every third round. The big secret of this sock is that you can place the instep increases anywhere. On the instep, top, bottom, side... absolutely anywhere. I've included a toe-up formula on the last page to
encourage experiments
materials
Universal Yarns "“Pace" sock yarn 1.76 ounces 220 yards/50 grams 200 meters 2 skeins "Kiwi" color #15 Size O-1 US needles, or the size needed to obtain gauge.
gauge
Size 0-1 US needles 1" - 2.5cm = approx. 8 - 9 sts 1" - 2.5cm = approx. 10-13 rows. Take a stitch and row gauge reading after you've knitted the toe to length.
sizes
This pattern is sm (med, Ig), 8 (8 1/2, 9" circumference measured around the widest part of your lower foot). of the other 2 needles to the top-of-the-foot needle so there are now 25 stitches on that needle. If you want, you can redistribute a couple of stitches on the other 2 needles so the stitch counts on each of them is, more or less, even.
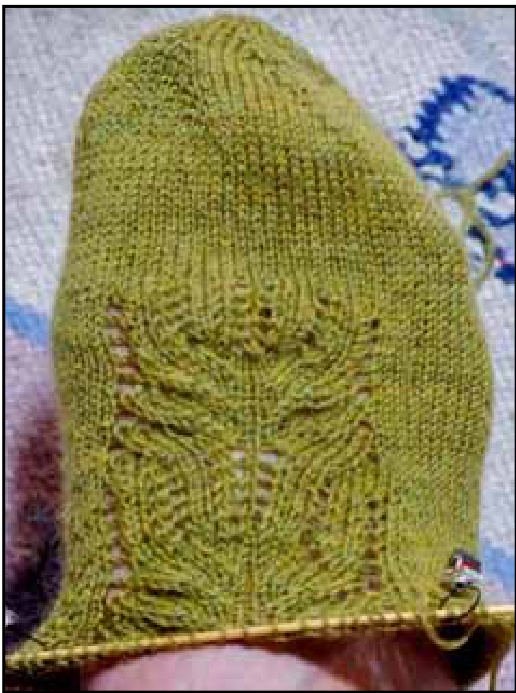
cast on & toe
Using Cat Bordhi's Personal Footprints Cast On (link) Cast on 3 over 2 needles held together as one. Knit 3 stitches from first needle. Turn. Using both yarn tails, knit 3 (9 stitches). Turn. Using both yarn tails knit 3 (12 stitches) Place marker st beginning of round and abandon the short yarn tail. Knit one round. Round 1: \* Knit 1, Knit one through front & back of stitch (K1FB)\*, repeat from \* to \*, 18 sts. Round 2: Knit. Round 3: \* Knit 2, K1FB \*, repeat from \* to \*, 24 sts. Round 4: Knit. Round 5: \* Knit 3, K1FB \*, repeat from \* to \*, 28 sts. Keep increasing every other round at 6 points until you have 60 (66, 72) stitches. This is called a "spiral", "whirlpool", or "star" toe. Knit until the toe measures 2" (2 1/2", 3") long. Take a stitch and row gauge here. If your counts are nowhere near 8 1/2 or 9 stitches per inch and you want to proceed with the yarn you've chosen, use the "toeup sock formula" at the end of the pattern to get stitch counts for all parts of the sock. There will be 3 plain sts before and 3 plain stitches after the central 19 lace stitches on the top-of-the-foot needle. You can place markers where the lace pattern begins and ends or simply keep those extra stitches in your head.. 3 fore and 3 aft. Read the lace pattern beginning with row 1 and work the lace patterm across the central 19 stitches of the top-of-the-foot needle as follows: Knit 3, work lace chart, knit 3. Work one fullrepeat of lace pattern through row 24 (toe should measure about 4 3/4 inches or 12cm), then begin increases for instep as follows: K1FB, place marker (PM), knit 2, work 19 sts of lace pattern, knit 1, PM, K1FB, knit 1. Repeat this increase every third round working a K1FB in the stitch before the first marker and in the stitch after the second marker on rounds 1, 4, 7, 10, 13, 16, 19, and 22. Repeat from round 1. Continue lace pattern as follows: After marker 1, knit 2 work lace pattern, knit 1, slip marker. Work until foot measures 7" (7 1/2", 8") from the tip of the toe.
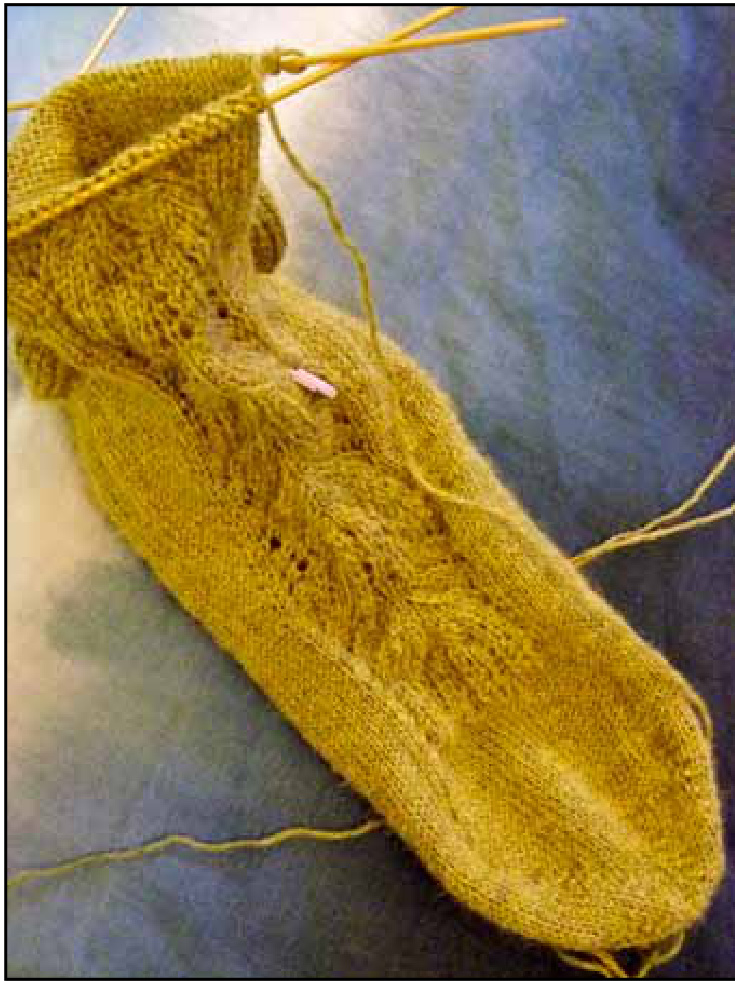
foot
The wonderful thing about a Spiral Toe is that there's no wrong
way to orient it to the rest of your sock. Pick one needle to be the "top-of-foot" needle on which you'll begin working the lace pattern. Youll need to move several of the stitches onto that needle.. There are 20 (22, 24) stitches on each of the 3 needles. Redistribute +5 (+3, +1) stitch from either
heel turn
When the foot of your sock measures about 1.25 - 1.5 inches less that the finished length you want it to be, and the instep fits the foot that will be wearing the sock, start the heel shaping. You'll have to reposition the stitches to work the heel turn. The heel takes up 1/3 of the total number of stitches you've got at this point. Take the total number of stitches you have and divideby3. Begin by centering the lace motif on the top-of-foot needle. Take the number you got by dividing above and make sure that number of stitches is on the top-of-foot needle... ts okay to be off one stitch, the important thing is that the lave panel is centered on that needle. Take the number you got above and divide it by 2. You'll place that number of stitches on one additional needle to the left of the center group of stitches, and on extra needle to the right of the center group. These are the side-of-heel nee dles. The remaining 1/3 of the stitches should be on the bottom of the foot. You'll use these to turn the heel. So... 1/3 of the stitches for the top-offoot needle, 1/3 for the heel, and 1/6 on each side of the heel. Divide the number of heel stitches by 3. If you have an odd number, place the extra stitch in the center third (this becomes the bottom of the heel). With the right side facing, knit across the heel stitches and stop before the last 2 stitches. Slip only the first of the last two stitches to your right needle, bring the yarn to the front, return the slipped stitch to the left needle and return the yarn to the back. Turn. This is a wrap and turn on the knit side (W&T-knit) Purl across and stop 2 stitches before the last stitch. Slip the next stitch to the right needle, bring the yarn to the back, return the slipped stitch to the left needle, returm the yarn to the front. Turn. This is a wrap and turn on the purl side (W&T-purl) \* Next row: Knit across and stop at the last 3 stitches. W&T-knit. Next row: Purl across and stop at the last 3 stitches. W&T-purl \* Repeat from \* to \* stopping before one additional stitch on each set of knit and purl rows. When you have W&T 1/3 of the total heel stitches on each side of the center 1/3 of the stitches begin the back of heel.
back of heel
You'll be kniting the back of heel "flap" as you join it to the side of-heel stitches. On the first two rows of the heel flap you work, youllbe concealing half of the wraps on the first knitted row and the rest on the row you purl back like this... Knit to the first wrapped stitch. Pick up the back of the wrap and place it on the left needle, knit the wrap and the wrapped stitch together. Repeat across, stopping before you knit the very last stitch (that stitch has NOT been wrapped). SSK the last stitch and the first stitch on the next needle together -- this creates a visible gap. Slip the first stitch. Purl back to the first wrapped purl stitch. Pick up the front of the wrap, place it on the left needle and purl it and the wrapped stitch together. Repeat across, stopping before the last stitch. Purl that stitch and the first stitch on the next needle (side-of-heel needle) together. \*TUumn. Slip the first stitch, knit across to the stitch before the last stitch on the needle. SSK that last stitch and the first stitch of the side-ofheel needle together. Tun. Slip the first stitch and purl across to the last stitch. Purl the last stitch and the first stitch on the side-of-heel needle together.\*\*\* Repeat from \*\*\* to \*\*\* until you've eaten up all the stitches on both side-of-heel needles. Begin kniting in the round again
work across instep

Now you'll be motoring on up the calf Before you begin to work across the top of foot needle, and resume working the lace pattern, pick up the running thread between the right and left needles, twist the heck out of it and knit it together with the frst stitch of the top of foot needle. Do the same move after you knitted across the lace pattern and reached the end of the top-of-foot needle. Now your stitch count should magically match the count you began with 60 (66, 72) stitches. If you're off by a stitch or two you can increase in the next round to get back to the original stitch count. If you have a larger than average calf its very easy to increase up to the width you'd like your sock to be. Knit about 1" - 2.5cm plain and then gently continue increasing, using the same placement as the instep increases, but only increasing every 5th or 6th round.
work the ribbing
When your sock is as long as you like. I stopped mine after a total of 6 repeats of the lace patter.. start ribing. Begin at the center back of the sock. I prefer a 2 X 1 rib (K2, P1) because it keeps the top of the sock from curling but doesn't strangle my calf. You can do a 2 X 2 rib if you like. Count your stitches and divide by 3 (for a 3x1), or 4 (for a 2x2). If the count doesn't come out even, decide whether you'd rather have more of less room at the top of your sock and increase or decrease the few stitches you need for your rib to come out even. Work about 1 1/2" - 4cm in the ribbing of your choice.
a super-stretchy bind off
Thanks to Jeny Staiman for this super stretchy bind of.. Begin at the center back of the sock.
To work KNIT stitches:
Wrap yarm around needle from back to front (the opposite way you'd normally do a yarn over). Knit one. Pass the wrap and the previously worked stitch over the stitch you just knitted.
To work PURL stitches:
Wrap yarn around needle from front to back (the exact way you'd normally do a yarn over). Purl 1 Pass the yarn and the previously worked stitch over the stitch you just purled.
wash your socks!
Add baby shampoo or your favorite wool wash (like Soak or Eucalan) to room temperature water. Immerse socks and let soak for 10-20 minutes. Spin dry in the spin cycle of your washing machine or roll in a towel and gently squeeze to remove excess water. Soak again in plain room temperature water, repeat spin (or squeeze), re-shape and dry flat or place on sock blockers.

OrkS & SJ Griffin A rights reserved. htp:/theflbreworks.com This is a FREE PATTERN
bibliography
A Treasury of Knitting Patterns, Barbara G. Walker. Schoolhouse Press, Pittsville, Wisconsin. 2001, Print. Socks, Rita Buchanan & Deborah Robson, editors. Interweave Press, Loveland, Colorado. 1994, Print. Knitting Around, Elizabeth Zimmermann. Schoolhouse Press, Pittsville, Wisconsin. 1989, Print. Socks from the Toe Up, Wendy D. Johnson, Potter Craft, New York, New York. 2009, Print. New Pathways for Sock Knitters, Book One, Cat Bordhi Passing Paws Press. Friday Harbor, Washington 2007, Print.
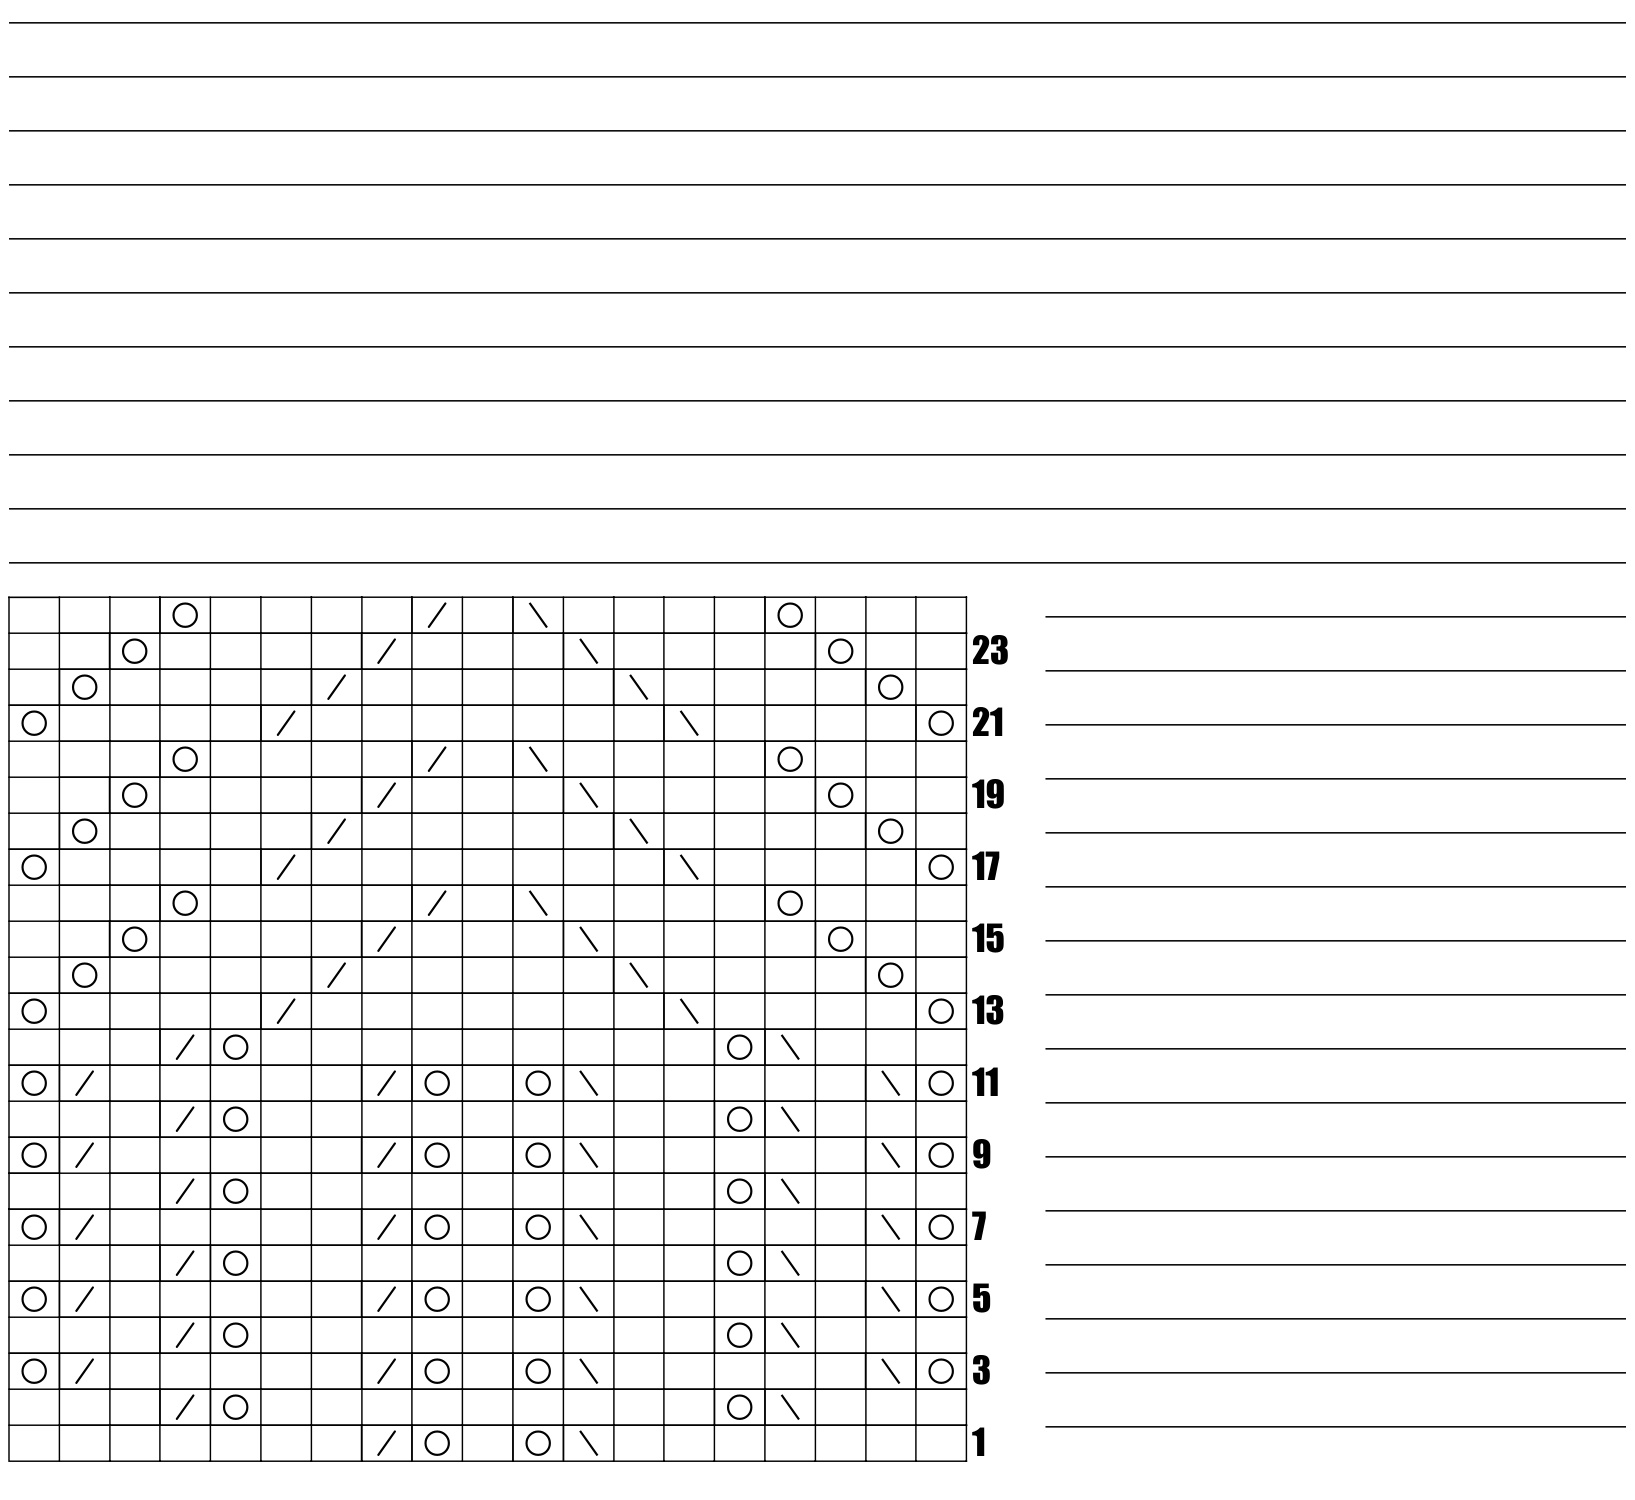
frosted lace pattern
1) K7, SSK, YO, K1, YO, K2-tog, K 7 2) K3, SSK, YO, K9, YO, K2-tog, K3 3) YO, SSK, K5, SSK, YO, K1, YO, K2-tog, K5, K2-tog, YO 4 - 11) Repeat rows 2 & 3 five times more 12) Repeat row 2 once. 13) YO, K4, SSK, K7, K2-tog, K4, YO 14) K1, YO, K4, SSK, K5, K2-tog, K4, YO, K1 15) K2, YO, K4, SSK, K3, K2-tog, K4, YO, K2 16) K3, YO, K4, SSK, K1, K2-tog, K4, YO, K3 17 - 24) Repeat rows 13-16 two times more (these 24 rows comprize the Frosted Lace pattern)
toe-up sock formula
Knit any toe. TOE Measurement: (Length of toe you knitted 2 to 3 inches, 5 to 7.5cm) SPI: (stitches per inch - or per 2.5cm) RPI: (rounds per inch - or per 2.5cm) Actual Foot Width: (measurement of widest part of lower foot in inches or cm) FootWidthEASE\*: (\*for stockinette stitch multiply Actual Foot Width by .90 for 10% negative ease, for lace mul tiply by .85 for 15% negative ease, for cables use the number as is.) Actual Instep: (measurement of instep about 1.5" - 4cm away fromback of heel. Multiply same as Foot Width EASE) InstepEASE\*: Actual Foot Length: (place the 1" end of a wood or metal ruler against a vertical surface like a wall or cabinet and stand on the ruler to get the measurement. Multiply by .95 for 5% negative ease) FootLengthEASE: SPI times Foot WidthEASE KEY (number of stitches needed for foot and calf- 100%, This is your KEY number) EASE INSTEP Stitches (number of stitches needed for instep) Instep EASE divided by 3 = HEEL (total stitches for heel) HEEL divided by 3 = HEEL Turn (stitches left after wrapping and tuning for heel) HEELTurn divided by 2 - HEEL Side (number of stitches on each of the two side-of-heel needles) HEEL divided by SPI HEEL Depth (actual measurement around back of heel) divided by 2 = HEEL Half (measurement to deduct from lower foot for her Foot Length EASE minus HEEL Half minus TOE Measurement =INSTEP Measurement (actual measurement of the lower foot minus heel and toe measurements) INSTEP Measurement timesRPI = INSTEP Rounds (number of rounds that will be knitted for the instep) INSTEP Stitches minusKEY = INCREASE Total (number of stitches you need to increase for the instep) INCREASE Total dividedby 2 = INCREASE Pairs (number of times you have to work paired increases for the instep) INSTEP Rounds divided by INCREASE Pairs 二INCREASE Times (number of rounds to knit between INCREASE Pairs. Round down to the nearest whole number.)


