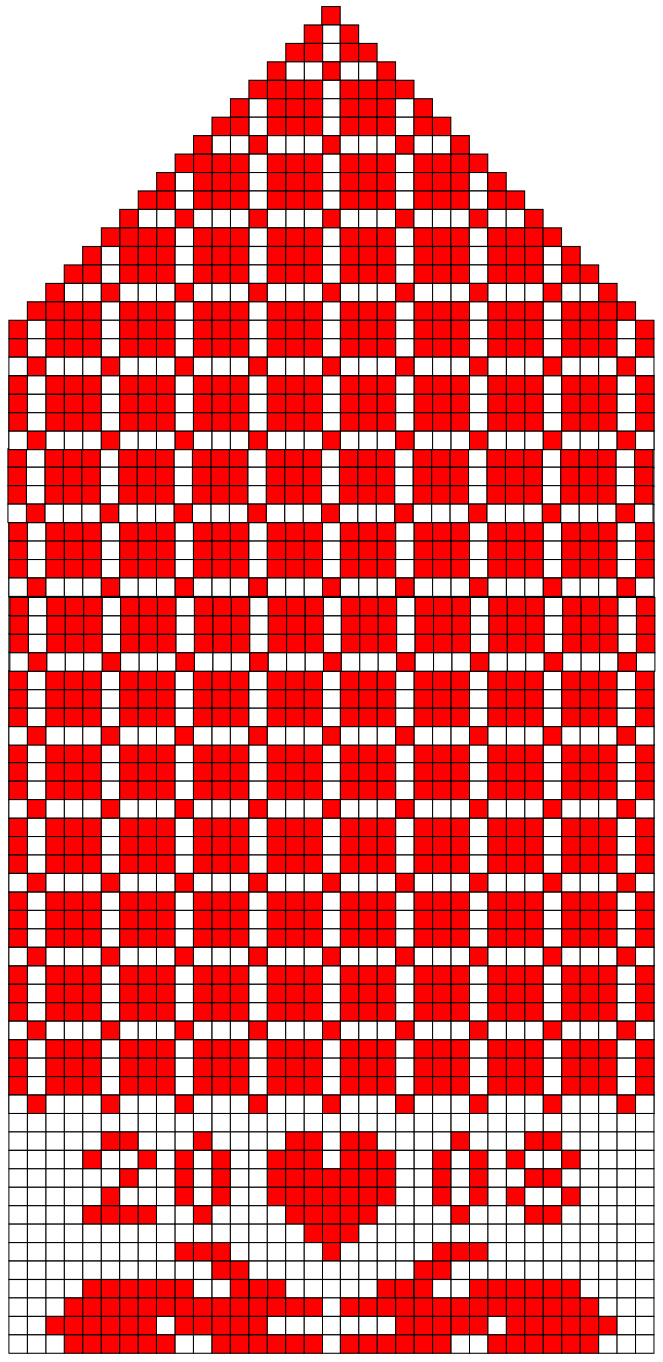
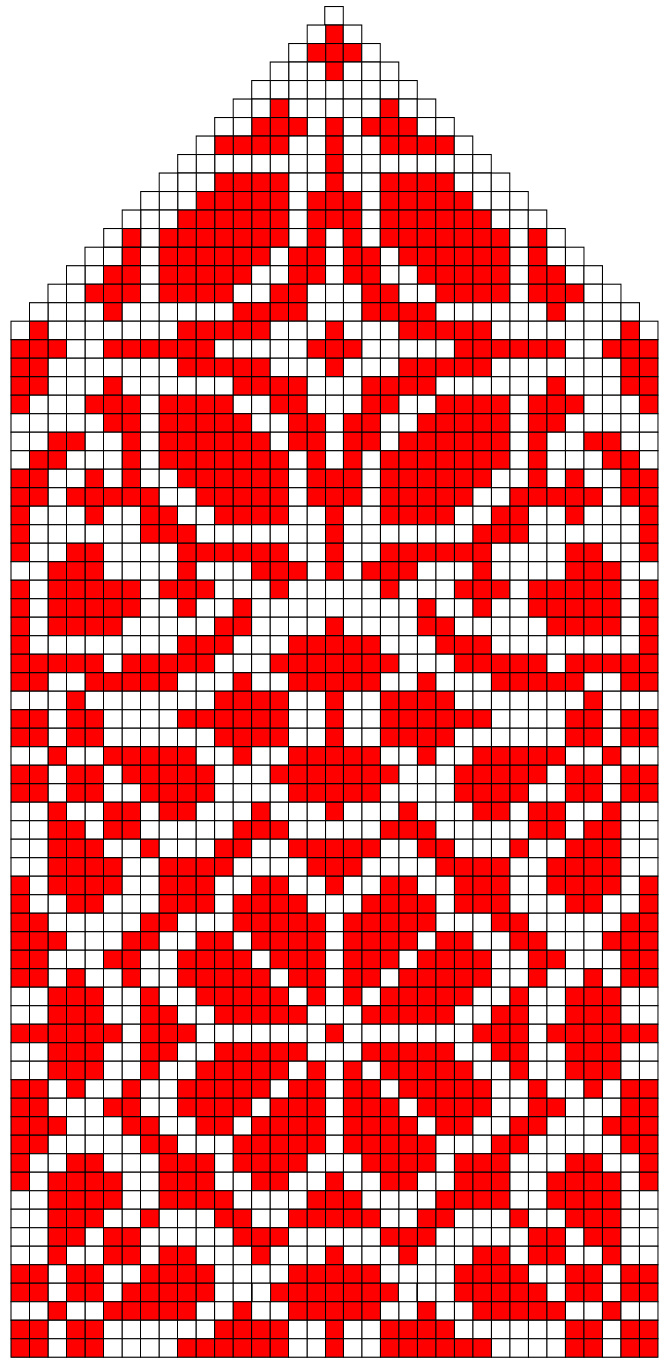
Choose your needle size so that you can get an appropriate gauge. The hand of these mittens has 70 stitches; if your hand measures seven inches around the palm, you want to get about 10 stitches to the inch. If your yarn felts well, you can make the mittens big and felt them down to size. Cast on and work the cuff of one mitten however you like. Ribbing is good. Knit one row with Color A (white in the charts), increasing or decreasing evenly around so that there are 70 stitches on the needle. Join Color B and work the first 35 stitches according to the chart for Back and the others according to the chart for Palm 1. Continue working according to the charts until you are ready to set aside stitches for the thumb, two to three inches after starting the chart.
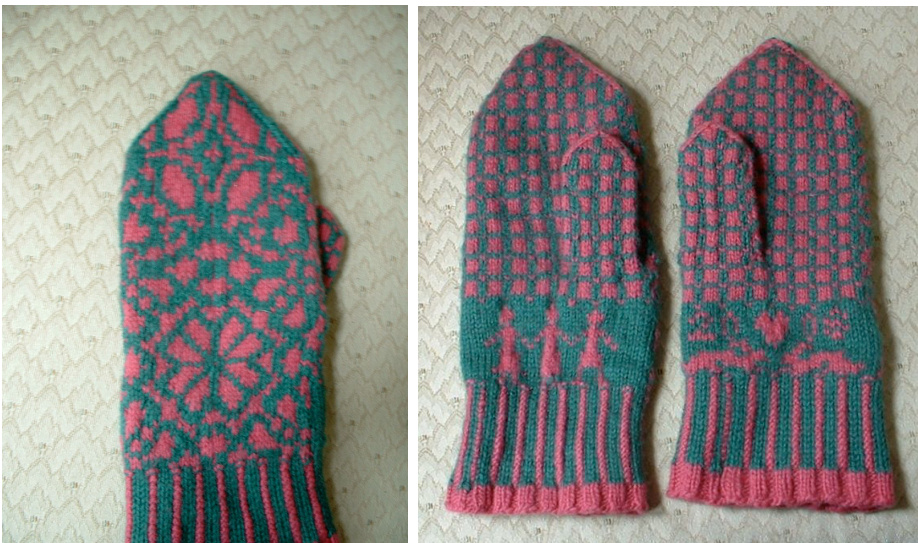
LOVE MITTENS
ALLISON SMITH This is less a detailed pattern than a set of graphs. To use it, you should probably be comfortable stranding and weaving colorwork and knitting small stuff in the round, or have other resources on the subject which you would be happy consulting. If you have questions about the pattern, please contact me at al.marie.smith@gmail.com. To set aside stitches for the thumb, work the Back of the mitten and two stitches on the Palm side as usual, then knit the next 13 stitches onto a piece of waste yarn. Pass these 13 stitches back to the left hand needle, and knit into them in Color B, carrying Color A by weaving, then finish the round according to the chart. You will need two balls of yarn in contrasting colors, but preferably about the same weight yarn. A worsted wool would be a good choice. You should have about the same amount of yarn of both colors, and enough yarn in total to make two mittens; for me this was 160 yards of each color. You may want to begin the top decreases earlier than shown on the charts, as the pattern makes mittens good for people with fairly long hands. You may start the decreases as soon as the mitten is long enough to completely cover the little finger, unless you are planning to felt, in which case work according to the chart. In any case, to work the decreases, make sure the edge stitches on the Back of the mitten are Color A, and the edge stitches on the Palm are Color B. Work according to the chart, decreasing in each round by SSK $^{\mathrm{~1~}}{}$ on the first two stitches of the Back and the Palm and K2Tog? on the last two stitches of each side.
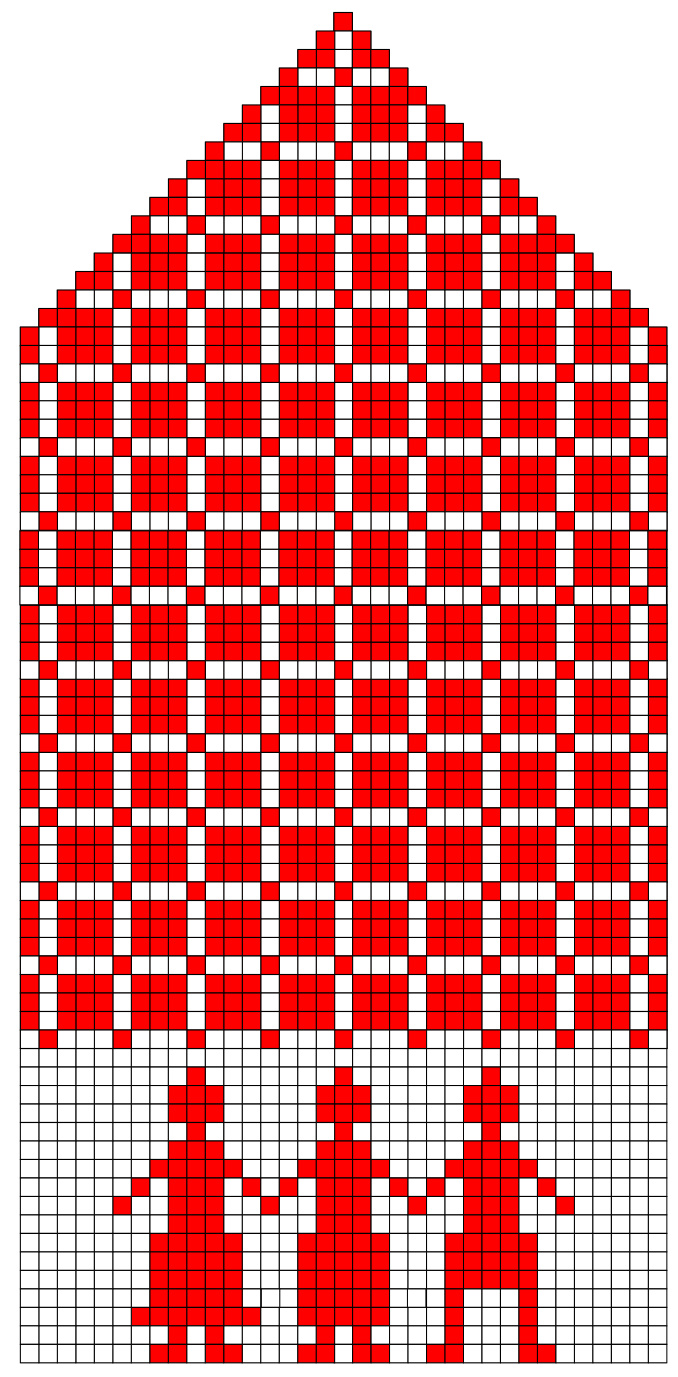
When there are two stitches left, pass one of the yarn ends thorough both a few times and weave in the ends. To knit the thumb, remove the waste yarn and put the stitches both below and above it on your needles. Pick up additional stitches at the sides as needed to prevent gaps. Work in the Palm pattern until long enough (two or three inches), then decrease as at the top of the hand. Weave in all ends and wash or felt. Block and trim ends. For the second mitten, use the chart for Palm 2, and on the row where you set aside stitches for the thumb, knit according to the chart until 15 stitches of the Palm side remain, then knit the frst 13 of these onto waste yarn and proceed again as above.3