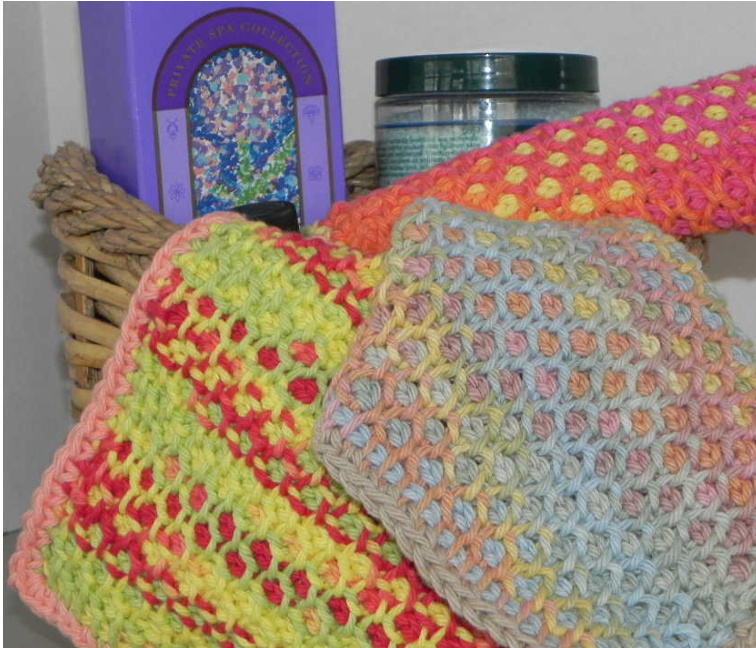
Oh, Honey!
Honeycomb Tunisian Crochet Spa Cloth Designed by Margo Bauman (AKA flyingflower)
Skill Level:
Intermediate Crocheter/Tunisian Beginner US Terminology Finished size: approx. 7-1/2 in (19cm) square Materials/supplies: I-size crochet hook (5.5mm) Tunisian hook, size J/10 (6.0mm) Yarn: Aran Cotton Yarn (Lily Sugar 'n Cream or similar) Main Color: approx. 50yds/30g Contrast Color: 10yds/6g Tapestry needle Honeycomb stitch is a combination of Tunisian Purl Stitch (tps) and Tunisian Simple Stitch (tss). The honeycomb pattern is created by the staggered stitches - working a tps into the tss from the previous row, and a tss into the tps from the previous row. The stitch pattern gives wonderful texture and visual appeal. To really make the piece "pop" I recommend using a variegated yarn as the main color for the honeycomb area and a coordinating solid for the contrast color on the edge. This pattern includes a Tunisian Foundation Row, Tunisian Simple Stitch, Tunisian Purl Stitch and a final Binding-off row. If you have never done Tunisian Crochet, I recommend you do sample swatches of Tunisian Simple Stitch and Tunisian Purl Stitch before doing the Tunisian Honeycomb Stitch pattern. This pattern includes a section of stitch descriptions and photos. Some general things to remember with Tunisian crochet: · All work is done on the right side. Each stitch adds a loop on the hook. It is important to count the number of loops on your hook before each return pass. .The last stitch of every forward pass is always a tss. · The last row is only a forward pass and "binds off" the piece. Some curl is natural in Tunisian crochet. If you find the piece curling tightly, increase your hook size. Please respect my copyright and do not resell, publish, or distribute this pattern. You are free to use the final items you make from the pattern for charity, gifting, or selling.
Stitch Descriptions & Photos
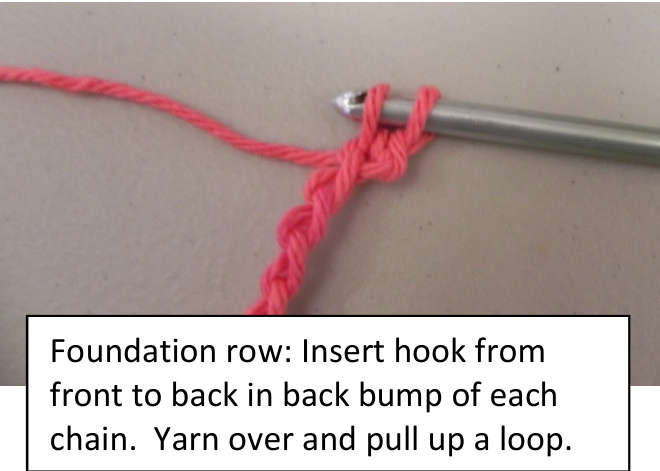
Foundation Row (also known as "Casting On")
Working in back bump of each chain, insert hook from front to back through second chain from the hook. Yarn over and pull up a loop through the chain. Leave the loop on the hook. Insert hook in back bump of the next chain. Yarn over and pull up a loop through the chain. Continue across the chain. The number of loops on the hook will be the same as the number of chains you started with.
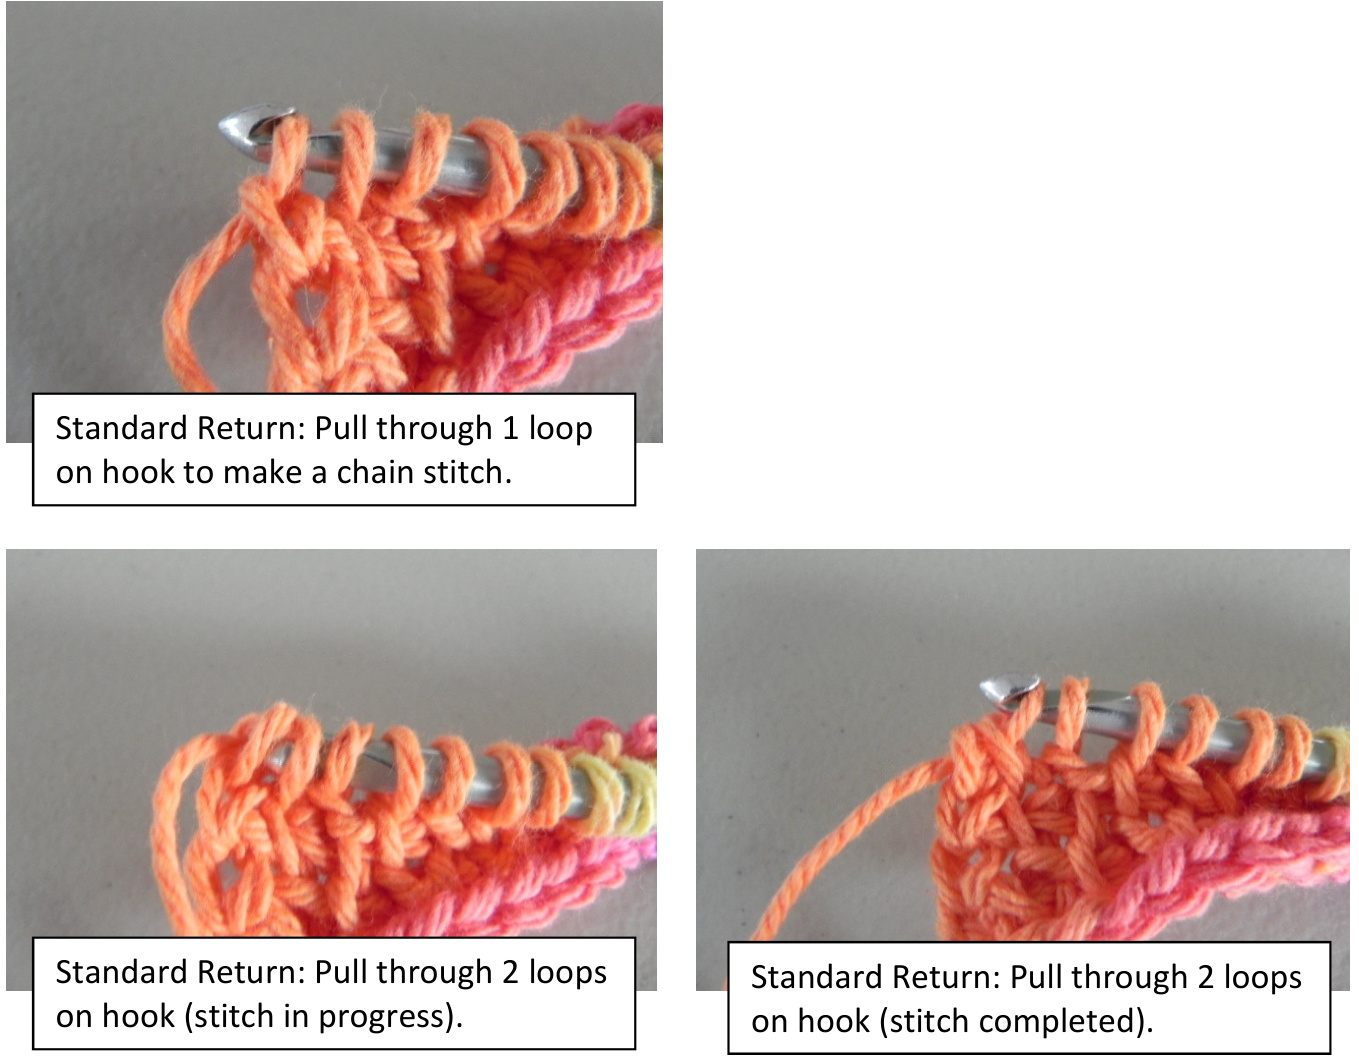
Standard Return
Yarn over; pull through 1 loop on hook to make a chain stitch. Yarn over and pull through 2 loops on the hook, repeating for each stitch across. The last loop remains on the hook.
@Margo Bauman (aka flyingflower) 2015 All Rights Reserved
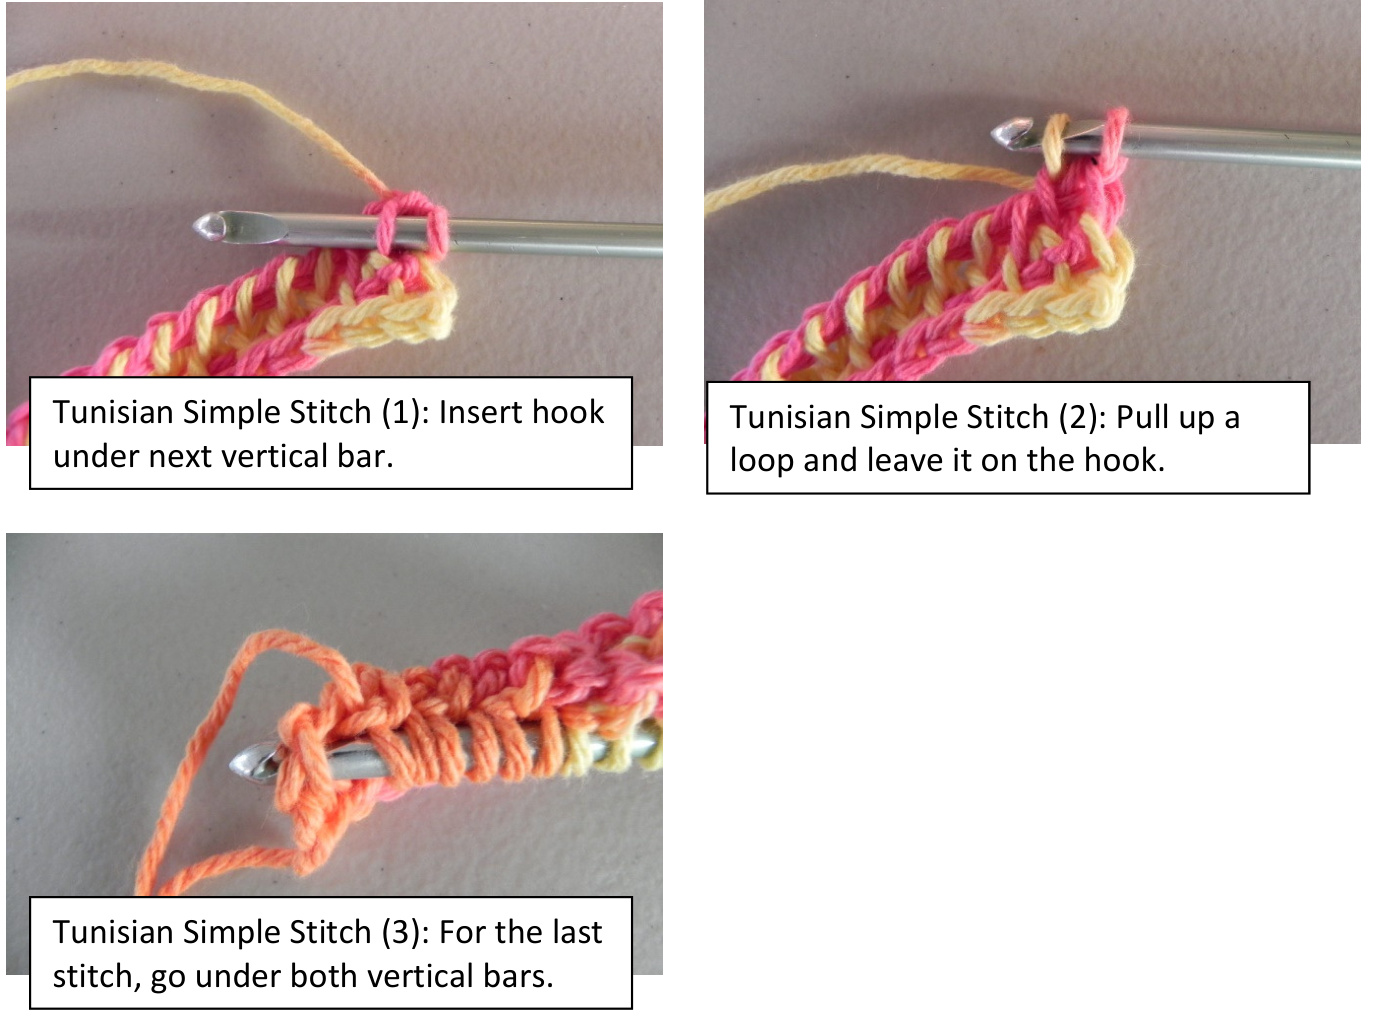
Tunisian Simple Stitch (tss) Forward Pass
Skip the first vertical bar. Insert hook under next vertical bar, pull up a loop and leave it on the hook. Continue to the last stitch. For the last stitch, go under both vertical bars. The front one is the same as the others you've used. Turn your work slightly and you will see the other one behind it.
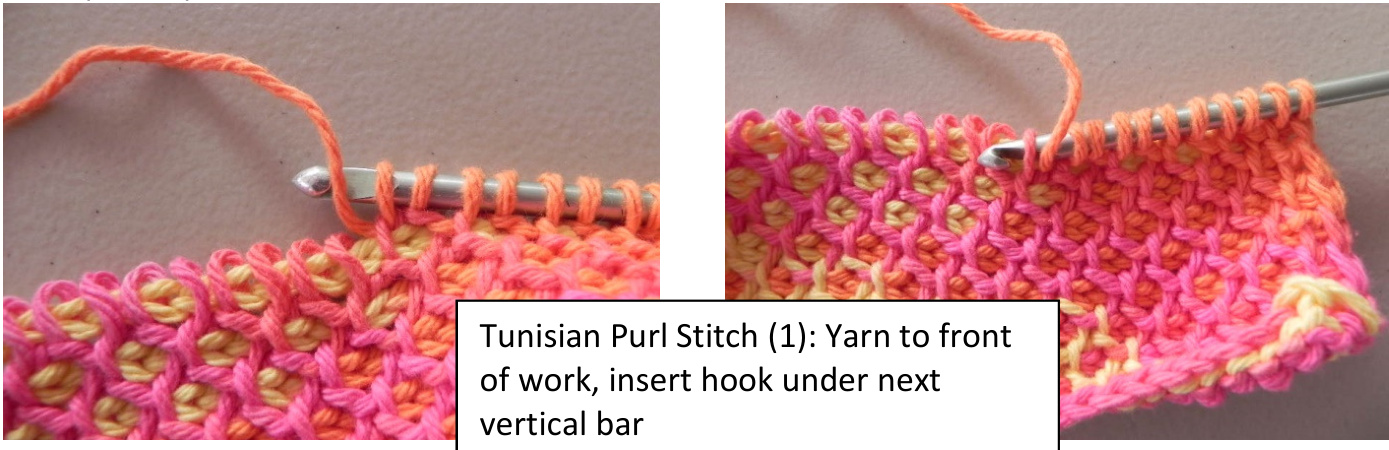
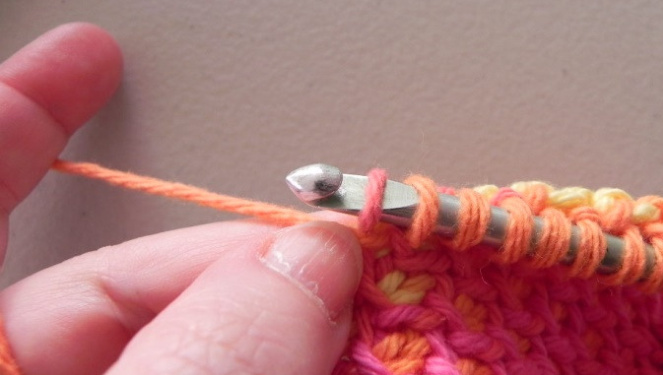
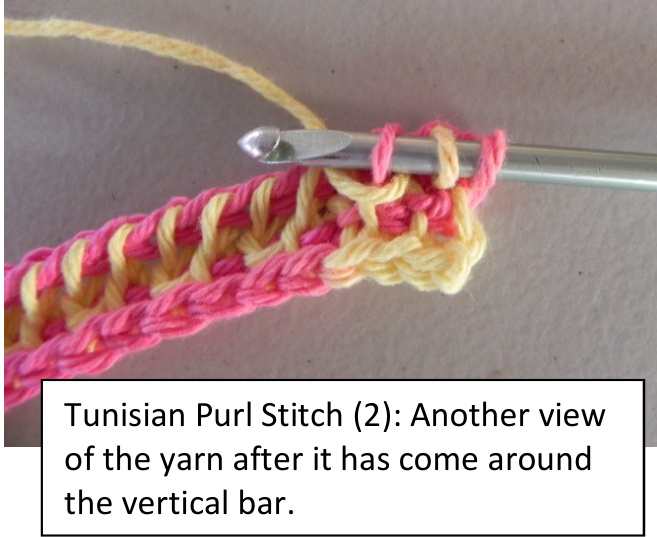
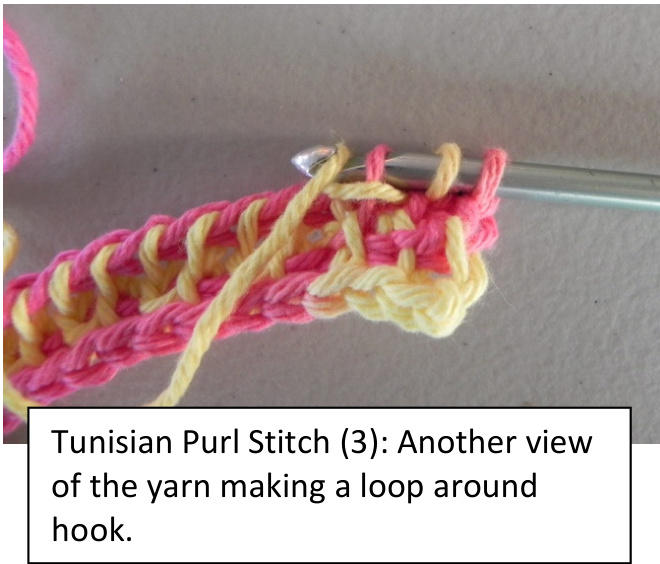
Tunisian Purl Stitch (tps) Forward Pass
Skip the first vertical bar; bring the yarn to the front of your work. While keeping the yarn to the front, insert hook under the next vertical bar. Bring the yarn backward around the front of the vertical bar. Hold the yarn in place with your thumb. Yarn over making a loop around the hook. Pull up a loop.
| Abbreviations | |||
| MC CC tps tss | maincolor contrast color Tunisian Purl Stitch TunisianSimple Stitch | ch rnd SC sk skip yo | chain Ip, Ips loop, loops round single crochet st, sts stitch, stitches yarn over |
| Stitch Conversion Chart |
| US UK/AU/NZ |
| ch ch |
| SC dc |
| sl st sl st |
Instructions:
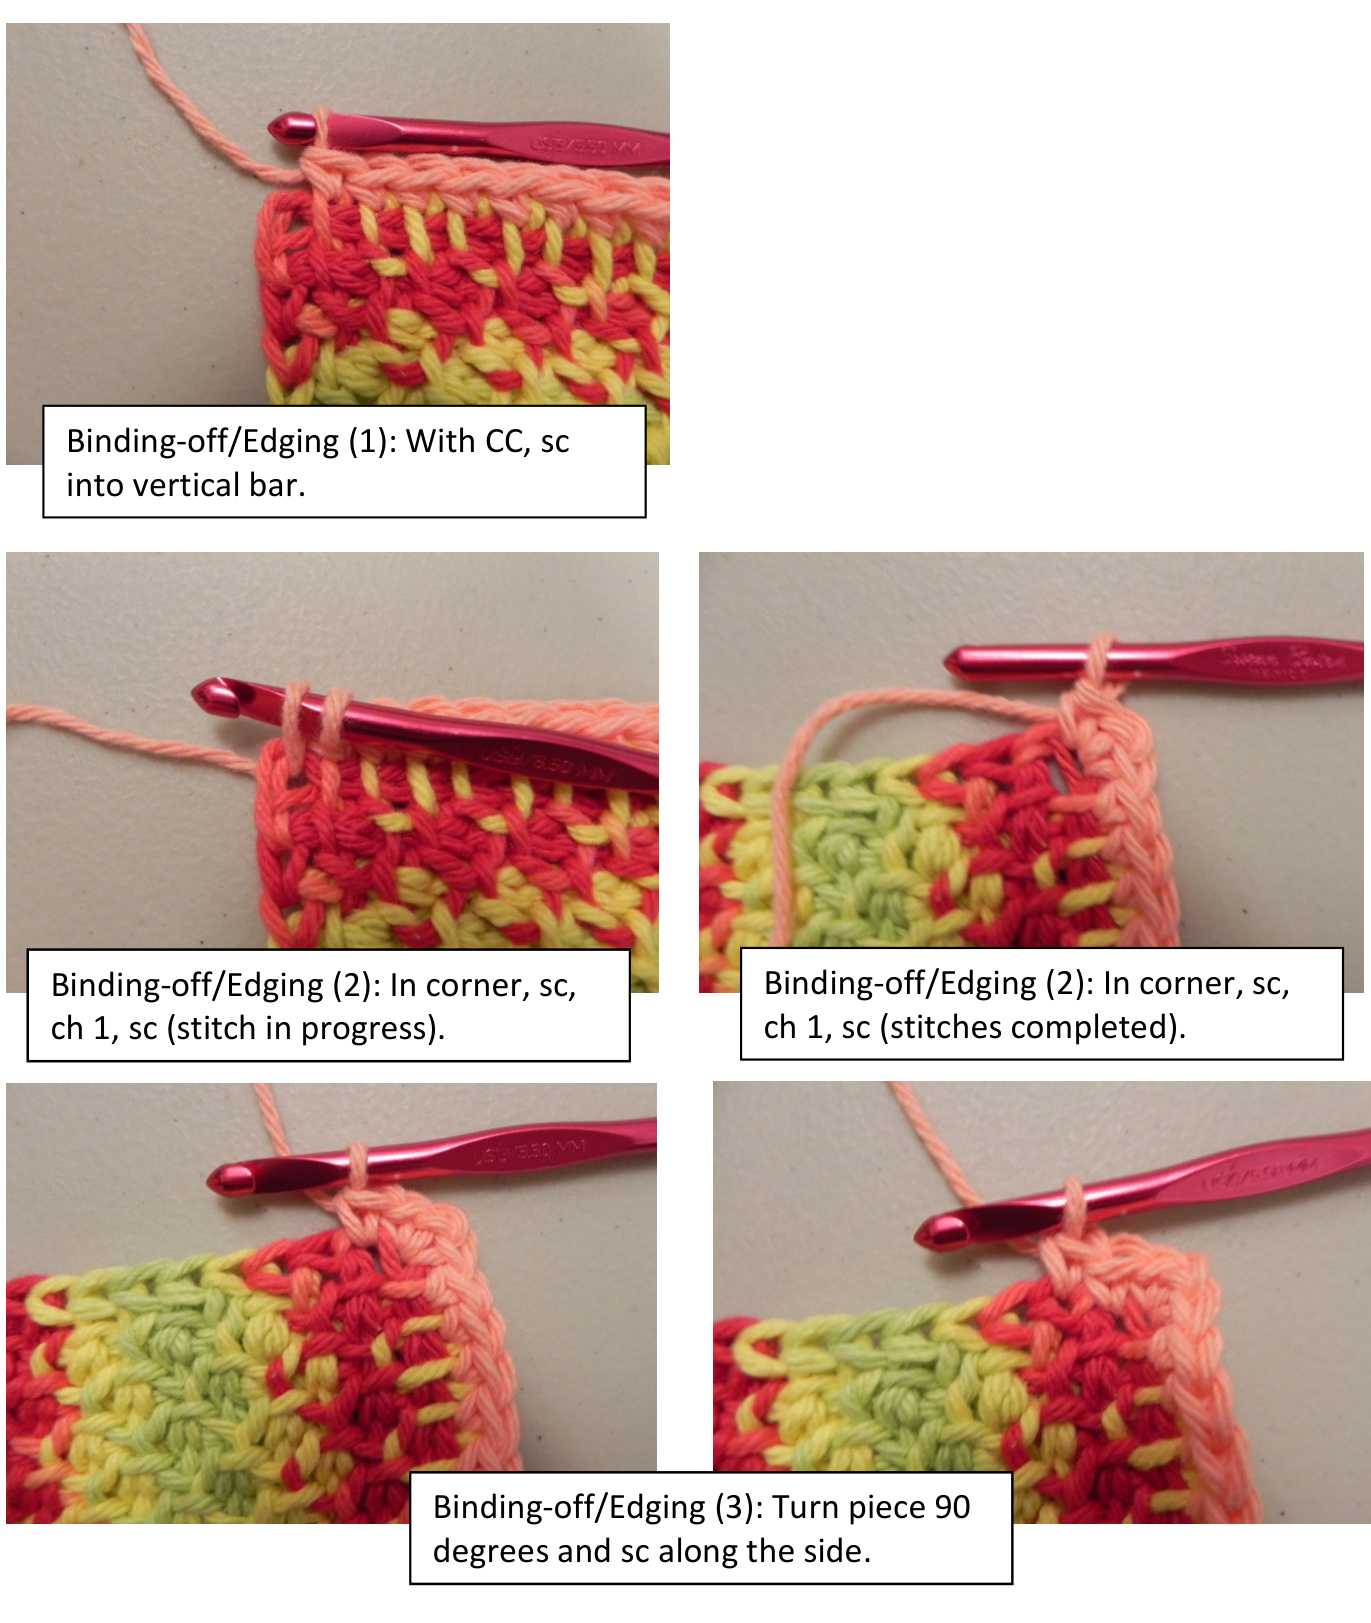
With MC and Tunisian hook, ch 27. If you find it awkward to make a starting chain with a Tunisian hook, do the chain with a traditional Jsize hook and change to the Tunisian hook to do the foundation row. Begin "Casting On": Foundation row, forward: Working in back bump of each ch, insert hook from front to back through second ch from hook; yo, pull lp through ch and leave on hook, [insert hook in next ch; yo, pull Ip through and leave on hook] across. Total 27 Ips on hook (the same number as the foundation chain). Standard return: yo, pull through 1 Ip on hook to make a ch st; [yo, pull through 2 Ips on hook] 26 times. The last Ip remains on hook. Row 1, forward: sk first vertical bar,[ tss in next vertical bar] across. Total 27 Ips on hook. Standard return. Begin Honeycomb Stitch Pattern: Row 2, forward: sk first vertical bar, [tps in next vertical bar, tss is next vertical bar] across to last st; tss in the last st. Total 27 Ips on hook. Standard return. Row 3, forward: sk first vertical bar, [tss in next vertical bar, tps in next vertical bar] across ending with a tss in the last st. Total 27 loops on hook. Standard return. Rows 4-21: Repeat Rows 2 & 3. Begin "Binding-off" and start the edging: Change to traditional l-size hook for a tighter edging. Row 22 (forward only): Change to CC and ch 1, sk first vertical bar, [sc into next vertical bar] 25 times. In corner: sc, ch 1, sc . Turn piece 90 degrees and sc along the side (21 sts). In corner: sc, ch 1, sc. Turn piece 90 degrees again and sc along foundation edge (25 sts). In corner: sc, ch 1, sc. Turn piece 90 degrees and sc along the side (21 sts). In corner: sc, ch 1, sc. Photo series at first corner of Binding-off/Edging:
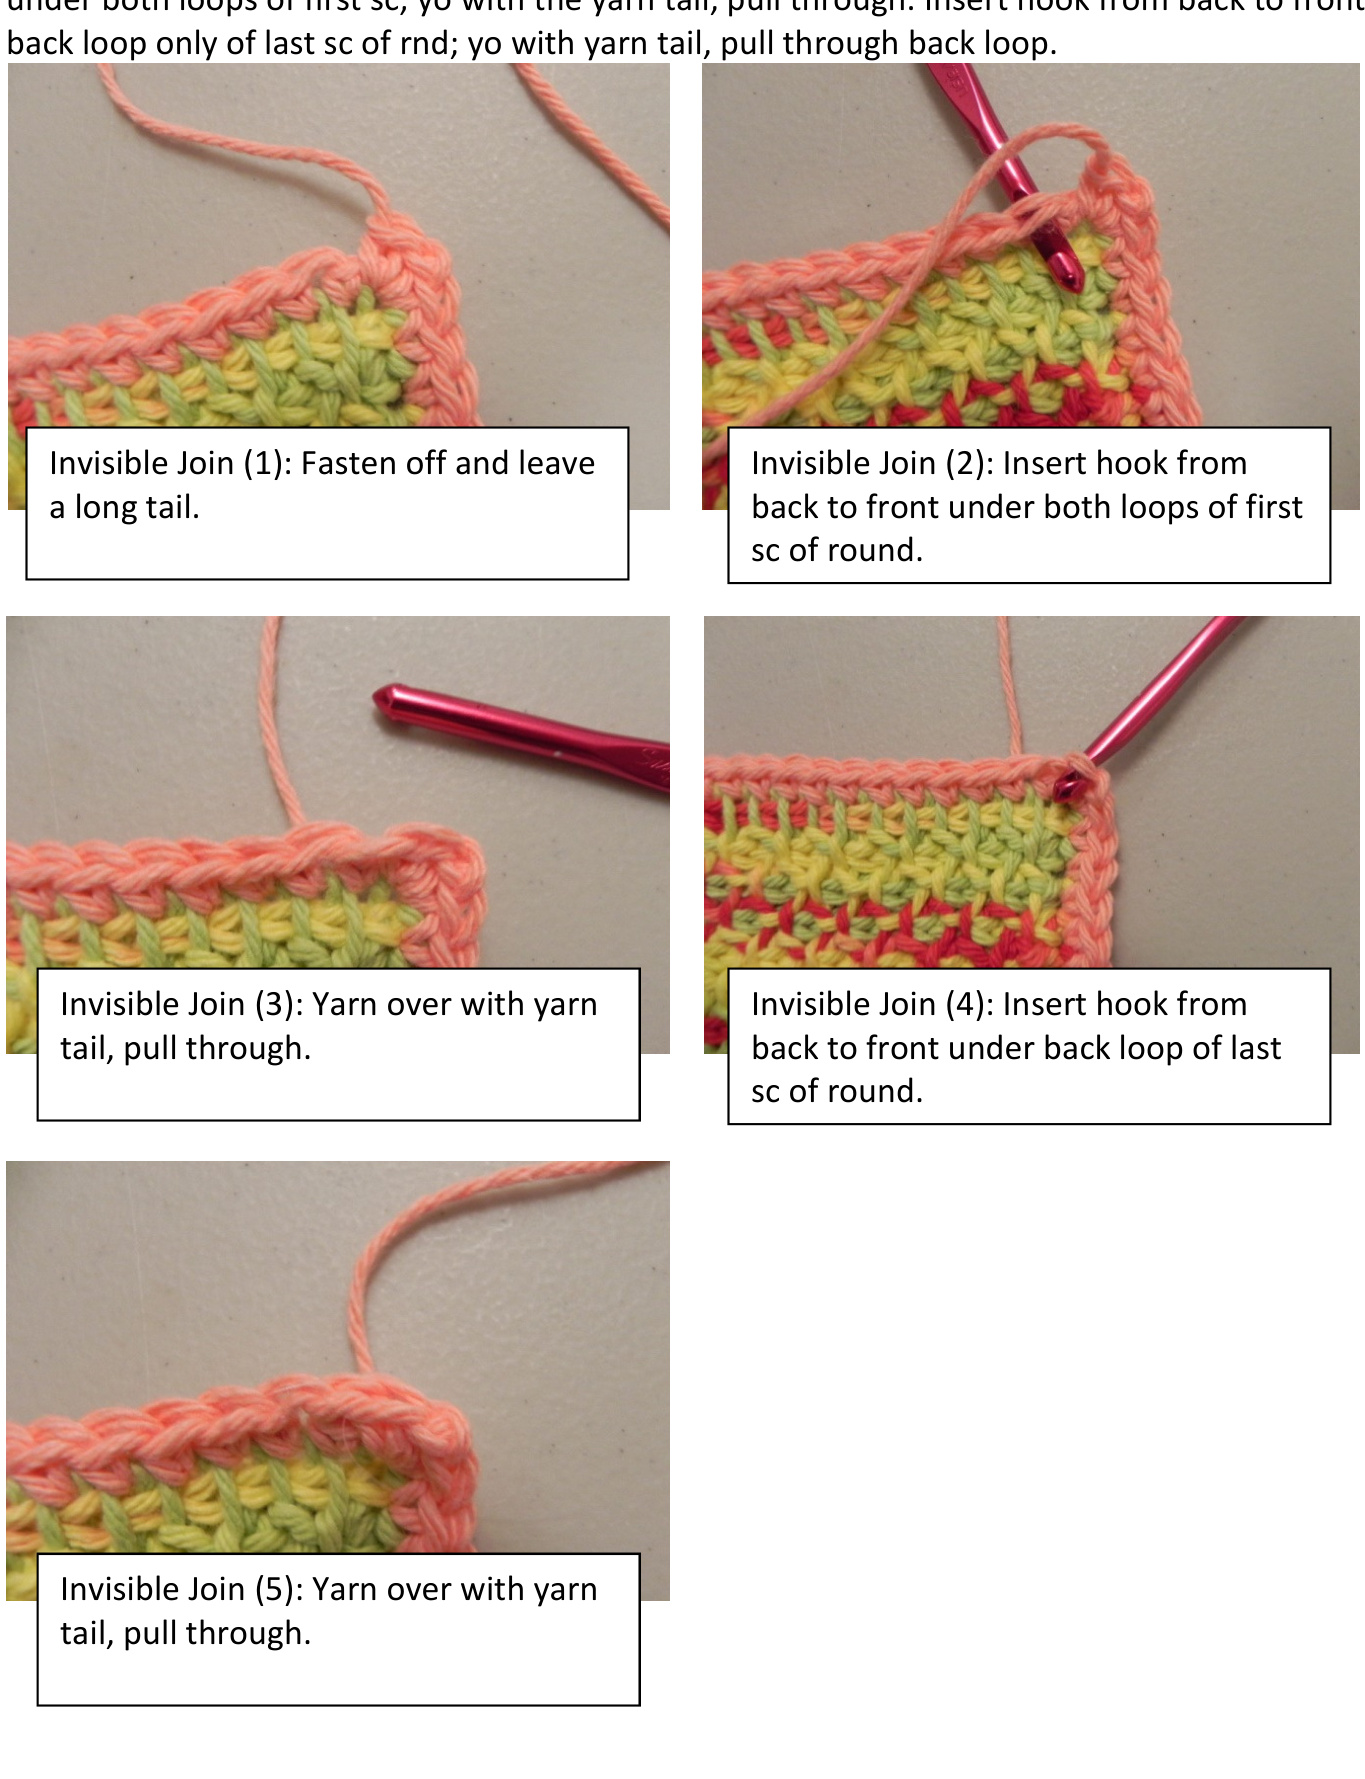
Finish the round with an invisible join, then fasten off and weave in ends: Invisible join to first sc: Fasten off and leave a long (4 in/10 cm) tail. Insert hook from back to front under both loops of first sc; yo with the yarn tail, pull through. Insert hook from back to front under