RAMONAELOWERS

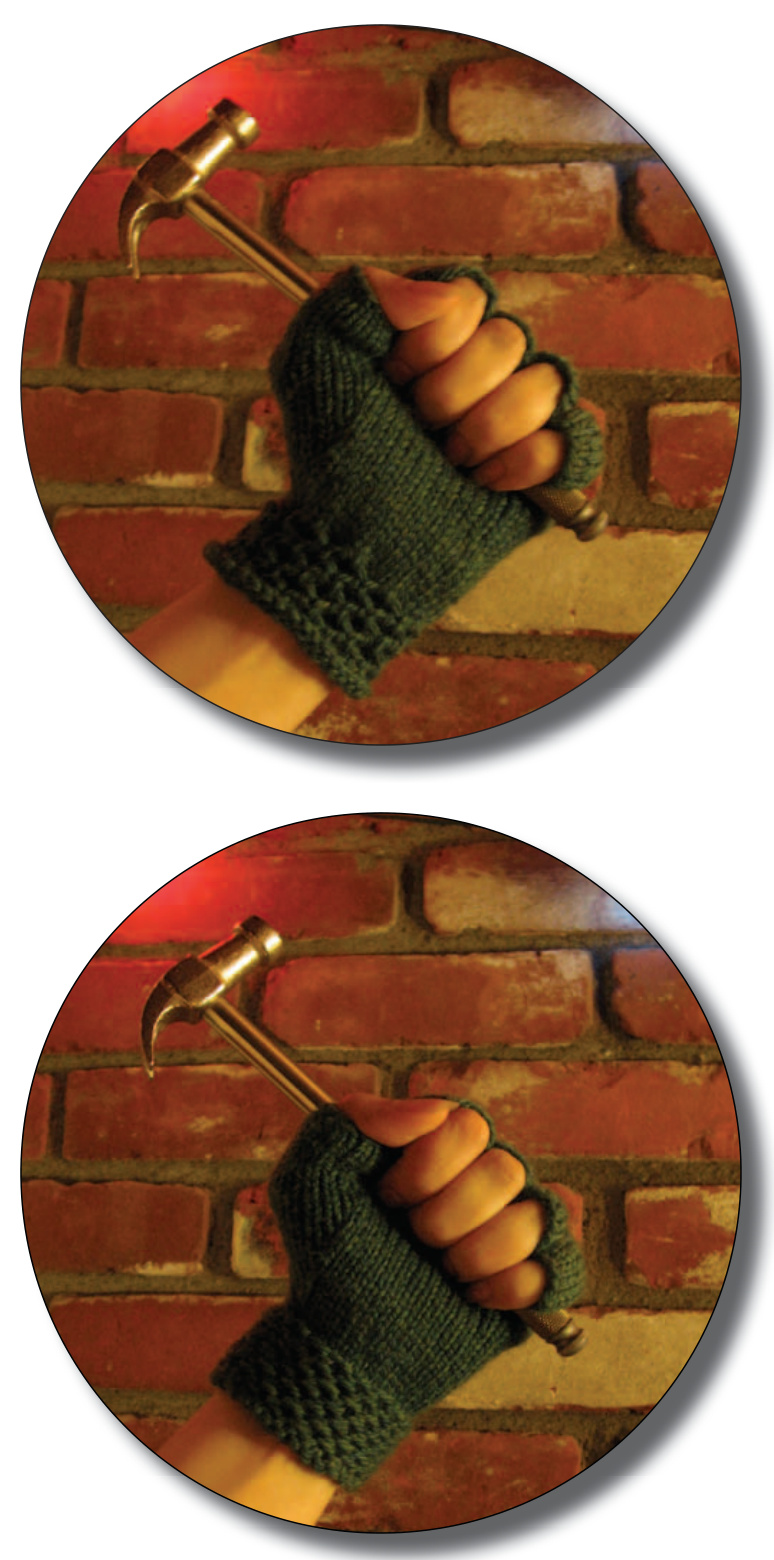
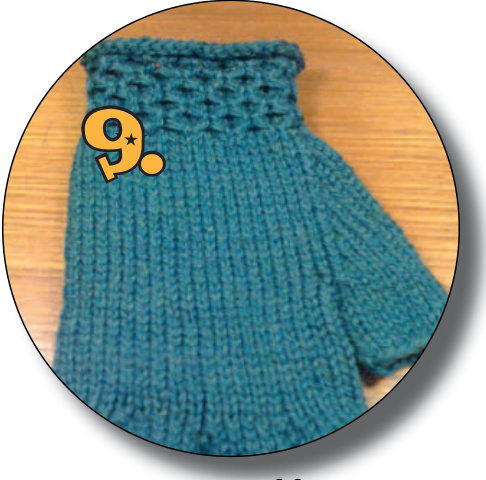
A simple fingerless knitted glove pattern based on the gloves worn by the character Ramona Flowers, in the movie "Scott Pilgrim vs. The World". Written for beginners, it is worked from the fingers down, so you can try it on as you go. (Sizes in both medium and large) This pattern has three different cuffs to choose from, the first is an easy honeycomb cable pattern that creates a closer fitting cuff, the second is a simple slip stitch honeycomb pattern that creates a looser fitting cuff, and the third cuff is made with a really easy garter stitch. Designed by: Shannon Foss
FENGERLESSGEOVES
NOTES
SUPPLIES
4 - 4mm double pointed knitting needles 130 - 160 yards of worsted weight yarn Yarn needle Cable needle - for cabled cuff
GUIDE
STITCH GUIDE
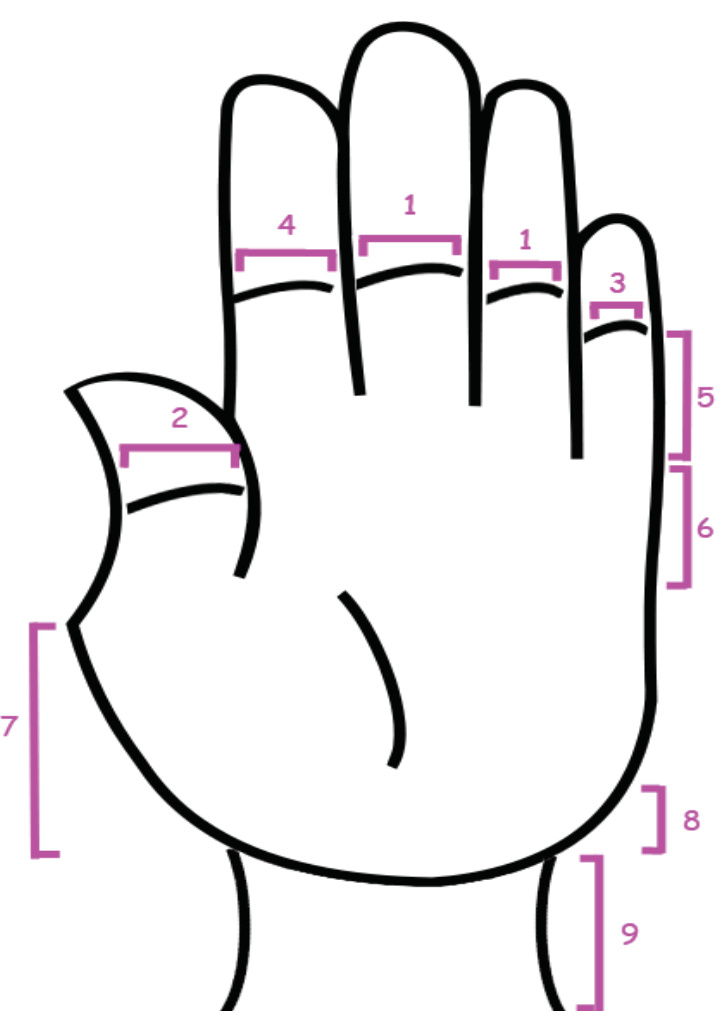
st(s) - stitch(es) sl - slip one stitch (usually as if to purl, unless otherwise stated) k - knit one stitch p - purl one stitch ssk - slip slip knit (left leaning decrease) - slip two stitches knitwise to the right needle, insert the left needle into these two stitches from left to right, then knit them together. k2tog - knit two together (right leaning decrease) - insert right needle into two stitches on left needle and knit them together. CN - cable needle Gauge - \~6 sts per inch 1. Middle and Ring Fingers - 14 (16) sts around. 2. Thumb - 16 (18) sts around. 3. Pinky - 12 (14) sts around. 4. Index Finger - 14 sts around. Do not cast off. 5. Finger Length - 1" (about 10 sts) 6. Top of Palm - about $1.5"$ 7. Thumb Gusset - decs every 3 row 8. Palm Decreases - a few optional decreases for palm shaping. 9. Honeycomb Wrist Cuff - Choose either the cabled or slip stitch cuff.
STEPS
Cast on finger.
Make 8 fingers.
Knit in rounds for $\times1.5^{\prime\prime}$ then add on thumb.
Divide stitches between 3 needles.
Make index finger. Divide stitches onto 2 needles.

Knit thumb gusset.
Knit in the round until \~1" long.
Place middle, ring, and pinky fingers onto needles.
Knit cuff.
PATTERN
FINGERS
Make 8 Fingers
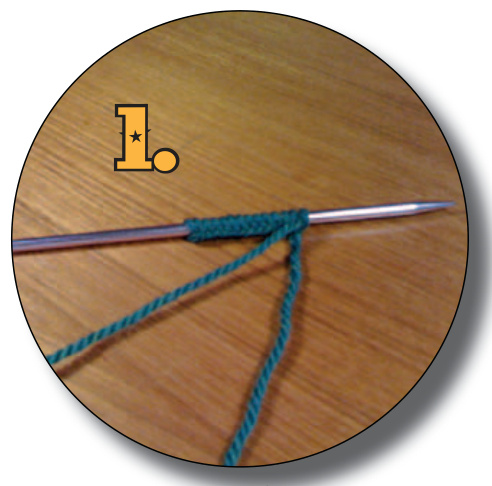
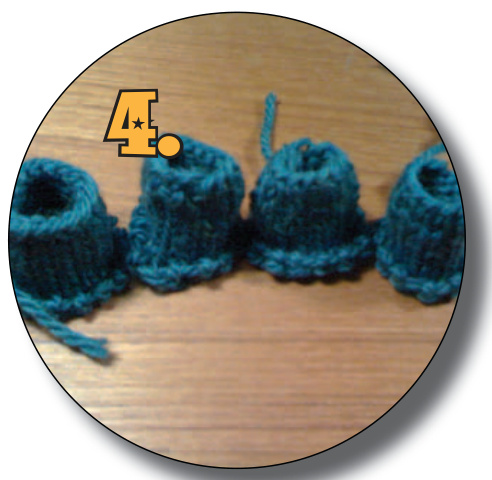
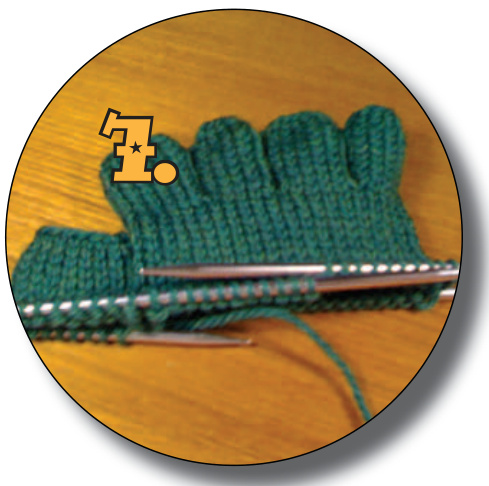
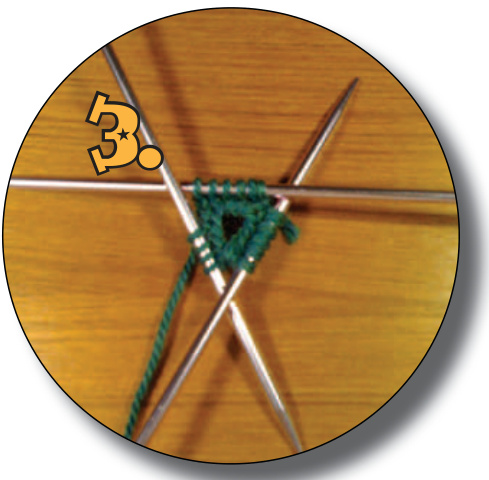
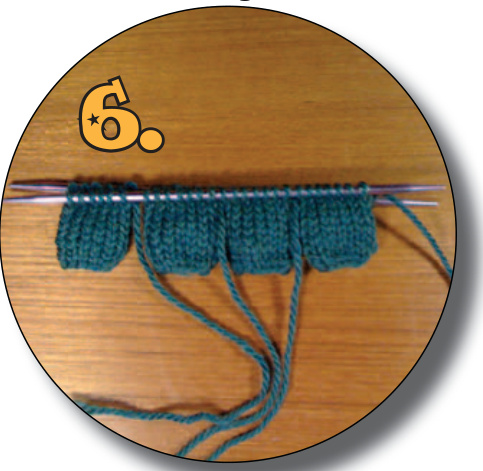
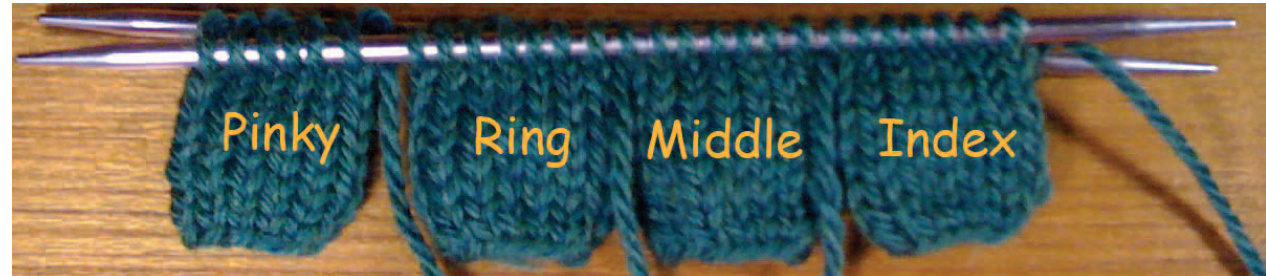
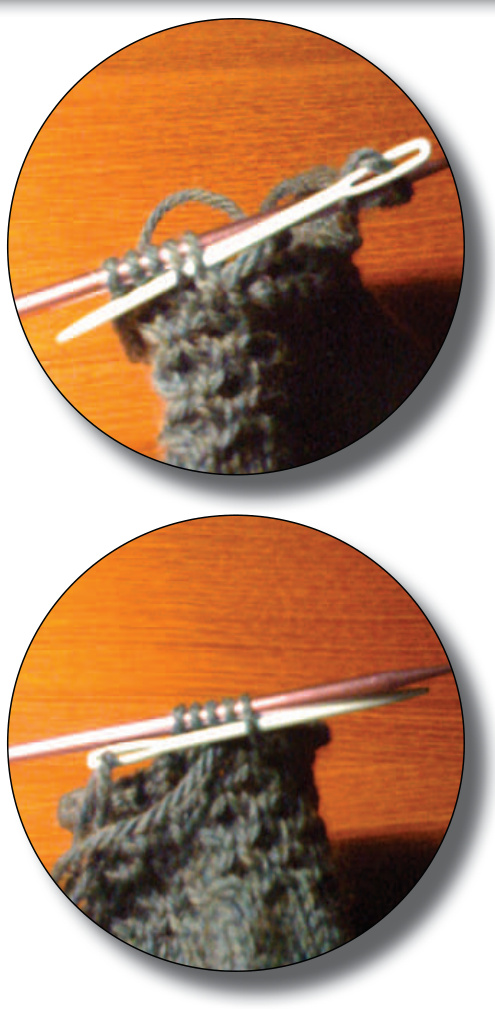
. 2 Thumbs - Medium: 16 sts, Large: 18 sts, Custom: · 2 Middle Fingers - Medium: 14 sts, Large: 16 sts, Custom: 2Ring Fingers - Medium: 14 sts, Large: 16 sts, Custom: · 2 Pinky Fingers - Medium: 12 sts, Large: 14 sts, Custom: Start with the middle finger - (See Figures #1 - 4 for pictures) - 1. Cast 14 (16) sts, loosely, on to one needle. 2. Evenly divide the stitches between 3 needles. 3. Knit in the round until the finger is about $1"$ long (about 10 rows) (knit cast-on tail into the stitches to avoid needing to weave it in later). 4. Do not cast off, but cut yarn and leave a $6"$ to $8^{\prime\prime}$ tail. 5. Thread the tail through a yarn needle and slip each stitch (purlwise) onto the yarn needle. Pull the thread through to hold the stitches in place. Try it on your middle finger. It should fit comfortably. If it doesn't, try it on your other fingers to see which ones it does fit on. Increase or decrease by 2 stitches as needed to customize the size of each finger. Make 7 more fingers in the same manner based on the information above, or on the changes that you just made. Index Finger - (Figure #5) - Medium: 14 sts, Large: 16 sts, Custom: Test the different fingers that you made on your index finger to find out which one fits the best, then use that number for your index finger instead. 1. Cast on 14 (16) sts, loosely, on to one needle. 2. Evenly divide the stitches between 3 needles. 3. Knit in the round until the finger is about $1"$ long (about 10 rows). 4. \*\*DO NOT CUT YARN!!\*\* 5. Re-divide the stitches so that they are evenly divided between two needles.
PATTERN
HAND
Joining Fingers
1. Place the middle finger on to the two needles so that each of the fingers has half of its stitches on each needle and the tail is between the two fingers 2. Place the ring and pinky fingers onto the two needles in the same manner.
3. You should now have 4 fingers on 2 needles. If you haven't already, pull each tail out of the stitches since you no longer need it to hold them in place. Leave the tails hanging between the fingers for now, they will be used to stitch the space between the fingers closed. 4. Using your 3rd needle, knit to the last 2 stitches of the index finger, decrease 1 using a ssk. Decrease 1 using a k2tog on the middle finger, knit to the last 2 stitches of the middle finger, decrease 1 using a ssk. 5. Using your 4th needle, decrease 1 using a k2tog on the ring finger, knit to the last 2 stitches of the ring finger, decrease 1 using a ssk. Decrease 1 using a k2tog on the pinky finger, knit to the end of the needle. 6. Knit to the last 2 stitches of the pinky, decrease 1 using a ssk. Decrease 1 using a k2tog on the ring finger, knit to the last 2 stitches of the ring finger, decrease 1 using a ssk. Decrease 1 using a k2tog on the middle finger, knit to the last 2 stitches of the middle finger, decrease 1 using a ssk. Decrease 1 using a k2tog on the index finger, knit to the end of the needle.
Top of Palm -
1. Knit around for several (12 to 15) rows until this section measures about $1.5"$ or until it is even with the webbing of your thumb. Stop 2 stitches before the end on the index finger side. Decrease 1 using a ssk.
PATTERN
Joining Thumb
1. Hold thumb in your left hand so that the stitches are at the top and the tail is to the right. 2. Hold the fingers in your right hand so that the stitches are at the top and the index finger is to the left. 3. Place the back half of the thumb's stitches onto the same needle that's holding the back half of the index finger's side of the glove.
4. Place the front half of the thumb's stitches onto the 4th empty needle. 5. Decrease 1 using a k2tog on the front half of the thumb. Knit to the end of that needle. 6. Knit to the last 2 stitches of the thumb, then decrease 1 using a ssk. Decrease 1 using a k2tog on the hand. 7. Knit across to the pinky edge of the glove.
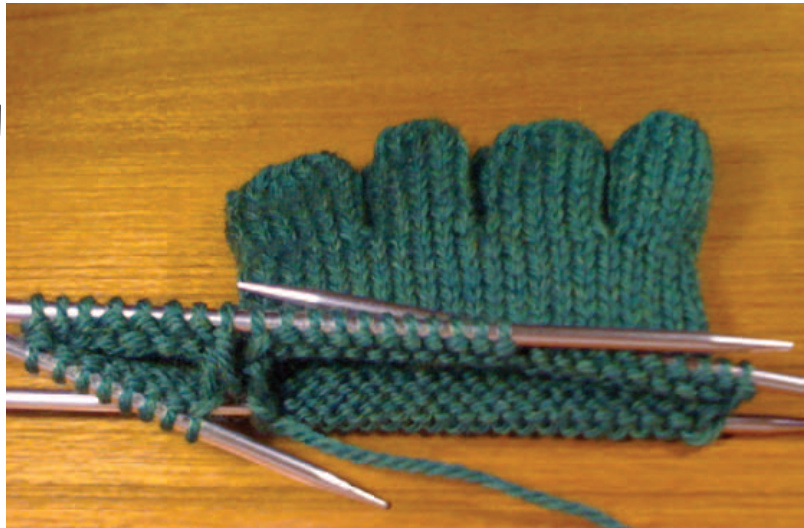
Thumb Gusset - (See Figure #8 for picture)
Total Thumb stitches (Ex. 16) divided in half minus 1: (Ex. sts = 7) 1. Repeat these steps (sts) times (Ex. 7 sts = 7 repeats) a. Knit around 2 rows b. Knit to last (sts) stitches, decrease 1 using a ssk, knit to end of needle. c. Knit (sts - 2) stitches, decrease 1 using a k2tog, knit until pinky edge. d. Subtract 1 from sts and use this new number for the next repeat. 2. Try on your glove from time to time, if you need to add more length, add a row or two at the end of the gusset. if it needs to be shorter, leave out the last repeat and start the cuff earlier. 3. -Optional-: If you are making the slip stitch cuff, you may want to include a decrease at the beginning of step b in the last few gusset repeats. This will create a taper into the wrist and may make the glove fit a little better.
CHOOSE YOUR OWN CUFE ADVENTURE
· If you want a cabled honeycomb cuff, go to page 6. . If you want a slip stitch honeycomb or garter stitch cuff, go to page 7.
PATTERN
CABLED CUTT
Count the number of stitches on your needles. This cable pattern requires a multiple of 4 stitches If you have a multiple of 4 stitches, knit one row. If you have one extra stitch, decrease one stitch using a k2tog and finish off the row. If you have two extra stitches, decrease one stitch on each edge of the glove in the next row. Or, go back and remove the last 2 decreases for the gusset. Then knit one row. If you have three extra stitches, go back and remove one decrease from the gusset. Then knit one row
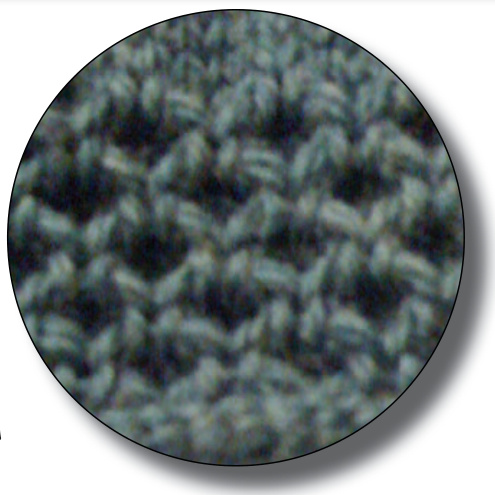
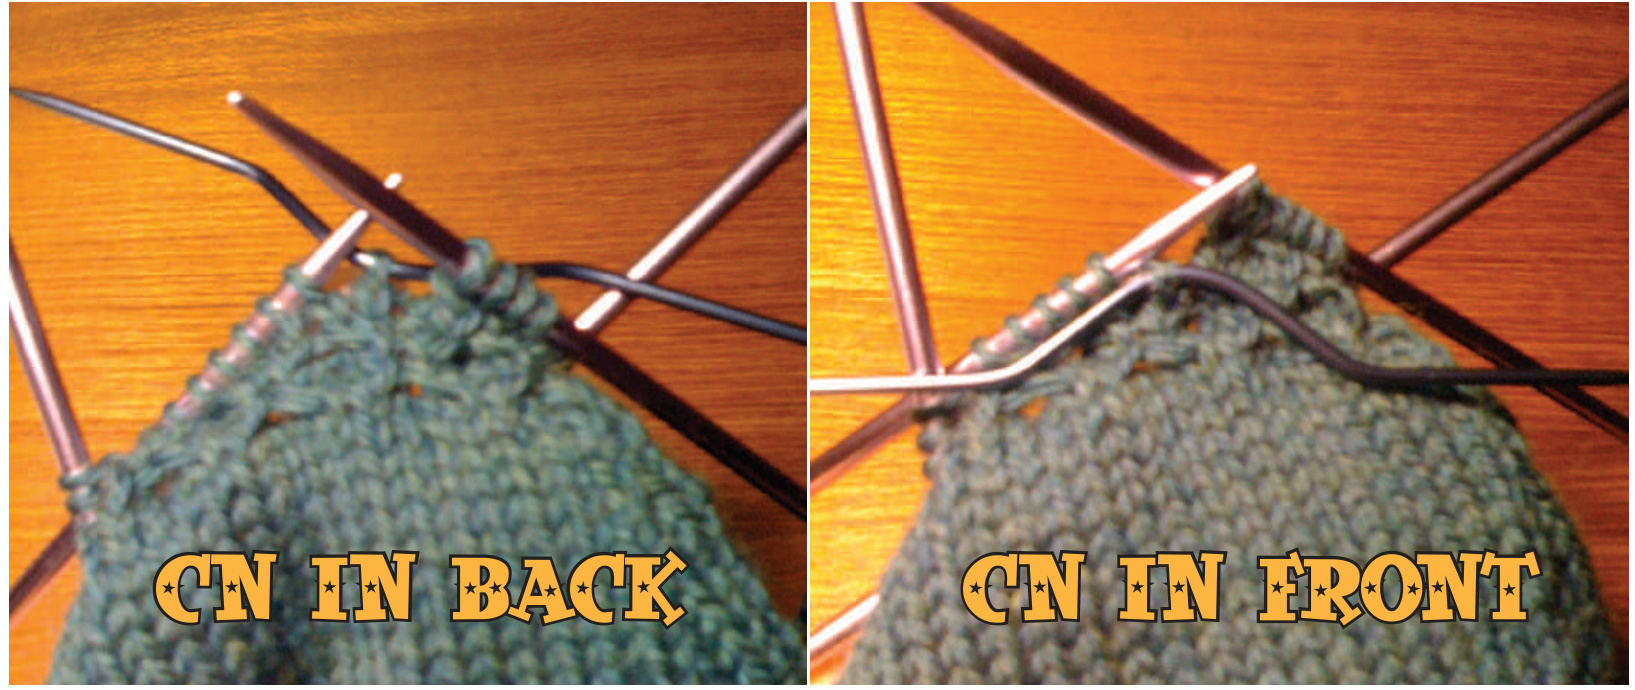
Cuff - Repeat these steps until cuff is desired length (Ex. 2" - 2.5") 1. \*sl1 (purlwise) to CN, hold in back, k1, k1 from CN; sl1 to CN hold in front, k1, ki from CN\* - repeat from \* to \* around. 2. knit around 3. \*sl1 to CN, hold in front, k1, k1 from CN; sl1 to CN, hold in back, k1, k1 from CN\* - repeat from \* to \* around. 4. knit around
PATTERN
SLIP STITCH CUTT
Count the number of stitches on your needles: The slip stitch pattern needs to have an odd number of stitches. If you have an odd number of stitches, knit one row. If you have an even number of stitches, decrease one stitch using a k2tog and finish off the row.
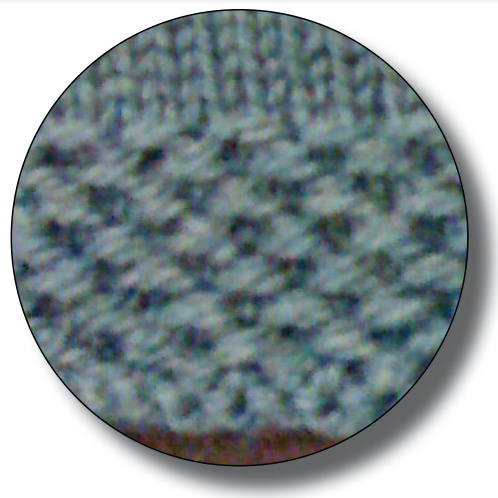
Cuff - Repeat these steps until cuff is desired length (Ex. 2" - 2.5") 1. pl, \*sl1 (purl-wise, with yarn held in front), $p1^{\star}$ - repeat \* to \* around. 2. knit around 3. \*sl1 (purl-wise, with yarn held in front), p1\* - repeat \* to \* around, end the row with a sl1. 4. knit around
GARTER STITCH CUFE
Cuff - Repeat these steps until cuff is desired length (Ex. 2" - 2.5") 1. purl one row 2. knit one row
PATTERN
FINISHING
1. Use any stretchy bind off method you wish, but I suggest Elizabeth Zimmermann's Sewn Cast Off Method from her book, "Knitting Without Tears". a. Cut the yarn leaving a tail that is about 4 times the circumference of the cuff. Thread the end through a yarn needle. b. \*Sew through two stitches on the knitting needle. Then sew back through the first stitch. Pull the yarn so it's taught, but not tight. Slip this stitch off of the knitting needle.\* Repeat this process from \* to \* until you have finished all of the stitches. Weave end into the inside of the cuff and snip off the tail. 2. Turn the glove inside out and use the tails between each of the fingers to sew up the holes. 3. Weave in ends and snip off tails.
THE SECOND GLOVE
Repeat this process again starting with the index finger.
ALTERNATE IDEAS
. Use a bulkier yarn and bigger needles for a chunkier look. For a stiffer finished fabric, use a wool yarn and make them a size bigger. Then throw them in the wash for a few minutes to felt a bit.


