Expandable Chic Bag
by Yolanda Munoz This is a free pattern that I have personally designed and written. It is not intended for sale. Pattern shall not be copied, reproduced, re-posted, or sold. However, permission is granted to sell the completed project in any quantity.
Materials
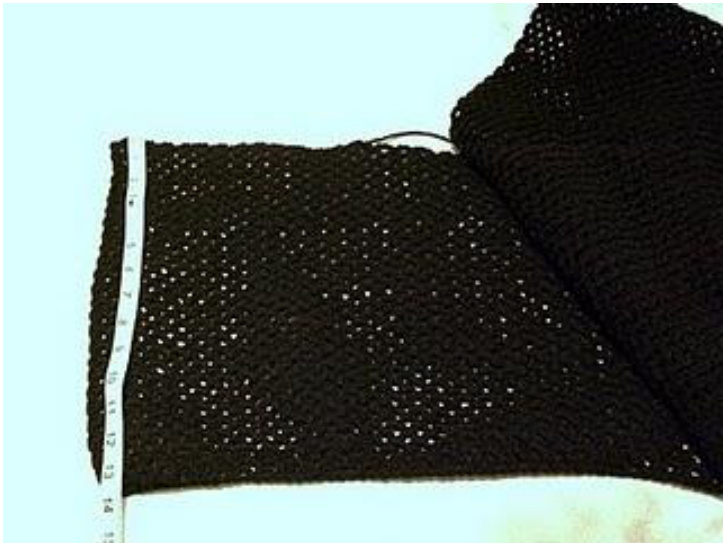
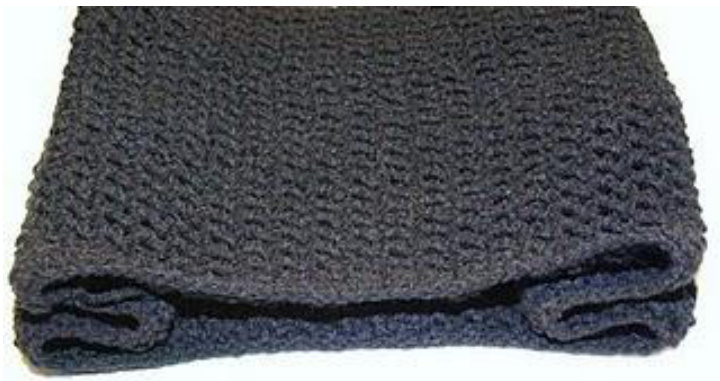
\*\* 1 /2 skeins of worsted weight yarn. Suggest Red Heart Super Saver. \*\* Small amount of contrasting color yarn for trim \*\* size G crochet hook \*\* Scissors \*\*Yarn Needle Chain 123 SL ST (slip stitch) into 5th CH from hook (chain) Continue to CH (chain) 3 and SL ST (slip stitch) into every other chain loop until you reach the end of the row At end of row, CH 3, turn and SL ST (slip stitch) through first loop. Continue this for 52 rows, or, until your panel meaures approximately 14" tall. The picture below is what this should look like (your flat panel almost looks like a tightly stitched net).
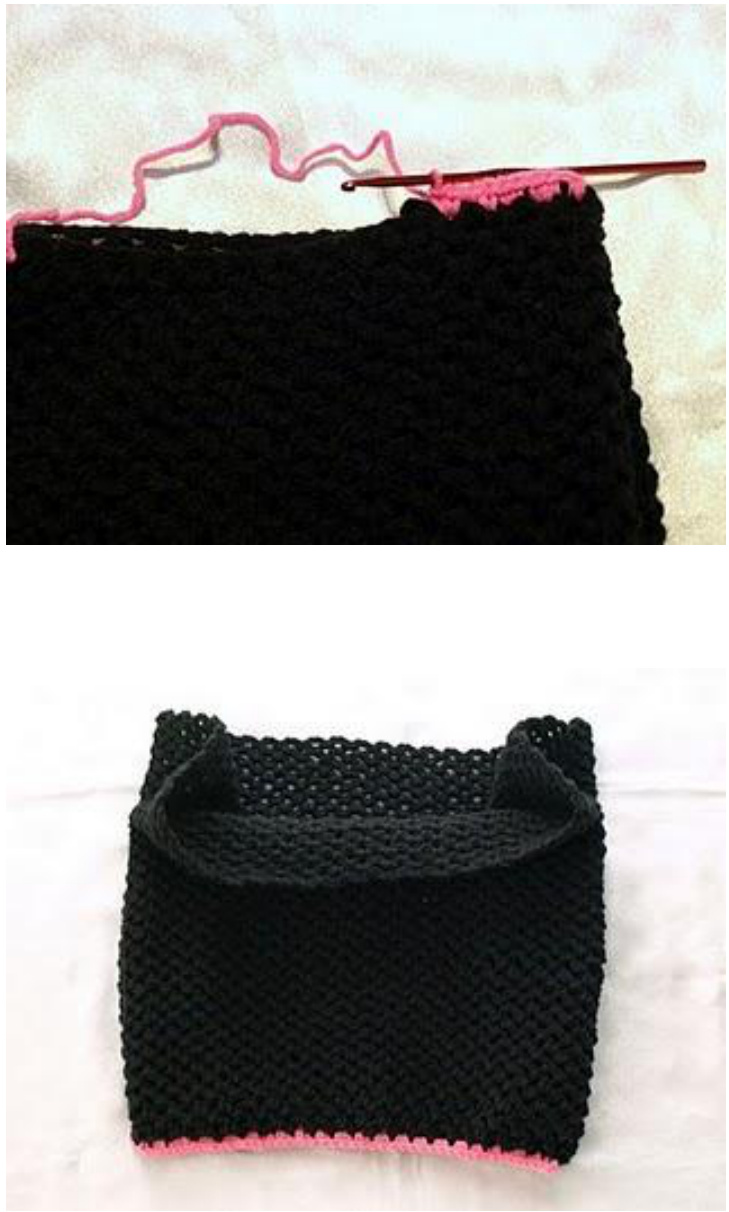
Fold in half , (making sure that the height is still 14 inches tall) Using a yarn needle, stitch the side edge closed. Make sure that the edges are stitched together evenly. A good way to keep them even is to stitch from the top towards the middle, and then the bottom towards the middle, tying off when both ends of yarn meet.
After edges are stitched together (creating a cylinder or tube form), fold the sides inward, so that there is a 2" fold on both the top and bottom layers as shown in the photo.
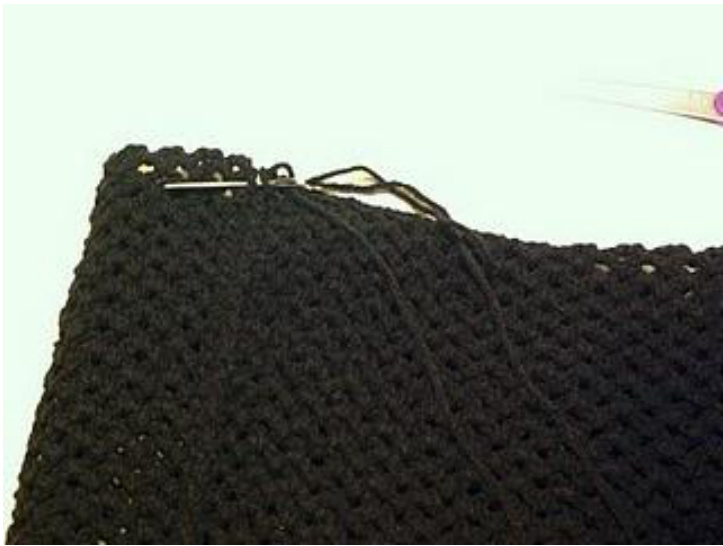
You'll want to stitch the bottom portion of the bag together now. With a new shade of yarn, SC (single crochet) 1 row through all layers of the bottom portion of the bag, as shownbelow
Now you are ready to make the carry handles. Start by marking (I just used pink yarn for my markers). Where your first marker is, insert your hook and CH (chain) 3, Insert into next loop and repeat. Do this 6 times, across. Continue until you finish 18 rows Do this for all 4 spots where your markets are located. Your project should now look like the imagebelow
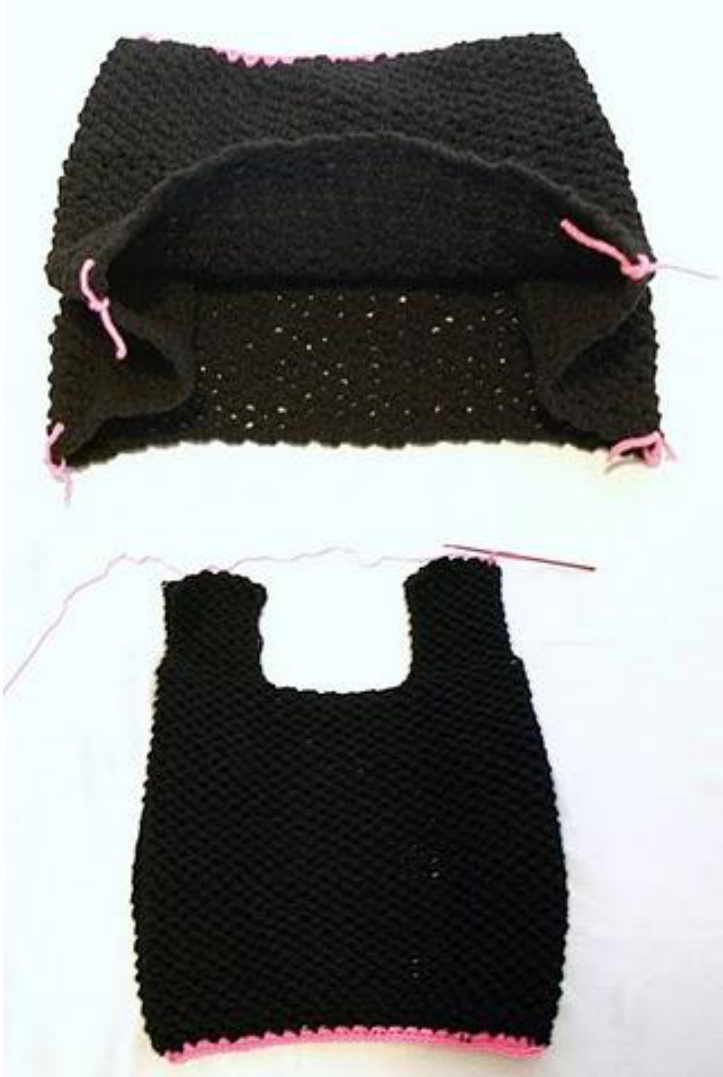
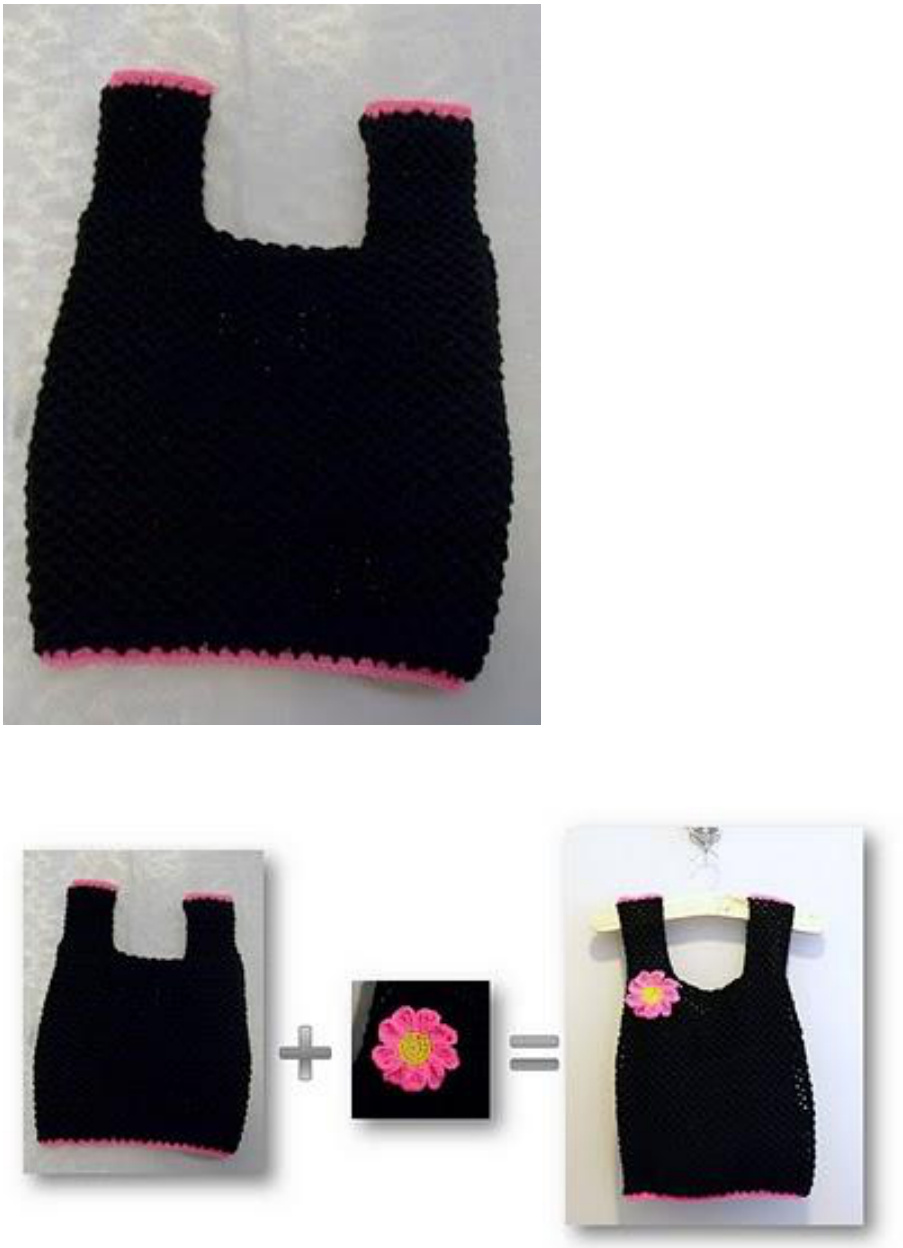
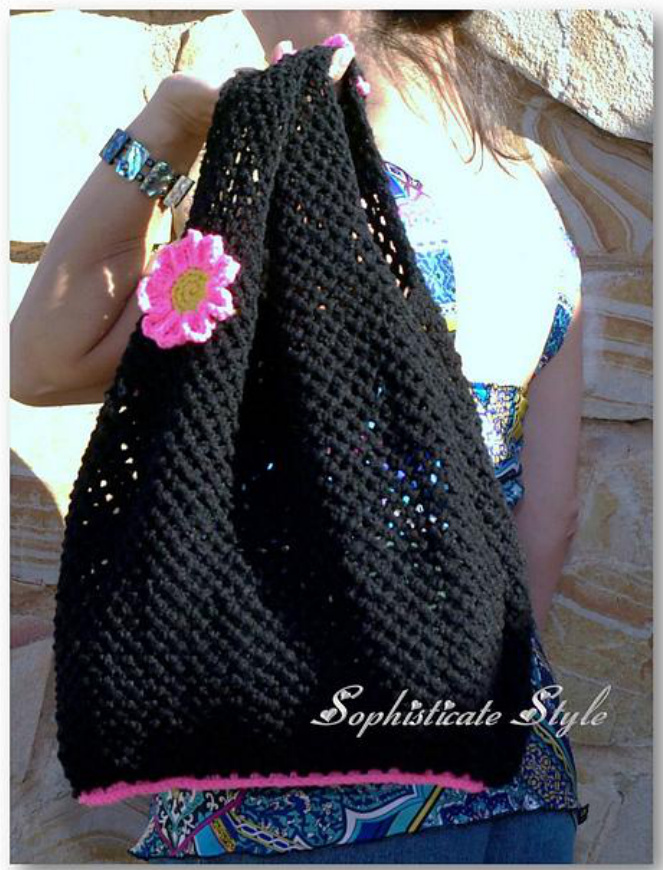
Your final steps will be to SC (single crochet) the tops of the carry handles to close them. SC through the tops of them in the same manner that you did with the previous step to close the bottom of the bag. (example is shown in the image above.) \*\*\*\*\*\*\*\*\*\*\*\*\*\*\*\*\* Your completed project should now look like the image shown below. You can mix and match colors to create vibrant patterns, or you can have a simple bag like this. If you like to embellish, you can create a bow or flower and attach it.