Toe Replacement By Susan Sedlak
Don't throw them away. Sometimes the only answer is a total replacement. Here is a recipe for drastic surgery for worn out toes. I have based this on 60st socks. Adjustments may be required for the number of stitches in your socks. Advise using a round number to make thiswork.
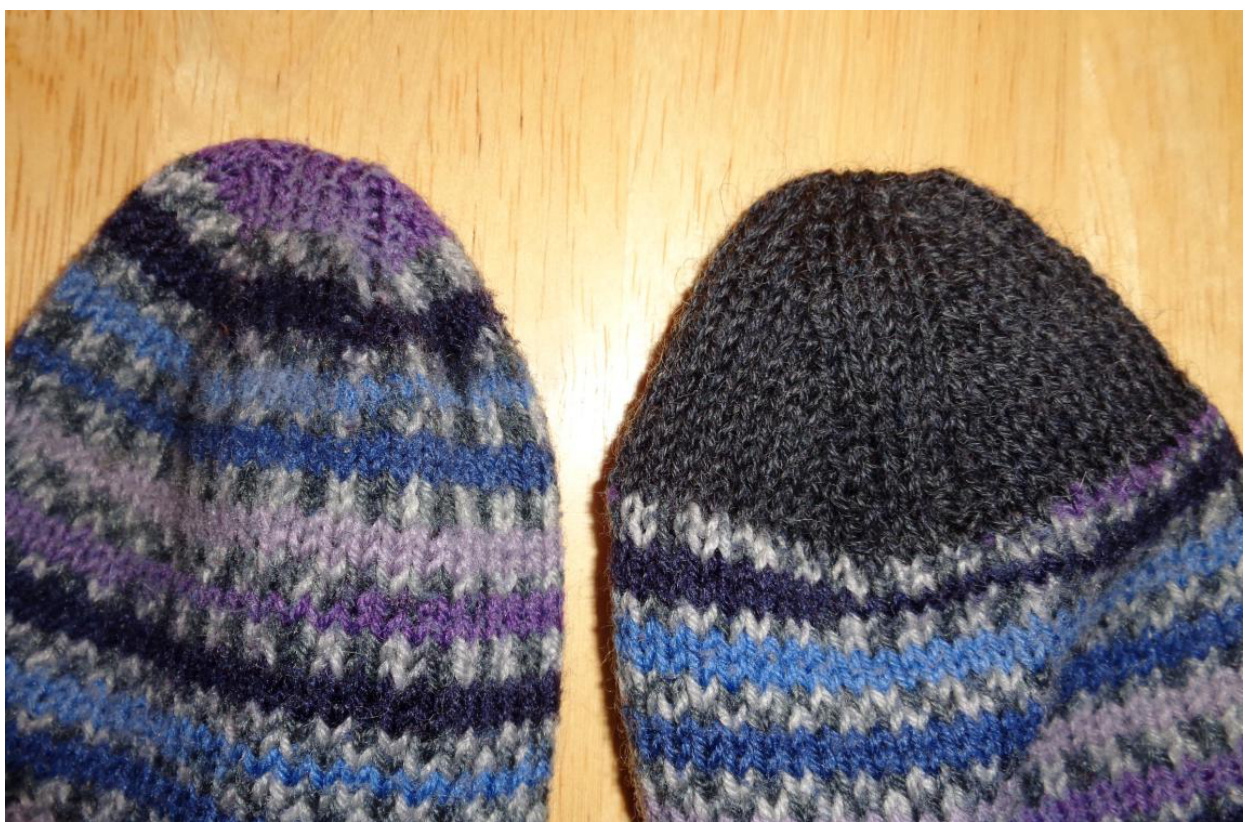
Used socks with worn out toes
I used 2.5mm Dpns (set of 5) 1.5 Us (depends on the socks you are fixing) sock yarn (fingering weight/ 3 or 4 ply) Hopefully leftovers from the originals, if not go for something shocking..J ust for fun! Darning needle, scissors, marker.
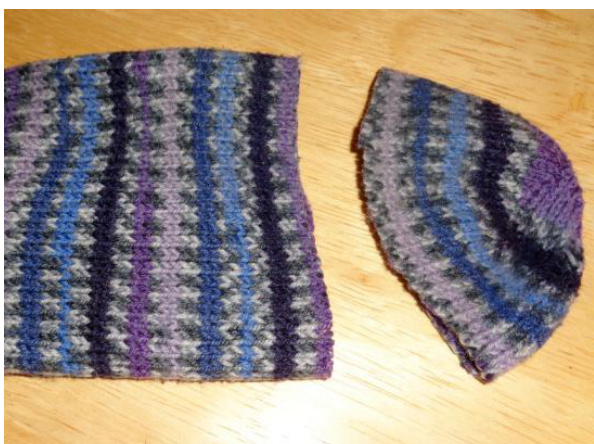
Old Toe Removal
First using scissors cut off the offending toe 2 rows closer to the toe than the desired point, carefully cutting along a single row. Yes this is scarry, but what have you got to lose? Susan Sedlak 2016 Note: If you are anxious about this make it 4 or 5 rows more, however it will be more difficult toweed out the old toeyarnlater. The new toe will be about 2". Keep this in mind so your socks don't end up too small or too largewhenaltered.
For this part of the operation, it might be easier to use a smaller knitting needle. Carefully pick the stitches up, these stitches are likely a little felt, so unraveling should not beanissue. I picked up 60st. Gently tug and snip out, as much of the two rows of toe yarn as you can. With the new yarn on 3 dpns, pick up starting at the underside of the foot centre 15st on first needle. Second needle, pick up 30st, across the top of the foot. Third needle pick up 15st back to the underside foot centre.
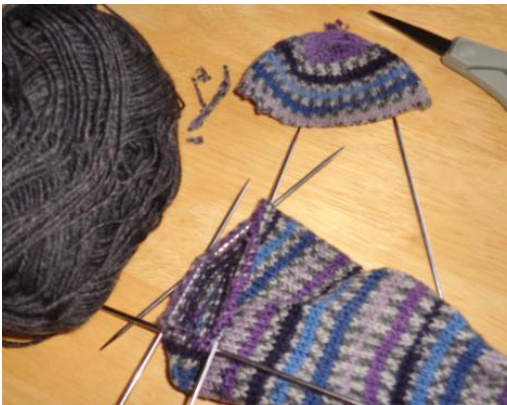
Note; Watch the orientation on this. Your number of stitches may be different than mine; some number fudging may be required. Try to get to an even number, by decreasing or adding astitch. It is much better to leave a bit in than risk snipping the stitches you are knitting to, and the little bit that is left will felt down with wear. The object is to remove as much of the old toe as possible. Carefully examine the sock to make sure you didn't miss any stitches. Susan Sedlak 2016 Ready, set, go! Changing to the larger needle. Knit 2 or 3 rows. Row 1: Knit to the last 4 st from the centre of the underfoot, k2tog, k2. k2, k2tog, knit across top of foot to last 4st, k2tog, k2, k2,k2tog, knit remaining stitches back to centre underfoot. (dec of 4st) Row 2: Knit Alternate rows Continue reducing 4 stitches every other row to 24st (6,12,6 on 3 dpns) At this point I move to 4 dpns as it gets a bit ticklish. Whatever works for you. Knit 4st move the next 2 stitches to a new dpn, pick up 2 stitches from the next needle. These4stitchesarenowreducedto3 K1, k2tog,k1, Knit across top of foot and repeat this process on the other side. Knit to the centre underfoot, pm (22st) Almostdone! Next row: \*k2tog\* (11st) Bind off remaining stitches with yarn tail and darn in ends. Rinse and repeat for other sock. Enjoy!
Techniques mentioned in this pattern can be found here
Knitting the toes and heels in a complementary colour makes removing and replacing a toes orheel easier. Provisional Cast on http://techknitting.blogspot.com/2007/10/quicktip-improve-longtail-cast-on-with.html Use a Russian Join to hide the transition between two yarns http://techknitting.blogspot.com/2007/06/working-in-ends-on-multi-color-knitting.htm
For further information contact
spinnersyarn@live.com Or visit my Blog for info on other patterns http://kitenswithmittens20.wordpress.com SusanSedlak2016


