Mud Season, v2
designed by: elizabeth smith
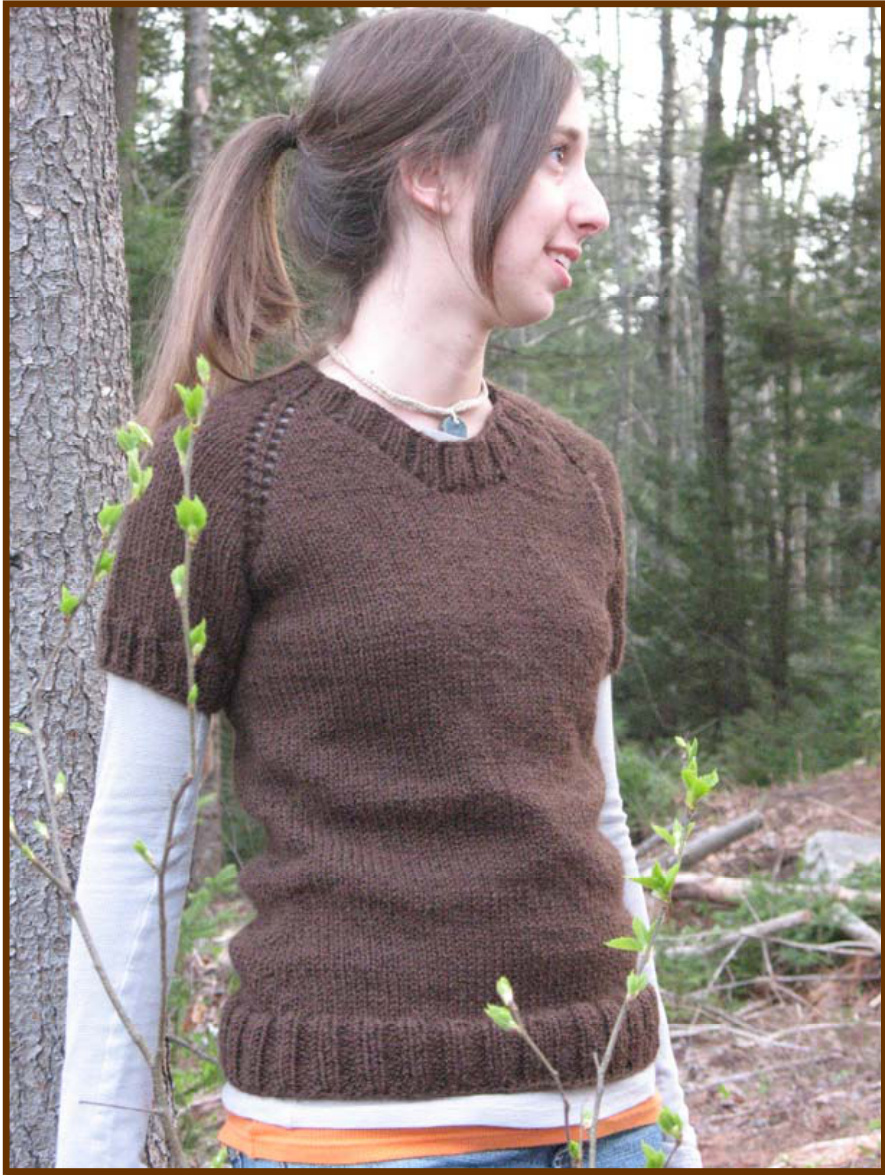
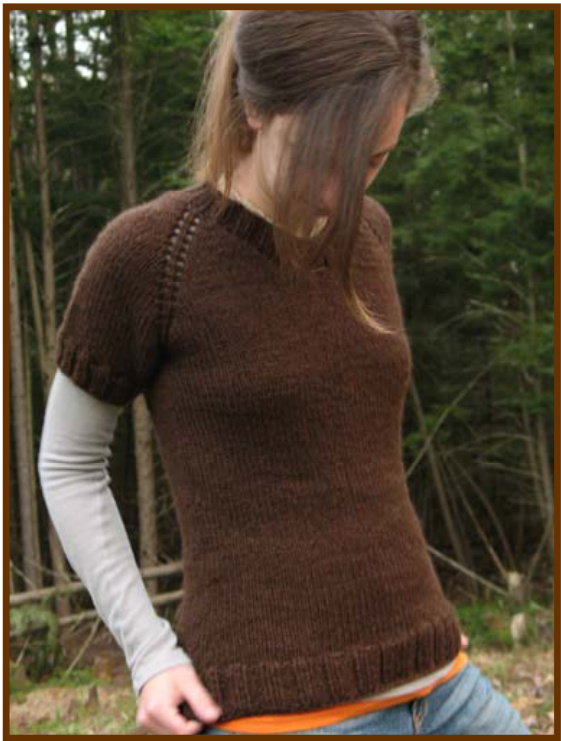
Living in Maine, we have 5 seasons—-the $5^{\mathrm{th}}$ being "Mud Season." Its the few weeks (usually in April) when the temperature finally starts to inch its way above freezing, melting the many feet of snow that has accumulated all winter long. And when you live on a dirt road in Maine as I do, the combination of lots of melting snow $^+$ dit $=$ lots and lots of mud. But the funny thing is that no one really minds it-we are all so excited about winter being over that we welcome mud season with open arms. Mud season is what inspired this sweater—-the rich, "muddy" brown color, the short seeves (because winter is A litle waist shaping is added so it's a bit fom fiting-—-but it'sillroomy & loose enough to wear a long sleeve shirt underneath.
Techniques used in this pattern:
Increasing using YO and m1 Decreasing using K2tog and ssk Cable cast-on method Working in the round from the top Picking up stitches
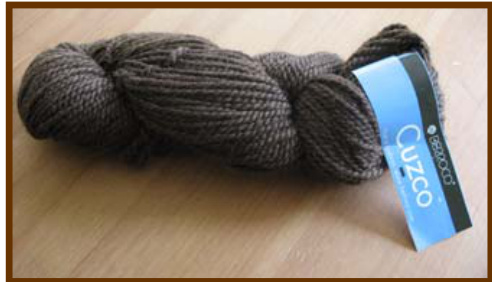
Supplies:
Berroco Cuzco Yarn (bulky weight) 5 (6, 6, 7, 7, 7, 8, 8) skeins or: 688 (727, 765, 805, 843, 880, 925) yds of bulky weight yarn Size 10 24" & 16" circular needle (or size needed to obtain gauge) Size 9 24" & 16" circular needle (or 1 size down from gauge needle) 4 stitch markers in one color and 1 stitch marker in a different color Scrap yarn Tapestry needle Crochet hook (to weave in ends) Row counter (or piece of paper to keep track of rounds)
Gauge:
3.5 sts & 5 rows $=$ 1" in stockinette
Sizes:
S (M, L, XL,1X, 2X, 3X, 4X)
Finished Measurements:
Bust $=34$ (36, 38, 40, 42, 44, 46, 48)" Length $=23.25$ (23.5, 24.5, 26, 26.5, 27.5, 28, 29)"

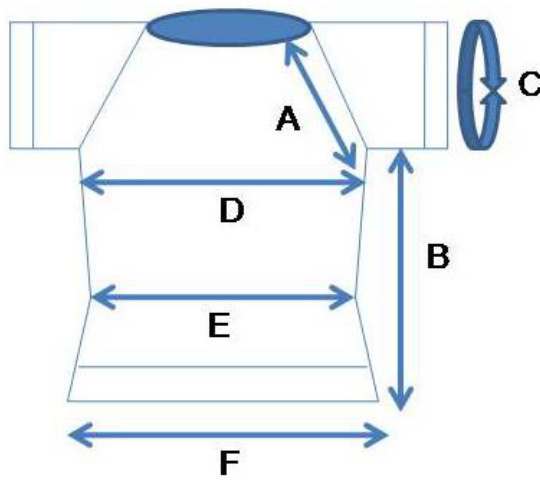
$\mathsf{A}=7.75$ (8, 8.5, 9, 9.5, 10, 10.5, 11)" $\mathsf{B}=15.5$ (15.5, 16, 17, 17, 17.5, 17.5, 18)" C = 13 (13.5, 14.25, 15, 16.25, 17.25, 18, 19)" D = 17 (18, 19,20, 21, 22, 23)" $\mathsf E=16$ (17, 18, 19, 20, 21, 22)” F = 18 (19, 20,21,22,23, 24)"
Abbreviations:
CO $=$ cast on st(s) $=$ stitch(es) ${\sf R S}=$ right side of work $\kappa={\mathsf{k n i t}}$ sm $=$ slip marker ${\mathfrak{W}}\mathbf{S}=$ wrong side of work $P=\mathsf{p u r l}$ $\mathsf{m m=}$ main marker pm $=$ place marker kfb $=$ increase 1 stitch by knitting into the front of stitch and then also knitting into the back of it to Create 2 stitches from 1 $\mathbf{m}\mathbf{1}=$ increase 1 stitch by, with the left needle, picking up the “bar' in between 2 stitches and knitting into the back of this stitch $\mathbf{vo}=$ yarn over K2tog $=$ decrease 1 stitch by knitting 2 sts together $\mathsf{\pmb{S}\pmb{k}=}$ decrease 1 stitch by slipping 2 sts (as if to knit) from left to right needle, then knitting the 2 slipped sts together by inserting left needle into the front of both of the sts & then knitting them
PATTERN:
Neck:
Using size 10 16" circular needle, CO 1, pm, CO 8 (8,8,9, 9, 9, 9, 9), pm, CO 23 (24,25,26, 26, 26, 27, 27), pm, CO 8 (8,8,9, 9, 9, 9, 9), pm, CO 1. [for this neck portion you wil be working back & forth, not in the round] Row 1: purl across Row 2: Kfb of 1st st, sm, YO, $^{\ast}\mathsf{K}$ to 1 st before marker, YO, K1, sm, YO; repeat from \* once, K to 1 st before 4th marker, YO, K1, sm, kfb of last st. Row 3: purl across Row 4: kfb of 1st st, YO, K1, sm, YO, $^{\ast}\mathsf{K}$ to 1 st before next marker, YO, K1, sm, YO; repeat from \* 2 times (through $4^{\mathrm{th}}$ marker), K to last st, kfb of last st Row 5: purl across Row 6: kfb of 1st st, $^{\ast}\mathsf{K}$ to 1 st before marker, YO, K1, sm, YO; repeat from $^\star\,_{3}$ times (through 4th marker), K to within 2 sts of end, kfb in next-to-last st, K1. Row 7: purl across Repeat the last 2 rows (rows 6 & 7) 7 more times Total back sts (between 2nd & $3^{\mathrm{rd}}$ markers): 43 (44,45,46, 46, 46, 47, 47) Each sleeve: 28 (28,28,29, 29, 29, 29, 29) Each front: 20 (20,20,20, 20, 20, 20, 20) Next row (Rs): Using cable cast-on method, cast on 4 (6,8,10, 10, 10, 10, 10) sts for front neck [these sts willater join the left & right front sides together since this is a pullover, not a cardigan] $^{\ast}\mathsf{K}$ to 1 st before marker, YO, K1, sm, YO; repeat from \* 3times (through 4th marker), K to end. Front should now have: 46 (48,50,52, 52, 52, 53, 53) sts
Joining Left & Right Fronts Together:
DO NOT TURN WORK. With RS of work facing you, pm on right needle (use a different color marker than the other ones-this marker will be called the MM-main marker),join left & right fronts together by knitting into 1st st on left needle, making sure not to twist sts. You wil now be working in the round. Round 1: (non-increasing row):K across to end (MM)) Round 2:(increasing row) : $^{\ast}\mathsf{K}$ to 1 st before marker, YO, K1, sm, YO; repeat from $^\star\:3$ times (through 4th marker), K to end (MM). [RECOMMENDATION: because you are working in the round, it will be hard to tell which round is a nonincreasing round and which is an increasing round. Use a row counter to count each round (or keep track of it on paper). If the number on the counter(or paper) is odd, you ll know it's a non-increasing round. If the number is even, it's an increasing round.] Switch to size 10 24" circular needle when the sts get too crowded Repeat Rows 1 & 2 from above until there are: O 60 (64,68,72, 76, 80, 82, 86) sts between front markers (not MM) 0 44 (46,48,51, 55, 59, 61, 65) sleeve sts (each) 0 59 (62,65,68, 72, 76, 79, 83) sts between back markers (2nd & 3rd markers) [End on an increasing round]
Dividing Round:
Step 1: K across to end (MM) Step 2: $^{\ast}\mathsf{K}$ to marker, remove it, put the next 4 (46,48, 51,55, 59, 61, 65) sts on scrap yarn using tapestry needle, sm from left needle to right needle (this marker willserve as one of the side markers);repeat from $^\star\,\,1$ time, K to end (MM). Total sts on needles: 119 (126, 133, 140, 148, 156, 161, 169) You will now be working the body of the sweater. The sleeves will be finished after the body is done.
After above dividing round, work in stockinette (knitting every round since we're working in the round) until measures 2" from underarm (should be 10 rows if gauge is correct)
Waist Shaping:
Step 1: K to 3 sts before 1st side marker, K2tog, K1, sm, K1, sk, Kto 3 sts before next side marker, K2tog, K1, sm, K1, ssk, K to end (MM). Step 2: K 18 (18,18,17, 17, 17, 17, 17) rounds O Repeat above 2 steps one more time O Total sts on needles: 111 (118, 125, 132, 140, 148, 153, 161) [RECOMMENDATION: if you are more short-waisted (meaning the measurement from the back of your neck to your natural waist line is shorter than 16.5 (17,17.25,17.25, 17.5, 17.5, 18, 18), then you can decrease the amount of rounds in step 2 above. This will customize the fit of this sweater so it frst your particular body shape better.]
Increase for hips:
Step 1:K5 (6,8,9, 10, 11, 11, 11) rounds Step 2: $^{\ast}\mathsf{K}$ to 1 st before marker, m1, K1, sm, K1, m1, Kto 1 st before 2nd side marker, m1, K1, sm, K1, m1, work to end (MM). $\bigcirc$ Repeat above 2 steps 2 more times Total sts on needle: 123 (130,137,144, 152, 160, 165, 173) The sweater should now measure around 21.25(21.5, 22.5, 24, 24.5, 25.5, 26, 27)" in length. If not, continue in stockinette until you reach this measurement (or 2" above desired length)
Bottom Ribbing:
Switch to size $9\:24^{\circ}$ circular needle $^{\star}\mathsf{K}2$ , P2; repeat from \* around to end (MM) (note: you can remove the 2 side markers as you reach them. Since waist shaping is complete you have no need for them.) Repeat ribbing, knitting the knit sts and purling the purl sts for 2" Bind off in pattern
Sleeves:
Take sts on scrap yarn and transfer to size 10 16" circular needle. Pick up and knit 2 underarm sts, pm, join for working in the round O Note: if you feel that the arm circumference is too big and you want a tighter fit, decrease 3-5 sts evenly along first row Work in stockinette until measures 2.25 (2.5, 2.75, 3, 3, 3.25, 3.5, 3.75)" from underarm or 1"" before desired length Switch to size 9 16" circular needle, $^{\star}\mathsf{K}2\mathrm{,}\mathsf{P}2$ repeat from \* around Continue in ribing pattern, knitting the knit sts and purling the purl sts for 1" Bind off in pattern Repeat all of the above steps for the 2nd sleeve
Neck Band:
Using size 924" circula needle,with right side of work facing you, join yan at toplf shoulr Pick-up and knit all sts around the neck (number should be divisible by 4) Pm, join for working in the round $^{\star}\mathsf{K}2$ , P2; repeat from \* to end Continue in ribing pattern for 1.5" or desired length Bind offin pattern
Finishing:
Weave in all ends with crochet hook Block (the technique I used was spraying the sweater generously with water using a spray bottle until all damp, then pinning it to shape, following the finished measurements noted at beginning of pattern)
Images and pattern $\circledcirc$ 2009 Elizabeth Smith. All rights reserved.


