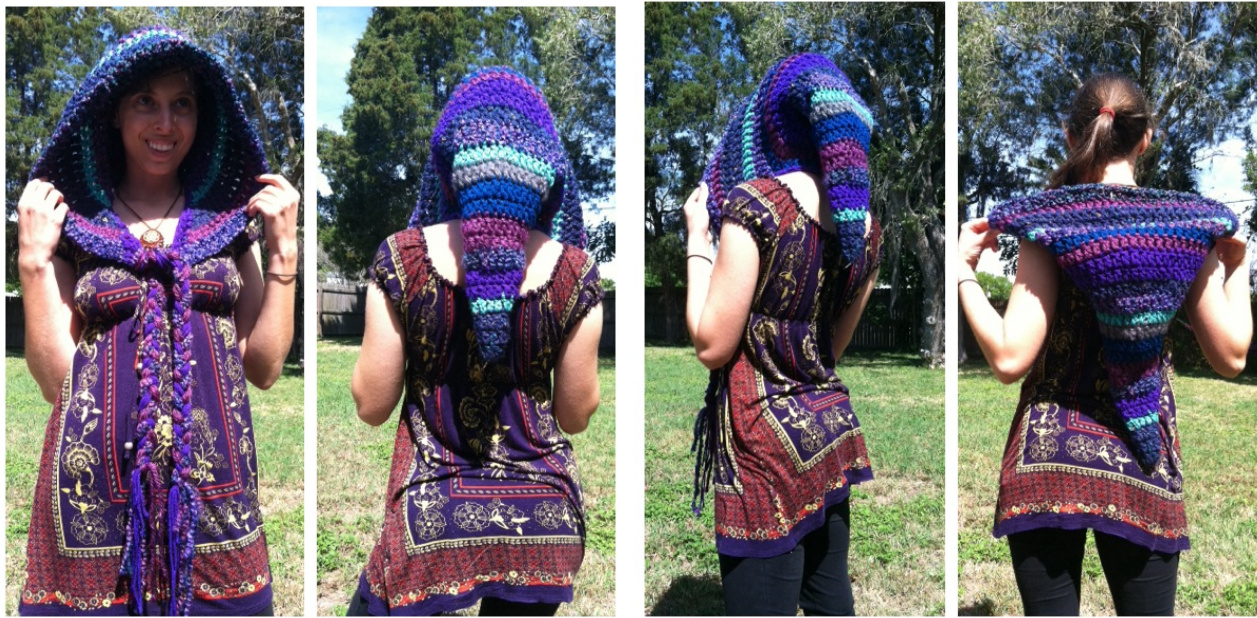
Mid-length Pixie Hood Designed by Earth Tricks
Materials:
Work this piece with bulky weight yarn, or two strands of worsted weight. Huge a variety of textures and colors to achieve a funky look! Hook: J/6mm
Hood:
Rnd 1: Create a magic circle, and dc 6 times. Rnd 2: 2 dc, inc dc, 2 dc, inc dc. (8 dc) Rnd 3: 3 dc, inc dc, 3 dc, inc dc (10 dc) Mark two stitches, anywhere on the round, that are two stitches apart. Since you should be frequently changing colors (and casting on at different places in the round to hide the seam), know that you will be increasing in these two spaces for the next couple rounds. Rnd 4-8: Inc at the marked spaces. The numbers of dcs between your inc should also increase (12, 14, 16, 18 dc). Rnd 9: Dc around (18 dc) Move your markers up, following along the lines of inc. The markers should be 4 dcs apart. Rnd 9-10: Inc at the marked spaces. In both rows, keep 5 dc between your incs. (20, 22 dc) Move your markers up, still keeping 5 dc in between your marked spaces. Then, add a third marker between your two markers, 2 dcs away from both. Rnd 11-20: Inc at marked spaces. The number of dcs between the side markers and middle markers will gradually increase. (25, 28, 31, 34, 37, 40, 43, 46, 49, 52 dc) Move the middle marker up to the last center inc from rnd 20 (Marker A). Place markers 7 dcs to the right and left of the center marker (Markers B and C). Holding your center marker, fold your work in half and find the other “center" point. Place a marker here (Marker D). Remove the first center marker placed (Marker A). Beginning the next round, you will be working in rows, not rounds. You will work from Marker B, pass Marker D, and finish the row at Marker C. Row 21: Begin at Marker B. Inc dc, inc dc, dc across to Marker D. Inc dc at Marker D. Dc across. In last two stitches, inc dc, inc dc. Last inc dc should be in Marker C. (43 dc) Rows 22-27 : Inc twice at the start and end of each row, and inc once in the center. (48, 53, 58,63,68,72dc)
Finishing notes:
Projection of the hood:
Personally, I like to take the last row of the hood and fold it over, to give the brim of the hood a little extra stiffness so it holds its shape well. You may decide to omit row 38 if you feel its to0 much fabric in the front.
Length of the front points:
Additionally, you make want the front points of the hood to dangle lower. In that case, attach to a bottom corner, dc 9, 2 hdc, 2 sc. This adds a triangle of extra fabric in the corner. You can add multiple rows this way until it is the desired length in the front. Repeat with the other corner.
Adding tassels/braids/closures:
I added long braids to the front of my hood, as an easy closure. You can make long chains, add scrappy pieces of fabric, or go wild! Maybe you prefer a big chunky button, or other closure. I worked directly onto the front corners of the hood.
Steam blocking:
I steam blocked the hood to get it to lay a bit nicer, both on the back of the head and along its length. I steam blocked the hood itself vertically, and the pointed end horizontally.


