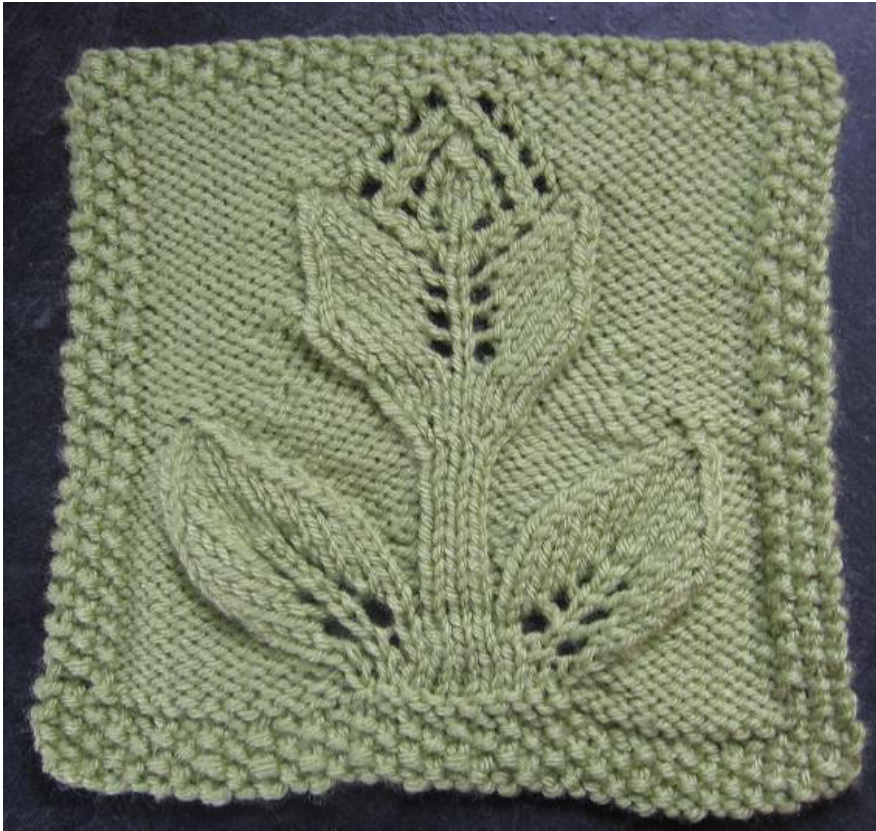
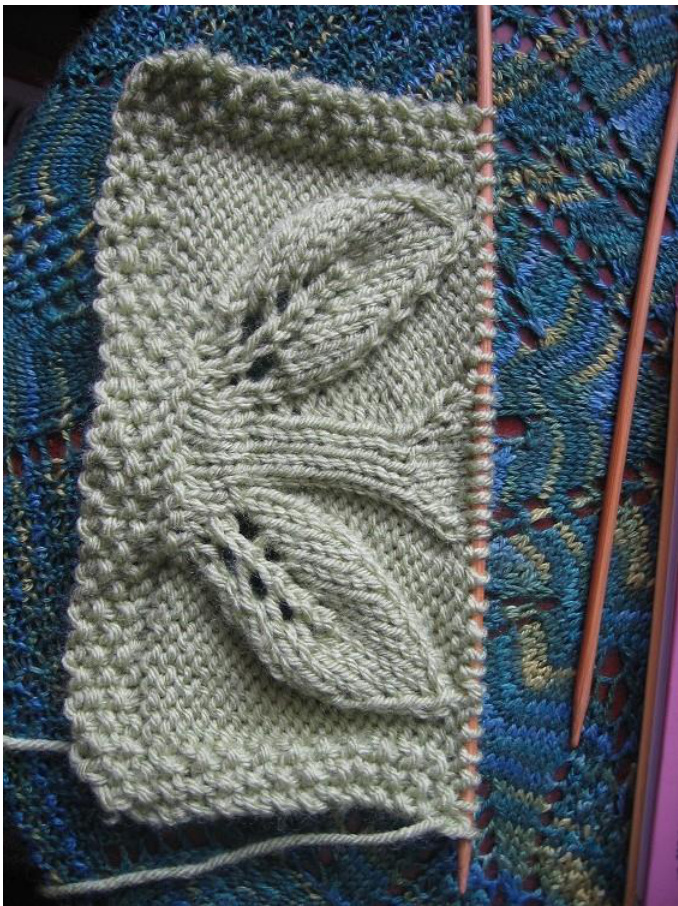
Turn a New Leaf
Afghan Block Square Dishcloth 9'
designed by Margaret Maclnnis c. 2012 adapted from Barbara Walkers 2nd Treasury,p.236'Embossed Double Leaf Panel
Supplies
Aran to worsted weight yarn, about 45-50 grams Needles: straights 4 to 5 mm (US 6- 8) depending on yarn weight Block finishes at about 8"for worsted, and 9" for aran weighted yarn Stitch markers Tapestry/Yarn Needle
Stitches and Notes
The block is worked flat, back and forth. There is a seed stitch border, demarcated after the 7th row with stitch markers. The short row sequence in the 6th row will build up the section, and avoid a crooked block due to the pull up effect of the leaves. RS—right/show side WS— back or non-show side PM—place marker Seed stitch—(k1, p1) across, then k1 (for odd numbers of stitches only), each ro Turn Over a Leaf/Tulip/Leaf 9" Afghan Dishcloth Block Page 1 yf—-yarn forward (yarn to the side of the work nearest you) yb—yarn back (yarn to the side of the work away from you) w&t—if knitting—-yf, slip next st to right needle, yb around left of stitch, slip the stitch back to the left needle, turn the work, and continue as instructed being careful not to pull the wrap too tightly when working the next stitch. w&t—if purling-—yb, slip the next stitch to the right needle, yf around the left of the stitch, slip the stitch back to the left needle, turn the work, and continue as instructed. pick up stitch with wrap (knit)— slip the upcoming wrapped stitch to the right needle, poke the right needle through the wrap at the base of the stitch, and lift the wrap on to the left needle. Knit through both the wrap and the stitch as one motion. pick up stitch with wrap (purl)—slip the upcoming wrapped stitch to the right needle, pick up the wrap from the base of it and slip to the left needle, slip the stitch to the left needle, and purl the two together. This will leave a little diagonal cross on the front of the knitting, which you 'could' have avoided with some stitch gymnastics, but for this piece, this method is adequate. p2tog—purl two stitches together. k2tog—knit two stitches together. ssk—slip next st as if to knit, slip next st as if to knit, insert left needle into FRONT of both stitches and knit them together as one. If it's easier, you can slip both the stitches back to the left needle, but the point is to change their lean, so make sure they are twisted. sk2p—slip the next st to the right needle, knit the next 2 sts together, then slip the slipped stitch over the stitch that resulted from the knit2together. (a double decrease) M1—-using the cross bar between the stitches, slip it on to the left needle and knit through the back of it. (a single increase) kfb—knit through the front and without removing the loop from the left needle, then through the back of the next stitch. (a single increase) pfb—purl through the front and without removing the loop from the left needle, then through the back of the next stitch. (a single increase)
Cast on 35 stitches (long-tail is fine)
Row 1: (k1, p1) x 17, k1 eat Row 1 (make sure the stitches are lining up and you are indeed working seed st
Row 5: k1, p1, k1, k10, p9, k10, k1, p1, k1
ith all the wraps and turns is written out in full at the end of the pattern \*\*
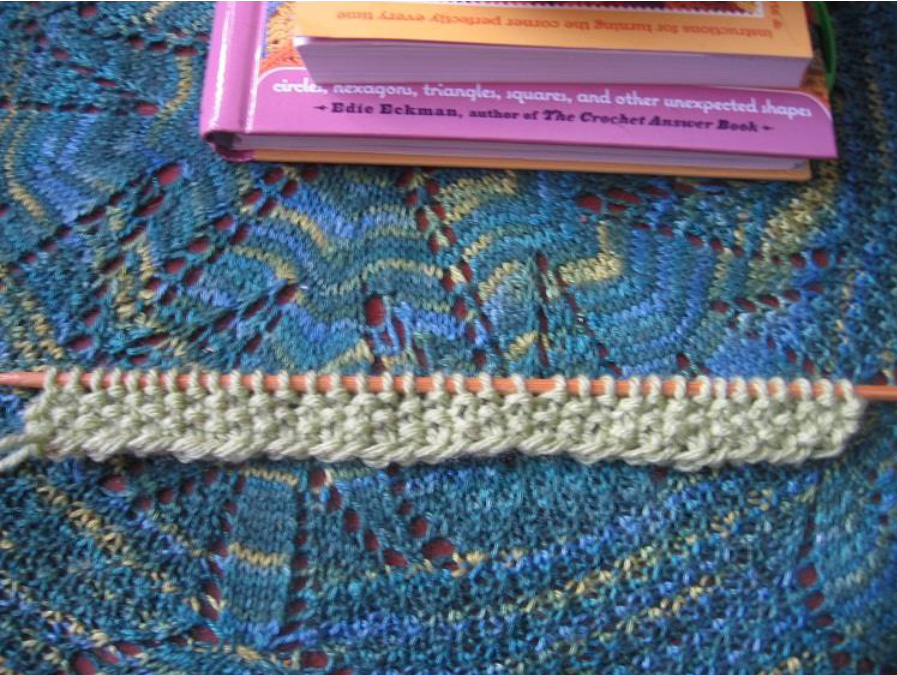
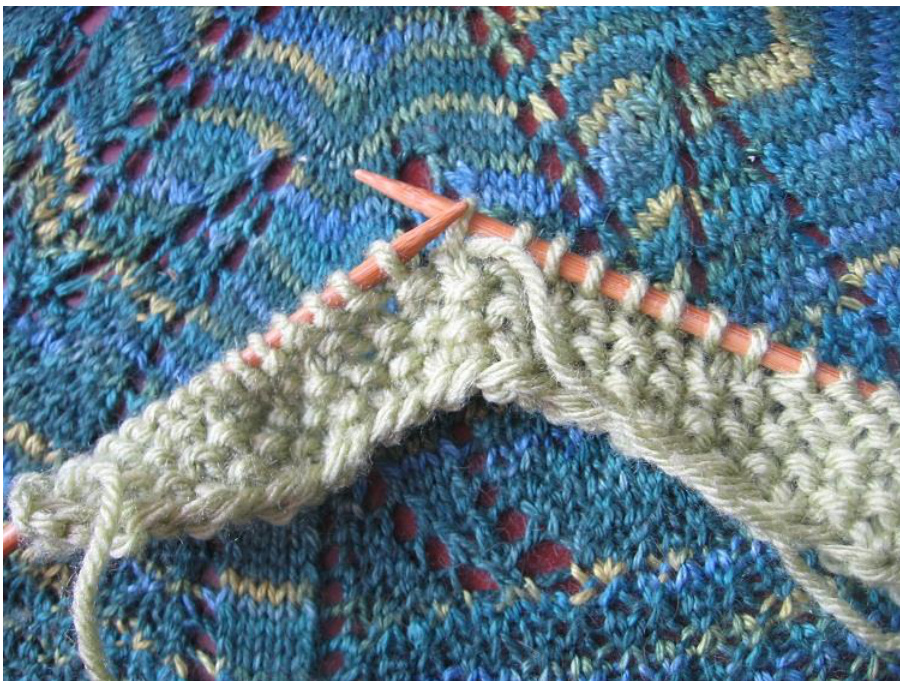
hort Row sequence within this row to build up the middle section prior to the leave k1, p1, k1, p10, k7, w&t the next st knit the seven stitches before
Slip the next stitch to the right needle
yarn back again, between the needles
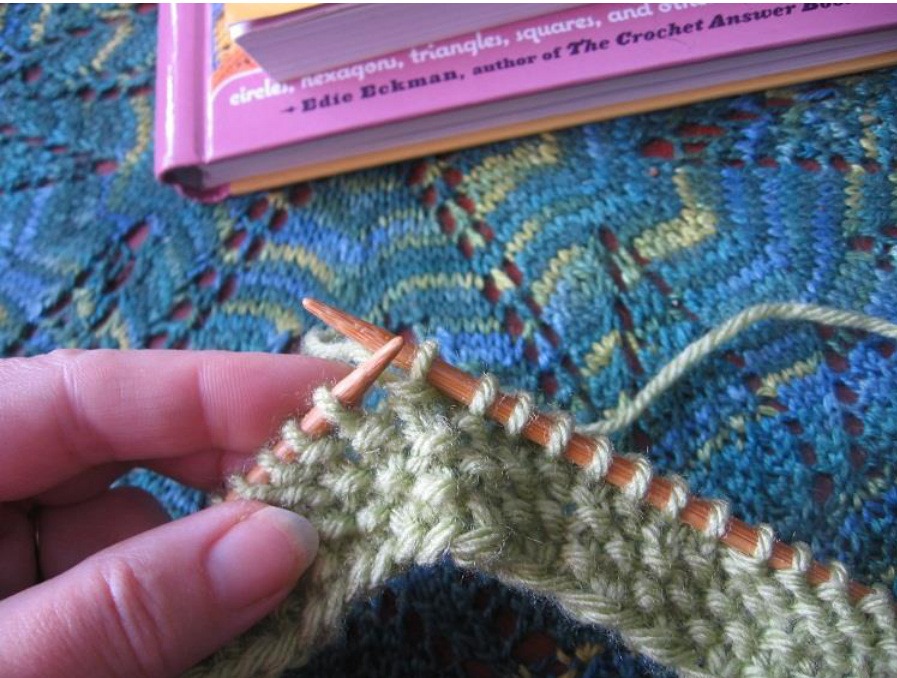
Yarn back between the needles
ne stitch back to the left needle. You can see the little 'wrap' at the base of the stitc
Turn your work so you are purling in the other direction.
p5, w&t the next st
jurling the five stitches, then yb (opposite of what you are doing, which is purling)
When you purl the first stitch after a wrap, make sure you don't pull on the wrap too much or you won't be able to get at it when you need to later.
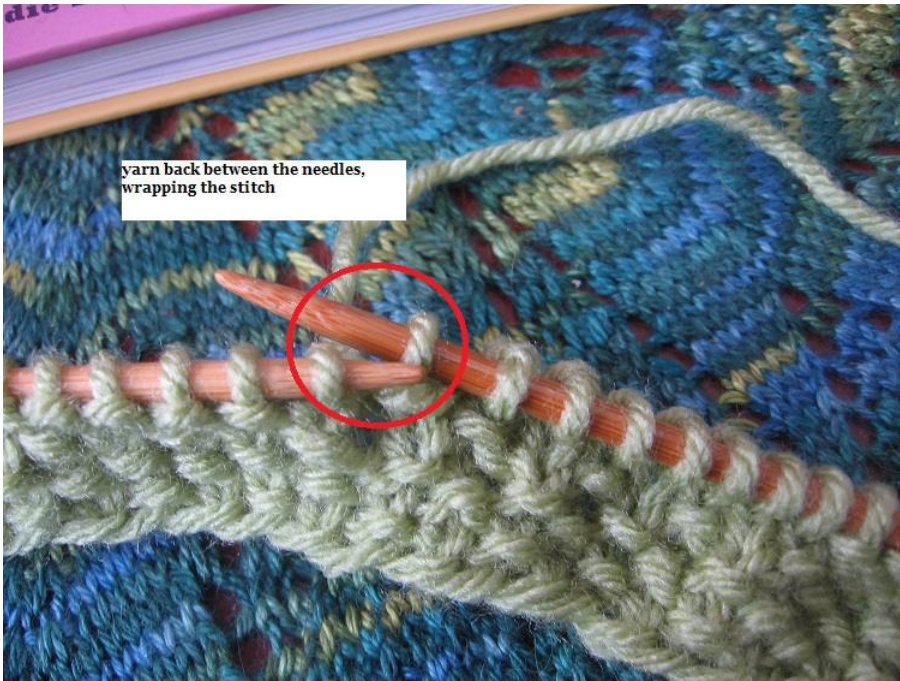
yarn forward again, between the needles, effectively WRAPPING the base of the stitch, and slip the stitchback to the left needle
Turn your work, so the knitting is facing you, and you are working the other way
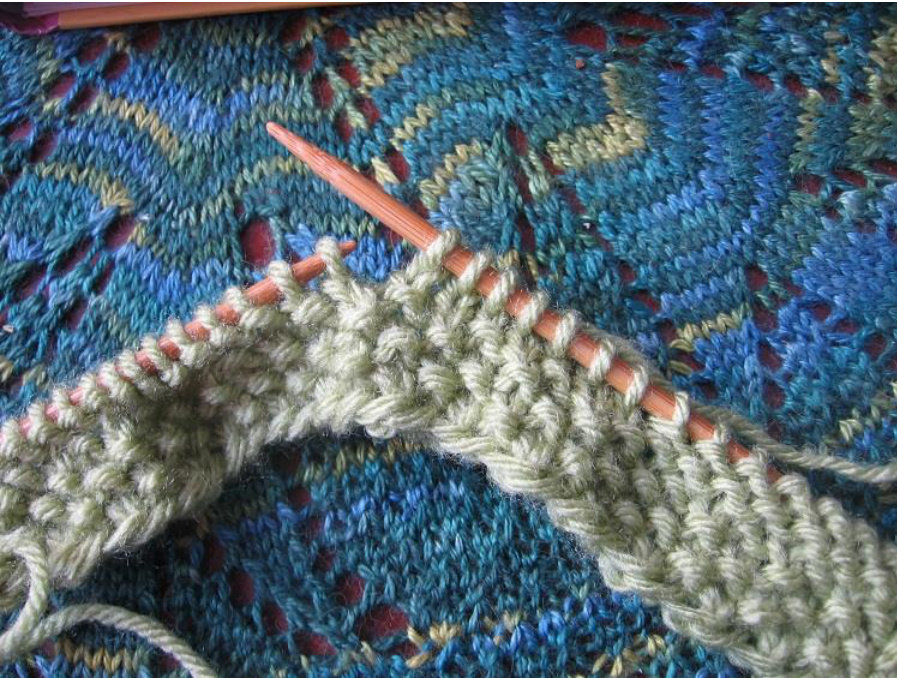
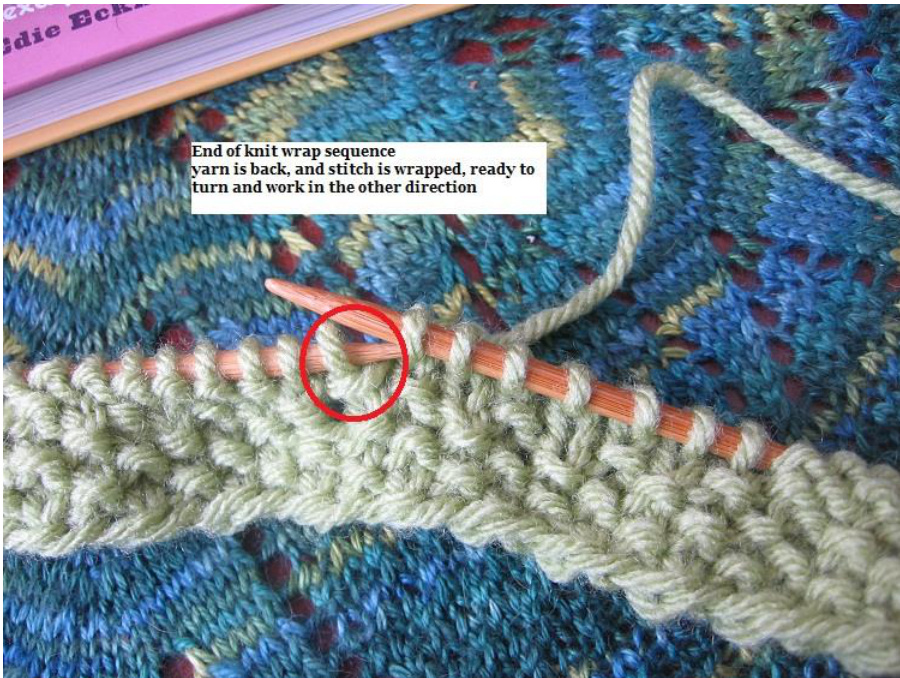
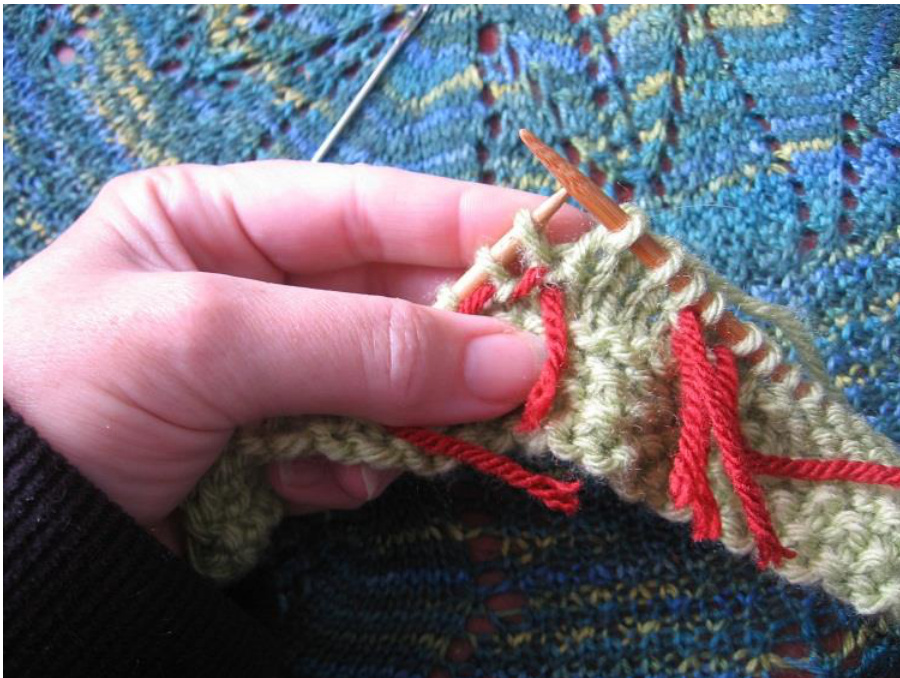
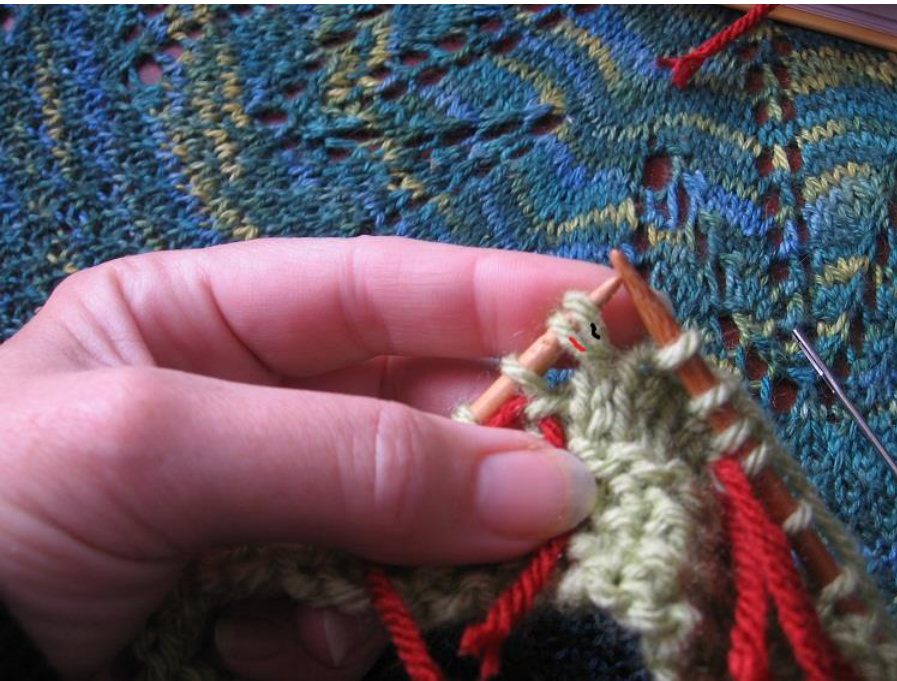
Remember not to pull too tightly on the first knit stitch after a wrap, or you won't find it again k4, w&t the next st in the same manner as the knit wrap above--TURN to purl side p3, w&t the next st in the same manner as the purl wrap above--TURN to knit side Then I like to 'mark my wraps' with a little piece of yarn.
And FINisH Row 6: k through the knit stitches, knitting with wraps as they are encountered as follows: (k3, k next st with wrap, k next st with wrap, k next st), and purl through 10 as established, then k1, p1, k1
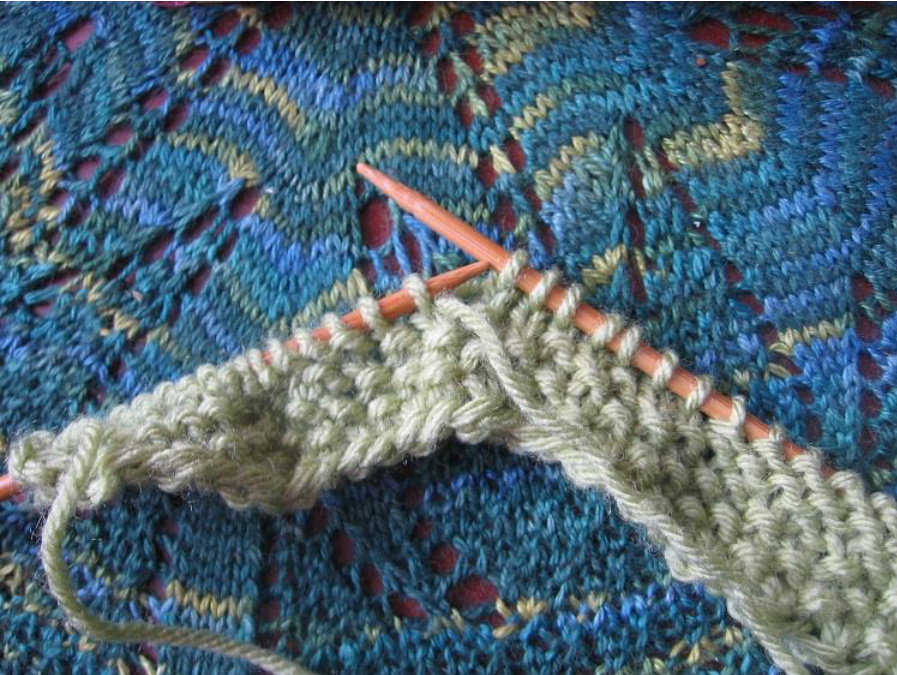
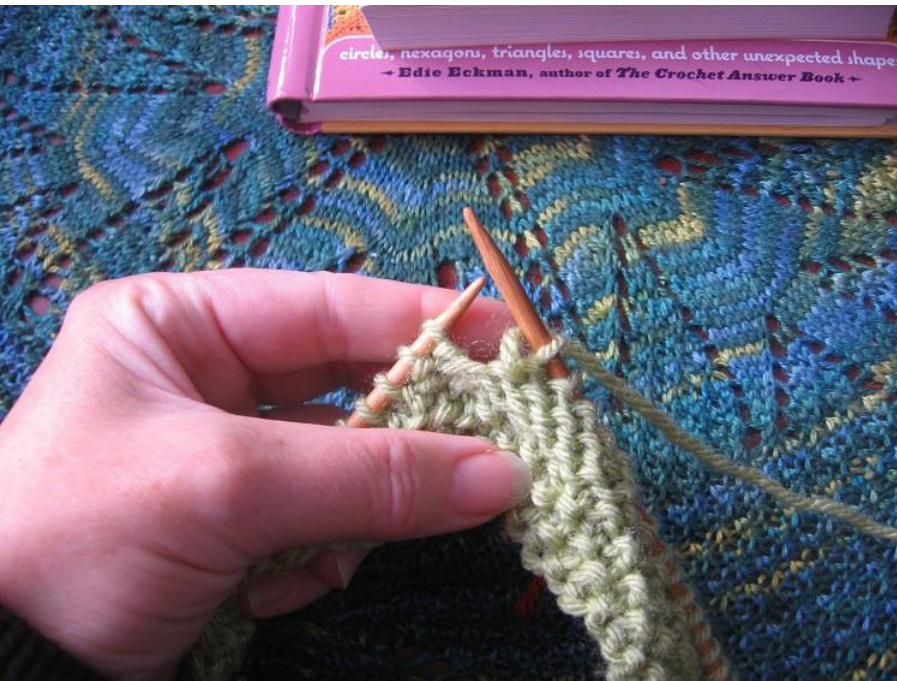
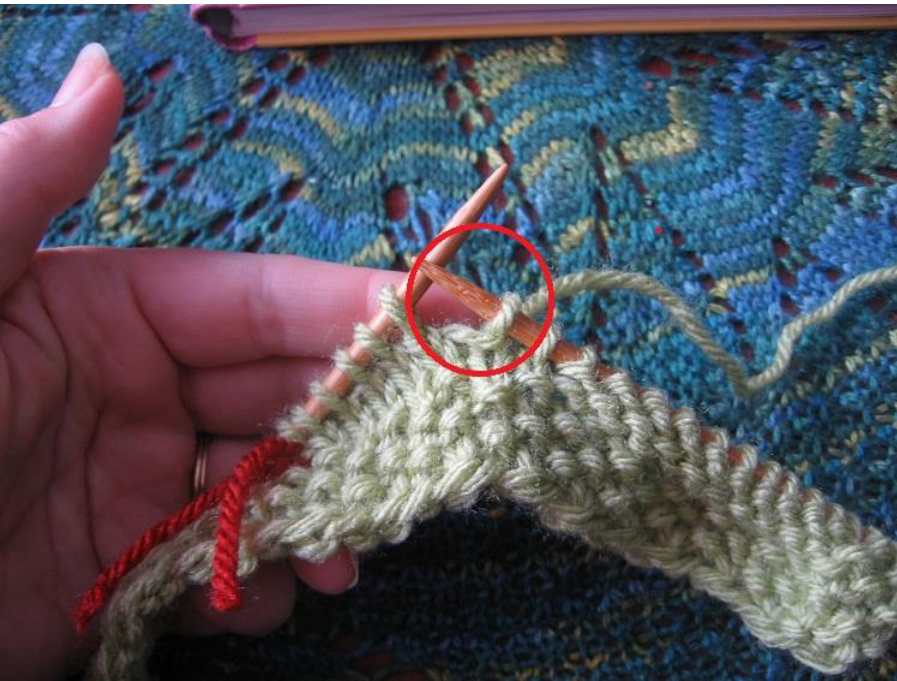
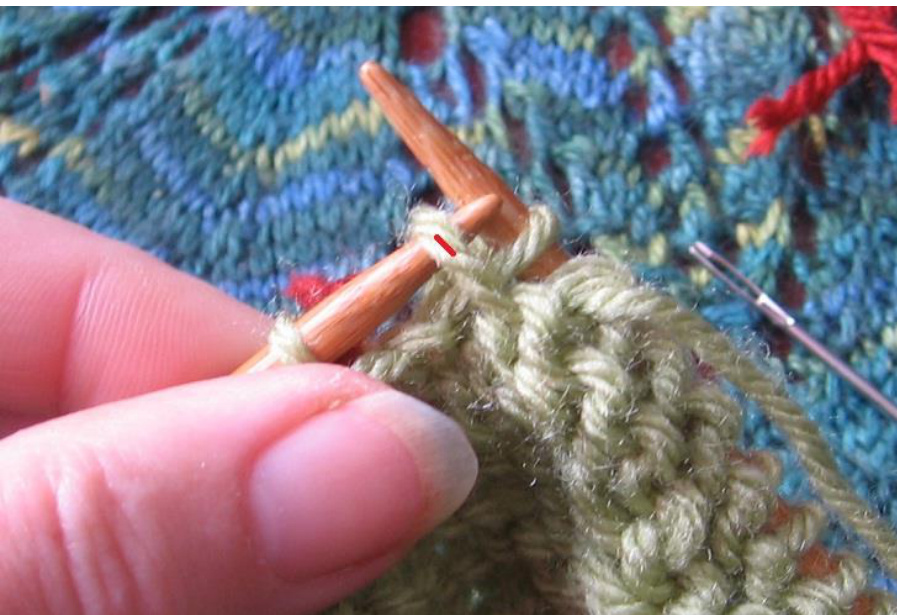
Here is a demonstration of how to 'knit a stitch with its wrap'
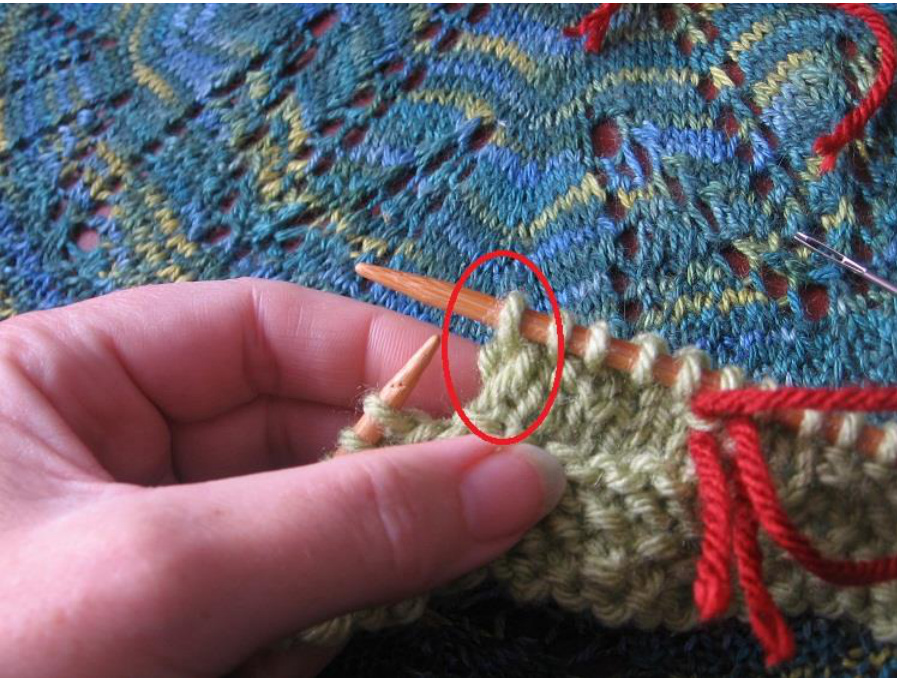
Here I've 'marked' all the wrapped stitches with a little thread through the wraps, so I could easily find them again. I suggest doing that if you are a w&t virgin....it's only hard your first time and then you'll figure it out and it will seem more natural So looking at the upcoming wrapped stitch, you want to first slip the stitch with its wrap to the right
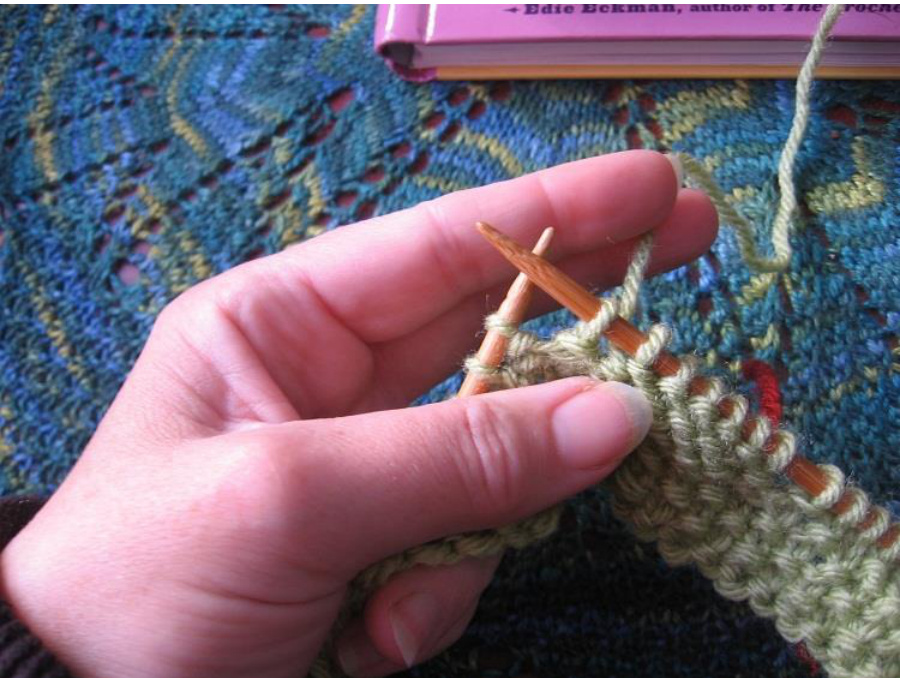
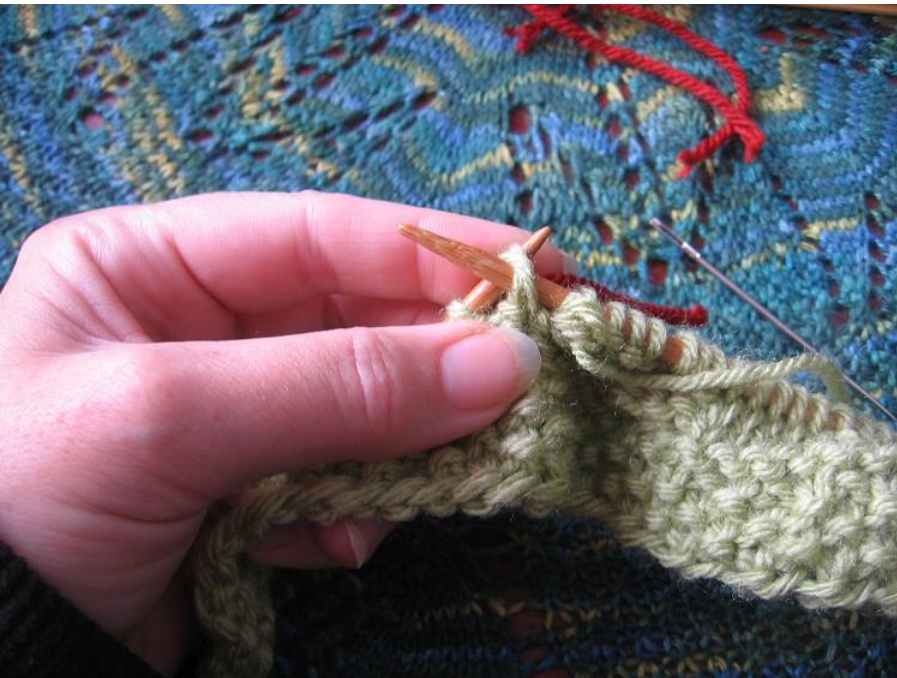
Pick the wrap off the base of the stitch with the left needle
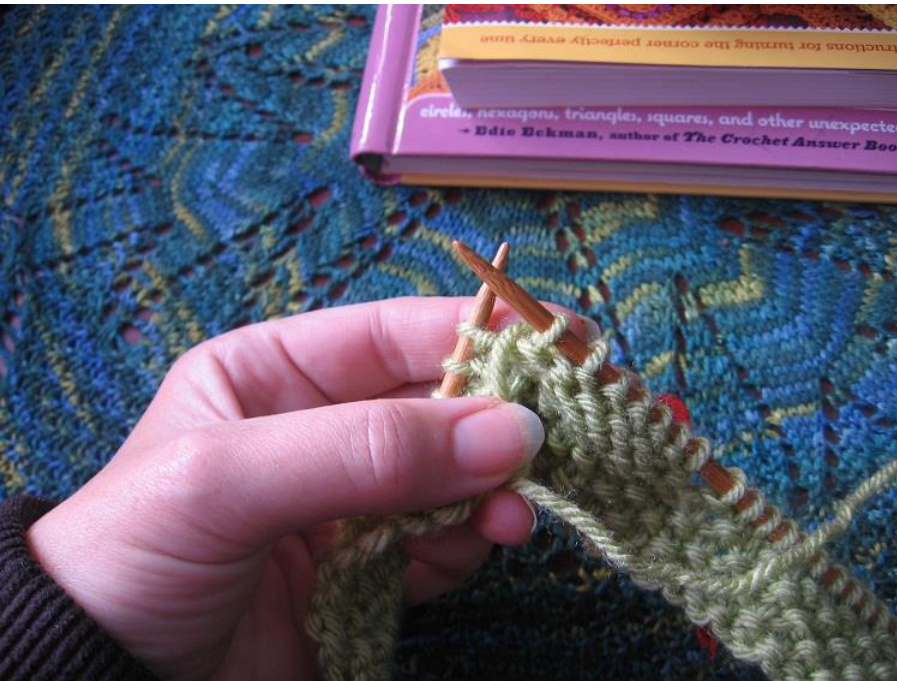
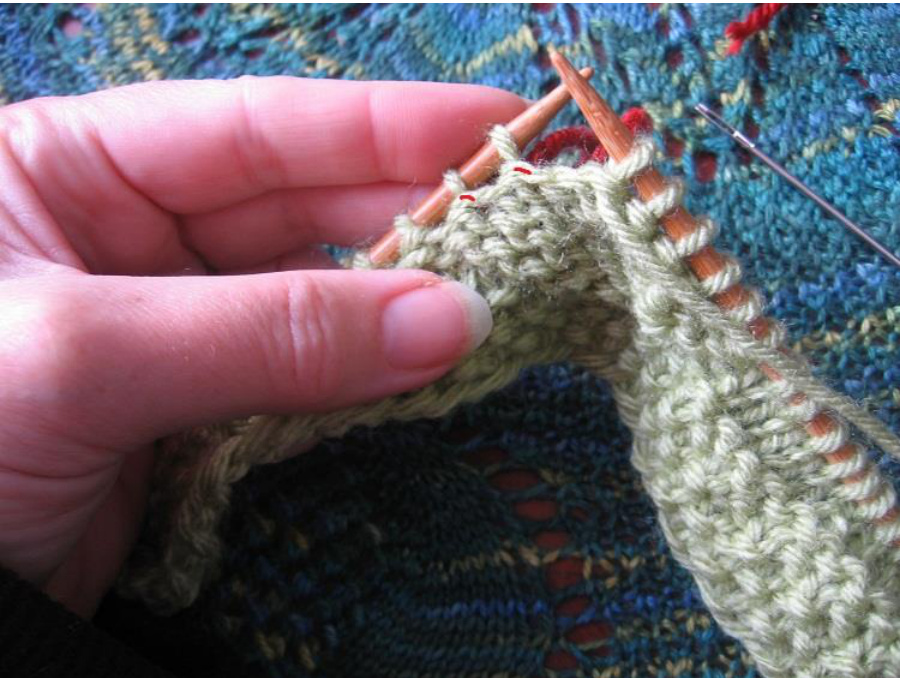
Slip the rest of the stitch back to the left needle to join its wrap
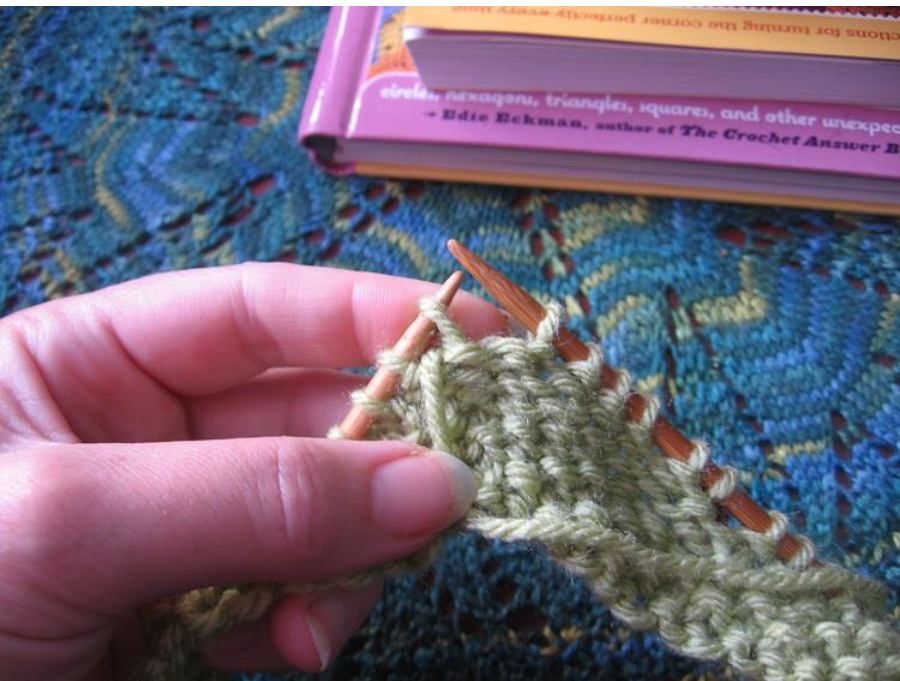
And knit the two together. Some people slip the wrap over the head of the stitch in a different way. You can see what works well for you. I like to slip it over if I'm doing fancy work, and then knit them through the back loops, but it's not necessary for this.
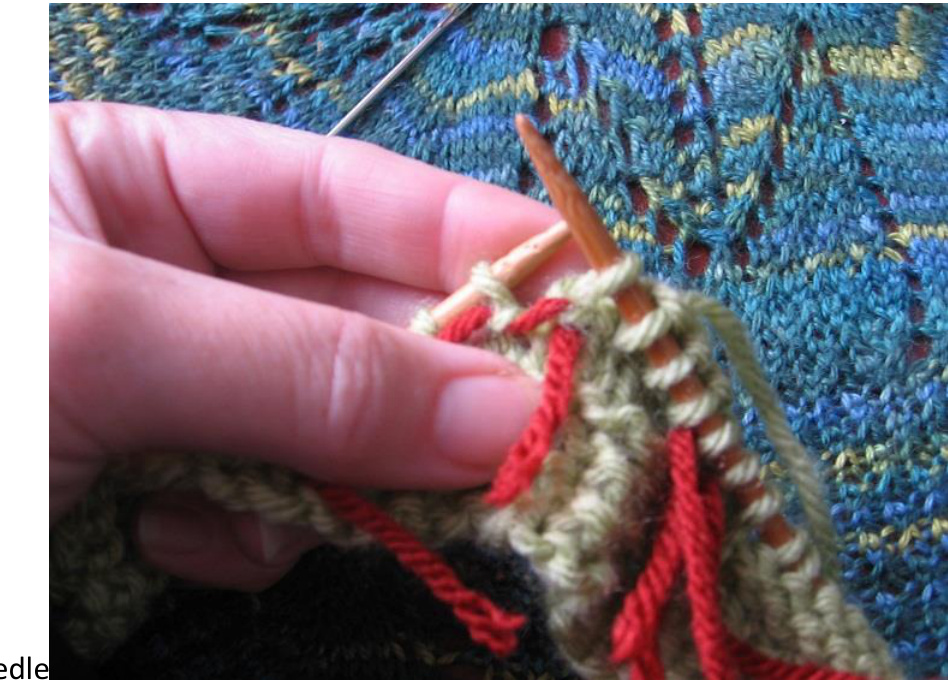
Before you move on, make sure you knit the next stitch with its wrap, too...and finish the row 6 as instructed---k1, and purl through 10 as established, then k1, p1, k1 Row 7: \*\*k1, p1, k1, PM\*\*, k10, p through the 9 stitches as follows: (p6, p next st with wrap, p next st with wrap, p1), k10, \*\*PM, k1, P1, k1\*\* Purling stitches with their wraps is a little trickier. You are almost always left with a diagonal 'line' on the show side. There are ways to avoid this, and you can look them up and practice them, but for today, we'll just 'purl the stitch with its wrap' pretty much the same way we did the knit one. This is what follows the 'p6' part of the instruction in Row 7. You are encountering the two stitches with their wraps.
lip the next stitch with its wrap to the right needle (you can pull the yarn marker ou
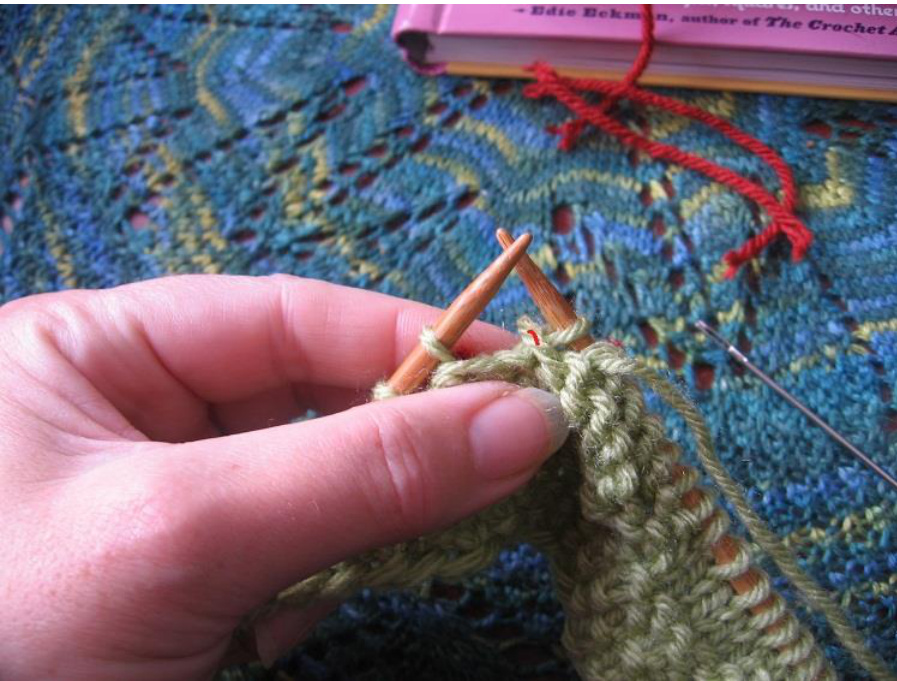
Slip the WRAP to the left needle
Then slip the rest of the stitch to the left needle, to join the wrap
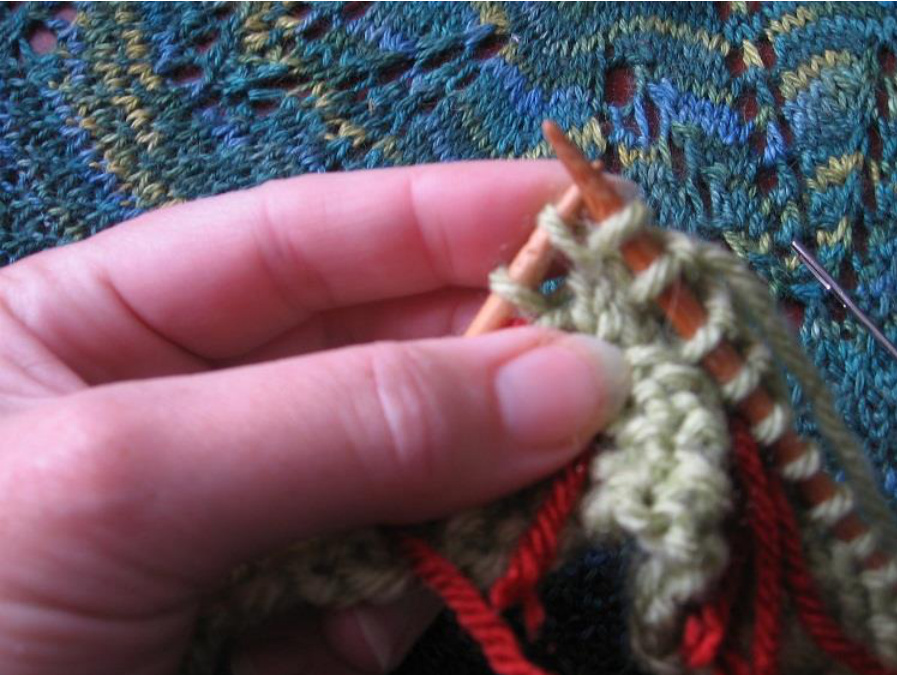
And purl them together. Again, there are needle and stitch gymnastics you COULD be doing here (including lifting the wrap up and over the stitch), but this is basic e is what the work should look like at the end of working both rows of wrap pickups
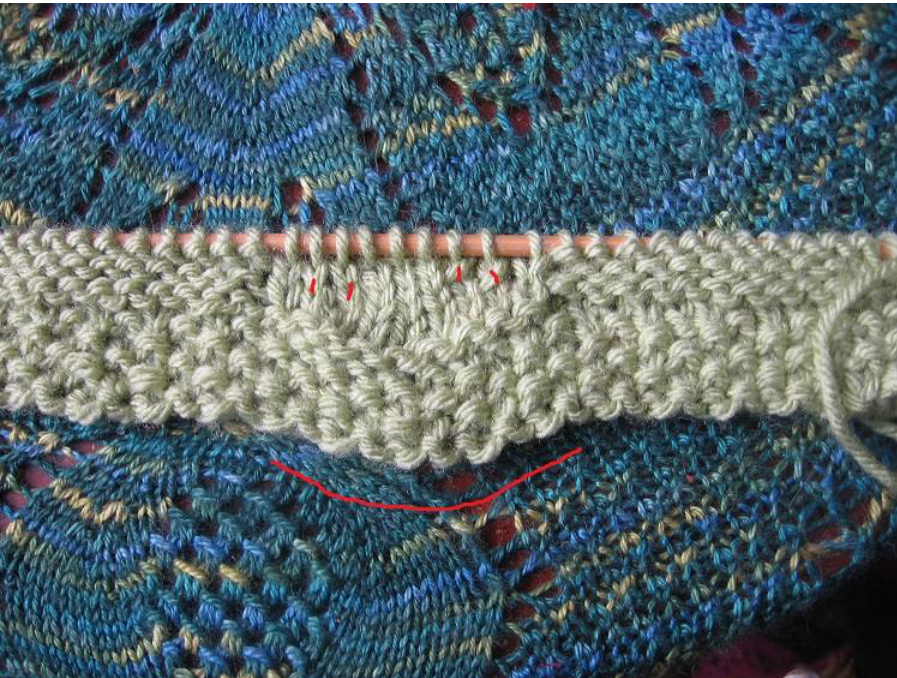
All the following rows have the first 3 and last 3 sts as (k1, p1, k1)—with the marker reminding you that the pattern is beginning or ended. These 3 stitches on each side are not written out. Row 8: Pattern (p8, p2tog, (k1, yo) x 2, kfb next st, k2, kfb next st, (k1, yo) x2, k1, p2tog, p8 Row 9: k9, p5, k1, p3, k1, p5, k9 Row 10: p7, p2tog, k2, yo, k1, yo, k2, pfb next st, k3, pfb next st, k2, yo, k1, yo, k2, p2tog, p7 Row 11 (WS): k8, p7, k2, p3, k2, p7, k8 Row 12: p6, p2tog, k3, yo, k1, yo, k3, pfb, p1, k3, p1, pfb, k3, yo, k1, yo, k3, p2tog, p6 Row 13: k7, p9, k3, p3, k3, p9, k7 Row 14: p5, p2tog, k4, yo, k1, yo, k4, pfb, p2, k3, p2, pfb, k4, yo, k1, yo, k4, p2tog, p5 Row 15: k6, p11, k4, p3, k4, p11, k6 Row 16: p4, p2tog, ssk, k7, k2tog, pfb, p3, k3, p3, pfb, ssk, k7, k2tog, p2tog, p4 Row 17: k5, p9, k5, p3, k5, p9, k5 Row 18: p3, p2tog, ssk, k5, k2tog, pfb, p4, k3, p4, pfb, ssk, k5, k2tog, p2tog, p3 Row 19: k4, p7, k6, p3, k6, p7, k4 Row 20: p2, p2tog, ssk, k3, k2tog, pfb, p5, (k1, M1) x 2, k1, p5, pfb, ssk, k3, k2tog, p2tog, p2 Row 21: k3, (p5, k7) x 2, p5, k3 Row 22: p1, p2tog, ssk, k1, k2tog, pfb, p6, k1, M1, k1, yo, k1, yo, k1, M1, k1, p6, pfb, ssk, k1, k2tog, p2tog, p1 Row 23: k2, p3, k8, p9, k8, p3, k2 Row 24: p1, pfb, sk2p, p8, k4, yo, k1, yo, k4 ....p8, sk2p, pfb, p1
ROW 25: WS K12, p11, k12 ROW 26: p8, p2tog, p2, k5, yo, k1, yo, k5, p2, p2tog, p8 ROW 27: k11, p13, k11 ROW 28: p11, ssk, k4, yo, k1, yo, k4, k2tog, p11 ROW 29: k11, p13, k11 ROW 30: p11, ssk, (k3, yo) x 2, k3, k2tog, p11 ROW 31: k11, p13, k11 ROW 32: p11, ssk, k2, yo, k2tog, yo, k1, yo, ssk, yo, k2, k2tog, p11 ROW 33: k11, p13, k11 ROW 34: p11, sk, k1, yo, k2tog, yo, k3, yo, sk, yo, k1, k2tog, p11 ROW 35: k11, p13, k11 ROW 36: p11, ssk, k1, yo, ssk, yo, k3, yo, k2tog, yo, k1, k2tog, p11 ROW 37: k13, p9, k13 ROW 38: p13, k1, yo, ssk, yo, sk2p, yo k2tog, yo, k1, p13 ROW 39: k14, p7, k14 ROW 4o: p14, k1, yo, ssk, k1, k2tog, yo, k1, p14 ROW 41: k15, p5, k15 ROW 42: p2tog, p13, k1, yo, sk2p, yo, k1, p13, p2tog ROW 43: k13, k2tog, k3, k2tog, k13 ROW 44: p31 ROW 45: k31 ROW 46: Including border: k1, p1, k1, p1, k1, p1, k1, (p2tog, k1, p1, k1, p1, k1) x 4 , p1, k1 ROW 47: seed ROW 48: seed ROW 49: seed ROW 5o: bind off in seed If you want a shorter block, work 2 rows of seed at the beginning and end and consider leaving out rows 44 and 45. That will reduce the total row count by 6.
\*\*Row 6 in normal write-up
k1, p1, k1, p10, k7, w&t the next st, p5, w&t the next st, k4, w&t the next st, p3, w&t the next st, k through the knit stitches, knitting with wraps as they are encountered as follows: (k3, k next st with wrap, k next st with wrap, k next st), and purl through 10 as established, then k1, p1, k1


