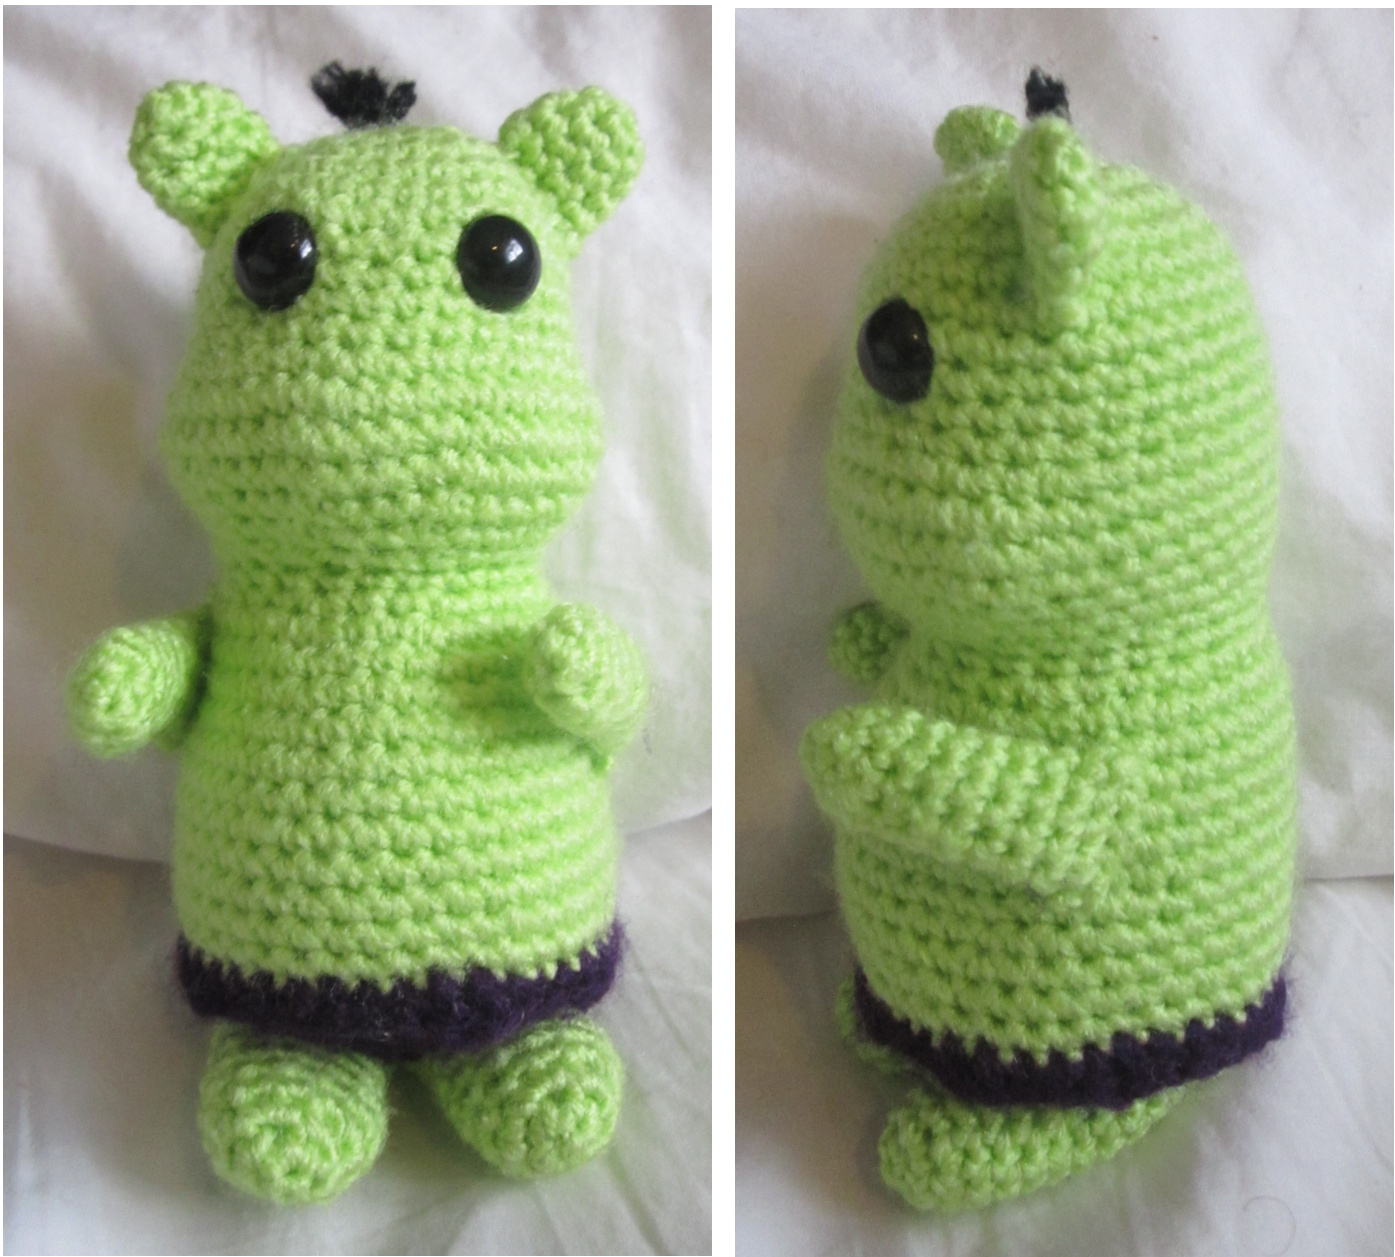
Hulk Hamster Pattern
Materials
WW Yarn- Green, Purple, Black (Barely any) less than 50g's altogether. Stuffing. X2, 12mm safety eyes. 3.00mmhook. Tapestry needle.
Key:
Ch: chain St: stitch Sc: single crochet US Inc: increase, (two stitches in one stitch) Dec: decrease BLO: Back loops only FLO:front loops only
ad and Body
1. Make a 'magic ring' 8 Sc in the ring (8) 2. Inc 8(16) 3. \*Sc 1, Inc 1\* rep 8 times (24) 4. \*Sc 2, Inc 1\* rep 8 times (32) 5. 1 Sc in each St (32) 6. 1 Sc in each St (32) 7. 1Sc in each St (32) 8. 1 Sc in each St (32) 9. 1 Sc in each St (32) 10.1 Sc in each St (32) 11.1 Sc in each St (32) Note: This is where you need to really READ the instruction as to where the increases and decreases go, some willrequire you only do decreases in half of a Rnd. Eyes are put in between the 8th and 9th Rnd, with 7 St's appart. 12.lnc 1, Sc 1, Inc 1, Sc 1, Inc 1, Sc2, Inc 2, Sc 2, Inc 1, Sc 1, Inc 1, Sc 1, Inc 1, Sc 16 (40) 13.Sc 3, Inc 1, Sc 1, Inc 1, Sc 13, Inc 1, Sc 1, Inc 1, Sc 18 (44) 14.1 Sc in each St (44) 15.Sc 4, Dec 1, Sc 1, Dec 1, Sc 1, Dec 1, Sc 17 (40) 16.Sc 2, \*Sc 3, Dec1\* rep 4 times, Sc 18 (36) 17.Sc 2, \*Sc 2, Dec1\* rep 4 times, Sc 18 (32) 18.\*Sc 2, Dec1\* rep 8 times (24) Begin stuffing the head and continue to stuff the body as you make the body. Add extra stuffing to the cheeks for cuteness. 19.Sc 2, \*FLO Sc 12\*, Sc 10 (24) 20.\*Sc 2, Inc 1\* rep 8 times (32) 21.Sc 4, \*Sc 3, Inc 1\* rep 4 times, Sc12 (36) 22.1 Sc in each St (36) 23.Sc 4, \*sc 8, Inc 1\* rep 4 times, Sc 16 (40) 24.1 Sc in each St (40) 25.1 Sc in each St (40) 26.1 Sc in each St (40) 27.1 Sc in each St (40) 28.1 Sc in each St (40) 29.1 Sc in each St (40) 30.1 Sc in each St (40) 31.1 Sc in each St (40) 32.1 Sc in each St (40) 33.1 Sc in each St (40) (Switch to purple) 34.1 Sc in each St (40) 35.\*Sc 3, Dec1\* rep 8 times (32) 36.1 Sc in each St (32) 37.\*Sc 2, Dec1\* rep 8 times (24) 38.\*Sc 1, Dec1\* rep 8 times (16) 39.Dec 8 (8) F/O and leave long tail to sew the hole left shut.
Arms (make 2)
1. Make a 'magic ring' 4 Sc in the ring (4) 2. \*Sc 1, Inc 1\* rep 2 times (6) 3. \*Sc 2, Inc 1\* rep 2 times (8) 4. 1 Sc in each St (8) 5. 1 Sc in each St (8) 6. 1 Sc in each St (8) 7. 1 Sc in each St (8) 8. 1 Sc in each St (8) 9. 1 Sc in each St (8) 10.1 Sc in each St (8) 11. Flatten the piece, Ch 1and Sc the first and last St's together 4 times (4) F/O stuff lightly and sew the arm closed.
Feet (make 2)
1. Make a 'magic ring' 4 Sc in the ring (4) 2. Inc 4 (8) 3. \*Sc 1, Inc 1\* rep 4 times (12) 4. 1 Sc in each St (12) 5. 1 Sc in each St (12) 6. 1 Sc in each St (12) 7. 1 Sc in each St (12) 8. 1 Sc in each St (12) 9. 1 Sc in each St (12) 10.1 Sc in each St (12) 11.1 Sc in each St (12) 12.1 Sc in each St (12) 13.Dec 6 (6) Stuff lightly 14.Flatten the piece, Ch 1and Sc the first and last St's together 3 times (3) F/O and leave long tail for sewing
Ears (make 2)
1. Make a 'magic ring' 4 Sc in the ring (4) 2. \*Sc 1, Inc 1\* rep 2times (6) 3. \*Sc 2, Inc 1\* rep 2 times (8) 4. \*Sc 3, Inc 1\* rep 2 times (10) 5. \*Sc 3, Dec1\* rep 2 times (8) F/O and leave long tail for sewing.
Assembly
Ears are sewn into the 4th-7th Rnds and parrallel to each other. Arms are sewn in 5mm behind the ears and sewn in around Rnd 22 - 27. Feet are sewn into the bottom, with all stitching pulled tight to flatten the feet. Hair is simply 2 short pieces of black yarn Tied to the top of his head for a cute little hair cut.


