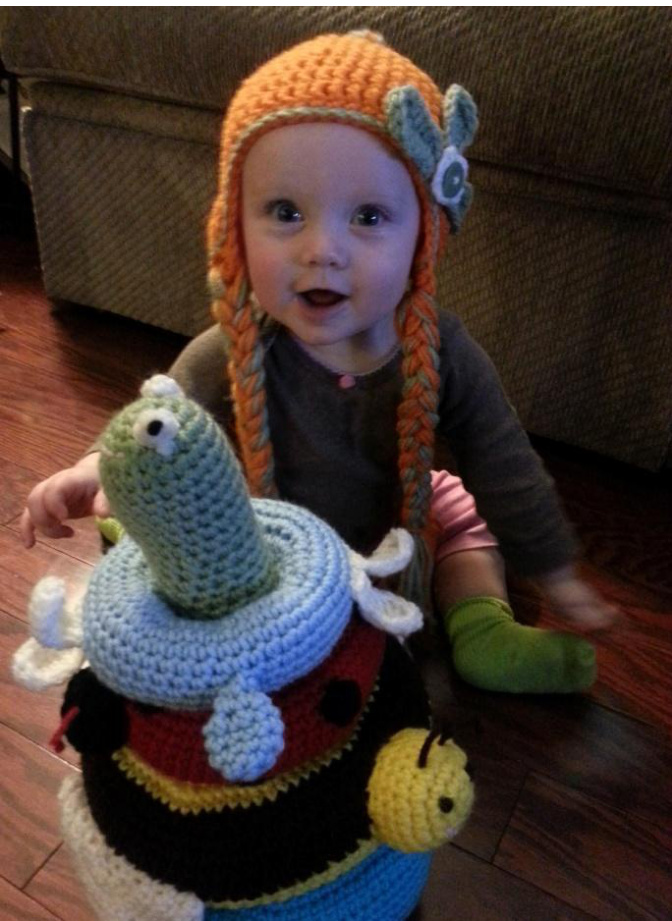
SPRINGTIME BABY SPRITE HAT BY CRAFTY RIDGE
Materials:
1 skein of red heart worsted weight yarn in orange 1 skein of red heart worsted weight yarn in green 1 skein of red heart worsted weight yarn in white (This is just an idea of what you need on hand. I didn't use anywhere near a whole skein of yarn for this project and feel free to use different colors to fit your own little sprite) H/8-5.00mm crochet hook or an I/9 -5.5 Hook depending on how tight your stitches are. Scissors Yarn needle for sewing
Notes:
\*I did not work in a spiral, I joined the first and last stitch of each row . Chain 2 does not count as a stitch. \* All rows begin with a chain 2. \* Chain does not count as a stitch in this pattern. \* Always start next row in same stitch as CH 1 \* Magic Circle tutorial http://www.youtube.com/watch?v=2Gehu8hL6xQ
Stitches and Techniques used
Magic Circle Ch-Chain SL- Slip Stitch HDC- Half Double Crochet DC- Double Crochet
Hat Base
For a Newborn (0-3 months - 11-13") Row 1: In magic circle, 10dc, join to first dc Row 2: ch 2 (counts as stitch throughout), dc in same stitch, 2dc in every stitch (20 stitches), join with sl st to 1" dc Row 3: ch 2, dc in same stitch, \*dc in next stitch, 2dc in following stitch, repeat from \* (30 stitches), join with sl st to 1" dc Row 4: ch 2, dc in same stitch, \*dc in next 2 stitches, 2dc in following stitch, repeat from \* (40 stitches), join w sl st to 1" dc Row 5- 11: ch 2, dc in each stitch, join with sl st to 1" dc For an Extra Small (3-6 months: 14-16") Row 1: In magic circle, 11dc, join with sl st to 1" dc Row 2: ch 2 (counts as stitch throughout), dc in same stitch, 2dc in every stitch (22 stitches), join with sl st to 1"t dc Row 3: ch 2, dc in same stitch, \*dc in next stitch, 2dc in following stitch, repeat from \* (33 stitches), join with sl st to 1" dc Row 4: ch 2, dc in same stitch, \*dc in next 2 stitches, 2dc in following stitch, repeat from \* (44 stitches), join with sl st to 1" dc Row 5- 12: ch 2, dc in each stitch (44 stitches), join with sl st to 1"t dc For a Small (6 - 18 months: 16-18") Row 1: In magic circle, 12dc, join with sl st to 1"t dc Row 2: ch 2 (counts as stitch throughout), dc in same stitch, 2dc in every stitch (24 stitches), join with sl st to 1"t dc Row 3: ch 2, dc in same stitch, \*dc in next stitch, 2dc in following stitch, repeat from \* (36 stitches), join with sl st to 1" dc Row 4: ch 2, dc in same stitch, \*dc in next 2 stitches, 2dc in following stitch, repeat from \* (48 stitches), join Row 5- 13: ch 2, dc in each stitch (48 stitches), join with sl st to 1"t dc For a Medium (18 months - 3T: 18-20") Row 1: In magic circle, 13dc, join with sl st to 1" dc Row 2: ch 2 (counts as stitch throughout), dc in same stitch, 2dc in every stitch (26 stitches), join with sl st to 1"t dc Row 3: ch 2, dc in same stitch, \*dc in next stitch, 2dc in following stitch, repeat from \* (39 stitches), join with sl st to 1" dc Row 4: ch 2, dc in same stitch, \*dc in next 2 stitches, 2dc in following stitch, repeat from \* (52 stitches), join with sl st to 1" dc Row 5- 14: ch 2, dc in each stitch (52 stitches), join with sl st to 1" dc For a Large (3T - Adult S: 20-23") Row 1: In magic circle, 12dc, join with sl st to 1" dc Row 2: ch 2 (counts as stitch throughout), dc in same stitch, 2dc in every stitch (24 stitches), join with sl st to 1" dc Row 3: ch 2, dc in same stitch, \*dc in next stitch, 2dc in following stitch, repeat from \* (36 stitches), join with sl st to 1" dc Row 4: ch 2, dc in same stitch, \*dc in next 2 stitches, 2dc in following stitch, repeat from \* (48 stitches), join with sl st to 1" dc Row 5: ch 2, dc in same stitch, \*dc in next 3 stitches, 2dc in following stitch, repeat from \* (60 stitches), join with sl st to 1" dc Row 6 - 15: ch 2, dc in each stitch (60 stitches), join with sl st to 1" dc
Ear flaps
Newborn 0-3 months the earflaps should be about 16 stitches apart and 6 stiches Wide 3-6 months the earflaps should be about 18 stitches apart and about 8 stitches wide 6-18 months the earflaps should be 20 stitches apart, and 8 stitches wide 18 months -3T the earflaps should be about 22 stitches apart, and 8 stitches wide 3T- adult the earflaps should be 24 stitches apart, and 8-10 stitches wide Find center front of hat and mark for reference. Count out space between earflaps and mark with stitch markers Row 1: Starting at reference point on right side of hat hdc in next 6, 8 or 10 st, ch 1 and turn Row 2: hdc in each st, ch 1, turn Row 3: hdc dec in next st, hdc across to end and do a hdc dec in last 2 st, ch 1, turn for 18 months and up continue to row 6 Row 4: Ch 4, slip stitch in last stitch, tie off and leave extra for tassels Row 5: Repeat on other side of cap at reference point Row 6: repeat Row 2 Row 7: repeat Row 3 until you are at 4 hdc Repeat Row: 4:
Finishing Hat Base:
sc around edge of hat putting 5 sc in each ch 4 of ear flaps. Leaves (make 2) 1. Ch 7 2. Sc in 2"d ch from the hook, sc in 1, hdc in next 2, 1 dc in next, 7 dc in last stitch, turn and working on the other side of your chain stitch, 1 dc in next stitch, hdc in next 2, sc in 2, sl st, leave tail for sewing
Flower
1. Ch 2 2. 5 sc in 2nd ch from hook 3. Sc in 1" ch, \*ch 3, sc in next st, repeat from \* 4 times, sl st 4. (sc, hdc, sc) in each ch 3 section, sl stitch into center and leave tail for sewing
Assembly
Using orange and green yarn cut 20, 25 inch lengths, separate into 2 groups, pull each group through ch 4 hole at end of ear flaps. Even lengths out and then braid tie with a single strand from braid. Cut 15, 40 inch lengths, separate in 2's, fold in half and pull through holes between stitches in round 1 and 2, even lengths out and braid them to form the main braid pictured at the top of the hat Slip stitch with green accent yarn around edge of cap and top around braid for vine detail. Attach leaves to flower and then sew to hat near front edge, sew extra yarn into cap and trim This is an original pattern by Crafty Ridge Please do not resale or distribute this pattern as your own, however you are more then welcome to sell items you make from the pattern just please remember to acknowledge Crafty Ridge as the designer. Thank you www.CraftyRidge.comwww.facebook.com/CraftyRidge @CraftyRidge of Twitter CraftyRidge @ gmail.com


