Little Owl's Hut www.LittleOwlsHut.com
Crochet Pattern
By Galina Astashova
Skill level: easy

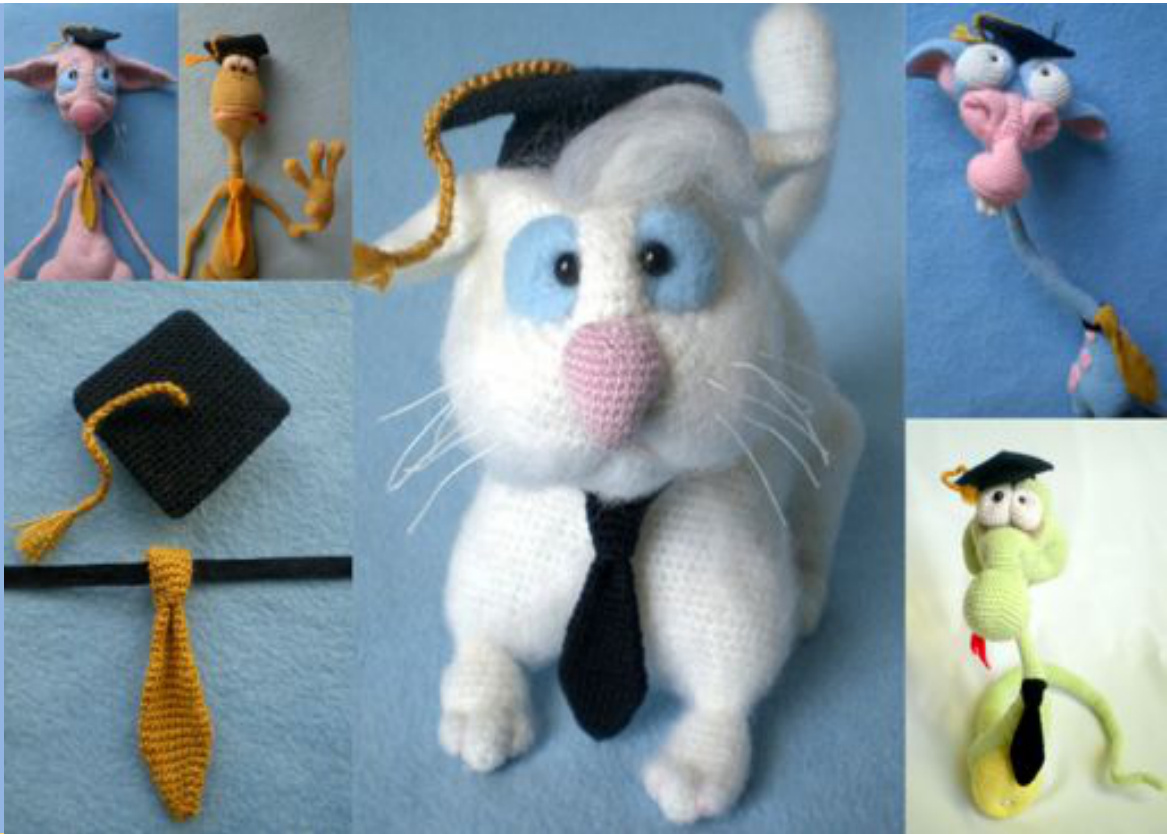
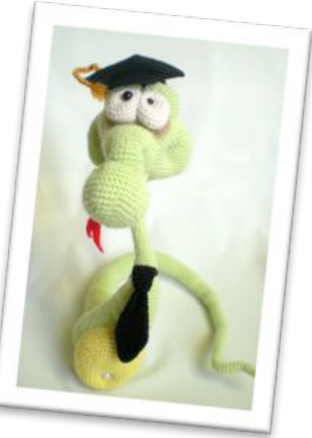
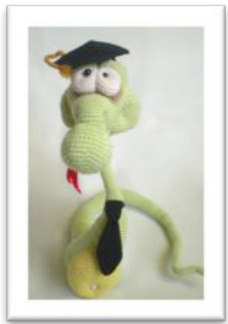
Graduation hat and tie for toys
About this pattern
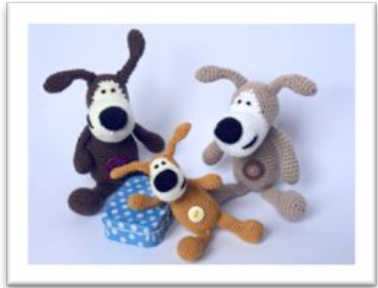
Hat is crocheted in continuous spirals without joining the rounds. You will need a stitch marker to keep track of where the beginning of each round starts. Move the marker up to the first stitch of the next round after finishing the previous one. If you have one of our patterns of toys with wire frame inside like: Cat Fillimon, Frog Kwak, Giraffe George, White Cat or Snake you may want to crochet new outfit for them for a special occasion.

Graduation hat and tie a good addition to those patterns.
I use USA terminology for my pattern (don't worry if you use UK terms, all the differences are explained in the pattern). Happy crocheting! This pattern is easy to follow with step-by-step instructions.
Finished size
Materials and tools
yarn:
1. Lace / 2 ply - for the hat and tie. I used black Iris (100% Cotton - 164 yards (150 meters)/ 25 grams (0.88 ounces)). 2. Scrap of yarn Lace / 2 ply (yellow, mustard or gold) - for tassel I used gold Iris (100% Cotton - 164 yards (150 meters)/ 25 grams (0.88 ounces). Hook 1 mm Finished size approx.: square top - 4.5 x 4.5 cm (1.7 x 1.7 inches), diameter of the cap - 3 cm (1.17 inches), tie 5 cm (2 inches) long. Needle for sewing Stitch marker Plastic lid of disposable container approx. 4.5 x 4.5 cm (1.7 x 1.7 inches) Narrow satin ribbon - 15 cm (6 inches)
Tip (size)
Accessories needed to be scaled according to the size of your toy and you may need to use heavier weight yarn and bigger hook to crochet them (if you used thicker yarn to crochet toys). Yarn for this hat and tie should be approximately 2 times thinner than the yarn you used to crochet toy.
Abbreviations
You will need:
ch = chain inc = increasing (2 sc in 1 st) ins = insert dec = decreasing (sc2tog) dc = double crochet sc2tog = single crochet two stitches together sc3tog = double dec = ddec = single crochet three stitches together rnd = round st(s) = stitch(es) sl st = slip stitch sc = single crochet pic = picture Hook conversion chart
| mm US | UK |
| 1 Steelhook | Steelhook |
| 12 | 6.5 |
Tip (marker)
If you don't have a stitch marker you can always use scrap of contrasting yarn instead. You can see it in my photos. USA/UK terminology comparison chart.
| Abbreviations USA | Abbreviations UK |
| ch - chain | ch - chain |
| sc - single crochet | dc - double crochet |
| hdc-half double crochet | htr-half treble |
| dc - double crochet | tr - treble |
| tr - treble | dtr -double treble |
| dtr -double treble | tr tr - triple etreble |
| sl st - slip stitch | sl - slip stitch |
Other differences in crochet terminology used:
| Terminology USA | Terminology UK |
| fasten off | cast off |
| skip | miss |
| gauge | tension |
| yarn 1over (yo) | yarnover hook (yoh) |
This pattern is for personal use ONLY.
This pattern is protected under Creative Commons Attribution - Non Commercial - No Derivative Works 3.0 United States License. This pattern may not be copied, shared, or sold in any manner. Any finished items made using this pattern may not be sold for profit without permission from the designer. Make as many as you like, but please just keep them for yourself or give them away. Thank you!

Graduation hat
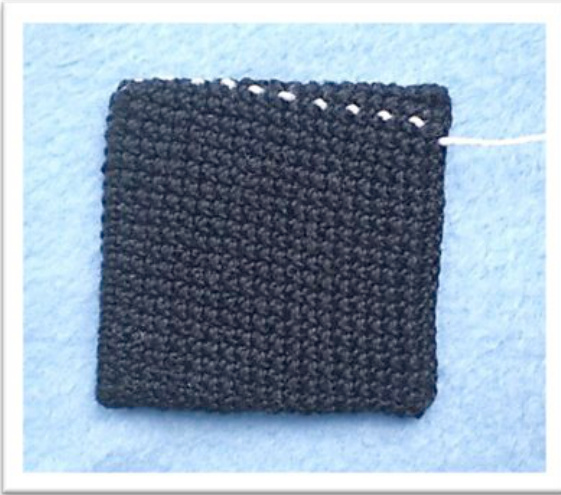
Row 1: ch 21 Work in rounds. Rnd 2: Work along the chain starting from the 2"d ch from the hook (20 sc on one side of the chain and 20 sc on another) = 40 sts Rnds 3-20: 1 sc in each stitch around = 40 sts You shall get a square pocket. Make it flat.
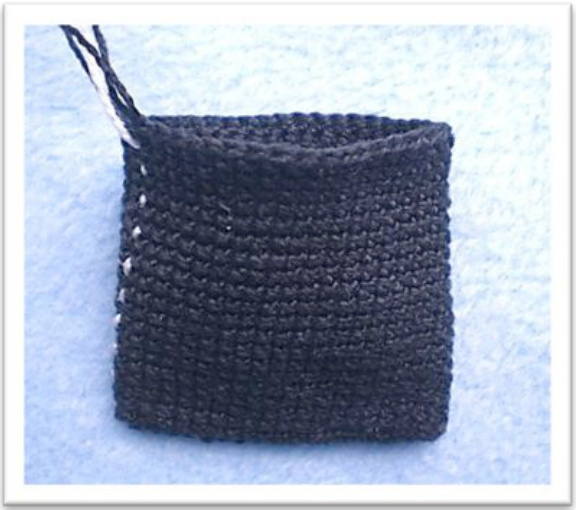
Measure width of the crochet pocket and cut a square from clear plastic. My one is 4.5 x 4.5 cm (1.7 x 1.7 inches). I used lid of disposable container.
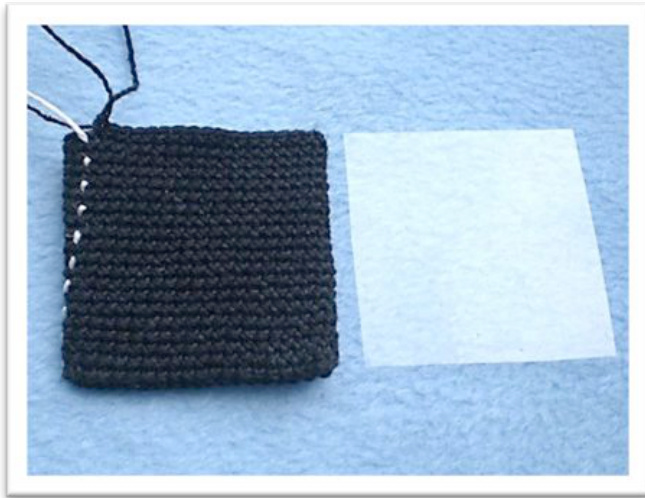
Work 3 sc (to get to the corner of our square), insert plastic square into our pocket and work 20 sc along its Open side hooking through sts of opposite sides.
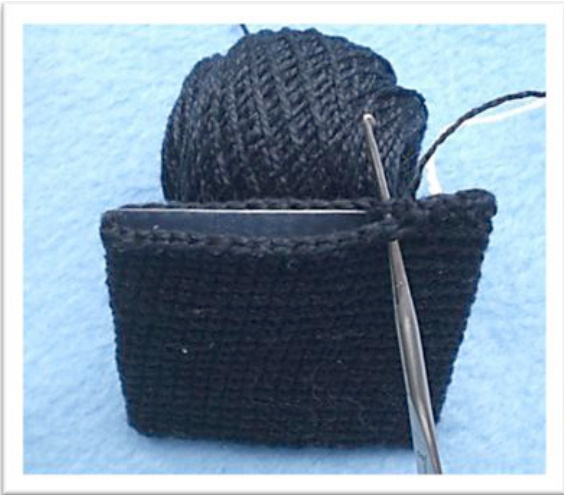
Fasten off and weave in loose ends.
Thread a needle with contrasting thread and mark a circle in the middle of the square.
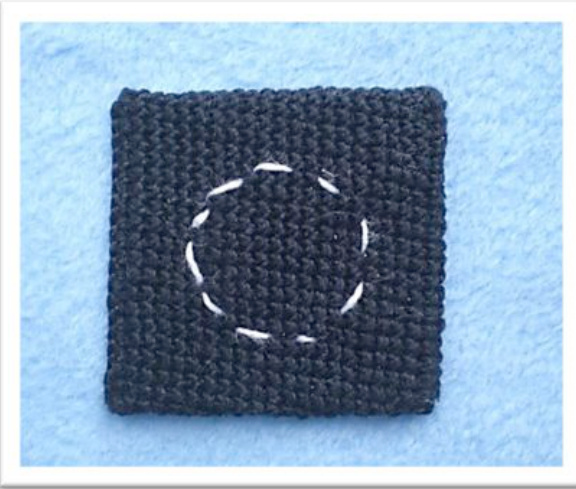
Work 35 sts on it starting in a corner.
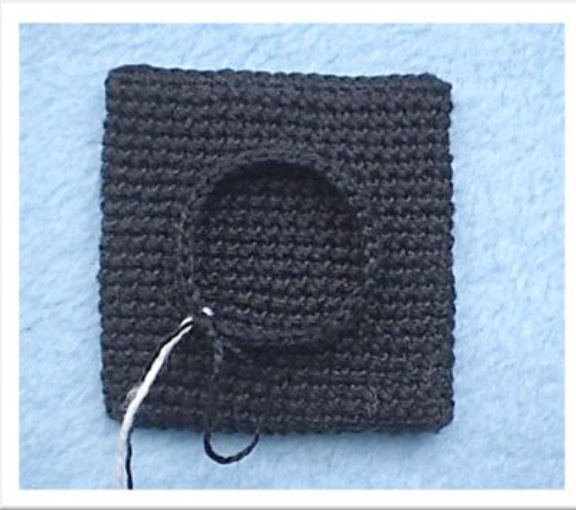
Rnd 1,2: 1 sc in each stitch around = 35 sts Rnd 3: (2 sc, 1 inc) x 11 times, 2 sc = 46 sts Rnd 4: 1 sc in each stitch around = 46 sts Rnd 5: (1 sc, 1 dc, 1 sc), 45 sc = 48 sts Rnd 6: 1 sc, 1 inc, 46 sc = 49 sts Rnd 7: 3 sc. Fasten off and weave in loose ends. A gore shall be formed at the front.


Tassel
Fasten yellow, mustard or gold color thread in the center of top of the cap, leaving loose end.
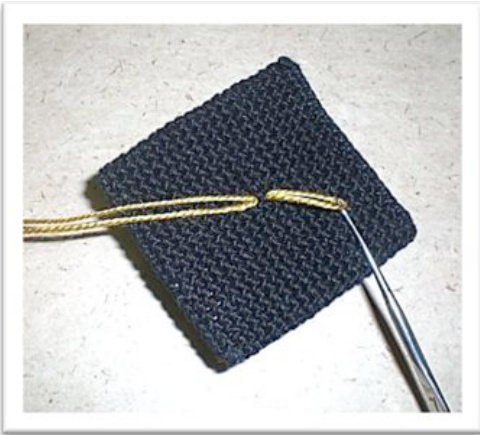
Work 25 ch using 2 threads (main thread and loose end).
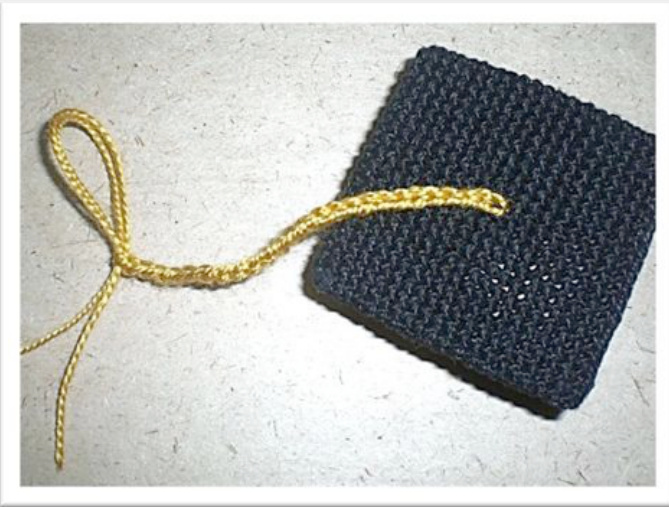
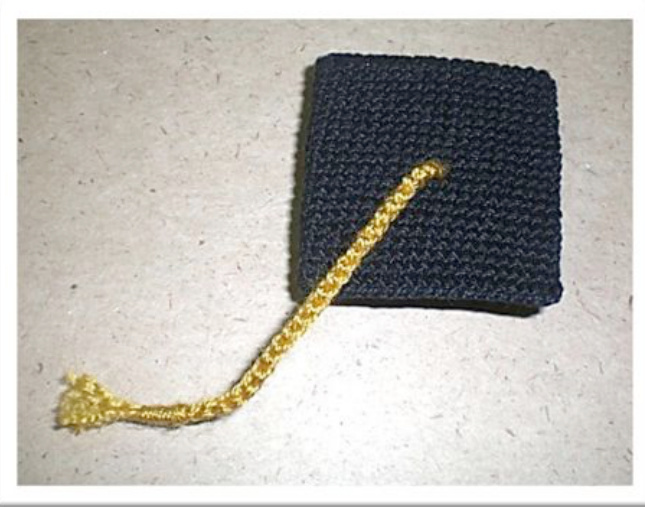
Make a big loop at the end of chain and form a tassel with 6 threads, winding its base. Fasten off, cut and nap the ends.
Tie
Rnd 1: 6 sc in magic ring Rnd 2: 1 sc, 1 inc, 2 sc, 1 inc, 1 sc. = 8 sts Rnd 3: 2 sc, 1 inc, 3 sc, 1 inc, 1 sc. = 10 sts Rnd 4: 3 sc, 1 inc, 4 sc, 1 inc, 1 sc. = 12 sts Rnd 5: 4 sc, 1 inc, 5 sc, 1 inc, 1 sc. = 14 sts Rnd 6: 5 sc, 1 inc, 6 sc, 1 inc, 1 sc. = 16 sts Rnd 7: 6 sc, 1 inc, 7 sc, 1 inc, 1 sc. = 18 sts Rnd 8: 7 sc, 1 inc, 8 sc, 1 inc, 1 sc. = 20 sts Rnd 9: 8 sc, 1 inc, 9 sc, 1 inc, 1 sc. = 22 sts Rnd 10: 1 sc in each stitch around = 22 sts Rnd 11: 7 sc, 1 dec, 9 sc, 1 dec, 2 sc = 20 sts Rnd 12-14: 1 sc in each stitch around = 20 sts Rnd 15: 7 sc, 1 dec, 8 sc, 1 dec, 1 sc = 18 sts Rnd 16: 1 sc in each stitch around = 18 sts Rnd 17: 7 sc, 1 dec, 7 sc, 1 dec = 16 sts Rnd 18: 14 sc, 1 dec = 15 sts Rnd 19: 6 sc, 1 dec, 7 sc = 14 sts Rnd 20-32: 1 sc in each stitch around = 14 sc Rnd 33: 5 sc (to get to the corner), fold the tie in half a work 7 sc hooking through sts of opposite sides. Fasten off, leaving small loose end to form a knot at the tie
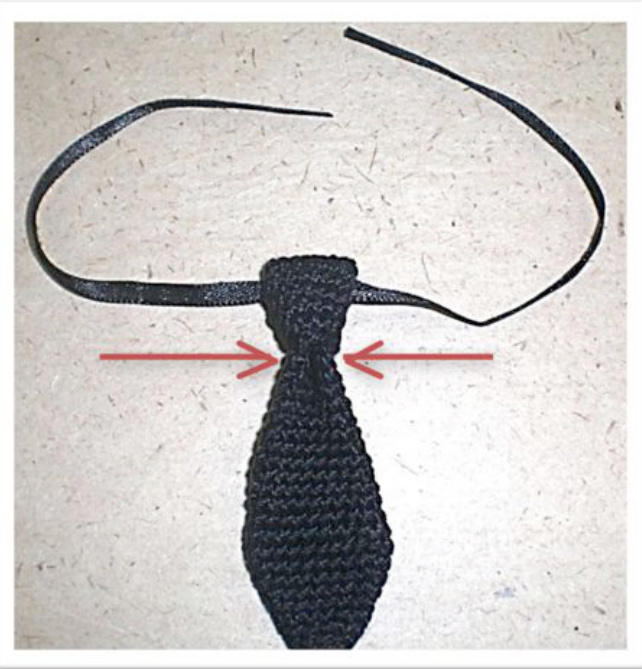
Forming a knot at the tie
Make a fold with your fingers approx. in the middle of the tie.
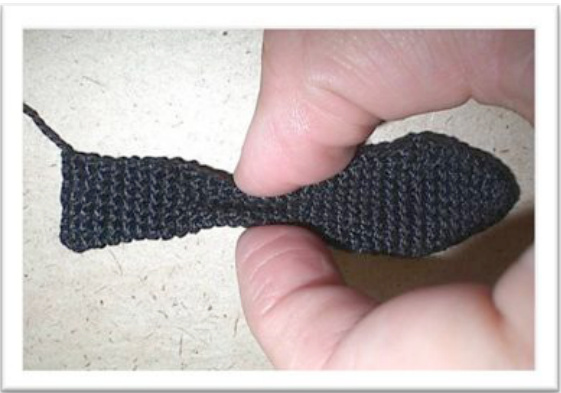
Fold top part of the tie to the front, inserting narrow satin ribbon into the fold.

Fasten the knot with several needle stitches, sewing the corners of the last round at the back side.
FREE Crochet Pattern at www.LittleOwlsHut.com
Crochet patterns available for sale at Little Owl's Hut www.LittleOwlsHut.com

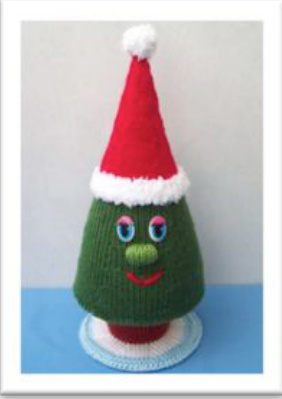
Christmas tree
Snake
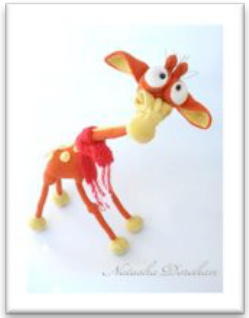
Giraffe George

Cat Siam
Coming soon!
Subscribe to our Newsletter at www.LittleOwlsHut.com to receive notifications when new patterns are available for sale and get 30%discount when purchased within a few days of the release date.

Cat
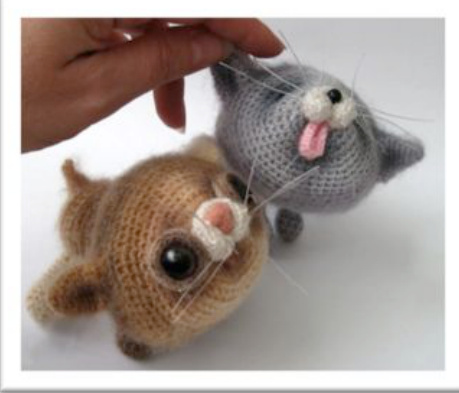
Kitty
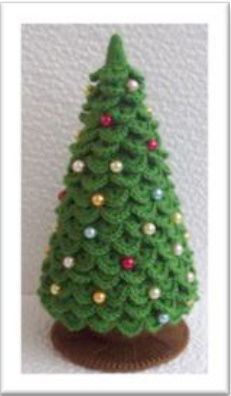
Christmas tree
Christmas tree

Download the free “QRcode APP" for your iPhone/smart-phone and scan this code to take you straight to our website. And much more at www.LittleOwlsHut.com Facebook: https:/ /www.facebook.com/Littleowlshut Twitter: https: / /twitter.com /LittleOwlsHut


