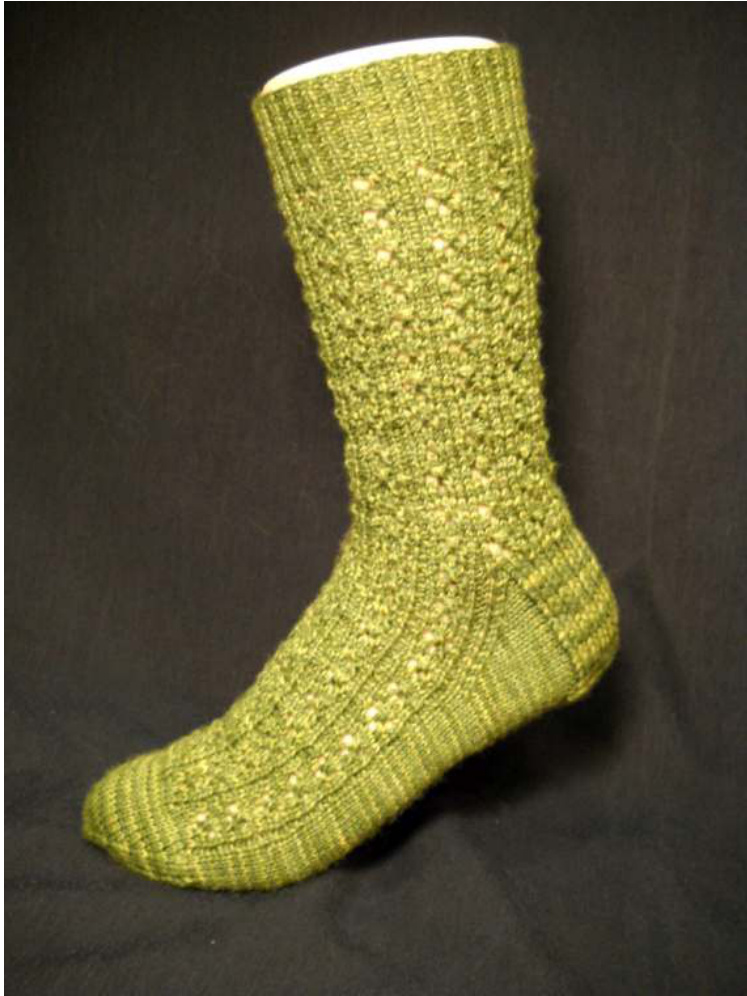
Three Leaf Clover Rib Socks - Detailed
(ladies small/medium) started knitting socks as a way to teach myself how to knit using double pointed needles. Ending up with a sock was a learning experience in itself. (That first sock is hanging on my craft room wall as a reminder of that frustrating time.) When one needle in my favorite set of short wooden double pointed needles snapped in the middle of a complex row, I moved on to using two short circulars, but kept getting distracted and ending up with all the stitches crowded onto just one short circular. So, that's how I learned the magic loop method, quite by accident. Now it's the only method I use to knit socks. Therefore, these instructions are written for knitting the socks using the magic loop method. While there are scores of knitters who thoroughly and frequently enjoy knitting socks, there are many others who feel a bit timid about getting started. The first part of this sock pattern is written for the knitters in the latter group. There are also quick directions (at the end) for those knitters who are comfortable with abbreviations and charts.
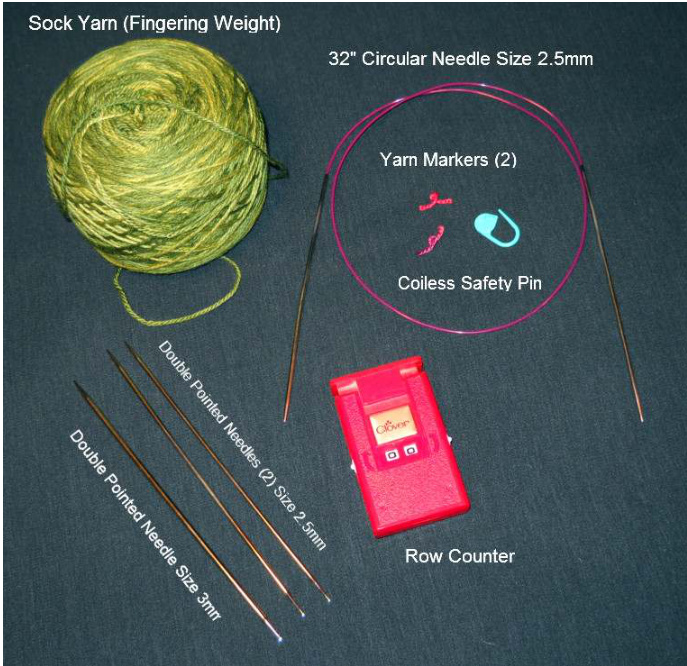
The first part of this pattern is written out in excruciating detail with plenty of photos to help at each stage of the process. I have assumed that the knitter knows how to knit, purl and pick up stitches. When the directions reach the point of using the ssk decrease, I have given detailed instructions explaining how I prefer to make those. You may, of course, make the ssk any way you so desire. For those knitters who prefer (or want to learn how) to knit from a chart, I've also included a chart for the stitch pattern with detailed instructions on how to read and use the chart. The stitch pattern, stitch pattern chart, symbol key, abbreviations, quick instructions, and various other aids are given at the very end of this pattern. It is suggested that the knitter read through all the directions before beginning this pattern. I should also mention that I am a fairly tight knitter. (Hence, the broken wooden double pointed needle.) If you are unable to match my gauge, try using a larger or smaller needle. Also, if you want to make these socks in a different size, I would suggest changing your needle size as a first resort. You can, of course, try these socks on as you knit them, to better judge their snugness and length at any point during the knitting process. I can assure you that I did. Materials 1 skein (437 yards) Heritage Sock Yarn (Cascade Yarns) Yarn: Needles: 2.5 mm circular needle (32") 2.5 mm double pointed needles (2) 3.0 mm double pointed needle (1) Yarn Markers (2) Locking Stitch Marker (1) Row Counter Gauge (stockinette stitch) 9 stitches = 1 inch Note: The number of rows per inch is not as important as matching the stitch count gauge because the socks are knit to a preferred length. The lace pattern has more stretch to it than the stockinette foot will have, therefore some stitches will be eliminated by decreasing at the end of the leg.
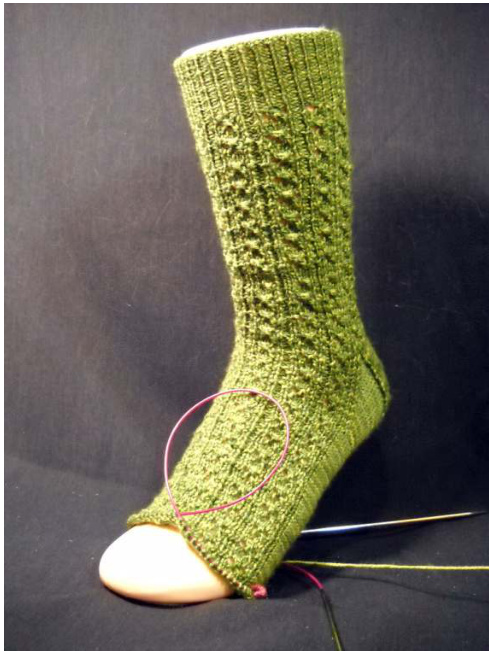
The lace pattern continues across the top of the foot, while the sole is knit in plain stockinette stitch, until the beginning of the toe when all stitches will be knit in stockinette.
Cast On
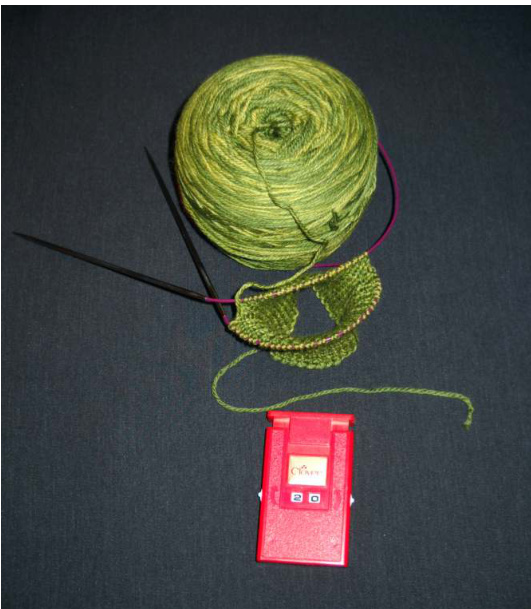
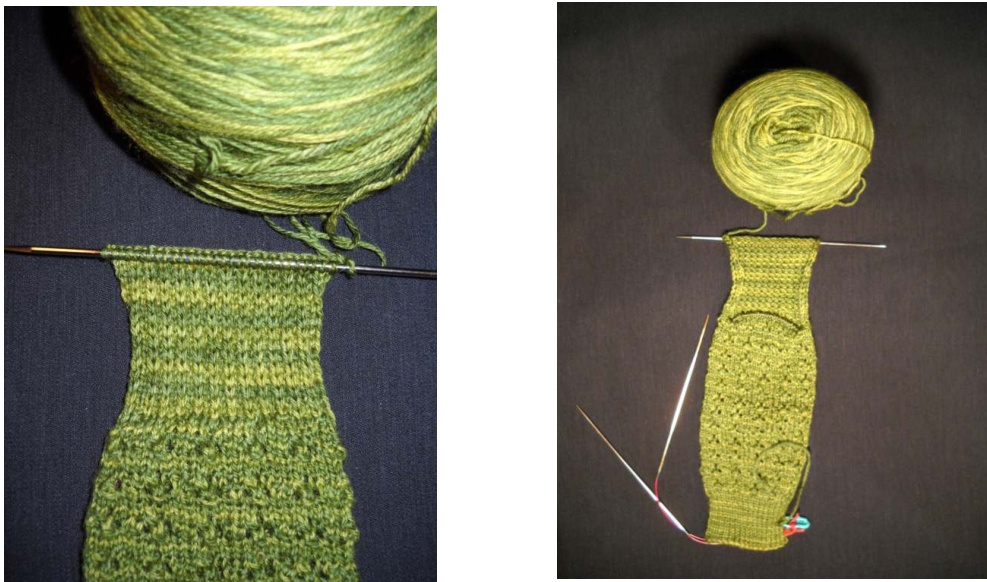
Using the 3.0 mm double pointed needle and the long tail cast on method, cast on 67 stitches (uses approximately 35 inches of yarn for stitches and includes a 6" tail). Note: Using a needle sized at least one size larger than the working needle helps ensure that the cast on edge is not too tight. Transfer 34 stitches to the circular needle. Pull cable until stitches are all resting on the cable. Transfer the remaining 33 stitches to the circular needle.
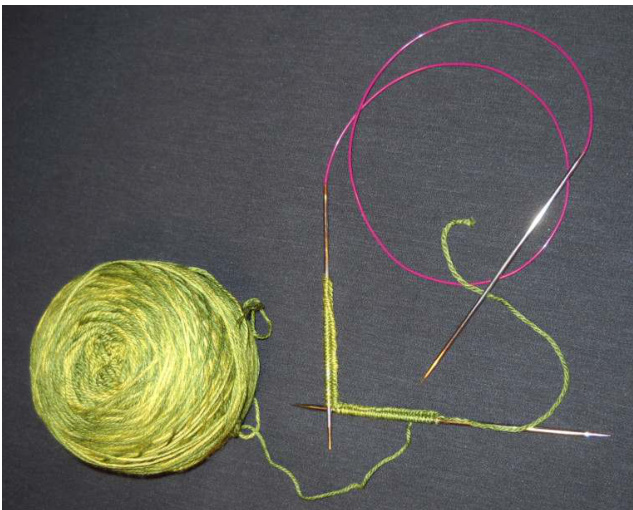
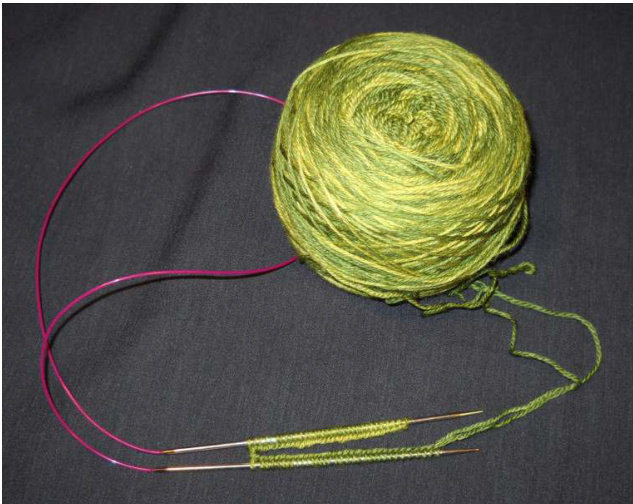
Alternatively, you can transfer all the stitches at one time to the circular needle and then separate them by inserting a needle between two stitches, hooking the cable and then pulling the cable out into a loop. Make sure that none of the stitches fall off the needle tips. Make sure the stitches are not twisted on the needles. You can either use the locking stitch marker (or a regular marker) to show the beginning/end of a round, or simply use the position of the tail as a reminder.
Cuff
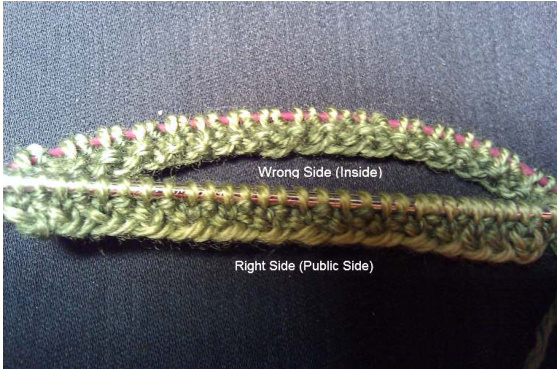
Move first stitch on bottom (or front) needle to become first stitch on top (or back) needle. Knit 2 together. This maneuver joins the round into 66 stitches. (See note below.) Work 1x1 rib (\*knit 1, purl 1; repeat from \* to end of round) - 20 rounds Note: Because I prefer one side over another to be my public side, I begin knitting on the back needle. This will appear to be wrong, as the yarn will be coming from the back needle indicating that normally the first stitch to be knit would be on the front needle. If you prefer the other side, move the extra stitch from the back needle to the front needle, knit those 2 stitches together, and simply begin your first row of knitting on the front needle. My way can be a bit tricky in knitting that first stitch, but it's worth the slight bit of extra effort to me. However you choose to begin, the first 2-3 rows are always the most difficult to accomplish because you are not only trying to form the stitches, but you are also fighting the cable (or the positioning of the inactive needles, if using double pointed needles).
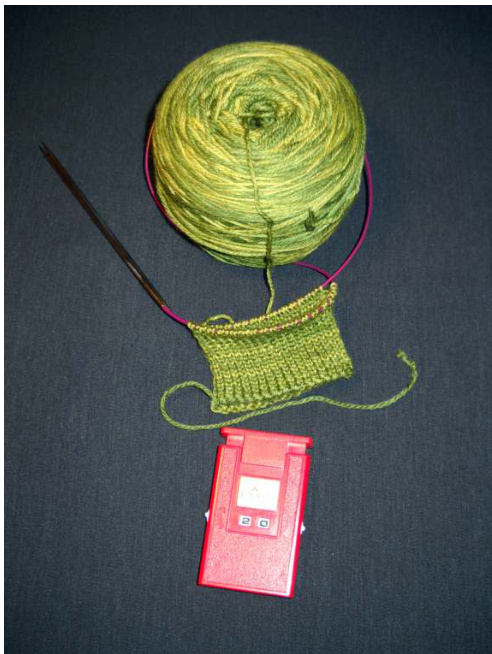
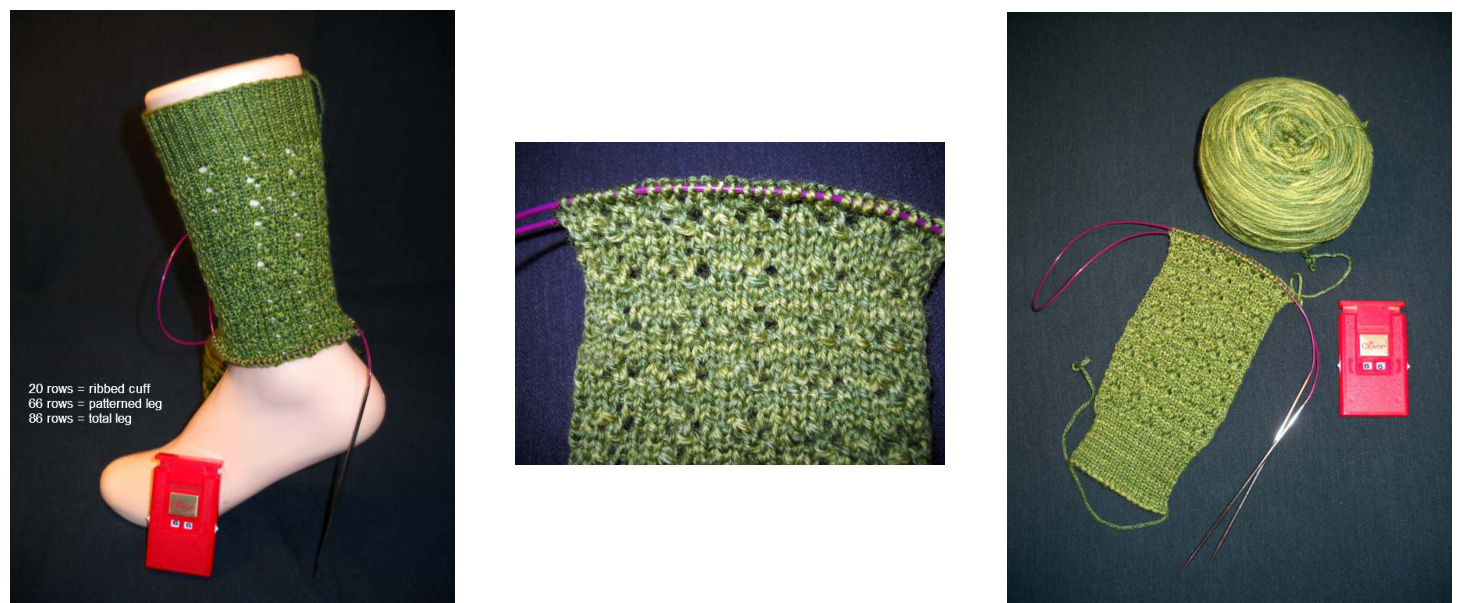
Leg Arrange stitches so that there are 30 on the needle that begins the round, and 36 on the second needle. (Having the stitches arranged this way allows for the completion of the six stitch pattern without having to interrupt it across a round between needles. This will also ensure that the correct number of stitches required for the heel are on the appropriate needle when you have knit to that point in the pattern.) Work in stitch pattern for 72 rounds at which point the leg, including the cuff, measures 7" (or desired length).
Heel
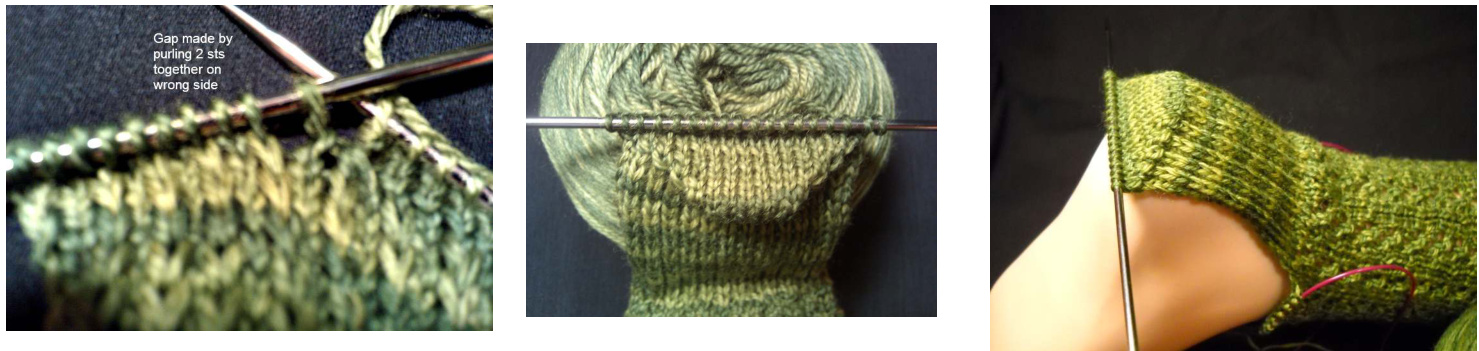
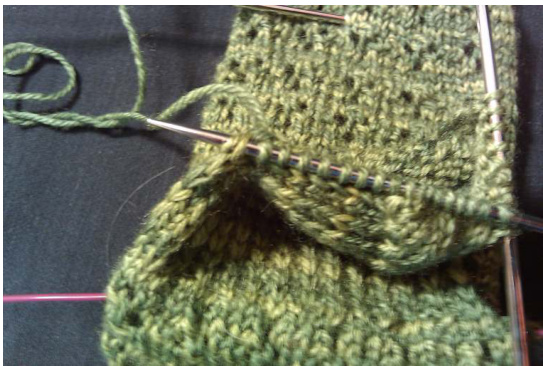
The heel is worked using half the number of stitches required for the entire sock. Using one double pointed needle (2.5mm) and right hand needle (holding 36 stitches) turn work. Slip the first stitch with yarn in front and purl across stitches as follows purl 3, purl 2 together, purl 3, purl 2 together, purl 4, purl 2 together, purl 3, purl 2 together, purl 3, purl 2 together, purl 3, purl 2 together, purl 4. (Six stitches evenly decreased leaving 30 stitches on double pointed needle.) Note: Working the heel will be easier if you thread the dangling needles of the circular needle down inside the leg of the sock to keep them out of the way until needed again. Using the 2.5mm double pointed needles work the heel as follows: Row2: \*Slip 1, Knit 1; repeat from \* across row Row3: Slip 1, purl across row Note: Slip the first stitch by inserting the right hand needle as if to purl and slip the stitch onto the right hand needle without working it. The yarn should remain in whatever position it needs to be for the next stitch: back on knit rows, front on purl rows.) Repeat rows 2 and 3 for 31 rows ending ready to begin a right side row (or until heel measures 2" or desired length).
Heel Cup (turning the heel) Note: Each decrease (purl 2 together and ssk) forms a small gap. On the next row the decrease is made using stitches from both sides of the gap which closes it nicely. Row 1: Slip 1, knit 16, (ssk: slip the first stitch as if to knit, slip the second stitch as if to knit, insert the left needle through both slipped stitches in the front, and knit them together), knit 1, turn work (10 unworked stitches) : Slip 1, purl 5, purl 2 together, purl 1, turn work (10 unworked stitches Row 3: Slip 1, knit 6, (ssk: slip the first stitch as if to knit, slip the second stitch as if to knit, insert the left needle through both slipped stitches in the front, and knit them together), knit1 (8 unworked stitches) Row 4: Slip 1, purl 7, purl 2 together, purl 1 (8 unworked stitches) Page 5 of 12 Row 5: Slip 1, knit 8, (ssk: slip the first stitch as if to knit, slip the second stitch as if to knit, insert the left needle through both slipped stitches in the front, and knit them together), knit 1 (6 unworkedstitches) Row 6: Slip 1, purl 9, purl 2 together, purl 1 (6 unworked stitches) Row 7: Slip 1, knit 10, (ssk: slip the first stitch as if to knit, slip the second stitch as if to knit, insert the left needle through both slipped stitches in the front, and knit them together), knit 1 (4 unworkedstitches) Row 8: Slip 1, purl 11, purl 2 together, purl 1 (4 unworked stitches) Row 9: Slip 1, knit 12, (ssk: slip the first stitch as if to knit, slip the second stitch as if to knit, insert the left needle through both slipped stitches in the front, and knit them together), knit 1 (2 unworkedstitches) Row 10: Slip 1, purl 13, purl 2 together, purl 1 (2 unworked stitches) Row 11: Slip 1, knit 14 , (ssk: slip the first stitch as if to knit, slip the second stitch as if to knit, insert the left needle through both slipped stitches in the front, and knit them together), knit 1 (0 unworkedstitches) Row 12: Slip 1, purl 15 , purl 2 together, purl 1 (0 unworked stitches) 18 stitches on needle
Instep
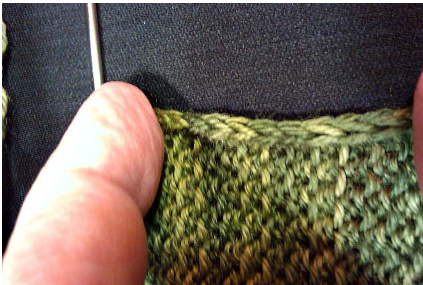
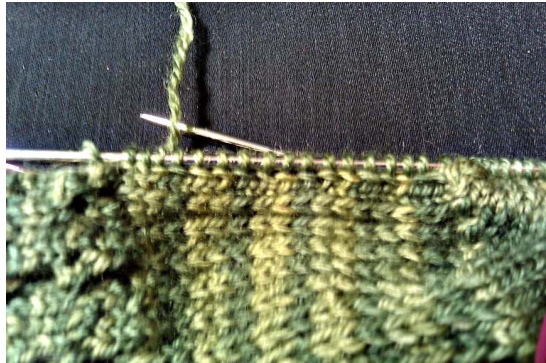
Knit 9 stitches using double pointed needle Knit remaining 9 stitches using circular needle (pull up needle from right side of leg) Pick up 18 stitches along left side of heel (put needle point through both loops of slipped stitches), place marker, pick up 1 additional stitch.
Page 6 of 12
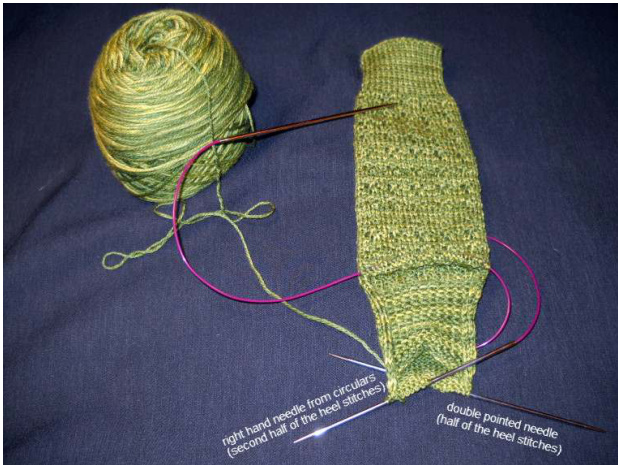
Pick up 18 stitches along right side of heel Knit 9 stitches from double pointed needle. Knit in pattern (row 1 of chart) across instep, place marker (Pull loop of cable through after 12 pattern stitches to re-form Magic Loop.)
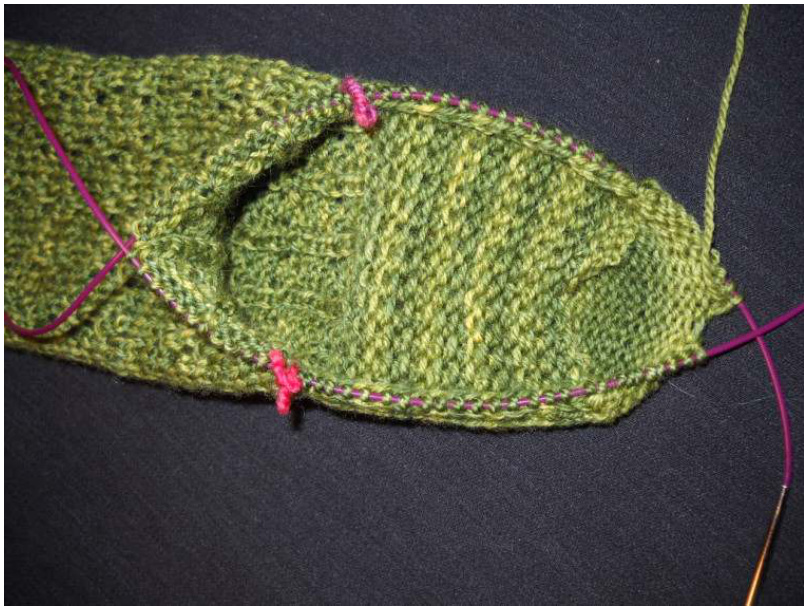
There should be 27 stitches on the first needle before the marker, 13 stitches after the marker, making 40 total stitches on the first needle. There should be 18 stitches on the second half of the needle before the marker, 27 stitches after the marker, making 45 total stitches on the second needle. There should be 85 total stitches on the needles, which will be reduced to 67 stitches to complete the foot. (The extra stitch after the first marker on the first needle is purled and used to delineate the instep pattern from the plain stockinette stitch sole.)
A different way to knit ssk: slip the first stitch as if to knit, slip the second stitch as if to purl, insert the left needle through both stitches in the front, and knit them together. On the next row, knit the stitch made by the ssk through the back loop. This method gives an even appearance to the line of ssk decreases that more closely matches the opposite side that uses the knit two together decreases. Round 2: Knit 24, knit 2 together, knit 1, slip marker, purl 1, work in pattern across 30 stitches, slip marker, knit 1, slip one stitch, slip the next stitch, insert left needle into the front of both slipped stitches on the right needle and knit both together, knit 24. Round 3: Knit 26, slip marker, purl 1, work in pattern across 30 stitches, slip marker, knit 1, knit 1 through the back loop, knit 24. Continue in this manner repeating Rounds 2-3 until the total stitch count has been reduced to 67 stitches. (Decreases are done every other round. The total round count will be 18 rounds for the instep.)
Note: I always use a row counter when knitting socks. Not only am I picky about both socks being as nearly identical as possible, it's easier for me to keep track of where I am in the pattern. While knitting the instep, remember that decreases are always done on the even rows and the odd rows are knit as presented, either in pattern, or in stockinette.
Foot
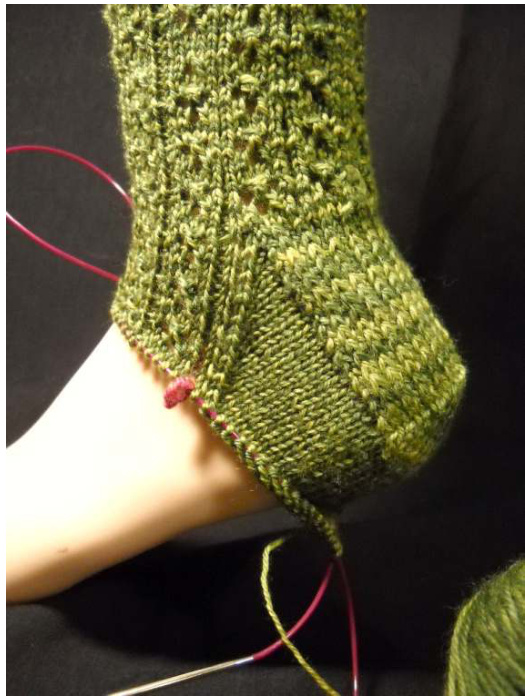
Continue working as established across all stitches without decreasing until you have worked a total of 72 rows, including those from shaping the instep. (Or work as established until the foot measures your preferred length from back of heel to beginning of toes.)
Set up for toe shaping All rounds will be knit in stockinette stitch from this point. Round 73: Knit 16, place marker, knit 2, knit 2 together, knit 7, knit 2 together, knit 7, knit 2 together, knit 13, place marker, knit 16. (64 total stitches) Arrange stitches so that there are 32 stitches on each needle. Round 74: Knit all stitches even Round 75: Knit 13, knit 2 together, knit 1, slip marker, knit 1, slip one stitch, slip the next stitch, insert left needle into the front of both slipped stitches on the right needle and knit both together, knit 26, knit 2 together, knit 1, slip marker, knit 1, slip one stitch, slip the next stitch, insert left needle into the front of both slipped stitches on the right needle and knit both together, knit 13. (4 stitchesdecreased) Round 76: Knit 15, slip marker, knit 1, knit 1 through back loop, knit 28, slip marker, knit 1, knit 1 through back loop, knit 13. (60 total stitches) Round 77: Knit to 3 stitches before marker, knit 2 together, knit 1, slip marker, knit 1, slip one stitch, slip the next stitch, insert left needle into the front of both slipped stitches on the right needle and knit both together, knit to 3 stitches before next marker, knit 2 together, knit 1, slip marker, knit 1, slip one stitch, slip the next stitch, insert left needle into the front of both slipped stitches on the right needle and knit both together, knit to end of round. Round 78: Knit to first marker, slip marker, knit 1, knit 1 through the back loop, knit to next marker, slip marker, knit 1, knit 1 through the back loop, knit to end of round. Repeat Round 77 and Round 78 ( decreasing on odd numbered rows, working even on even numbered rows) until 12 stitches remain on each needle (24 total stitches). (93 total rows for the foot from instep shaping to toe.) Partial Round: Knit 6. Remove markers. Rearrange stitches so that there are 12 stitches on each needle and the decreases are at each end of the needles. Cut yarn leaving approximately 12 inches to use in finishing up the toe.
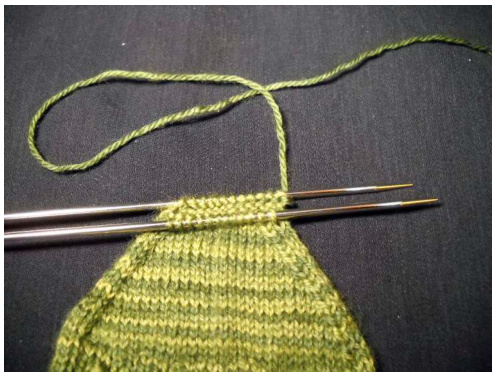
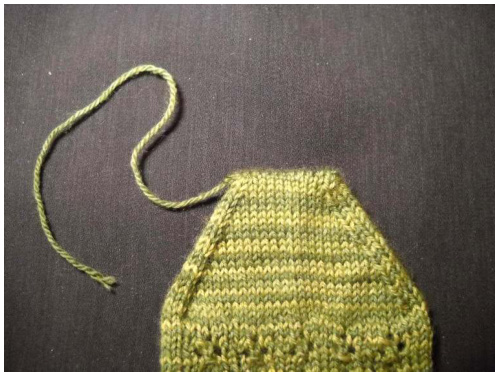
Grafting (or Kitchener Stitch) Graft the stitches together on the needles using a 2.5mm double pointed needle as follows: Line up the needles as shown in the photo with the cut yarn coming from the first stitch on the backneedle. 1. Purl the first stitch on the front needle drawing the yarn all the way through and dropping the purled stitch off the needle. (Remember to always bring the yarn from under and/or between the needles.) 2. Knit the next stitch on the front needle and leave it on the left needle while drawing the yarn all theway through. 3. Knit the first stitch on the back needle. Draw the yarn all the way through and drop the stitch from the needle. 4. Purl the next stitch on the back needle. Draw the yarn all the way through leaving the stitch on the left needle. Repeat these four steps until all stitches have been worked. (Remember that the first two stitches on each needle get attention before moving to the next needle.) As I work these final stitches I repeat to myself: Front needle: purl off, knit on Back needle: knit off, purl on The looseness in the corner will disappear when you thread the tail through to the inside and tug on it a bit before weaving in the tail.
Abbreviations
| k | Knit |
| p | Purl |
| yo | Yarn Over (bring yarn counterclockwise under and around right hand needle) |
| sl | Slip (insert right hand needle into next stitch on left hand needle and move to right needle) |
| ktbl | Knit through the back loop |
| ssk | Slip, slip, knit (slip first stitch as if to knit, slip second stitch as if to knit, insert left hand needle into the front of both stitches and knit them together) |
| psso | Pass slipped stitch over (lift the slipped stitch with the left hand needle and slip it over the stitch or stitches just worked) |
Pattern
In general, charts are read beginning at the lower right hand corner moving across the row to the left. The next row would be read from left to right. Because this pattern is knit in the round, every round (row) in this chart is read from right to left beginning with the first one in the lower right hand corner. The rounds are numbered, as well as the stitches. Once you have completed the 6 stitch pattern, repeat the pattern (stitches 1-6) across the round for as many rounds as instructed. I have provided two charts. The first one (shows each row plus how each row is to be knit) is spelled out in words. The second chart differs only in that just the symbols are explained in abbreviated form. They both provide the same stitch pattern. Use whichever one is most comfortable for you.
| 9 | 5 | 4 | 3 | 2 | 1 | |||
| / | 6 | Knit 5 stitches, purl 1 stitch | ||||||
| 5 | Knit 4 stitches, knit 1 stitch through the back loop, purl 1 stitch | |||||||
| F | 4 | Knit 3 stitches, yarn over, ssk, purl 1 stitch | ||||||
| 3 | Knit 5 stitches, purl 1 stitch | |||||||
| j | a | 2 | Knit 2 stitches, yarn over, slip 1 k2tog psso, purl 1 stitch | |||||
| 1 | Knit 5 stitches, purl 1 stitch |
| 6 | 5 | 4 | 3 | 2 | 1 | Stitch Key | ||
| 1 | 9 | |||||||
| / | 5 | / | p | |||||
| F | j | 4 | yo | |||||
| / | 3 | a | s1, k2tog, psso | |||||
| / | aj | 2 | F | ssk | ||||
| 1 | ktbl | |||||||
I have provided this chart to make it easier to keep track of the rows. I use this myself, as it's easy to forget which row you were on after being interrupted. Sometimes, if the light is right, I can read my own knitting and figure it out. With this chart, I don't have to worry about it, since I also use a row counter. I simply match my row counter number with the chart rows and I know exactly where I am in the pattern. To make it even more helpful, before starting the instep rows, mark rows 2, 4, and 6 with a small "D" to help you remember that those are decrease rows.
| 6 | 5 | 4 | 3 | 2 | 1 | ||||||||||||
| / | 9 | 12 | 18 | 24 | 30 | 36 | 42 | 48 | 54 | 60 | 66 | 72 | |||||
| / | 5 | 11 | 17 | 23 | 29 | 35 | 41 | 47 | 53 | 59 | 65 | 71 | |||||
| / | S | 4 | 10 | 16 | 22 | 28 | 34 | 40 | 46 | 52 | 58 | 64 | 70 | ||||
| / | 3 | 9 | 15 | 21 | 27 | 33 | 39 | 45 | 51 | 57 | 63 | 69 | |||||
| / | j | a | 2 | 8 | 14 | 20 | 26 | 32 | 38 | 44 | 50 | 56 | 62 | 68 | |||
| / | 1 | 7 | 13 | 19 | 25 | 31 | 37 | 43 | 49 | 55 | 61 | 67 |
About the Designer
Jill knit her first sock in 2006 and has been knitting actual pairs ever since. She lays absolutely no claim to being a photographer, but is willing to show off her knitting. She maintains (more or less) a knitting blog at http://www.jillknits.com and also is the owner of http://www.knittingtipsonline.com, which she fully admits needs updating. Jill can be found as Patchworkcat on Ravelry and can also be contacted at jill@jillknits.com.


