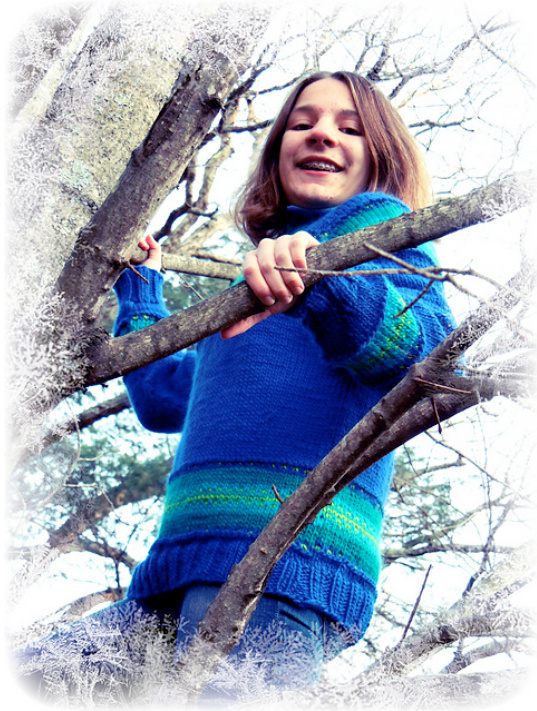
Colorido
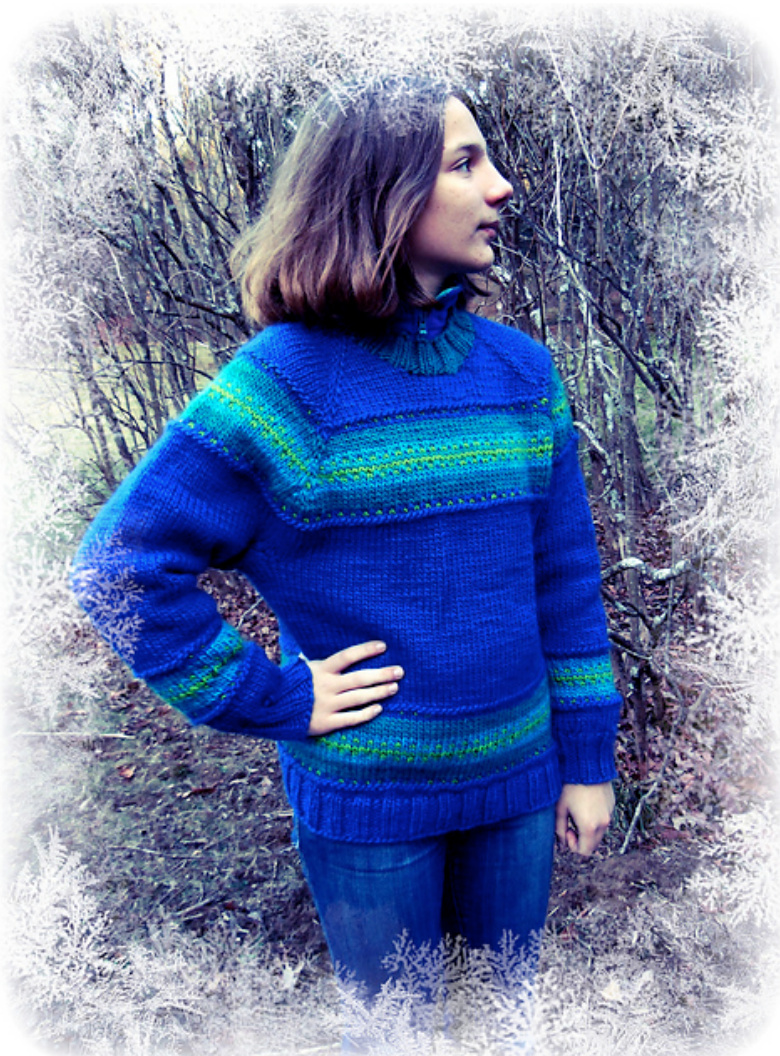
It's a top down raglan (no Seaming) and slip Stitches are uSed for the Color work (no Stranding). Size 12 (14) child / teenager. 30 (34)" finished buSt Circumference
Material
deSigned by Christiane Burkhard
with Colorido I wanted to Create a fun Colorful Knit. Originally I uSed this pattern for a Mystery knitdlong through wool-Aid in order to encourage Knitters to make a warm but Still nice garment for older kids, in this caSe victims of an earthguake in Tibet. I decided to make Colorido Nailable as a free pattern.

approx 4oo (8so) yards of bulky weight yarn (a main color and up to 4 othe) Colors). I uSed Brown Sheep, Lambs Pride bulky. Dpn US 10 and US 10.5, Circular needleS US i0 and US 10.5, StitchmarkerS, waste yarn, needle to Sew in ends Gauge: 3.5 StS and 4.25 row5 = 1inch Copyright@2011 Christiane Burkhard, you may use this pattern for personal, non-profit Or charity use only. www.lismiknits.blogspot.com Abbreviations & hints: RS:Right side WS: Wrong side M1: With left needle tip, lift strand in between needles from front to back. Knit the lifted loop through the back to twist the stitch. cO: Cast on. BO: Bind off MC: Main Color CC: Contrasting color Pm: Place marker Kfb: Knit in front and back of the stitch Increasing row/rnd (inc rnd): Increase before and after each seam stitch. If not mentioned differently use M1 as an increase technique. Unless mentioned differently these rows/rnds are workedwithakst. M1 purlwise: Lift the running thread between the stitch on the left needle and the stitch on the right, from back to front, so that the left leg of that running thread (the leg attached to that purl st on the left needle) hangs over the front of the left needle. Purl through that front/left loop. That will twist the running thread so you don't end up with an eyelet. Seam stitch: Stitch sandwiched by stitch markers (you should have 4 seam sts every rnd) Sl1: Slip one stitch purlwise. After joining your new round starts after the first marker. (the one with the different color). This means that if you work an increasing round you will end the round with an increase before your first marker.
HNSTRUCTHONS
With MC cast on 34 (36, 44) sts with larger needle. (Do not join) sts), pm, k1 (seam st), pm, k6 (sleeve sts), pm, k1 (seam st), pm, k1. Row 2: P to end. Row 3: [K to marker, M1, slm, k1, slm, M1] 4x, k to end. 42 (44 sts) Row 4: P to end. For size 12: Repeat rows 3 & 4 1x more (50 sts). Row 5: Kfb, [k to marker, M1, slm, k1, slm, M1] 4x, k to last st, kfb. Row 6: P to end. Repeat row 5 & 6 another 2 (3) x. Size 12: (9,1,16, 1,26,1,16, 1,9 = 80 sts) Size 14: (10, 1,16, 1, 28, 1, 16, 1, 10 sts = 84 sts) On the next right side row work an increasing row (M1 before and after each seam st). At the end of this completed row cast on 8 sts. Join and k to first marker. (This marker will show the beginning of you new round. It helps to make this marker a different color than the other ones.) Your round sequence will be the following now: seam st, sleeve, seam st, back, seam st, sleeve, seam st, front 96 (100) sts. Bodice shaping: Rnd 1: Increasing rnd in MC Rnd 2: K in MC Rnd 3: Inc rnd in MC Rnd 4: K in MC Rnd 5: Inc rnd in MC Rnd 6: K in MC Rnd 7: Inc rnd p all sts (do the M1 purlwise) in MC Rnd 8: With CC1 (k1, sl1) repeat to the end of the rnd. Rnd 9: Inc rnd in MC Rnd 10: K in CC2 Rnd 11: Inc rnd in CC2 Rnd 12: K in CC2 Rnd 13: Inc rnd with CC2 Rnd 14: K in CC3 Rnd 15: Inc rnd in CC3 Rnd 16: With CC1 (k1, sl1) repeat to the end of the rnd. Rnd 17: Inc rnd in CC3 Rnd 18: K in CC1 Rnd 19: Inc rnd in CC3 Rnd 20: With CC1 (k1, sl1) repeat to the end of the rnd. Rnd 21: Inc rnd in CC3 Rnd 22: K in CC3 Rnd 23: For size 12 K in CC2, For size 14: Inc rnd with CC2. Rnd 24: K in CC2 Rnd 25: For size 12 K in CC2, For size 14: Inc rnd with CC2 Rnd 26: K in CC2 Rnd 27: K in MC Rnd 28: With CC1 (k1, sl1) repeat to the end of the rnd. Rnd 29: K in MC Rnd 30: P in MC Continue to k every rnd in MC until you have completed 42 (46) rnds or your garment measures 10 (10.5)”. Slip the sts for each section onto separate pieces of scrap yarn in following sequence: 38 (44) sleeve sts 1 seam st + back sts + 1 seam st = 50 (58) sts 38(44) sleeve sts 1 seam st + front sts + 1 seam st = 50 (58) sts
Sleeves
With larger needle and MC cast on 5 sts, work sleeve sts, cast on 5 sts, pm, and join. K one round. Continue to work in st st and decrease 1 sts on each side of the marker in the following way: K2tog, k to last two stitches, SSK. (decreasing rnd) For size 12: every 4th rnd 2x, then every 6th tnd 8x. For size 14 every 5th row 8x After this work following rnds: Rnd 1: P in MC Rnd 2: With CC1 (k1, sl1) repeat to the end of the rnd. Rnd 3: K in MC Copyright2011 Christiane Burkhard, you may use this patern for personal, non-profit 3 or charity use only. www.lismiknits.blogspot.com Rnd 4-6: K in CC3 Rnd 7: With CC1 (k1, sl1) repeat to the end of the rnd. Rnd 8: K in CC3 Rnd 9: K in CC1 Rnd 10: K in CC3 Rnd 11: With CC1 (k1, sl1) repeat to the end of the rnd. Rnd 12-14: K in CC3 Rnd 15: K in MC Rnd 16: With CC1 (k1, sl1) repeat to the end of the rnd. Rnd 17: K in MC Rnd 18: P in MC Continue to work in st st using MC until sleeve measures 14". In the next round decrease 4 (10)sts evenly distributed. Switch to smaller size needles. Work a K2 P2 ribbing in MC for 2.5 (3)" BO
BODY
Slip front and back body sts + former seam sts on bigger size circular needle. 100 (116) sts With MC cast on 5 sts, work across front 50 (58) sts, cast on 5 sts, pm (to mark side seam), cast on 5 sts, join front and back, work across back 50 (58) sts, cast on 5 sts, pm (beginning of the rnd marker). Join. (120, 136 sts) Work even in rnds (k) for 6.5 (7)" measured from underarm. After this work following rounds: Rnd 1: P all sts in MC. Rnd 2: With CC1 (k1, sl1) repeat to the end of the rnd. Rnd 3: K in MC Rnd 4 -7: Kin CC2 Rnd 14 & 15:Kin CC3 Rnd 16: With CC1 (k1, sl1) repeat to the end of the rnd. Rnd 17: K in CC3 Rnd 18: Kin CC1 Rnd 19: Kin CC3 Rnd 20: With CC1 (k1, sl1) repeat to the end of the rnd. Rnd 21& 22:Kin CC3 Rnd 23 - 26: K in CC2 Rnd 27: K in MC Rnd 28: With CC1 (k1, sl1) repeat to the end of the rnd. Rnd 29: K in MC Rnd 30: P in MC Then work even (k) in MC until piece measures 11.5 (12)" from underarm. In the next round decrease 12 sts evenly distributed. (108, 124 sts) Switch to smaller size needles and work in K2 P2 ribbing for 2.5 “ Bind off.
Neckband
With smaller needle pick up 58 (60) sts around neck edge in CC2 or color you prefer. Work in K2 P2 ribbing for approx. 1.5 (2)" or desired length. Bind off loosley. (Use bigger needle if necessary.) Graft underarms and sew in ends. Copyright@2011 Christiane Burkhard, you may use this pattern for personal, non-profit Oor charity use only. www.lismiknits.blogspot.com


