lacy Cuffs I
by Dawn Swain
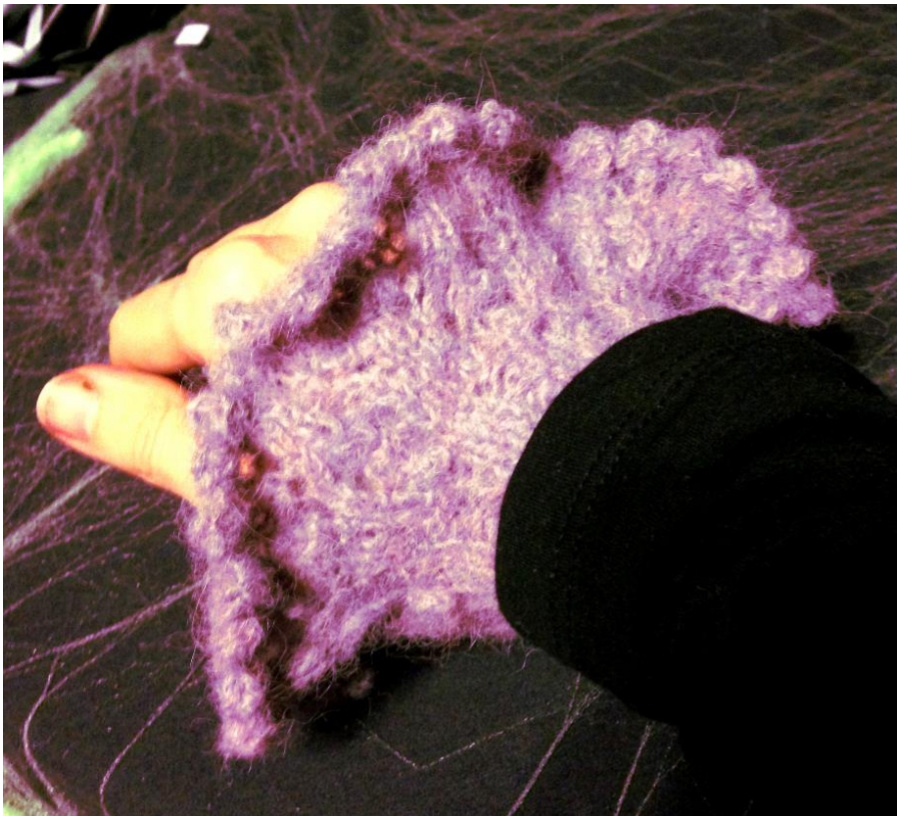
In honor of my Gothic and slightly Lolita fashion history, I've created a fast and easy lacy cuff that can be modified for almost any yarn and any size wrist. The key is that this is starts as a five-stitch rib, so if you can get your gauge with the ribbing to fit your intended wrist to round up to the nearest fivecount, you're golden. This little ditty will go perfect under the cuffs of your favorite velvet jacket or tuxedo to add just a little personal flair. The model shown is Nashua Handknits Creative FocusBrushedAlpacawithUSSize 2 needles,but you can use pretty much ANYYARNYOU WANT. You'll just have to work that gauge swatch to find out how many repeats you need. A word of advice, though: finer yarns (lace to fingering weight) will show off your handiwork better, and use the smallest needles you can for the yarn The other fabulous thing about this pattern is that it's fast and small, so you can probably use your leftover stash bits to whip a few out ahead of holidays and gift-giving times - especially if you got stuck at the last minute. During the testing period, I managed to knock each one of them out in about two hours (including the picot bind-off), and I'm about a medium-speed knitter.
Requirements:
·Yarn of your preference Commiserate sized needles - Double-Pointed or circulars if you like using the Magic Loop method Tapestry needle to do the final weave-in Stitch marker to mark the beginning of the row, alternate markers for pattern repeats
Instructions:
Establish your gauge with your preferred yarn and needle combination, and then round the number of stitches you need UP to the nearest five. [The shown model was cast on with 40 stitches.] Cast on your required number and join without getting your stitches twisted. Hot Tip on the Type of Cast-On to Use: The traditional wisdom would be that since you're starting with ribbing, you're going to want to use a Cable Cast-On to get this started. However, if you want to really save a ton of time, double your needles (as in, hold two needles at one time facing the same way) and do a Long-Tail Cast-On over both needles. This will give you the right amount of flexibility without investing hours before you even get to the fun part. Also, make sure that you leave a nice long tail from your cast-on, and double this with your working yarn through your first row so that you don't have to weave it in later. Once you have the stitches cast on, establish a K3-P2 rib, and knit this for at least two inches. Remember that this is going to be the part that sits under your sleeve. [If you really want to be fancy, you can make it six to eight inches and wear them as stand-alone cuffs over your forearms with tank top.] When you have your ribbing to the desired length, set your stitch markers between each repeat - every five stitches.
Written Pattern:
Row 1: [k2, yo, k1, yo, k2], rep to end of row. (7 stitches per rep) Row 2 (and all even rows): Knit to end of row. Row 3: k2, yo, dd, yo, k2 (7 stitches per rep) Row 5: k2, yo, k3, yo, k2 (9 stitches per rep) Row 7: k1, yo, k2, dd, k2, yo, k1 (9 stitches per rep) Row 9: k1, yo, k1 yo, k1, dd, k1, yo, k1, yo, k1 (11 stitches per rep) Row 11: k1, k2tog, k1, yo, k3, yo, k1, ssk, k1 (11 stitches per rep) Row 13: k2, yo, k1, yo, k1, dd, k1, yo, k1, yo, k2 (13 stitches per rep) End on Row 14 with a complete knit row, and then get ready for the piece de resistance -the Picot Bind-Off.
The Bind-Off:
The Picot Bind-Off does, it is true, take a bit longer than the usual bind-off but it leaves a slightly ruffled edge that complements the rest of this pattern beautifully.
Key:
k (blank square) - knit yo[ O ]-yarn over dd [ DD ]- double-decrease: Slip two stitches at the same time as though to knit, knit the next stitch, and then pass the slipped stitches over the knit stitch. This will create a center point double-decrease. k2tog [ K2T ]- knit two stitches together ssk -[ SSK Jslip two stitches, one at a time, as though to knit, move back to left needle, and then knit through the backloop more stitches in the next stitch, bind of four more, etc., allthe way to the end of the row. Knit the first and last stitches together, bind it, and then weave in your tail.
| 0 | 0 | DD | 0 | 0 | 13 | |||||||||
| SSK | 0 | 0 | K2T | 11 | ||||||||||
| 0 | 0 | DD | 0 | 0 | 9 | |||||||||
| 0 | DD | 0 | 7 | |||||||||||
| 0 | 0 | 5 | ||||||||||||
| 0 | DD | 0 | 3 | |||||||||||
| 0 | 0 | 1 | ||||||||||||


