Please follow Trixie's Treasures onFacebook https: / /www.facebook.com/Trixies.Treasures.and.Treats ∞ Candy Corn Hat Sizes: 2-5 year old Pattern Rated: Intermediate OTrixie's Treasures
Candy Corn Hat
Pattern written in US terminology.
Materials
Red Heart Super Saver or equivalent Medium 4 Worsted Weight Yarn, WPI 10 You'll need 1/4 skein or less of each color, white, orange, yellow. Size H hook, or 5.00 mm Scissors StitchMarker TapestryNeedle
Abbreviations
beg =beginning sc5tog = single crochet 5 together ch = chain sk = skip dc = double crochet sl st = slip stitch sc = single crochet sts= stitches sc2tog = single crochet 2 together WPI = wraps per inch sc3tog = single crochet 3 together Gauge: 13 dc = 4", 6 rows = 4” Row 1: Ch 22, dc in 4th ch from hook, dc across. Counting beg chains = 20 dc Row 2 - 6: Ch 2, turn, dc across. = 20 dc Measure in the middle, proper gauge will be 4" across 13 dc and all 6 rows will be 4”. If you are having trouble meting gauge, view this video.Type this in yourbrowser bar: https:/ /www.youtube.com/watch?v=eAvysbdNxWU#t=34
Instructions
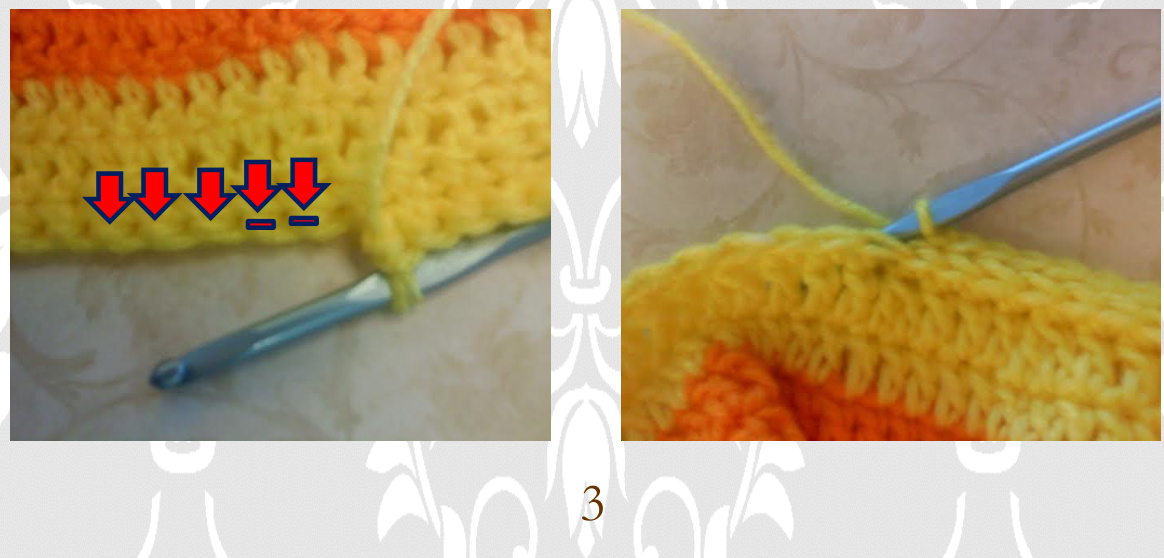
NOTE: Beg ch 3 counts as 1 dc throughout. When reaching the end of each round, sl st into the top of beg ch 3 to join. Rnd 1: Inside a magic circle, work ch 3, 11 dc. Sl st to join. = 12 sts Rnd 2:Ch3,dcin same sp,[dnext3 sts,2d next st2tmesdinlast sts. S1 st to join. = 15 sts Rnd 3: Ch3,dcin same sp,[dc next3 sts, 2 dcnext st] 3 times, d in last 2 sts. S1 st to join. = 19 sts Rnd4:hin sam sp,[dxtsts,2next st]4ilas s. S1 st to join. = 24 sts Rnd 5: Ch 3, dc in same sp,[dc next 3 sts, 2 dc next st] 5 times, dc in last 3 sts. =30sts Rnd 6: Ch 3, dc in each sp around. Change to orange as you sl st to join by inserting hook into top of beg ch 3, yo orange yarn and pull through. =30sts Rnd7:YouareusingorangeyanowChdineachsparound st join. = 30 sts Rnd 8: Ch 3, dc in same sp, [dc next 3 sts, 2 dc next st] 7 times, dcin last st. S1 st to join. = 38 sts Rnd 9: Ch 3, dc in same sp, [dc next 3 sts, 2 dc next st 9 times, dc in last st. Sl st to join. = 48 sts Rnd 10:Ch3, din same sp,[dc next 3sts,2dc next st11 tmes, dcin last 3 sts. Sl st to join. = 60 sts Rnd 11: Ch 3, dc in same sp, [dc next 3 sts, 2 dc next st] 14 times, dc in last 3 sts. S1 st to join. = 75 sts Rnd 12 - 14: Ch3, dc in each st around. S1 st to join. = 75 sts NOTE: When joining rnd 14, switch to yellow in the same way you switched to orange at the end of rnd 6. Rnd 15: Youare using yelw yarnnow) Ch3, din eachsp around. S st join. = 75 sts Rnd 16: Ch3,dc dec, [dc next 3 sts, dc dec] 14 times, dc last 2 sts.Sl st to join. =60 sts Rnd 17: NOTE: Loosely crochet, otherwise you won't be able to get your hook into the correct loop on the next round. Ch 1 (does NOT count as a sc),sc in same sp, sc around. Sl st to join. =60sts. NOTE: You will be crocheting in the third loop of the single crochet to complete the edge of the hat. The following photographs show where that loop is located. This is NOT the back loop. It is behind that on the back side of the row of single crochet. Looking from right to left, the photo on the left shows bars over the loop on the first two stitches and only arrows pointing to that third loop behind the row. The photograph on the right shows what it looks like, from the front, when the hook is inserted in the third loop. Now that you know what it is to look like, continue with rnd 18.
wish to insert a stitch marker in the first sc made on each roun Rnds 18 - 19: Ch 1, sc in 3rd loop all the way around. Sl st in 1st sc to join. =60 sts Finish off. Weave in all ends. The hat can be worn with or without ear flaps. To add earflaps, attach yellow yarn in the 3rd loop of the 9th stitch to the LEFT of the center of the back of hat. Row 1: Ch 1, scin same 3rdloop space, scin 3dloopof next 12sts.= 13 sts Rows 2 - 4: Ch 1, turn. Sc in each stitch across. u will work them in the normal way from here on out.) = 13 s Row 5; Ch1, turn, Sc 2 tog, sc 1, sc2tog, sc next 3, sc2 tog, sc 1, sc2tog. 9 sts Rows 6 -/7: Ch1, turn. Sc across. = 9 sts low 8: Ch 1, turn. Sc 1, sc2tog, sc next 3, sc2tog, sc 1. = 7 st: Row 9:Ch 1,turn. Sc next 2, sc3tog, sc next 2. =5 sts Row 10 if NOT adding a braid: Ch1, turn. Sc5tog, = 1 st Finish off, weave in ends. Row 10 if USING braids: Ch1, turn. Sc2tog, ch 1, sk 1, sc2tog. = 2 sts Finish off. For the second ear flap, hold the hat with the back facing you and the completed ear flap is on the left side. Attach yellow yarn in the 3rd loop of the 21st stitch to the RIGHT of the center of the back of hat. This is so that both ear flaps look exactly the same on the outside. Now follow directions for the first flap. Finish off and weave in ends. The hat can be worn with or without braids. For braids, cut each strand approximately 30 to 40 inches long depending on how long you want the braids to be. Cut the quantities listed below. Orange: 6 (3 for each side) Yellow: 12 /(6 for each side) White: 12 (6 for each side) Place 3 orange, 6 yellow and 6 white together. Insert hook from the inside of the ear flap to the outside.
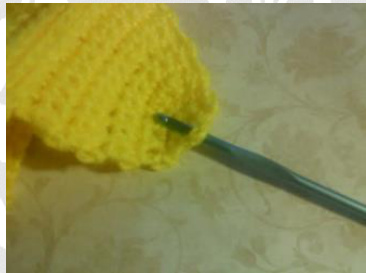
Fold the yarn in half and draw through as shown here.
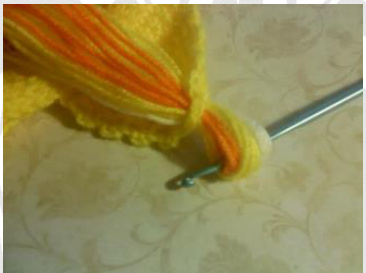
Pull the mass of yarn through the hole where the hook was.
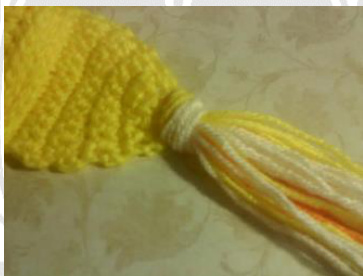
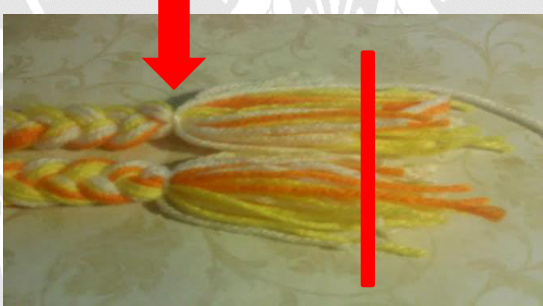
Divide the strands into three groups for braiding. Separate the colors to have 2 strands of orange, 4 strands of yellow and 2 strands of white to each of the three groups. Braid evenly. Using a 6 inch strand of white yarn, tightly tie the ends of the braids at the same distance, from the ear flap, on each side. The arrow points to it in the photograph. Trim the ends evenly.
This pattern is copyrighted. The copyright applies to the reproduction, selling or sharing of this pattern or my pictures in any way. You may sell the items you make from this pattern. Copyright never extends to prohibit your finished work. You must take your own photographs of your work. CTrixie's Treasures 2014 Trixies.Treasures.and.Treats@facebook.com


