NinJa biKe Mask (OF AWESOMENESS)
Stealthy as afox Sleek as a ferret And silent like a slug in the night by Jennifer Wang, pigu pigu design
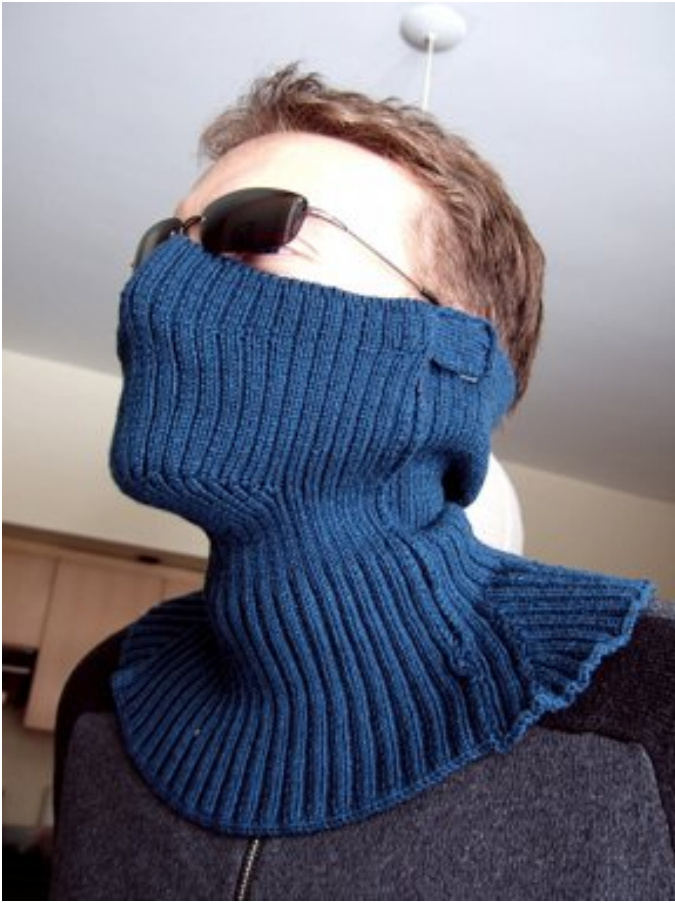
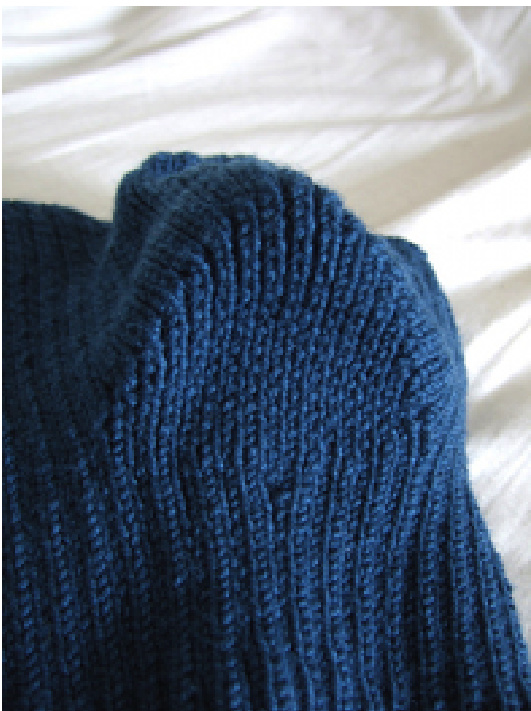
My partner and I are both avid urban cyclists. We bike to work, to the movies, to the grocery store. Everywhere, really. But when the weather gets cold and the roads get snowy, I tuck my bicycle away in the basement where it sleeps and waits for sunny. weather again. My partner, however, has got more spunk. A little snow? No problem! Sub zero temperatures? Bah! Although he does not complain, I know his cheeks get cold and his nose goes numb. Cold bits are nothing to sneeze about, so I decided to do something about it. I thought about balaclavas (and even made one), but I wanted the eyes completely clear and unimpeded. Safety first! A covered head also means annoying helmet adjustments and, really, the top of the head doesn't get cold that easily when biking (there's all that hair!). settled on a mask. But why settle for just a mask when you can make . ... A NINJa Mask!
A VERY IMPORTANT ANNOUNCEMENT
At some point, I decided to write up a pattern based on my very detailed notes. So I started a new mask (or two) and started typing. I had dreams of creating a beautiful work of written art. It would have lovely photos, beautiful layout, and the pattern would be customizable to any type of yarn and any shape of head. Then reality struck. I knit one mask based on the original instructions. Then I knit a second mask to fit a different head (mine). And then I got blues and could not bring myself to start a third mask with different yarn. Which, as it were, was also going to the “model" mask for the pattern. However, people still seem to be interested in the construction, so I've decided to put it out there anyways. Please Please PLEAsE use your discretion when following this pattern. It is not tech edited, nor polished. If you find mistakes, please do let me know. If you love it, I'd love to hear it! If you hate it, feel free to burn it. :
Ninja Bike Mask - page 1 of 15
Created November 2010 by Jennifer Wang. This pattern is available FREE to download from pigu pigu design on htp://www.ravelry.com. It is NOT for resale or redistribution. May those who knowingly violate this receive endlesinfestations of ravenous moth larvae Forqgestions and coments contaet lseu on Ravery oemail pigu.pigu.design@gmailcom.
TeCHnIQueS USEd
Provisional cast on, stretchy bind off (eg. Sewn or picot) Knitting in the round Short rows Basic increasing and decreasing, yarn overs
The TooLs
Circular needle - Us I 6 stitch markers Waste yarn for provisional cast on Darning needle for hemming and seaming (if knitted flat) (optional) 20 yds of coordinating laceweight yarn for hem.
Yarn OpTionS:
Option I: Yarn: Filatura di Crosa Zara, 3 balls (eg I424 - Navy) Needles: US I (2.25 mm) circular needles Gauge: Relaxed: 8 st/in, 10.5 rows/in Stretched: 5 st/in, 7 rows/in Note: Not entirely superwash, please wash with care!
Option 2: (Untested)
Yarn: Colinette Jitterbug, ? skeins (shown in Velvet Plum) Needles: Option3: Any tightly wound yarn that can hold up to heat, cold, dampness, washing, and moderate day-to-day abuse.
THE GLOSSaRY
RS Right side of mask WS Wrong side of mask k knit P purl mIr Make one right leaning knit stitch [diagrams, please!] mII Make one left leaning knit stitch mlp Make one purl stitch kfb Knit front knit back. Knit one stitch through the front leg of the loop, then again with the back leg. Increase by I stitch. pfk Purl front knit front. Purl one stitch through the front leg of the loop, then knit one stitch through the front leg of the same loop. Somewhat mirrors kfb. Increase by I stitch. k2tog knit two stitches together p2tog purl two stitches together ssk slip two stitches knitwise, then knit together ssp slip two stitches purlwise, then purl together
STITCH MARKErS
MB Back stitch marker. This marks the back of the mask and also the beginning of each round. MF Front stitch marker. This marker will lie on the line from between your eyes through the centre of your nose and chin. ML Left stitch marker. This marker will travel a bit along the mask on the left side. (Left when worn, not when knitted since we'll be looking at the mask upside down) MR Right stitch marker. Same as ML, except on the right side of the mask.
Ninja Bike Mask - page 2 of 15
pigu pigu design on http://www.ravelry.com. It is NOT for resale or redistribution. May those who knowin , contact lisseut on Ravelry or email pigu.pigu.design@gmail.com.
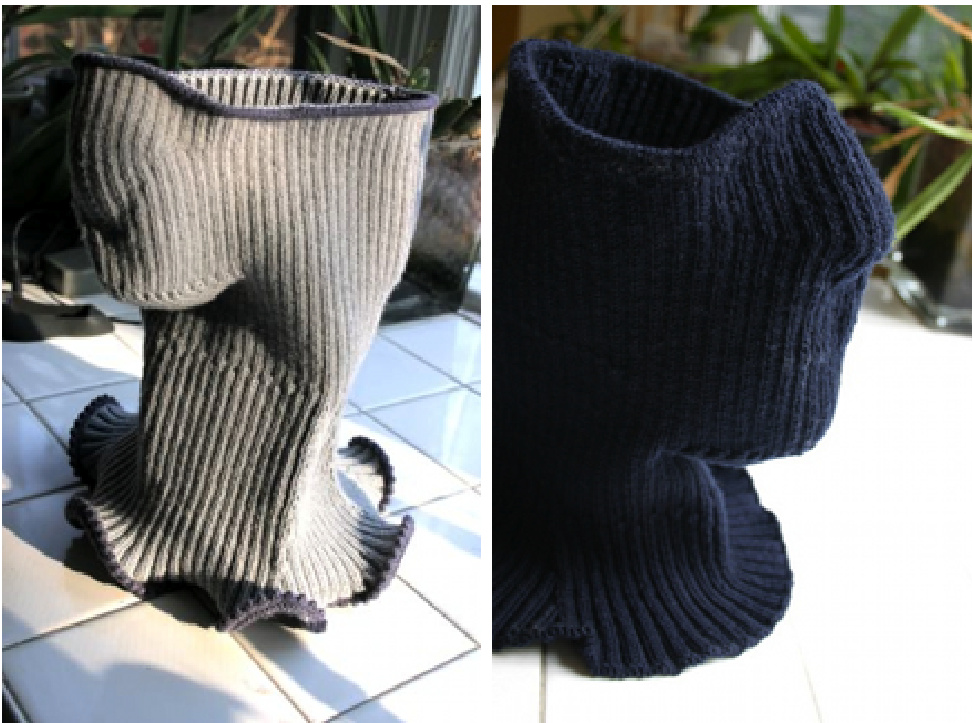
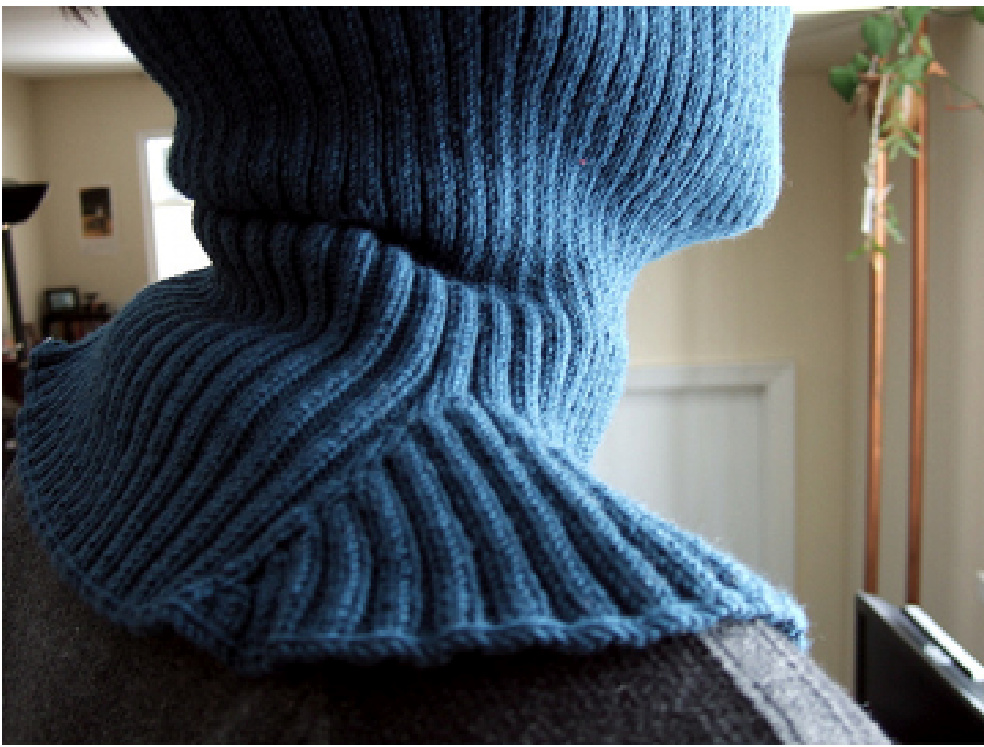
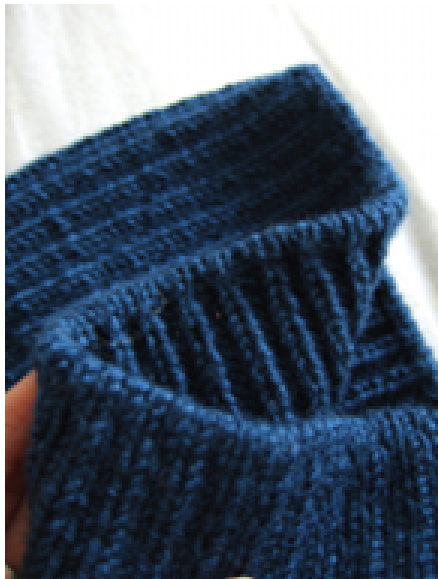
The Mask is knit from the top down. It may be knit flat or in the round. The instructions are for in the round knitting. If you choose to knit it flat, be sure to add an extra couple of stitches for seaming at the end. When complete, the Mask will cover the face from the nose down, as well as the neck, and collar (might as well get rid of the need to wear a scarf too while we're at it!). You'll probably have to knit with smaller needles than recommended on the ballband - we want this to be as windproof as possible! Lots of ribbing makes the Mask super stretchy and easy to pull on and take off. There will be some unexpected eyelets along the way - version one of the Mask caused breathing problems, so we'll need ventilation by the nose and mouth. If you wear glasses, you'll want to knit larger slits. "What? Swatch? Me swatch?!?" I am not a big fan of swatching. I like flying by the seat of my pants. However, in this case, I do highly recommend knitting this swatch. This swatch will take you through all of the ribbing variations used and most of the section transitions. You'll also most likely be knitting at a tighter gauge than usual, so you'll have time to get used to it. It will also give you a trial run with my pattern writing style. And FlNALLY, you can wash and beat up the swatch to see how the mask will hold up to the same. No joke, on its second trip through the wash, my first mask felted. Boo.. Keep in mind that the swatch is knit flat. If you plan on knitting the mask in the round, your gauge may vary slightly and the ribs may slant slightly if the yarn is not balanced. 1.Cast on 24 stitches 2. Knit in st st for 2 inches If using Zara, please check your gauge against mine in the Yarn Options section. Increase to 2xl ribbing (face): 3. RS: k2 [m1p k2] x 11. (24+11= 35 stitches) 4. Continue in 2x1 ribbing for 1 inch Decrease to Ixl ribbing (chin and neck): 6. RS: [k2tog p] x 6, [ssk p] x 5, ssk. (35-12 = 23 stitches) 7. Continue in 1x1 ribbing for 1 inch Decrease to 2xl ribbing (neck): 9. RS: [k k2tog p] x 3, [ssk k p] x 2, ssk k (23-6 = 17 stitches) 10. Continue in 2x1 ribbing for 1 inch Increase to 2x2 ribbing (shoulders): 11. RS: [k2 m1p p] x 11. k2. (17+5 = 22 stitches) 12. Continue in 2x2 until bored 13. BO. Unless you're sure you have enough yarn, leave the swatch attached to the ball of yarn. [side-by-side comparison of relaxed vs stretched to show tightness]
Ninja Bike Mask - page 4 of 15
pigu pigu design on http://www.ravelry.com. It is NOT for resale or redistribution. May those who knowin , contact lisseut on Ravelry or email pigu.pigu.design@gmail.com. diagram on how to measure. Please use the top edge of previous photos asaguideline
CALCULATING THE NUmBER OF CAST ON STITCHES
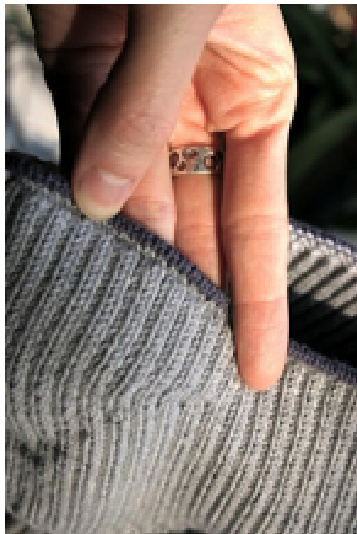
We don't want the mask too loose or too tight, so we're going to take the average of the relaxed and stretched stitch gauges. Relaxed stitch gauge (RG): st/inch (blue/grey: 8) (purple: 10) Stretched stitch gauge (SG): st/inch (blue/grey: 5) (purple: 6) Calculating Average stitch gauge (AG): Add RG and SG: (blue/grey: 8 + 5 = 13) (purple: 16) And divide by 2 to get AG: st/inch (blue/grey: 6.5) (purple: 8) Now, measure around your head (HEAD): inches (blue: 20) (grey: 21) (purple: 21) And finally, to get the final number of cast on stitches: Multiply HEAD by AG: stitches (blue: 130)(grey: 136.5) (purple: 168) If your number is odd, subtract 1 to get an even number: stitches (blue: 130) (grey: 136) (purple: 168) We now have an even number. If half of your number is another even number, subtract two more stitches to get your final cast-on stitch count: stitches. (blue: 130) (grey: 134) (purple: 166) If knitting flat, remember to add an extra seaming stitch on either side.
CaSTING ON
1. Provisionally cast on the number of stitches you calculated in the previous section. (blue: 130) (grey: 134) 2. Place marker (MB) to mark the beginning of the round. 3. Join and knit in st st for half an inch.
Ninja Bike Mask - page 5 of 15
pigu pigu design on http://www.ravelry.com. It is NOT for resale or redistribution. May those who knowin , contact lisseut on Ravelry or email pigu.pigu.design@gmail.com. [insert diagram to show what part of the mask we're knitting in this section] 1. [k2 m1p] for one round to get 2x1 ribbing (blue: 195) 2. Continue in 2x1 ribbing for 2 cm Try the mask on at this point. If you're knitting in the round, it may be more comfortable to transfer some stitches to a second circular needle. Look for a nice snug fit. Tight enough to not slip down the nose, loose enough that your face is not constricted. If the mask doesn't quite right, it's really best to just tink it all back and cast on again. Take a look in the mirror and guesstimate how many stitches you'll need to add or subtract. Then grab a glass of wine (or your indulgence of choice), take a deep breath, slide the needles out, and RRRlllPPP! If you do need to rip and start over, please let me know! It may mean my math needs reworking. @ Anyways, now that the mask fits right, it's time for some fun!
THE KNOWING NOSE
To give the nose some room to stick out, we now do some short rows over the front of the mask. We will be turning on each rib.
STItCh MarKer SETuP
1. Knit one round in the pattern. As you knit, place three stitch markers to mark the nose and both cheeks (details about placement below). The markers should be placed between the two knit stitches of a rib.
[insert diagram showing stitch marker positions]
MF: The halfway point. This should be the middle of a rib. (If not, no worries, just put it in the middle of the closest rib) To place the next two markers (right and left cheek), first calculate how many stitches makes up one eighth of your mask (OFFSET). (blue: 24) (grey: 25) MR: Place this OFFSET stitches before MF. If the position is not quite right, put it in the previous rib. ML: Place this OFFSET stitches after MF. If the position is not quite right, put it in the middle of the next rib. Note that I find it easier to count ribs instead of stitches. ;)
NOSE SHORT ROWS
1. RS: Knit in pattern to stitch marker ML. Slip ML. Knit one more stitch. Wrap and turn. 2. WS: p (remove ML) p k p (place ML). Continue in pattern to MR. Slip MR. Purl one more stitch. Wrap and turn. 3. RS: k (remove MR) k p k (place MR). Continue in pattern to ML. Slip ML. Knit one more stitch. Wrap and turn. 4. Continue in this manner until the mask extends slightly past the tip of your nose. Be sure to end with a WS row. (Blue: 6 wraps per side, 7 ribs between wraps) (grey: 4 wraps per side, 11 ribs between wraps) Next we "turn" for a few rows, to bring the fabric in a bit. 1。 RS: Knit in pattern to stitch marker ML. (remove ML) k p k (place ML) k. Wrap and turn. 2. WS: Knit in pattern to stitch marker MR. (remove MR) p k p (place MR) p. Wrap and turn. 3.RS: Knit in pattern to stitch marker ML. k p k2 p k2. Wrap and turn. 4。 WS: Knit in pattern to stitch marker MR. p k p2 k p2. Wrap and turn.
Ninja Bike Mask - page 7 of 15
pigu pigu design on http://www.ravelry.com. It is NOT for resale or redistribution. May those who knowin . contact lisseut on Ravelry or email pigu.pigu.design@gmail.com.
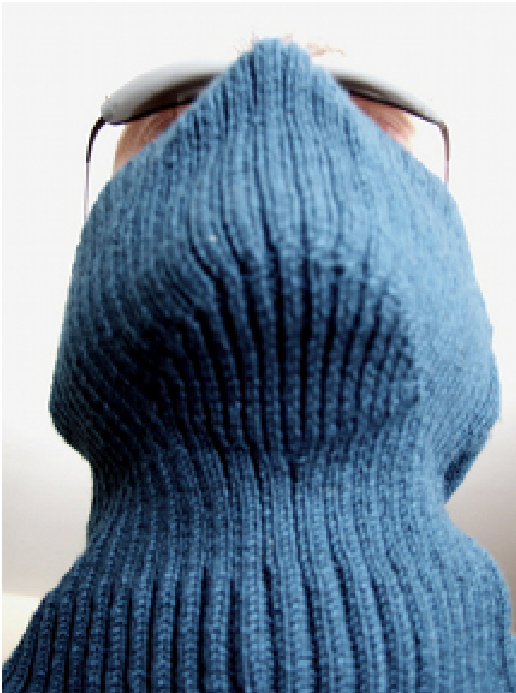
The AEraTed NoStrilS And BEYOND
[insert diagram to show what part of the mask we're knitting in this Section] We're now switching back to knitting in the round. At the front of the mask we'll add some eyelets to help with breathing. Because oxygen exposure is important, especially when biking. :D 1. Knit in pattern to stitch marker MR. Drop MR. [k yo k2tog] until MF. [ssk yo k] until ML. Drop ML. Knit in pattern to the end of the round. (blue: 2 repeats per pattern) (grey: 5 repeats per pattern) 2. Knit one round in ribbing pattern. 3. Continue alternating one row of eyelets and one row knit solid. \*\* 4. Knit in pattern until mask reaches chin. \* Note that as you encounter wrapped stitches, you may choose to pick up wraps and knit them together with the stitch. It's entirely up to you. There may be a bit of a gap if you don't pick up stitches, but since the mask is ribbed, the gaps should not be too apparent. \*\* Feel free to play around with the placement and number of eyelets. What cool pattern can you come up with? @ If you wear glasses, you may want to consider adding a slit for the nose and another one for the mouth. Unfortunately, I don't have instructions for that, I would recommend just casting off X stitches equal to the width of your nose/mouth and then casting on the same number of stitches when you knit back to that point.
NOT BY THE POINT ON MY CHINNY CHIN CHIN!
To fit the mask to your face, we're going to knit a short-rowed parabola shape on the underside of the chin. We will start by using decreases to get a soft point, then a gentle set of short rows, followed by a more severe set of short rows. The decrease pattern is designed to fit my partner's chin. I've added notes for where you can do more repeats to fit your own. If you make modifications, please use your best judgement when knitting up the rest of the decreases.
StItCh MarKer SetuP
1. Knit one round in the pattern. As you knit, place MR 4 stitches before MF. So, the stitches on your needles will be, from right to left: p MR k k p k MF k p [diagram for stitch marker placement]
KnIt on!
To form the point of the chin, we reduce three 2 stitch ribs to l stitch ribs as follows: 1. Knit in pattern to MR. 2. Remove MR. ssk p. 3. Slip stitch, remove MF, replace stitch. ssk, (place MF), p. 4。 k2tog. For the gradual slope of the chin parabola, we do short rows similar to the nose, except we're also decreasing the 2 stitch ribs to I stitch ribs: 1. Wrap next purl stitch and turn. 2. WS: [p k] x 3. p2tog. Wrap and turn. 3. RS: [k p] x 4. ssk. Wrap and turn. 4. WS: [p k] x 5. p2tog. Wrap and turn. 5. RS: [k p] x 6. ssk. Wrap and turn. 6. WS: [p k] x 7. p2tog. Wrap and turn. 7. RS: [k p] x 8. ssk. Wrap and turn. 8. WS: [p k] x 9. p2tog. Wrap and turn. 9. RS: [k p] x 10. ssk. We now have eleven I-stitch ribs on the Rs. If you have a wider chin, do more repeats in this pattern (and adjust stitch counts in the following sections accordingly). Next we do more aggressive decreasing to get the steeper sides of the chin parabola. 1. Wrap next purl stitch and turn. 2. WS: [p k] x 11. p. Wrap and turn.
Ninja Bike Mask - page 9 of 15
pigu pigu design on http://www.ravelry.com. It is NOT for resale or redistribution. May those who knowin , contact lisseut on Ravelry or email pigu.pigu.design@gmail.com. 3. RS: [k p] x 12. k. Wrap and turn. 4. WS: [p k] x 12. p2tog. Wrap and turn. 5. RS: [k p] x 12. ssk. Wrap and turn. 6. WS: [p k] x 13. p. Wrap and turn. 7. RS: [k p] x 14. k. Wrap and turn. 8. WS: [p k] x 14. p2tog. Wrap and turn. 9. RS: [k p] x 14. ssk. Wrap and turn. 10. Continue in this fashion (four step repeat) until the height of the chin parabola is the same as the depth of your chin. Repeat an EVEN number of times. For your last RS row, do not wrap and turn at the end. (blue: 4 repeats - 19 1-stitch ribs) (grey: 4 repeats - 19 1-stitch ribs) 11. Knit in pattern to end of round.
pigu pigu design on http://www.ravelry.com. It is NOT for resale or redistribution. May those who knowin , contact lisseut on Ravelry or email pigu.pigu.design@gmail.com. Next up is a lot of decreasing to reduce the circumference of the mask. Two things will be going on now. We'll decrease some ribs down to Ixl and then down to 2xl again. Also, there will be some decreasing to accommodate the slope at the back of the head. [diagram for neck decreasing]
STITCH MARKEr SETuP
1. Count the number of stitches you have remaining and divide by eight (OFFSET). (blue: 22) (grey: 22.5) 2. Knit in pattern for OFFSET stitches. Place MR. 3。 Knit in pattern until OFFSET stitches before MB. Place ML. 4。 Knit in pattern to end of round. You have now knit one row. The distance between MR and ML should be one quarter the circumference of the mask. Markers do not need to be placed in the middle of a rib.
DECREASING
Decreasing will occur at the back of the head and at the transition point from chin to neck. First, we do some decreasing as follows: - Back of the head, reduce four 2xl ribs on either side to Ixl. - Under the chin, reduce four Ixl ribs on either side to 2xl. 1. Knit to the fourth rib before MR. Move MR to this point (sorry, lots of stitch slipping and replacing here!). [k2tog p] x 4. [insert diagram to show moving of the marker) 2. Knit to the first 1xl rib on the chin. [k k2tog p] x 2. 3. Knit to four ribs before the end of the 1xl ribbing. [ssk k pl x 2. (mirror of Step 2) 4. Knit to ML. Knit to beginning of next rib. [ssk pl x 4. 5. Knit one round. Next Up: - Back of the head, reduce four Ixl ribs to two 2xl ribs - Under the chin, reduce remaining Ixl ribs to 2xl ribs 1。 Knit to MR. [k k2tog p] x 2. 2. Knit to first remaining 1x1 rib on the chin. [k k2tog p] repeat until (p k p) at the chin tip. 3. Do a centered double decrease. (slip two stitches as if to k2tog, knit third stitch, pass slipped stitches over knit sitch) 4. [ssk k p] for remaining 1x1 ribs on chin. k p [ssk pl repeat until end of chin 1x1 ribs. 5. Knit to ML. [ssk k pl x 2. 6. Knit to end of round. 7. Knit one round. And some more decreasing: - Back of the head, reduce two 2xl ribs to two Ixl ribs - Under the chin, knit normally, with one decrease at the tip of the chin 1. Knit to MR. [k2tog p] x 2. 2. Knit to three knit stitches on chin tip. 3. k2tog 4. Knit to ML. [ssk p] x 2. 5. Knit to end of round. 6. Knit one round.
And FINALLY:
- Back of head, reduce two Ixl ribs to one 2xl pigu pigu design on http://www.ravelry.com. It is NOT for resale or redistribution. May those who knowin . contact lisseut on Ravelry or email pigu.pigu.design@gmail.com. 1. Knit to MR. Remove MR. [k k2tog] 2. Knit to ML. Remove ML. [ssk k] 3. Knit to end of round. 4。 Knit one round. Woot! We now have 2x2 ribbing! But.. try it on at this point to make sure it goes over your head! pigu pigu design on http://www.ravelry.com. It is NOT for resale or redistribution. May those who knowin , contact lisseut on Ravelry or email pigu.pigu.design@gmail.com.
FOR SOME SERIOUS NECKINC
To finish the neck, we first knit the rest of the neck, then we start increasing for the shoulders. Bind off, hem, and done!
BrINg ON THE NECKINg!
1. Knit in pattern until the mask covers the length of your neck. Make sure it also covers your ears! (blue: 5 cm) (grey: 6 cm)
THE SHOULDERS
We increase to 2x2 ribbing in two steps. First we increase by one purl every other purl rib to get 2xlx2x2. Then we increase on the remaining one stitch purl ribs to get 2x2 ribbing. Magic! 1。 [k2 m1p p k2 p] repeat to end of round. Depending on the number of stitches cast on at the beginning, you could be ending with a [kfb p k]. 2。 Knit in pattern for one round. 3. [k2 p2 k2 m1p p] repeat to end of round. Depending on the number of stitches cast on at the beginning, you could be ending with a [k2 p2]. We're now ready to start increasing for the bib. Increasing will happen in front and behind each shoulder, which means we'll have four increase “"spots". Just to keep things pretty, one rib from the neck will run across the tops of the shoulders uninterrupted - the increases will happen in the ribs before and after this one.
Stitch Marker Setup
1. Knit in pattern for one round, placing markers ML, MR as follows: MR - For the right shoulder increases, find the spot halfway between MB and MF (blue dk: 49 stitches)(grey: 50). Now locate the three ribs that are centered over this spot. Place MR just before the rib closest to MB. (blue dk: 43 stitches from MB) (grey: 44) ML - For the left shoulder increases, find the spot halfway between MF and MB. As we did for MR, find the centered three ribs. Place ML just before the rib closest to MF. (blue dk: 42 stitches from MF) (grey: 44)
[insert diagrams for stitch marker placement]
Ninja Bike Mask - page 13 of 15
pigu pigu design on http://www.ravelry.com. It is NOT for resale or redistribution. May those who knowin . contact lisseut on Ravelry or email pigu.pigu.design@gmail.com.
KNITTING THE BIB
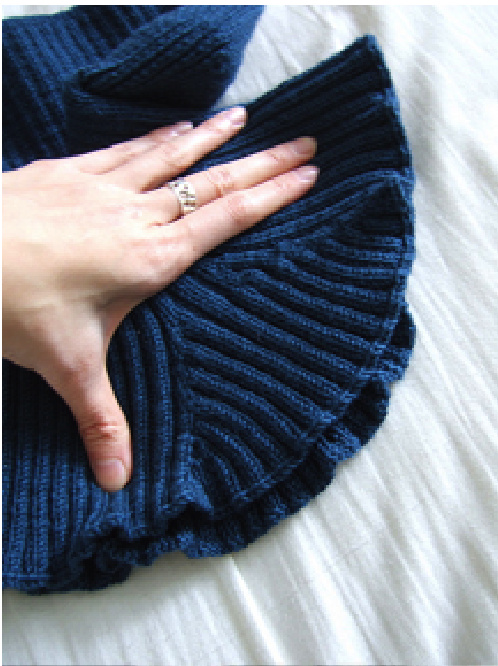
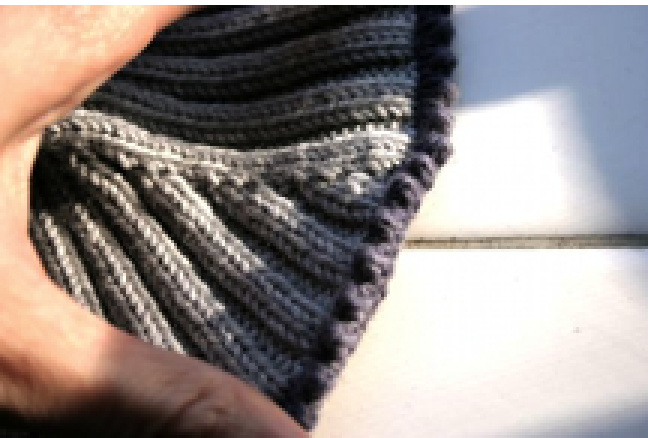
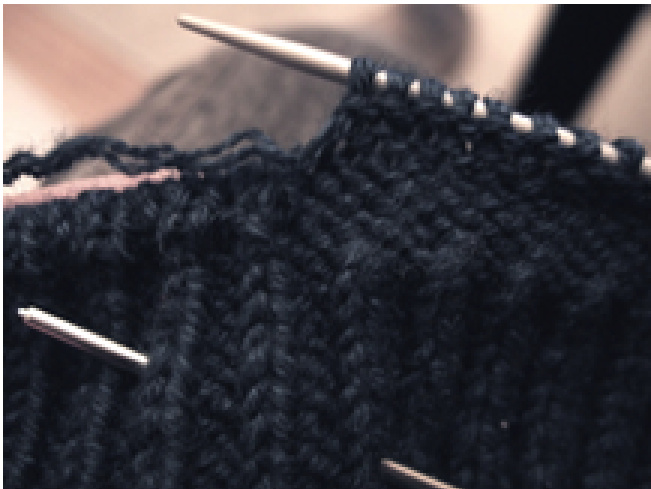
Almost there! All that's left is to knit the bit that sits on the shoulders. We'll increase by 4 stitches every other row. Or, using another way of counting, the RIB count will increase by 2. Eg You'll have I, then 3, then 5, etc ribs between the increase points. 1. Knit to MR, k2 m1l p2 [k2 p2]x1 m1r k2. Knit to ML, repeat increase pattern. Knit to end of round (MB) 2. Knit one round in pattern (there will be a k3 rib at the increase points) 3. Knit to MR, k2 m1l k p2 [k2 p2]x1 k m1r k2. Knit to ML, repeat increase pattern. Knit to end of round. 4。 Knit one round in pattern (there will now be a k4 rib at the increase points) 5. Knit to MR, k2 m1p k2 p2 [k2 p2]x1 k2 m1p k2. Knit to ML, repeat increase pattern. Knit to end of round. 6. Knit one round in pattern (there will be a p rib at the increase points) 7.Knit to MR, k2 m1p p k2 p2 [k2 p2]x1 k2 p m1p k2. Knit to ML, repeat increase pattern. Knit to end of round. 8. Knit one round in pattern (entirely 2x2 ribbing now) 9. Repeat steps 1-8 until the bib is long enough or you run out of yarn. Make sure you leave an end of yarn that is at least four times the circumference formed by your last row. 10. Bind off with your stretchy method of choice. I prefer EZ's sewn bind off. The photo below shows a picot edge bind off.
Ninja Bike Mask - page 14 of 15
pigu pigu design on http://www.ravelry.com. It is NOT for resale or redistribution. May those who knowin , contact lisseut on Ravelry or email pigu.pigu.design@gmail.com.
FINISHING
Weave in ends. For the provisional cast on edge, you have a few choices. You can do a stretchy bind off, or you can knit an inner lining with the laceweight yarn (for extra warmth). I usually knit just enough to for a folded hem (l cm), then kitchener the live edge to the ribs.
Ninja Bike Mask - page 15 of 15
pigu pigu design on http://www.ravelry.com. It is NOT for resale or redistribution. May those who knowin , contact lisseut on Ravelry or email pigu.pigu.design@gmail.com.


