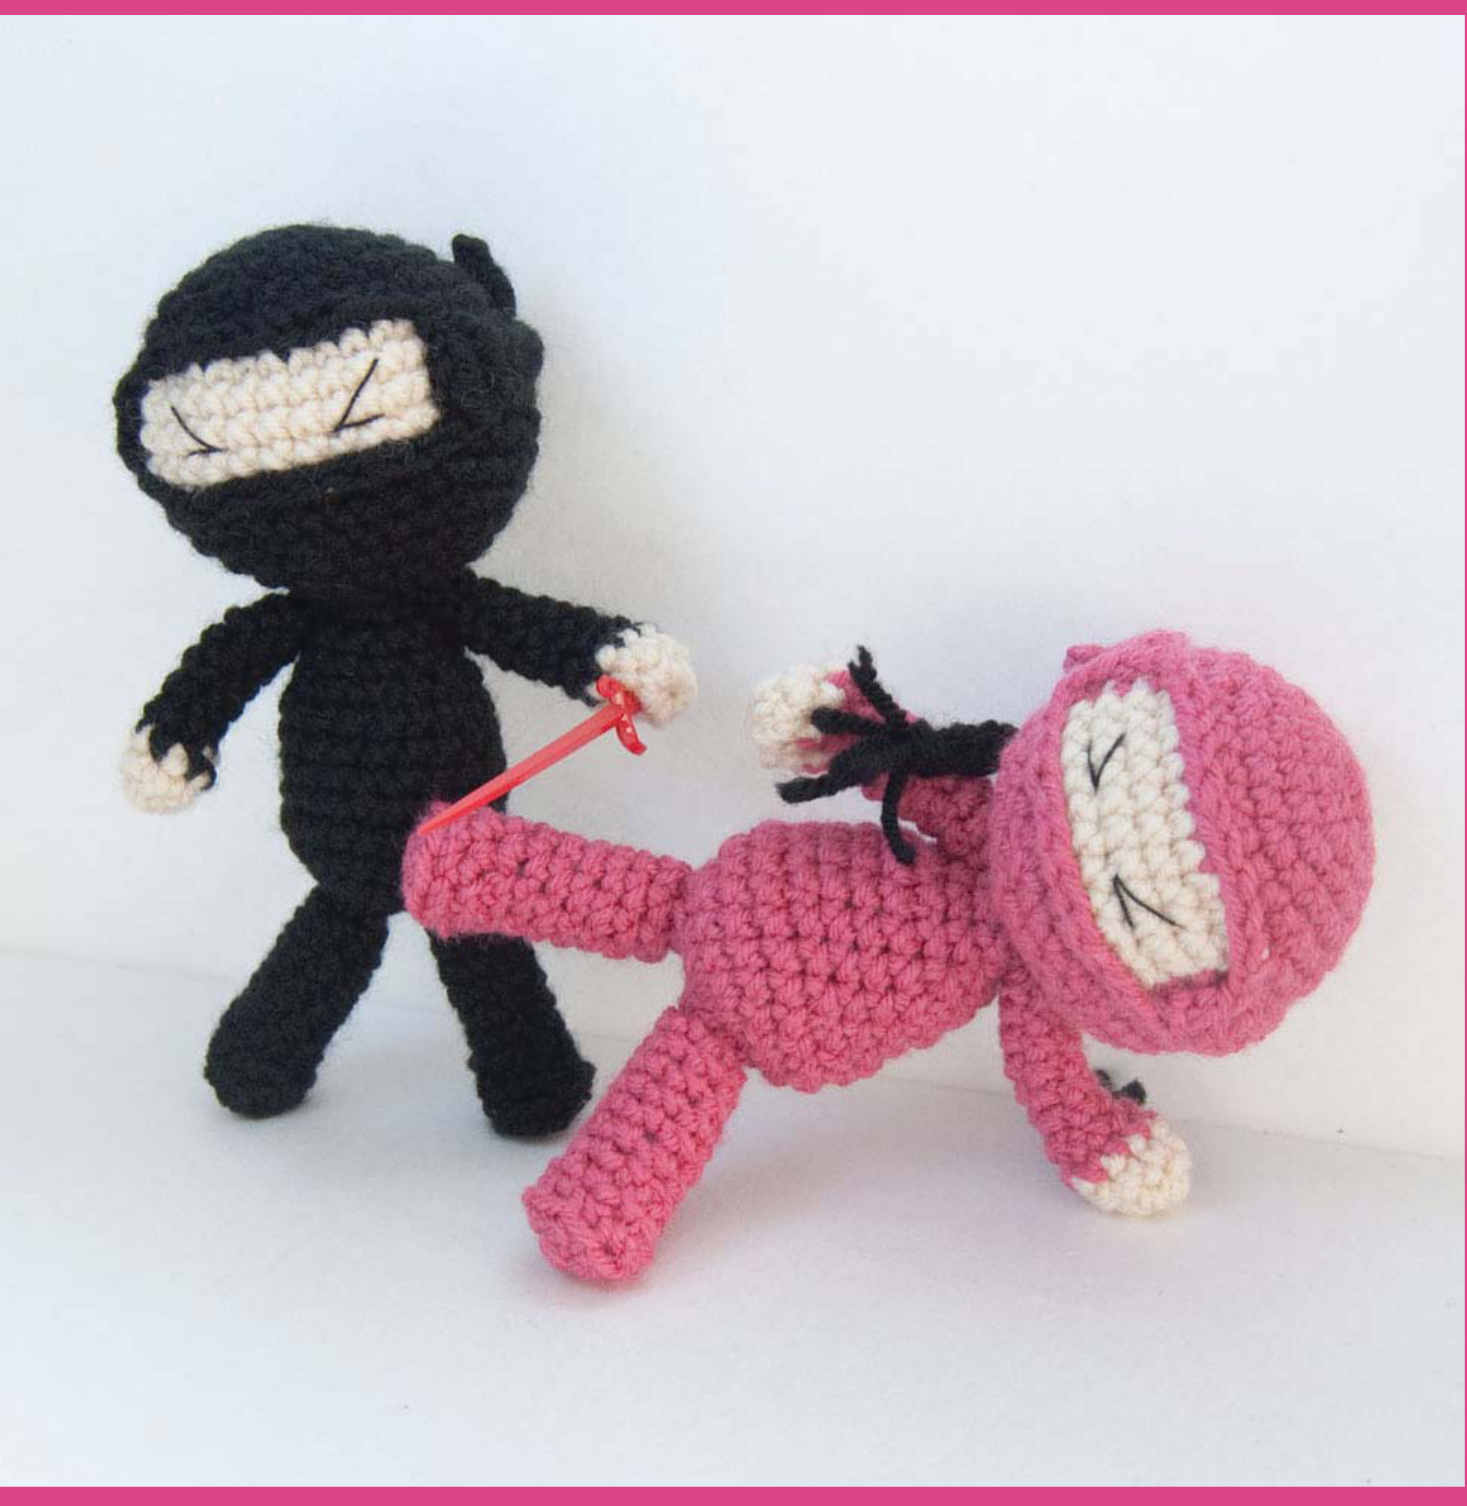
NINJA ATTACK!
Find More Patterns Online:
Web: http://www.itsybitsyspidercrochet.com Email: ibscrochet@gmail.com
NINJA ATTACK!
The other day, I was thinking... there are so many annoying people out there. That guy in the fast lane - driving 55 miles per hour and talking on his cell phone... That lady who clearly saw you waiting in line — yet felt it was her right to jump ahead of you when the store finally opens a new register... You know... those times. So what if... what if we had little ninjas for those moments of annoyance and we could just give those people a little “what for?" I'm not advocating violence or anything... but come on... wouldn't you like a little ninja of your very own?
MATERIALS
Knit Picks Brava worsted weight acrylic yarn in desired body color and cream (for face) Fiber fill Black embroidery floss Size F (3.75 mm) hook Embroidery needle Yarn Needle Stitch Marker
STITCHES&ABBREVIATIONS
CH Chain Stitch SC Single Crochet HDC Half Double Crochet DC Double Crochet TC Treble (Triple) Crochet DECR Single Crochet Decrease SL Slip Stitch ST/S Stitch/Stitches MM Move Marker FO Finish Off
PATTERN NOTES
For the project used in the photos, I used Knit Picks Brava worsted weight yarn in the following colors: Brava Worsted Cream Brava Worsted Rouge Brava Worsted Black Pattern instructions are written for the girl ninja (pink with braids). To make a boy ninja, choose your desired body color and leave the braids off.
COPYRIGHT
Copyright 2012 by Karla Fitch. No part of this pattern may be reproduced or disseminated in any other way without express written consent from the author. I WILL send my ninjas after you!
PART 1: HEAD
The head is made using two different yarn colors: your body color (which makes up the ninja's costume) and cream (used for the ninja's face).
If you are unfamiliar with using two different colors of yarn at the same time, please see the end notes on this pattern for instructions. Round 1: CH 2. 6 SC in second chain from hook. Place stitch marker in the last SC to mark the end of the round. Round 2: 2 SC in each ST around (12 SC). MM) Round 3: \*2 SC in first SC, 1 SC in next. Repeat from \* around (18 SC). MM. Round 4: \*2 SC in first SC, 1 SC in each of next two STS. Repeat from \* around (24 SC). MM. Round 5: \*2 SCin first SC, 1 SC in each of next three STS. Repeat from \* around (30 SC). MM. Round 6: \*2 SC in first SC, 1 SC in each of next four STS. Repeat from \* around (36 SC). MM. Round 7: Work 12 SC in body color, then join cream. Working in cream and carrying body color loosely behind, work 12 SC. Work remaining 12 SC in body color (36 SC). MM. Note: See end notes for photos and instructions on working with two colors at the same time. Rounds 8-9: Work 12 SC in body color. Working in cream and carrying body color loosely behind, work 12 SC. Work remaining 12 SC in body color (36 SC). MM. Round 10: Work 12 SC in body color. Working in cream and carrying body color loosely behind, work 12 SC. Break cream. Work remaining 12 SC in body color (36 SC). MM. Note: See end notes for photos and instructions on hiding the tail from the color you just finished. Continued, next column.
PART 1: HEAD (CONTINUED)
Rounds 11-12: SC in each ST around (36 SC). MM. Round 13: \*DECR across two STS and SCin each of the next four STS. Repeat from \* around (30 SC). MM. Round 14: \*DECR across two STS and SCin each of the next three STS. Repeat from \* around (24 SC). MM. Round 15: \*DECR across two STS and SCin each of the next two STS. Repeat from \* around (18 SC). MM. Round 16: \*DECR across two STS and SC next. Repeat from \* around (12 SC). FO and stuff head with fiber fill.
PART 2: MASK
The mask is worked across a single row of chain stitches. Depending on how big your head came out (you should have a pretty good idea after stuffing), you may need to adjust the length of the foundation chain.

Row 1: CH 49 (or number of STS needed to wrap completely around the head with tails to tie) Row 2: SL 8, SC 2, HDC 1, DC 2, then TC 1. CH 12. Skip 12 STS in the foundation chain, then TC 1, DC 2, and HDC 1. Note: If you worked more than 49 CH in the foundation chain, this next section is where you can make up the extra STS. SC 11 (or number of STS needed to get to the last 8 CH). SL 8 and FO, leaving a long tail to sew the mask in place.
PART 3: HEAD FINISHING
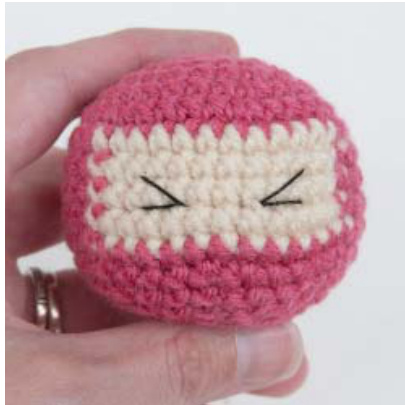
1. Using black embroidery floss and embroidery needle, stitch eyes. Tip: You can also use plastic safety eyes. For this size doll, I recommend using 9mm eyes.
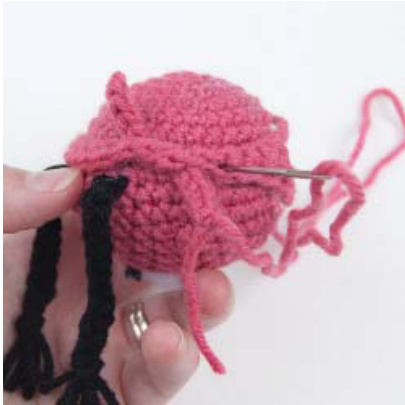
If making a girl doll, continue with steps 2-6. Otherwise, skip to step 7. 2. Cut six 6-8 inch pieces of black yarn (or desired braid color). 3. Using crochet hook, pull all six strands through the back of the head.
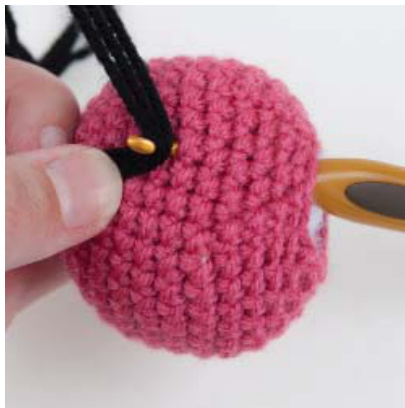
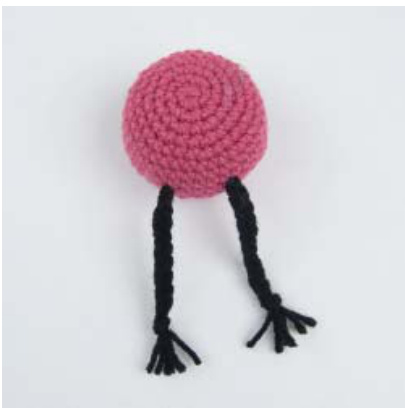
Note: I positioned my braids between rounds 8-9, spaced about 5 STS apart. 4. Knot strands and gently tug so that the knot goes up inside the head. 5. Braid strands (using two strands for each part of the braid)
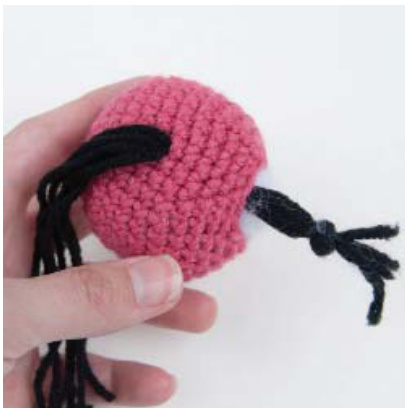
6. Repeat for second braid.
Continued, next column.
PART 3: HEAD FINISHING
7. Place mask with opening over the eyes and gently tie behind the head. Tip: It's OK if the mask doesn't completely fit at this point, you will be stretching the mask into place as you sew it on.
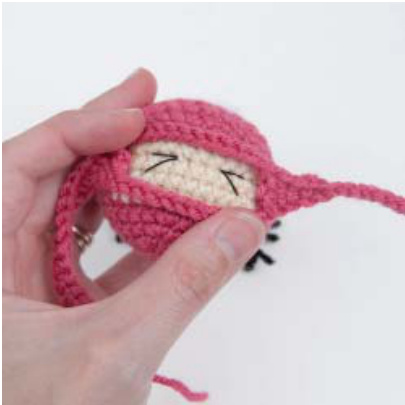
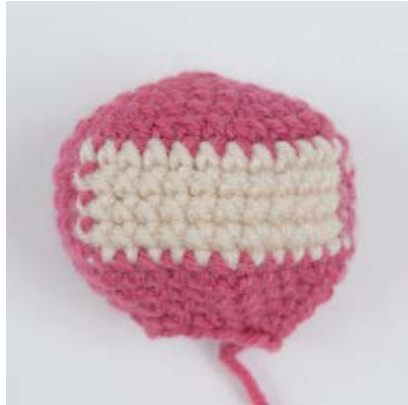
8. Staring at the knot in the back, sew the mask in place with the leftover yarn tail. As you work your way around the head, gently pull the mask to cover the edges of the face and the points where you pulled the yarn for the braids into the head.
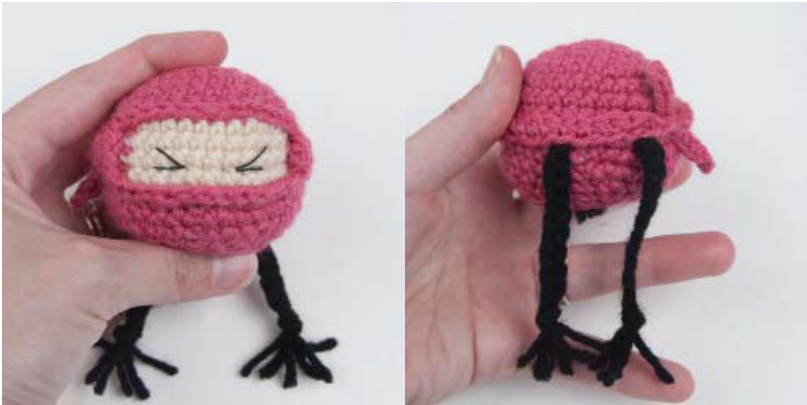
Your finished head should appear as shown in the above photos.
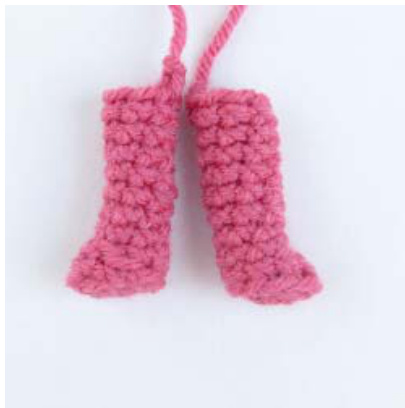
PART 4: LEGS (MAKE 2)
Work legs in the body color in a spiral round. Round 1: CH 2. 6 SC in second chain from hook. Place stitch marker in the last SC to mark the end of the round.

Round 2: \*2 SC in first SC, 1 SC in each of next two STS. Repeat from \* around (9 SC). MM. Round 3: Working in outside loops only, SC around (9 SC). MM. Round 4: DECR across first two STS. SC in each of the remaining seven STS (8 SC). MM. Round 5: DECR across first two STS. SC in each of the remaining six STS (7 SC). MM. Rounds 6-11: SC in each ST around (7 SC). MM. Note: FO after round 11, leaving a tail for sewing.
PART 5: ARMS (MAKE 2)
The first two rounds on the arm is made with cream. After round 2, switch over to your body color to make the rest of the arm. Round 1: With cream, CH 2. 8 SC in second chain from hook. Place stitch marker in the last SC to mark the end of the round.
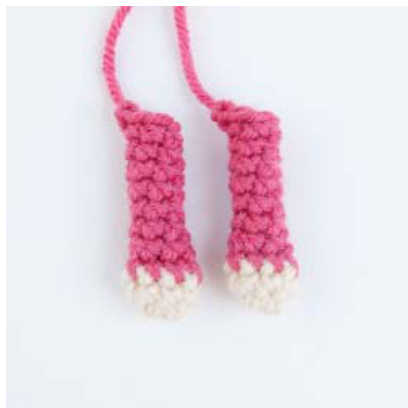
Round 2: SC in each ST around (8 SC). Break cream. Round 3: Join body color and SC in each ST around (8 SC). MM. Round 4: \*DECR across first two STS, SC in each of next two STS. Repeat from \* once more (6 SC). MM. Rounds 5-10: SC in each ST around (6 SC). MM) Note: FO after round 10, leaving a tail for sewing.
PART 7: BODY
Work the body in the desired body color. Round 1: CH 2. 6 SC in second chain from hook. Place stitch marker in the last SC to mark the end of the round. Round 2: 2 SC in each ST around (12 SC). MM. Round 3: \*2 SC in first SC, 1 SC in next. Repeat from \* around (18 SC). MM. Round 4: \*2 SC in first SC, 1 SC in each of next two STS. Repeat from \* around (24 SC). MM. Rounds 5-6: SC in each ST around (24 SC). MM.
Round 7: \*DECR across two STS and SCin each of the next two STS. Repeat from \* around (18 SC). MM. Rounds 8-10: SC in each ST around (18 SC). MM. Round 11: \*DECR across two STS and SC next. Repeat from \* around (12 SC). Rounds 12-13: SC in each ST around (12 SC). MM. Note: FO after round 13, leaving a tail for sewing.
PART 8: ASSEMBLY
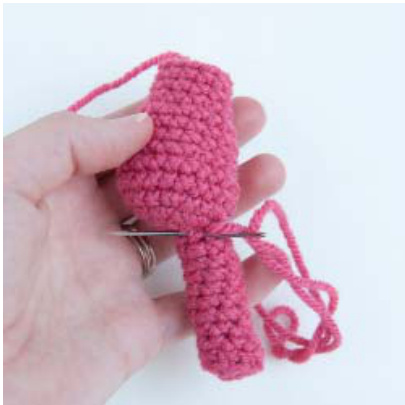
1. Stuff legs with fiber fill and stitch in place using leftover tails, as shown. 2. Stuff body with fiber fill.
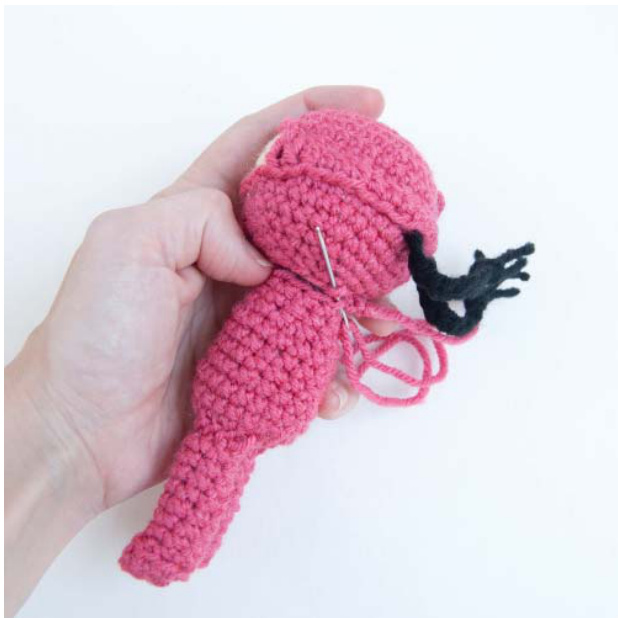
3. Center head on body and stitch in place using the leftover tail from the body, as shown below.
4. Pinch tops of arms together and stitch in place using leftover tails.
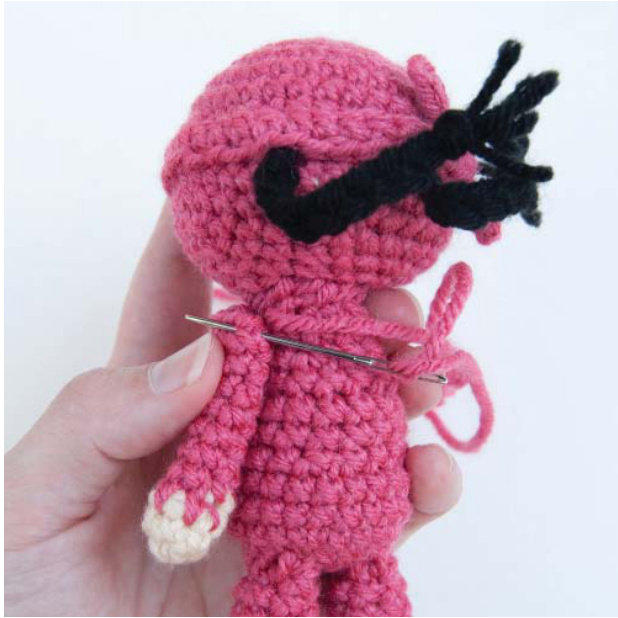
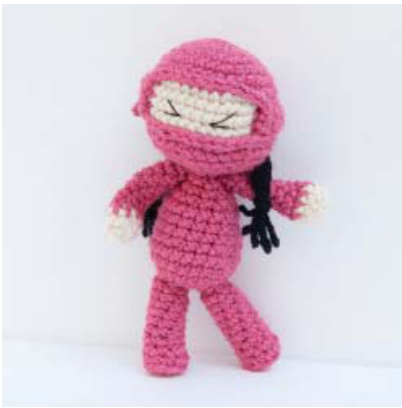
5. You're all done — ready your ninja for attack!
END NOTES: BASIC COLORWORK HOW TO
To make your ninja's face, you need to know some basic colorwork techniques — namely, how to work with one color while holding the other behind your piece. At round 7 in the head, you need to work 12 SC STS, then join the cream. When joining yarn in this way, you can usually do so without using a knot (make sure you do leave a tail inside the piece though!). After making the last stitch in your first color: 1. Put your hook through the next stitch and draw up a loop of the new color.
2. Then yarn over (YO), and draw through both colored loops onyour hook.
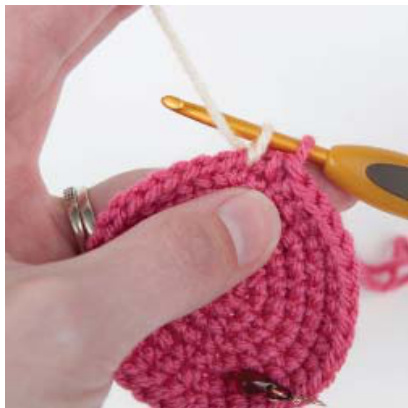
3. Your first SC stitch in the new color is made.
BASIC COLORWORK (CONTINUED)
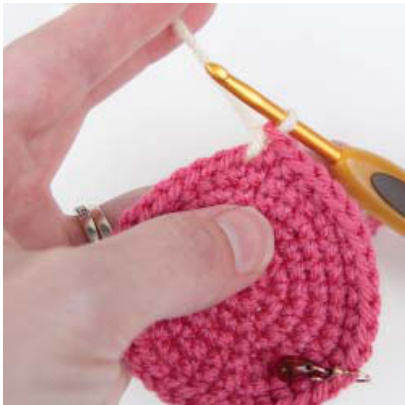
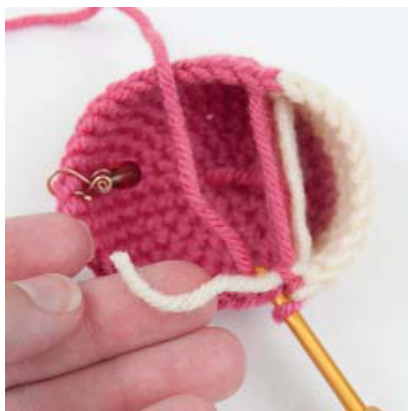
Continue to work along in the new color until you need to change again (for this pattern, 12 SC STS). To change: 1. Leaving enough slack so that your work remains nearly flat, pull the leftover tail from the first color across the back of your piece.
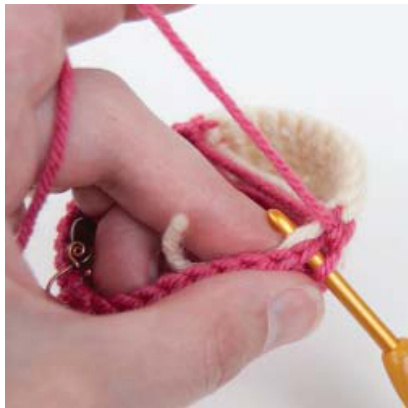
2. Put your hook through the next stitch and draw up a loop of the old color. 3. Then yarn over (YO), and draw through both coloredloopsonyourhook.
You've just changed colors again! As you work (and continue changing colors), the back size of your piece will become a zig-zag of yarns. This is NO BIG DEAL because it's going to be on the inside of your piece.

BASIC COLORWORK (CONTINUED)
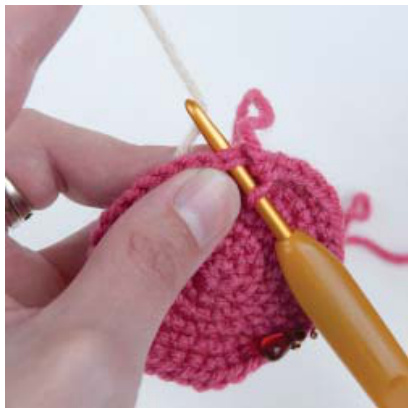
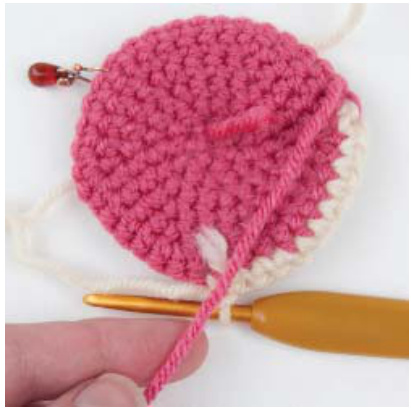
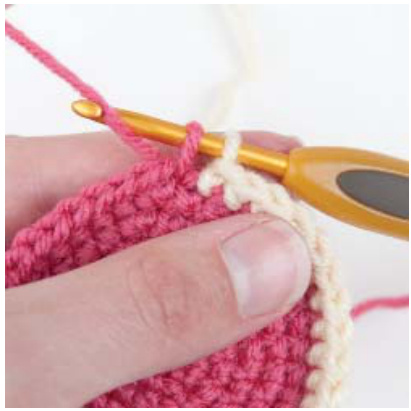
I typically do not knot off after finishing a colorwork section. Instead, I like to hold the tail end of the old color on the inside of my piece and stitch right over it. This works best with SC or HDC stitches that are really tight. So, to finish your colorwork section: 1. Cut off the color you want to finish, leaving a roughly one inch tail.
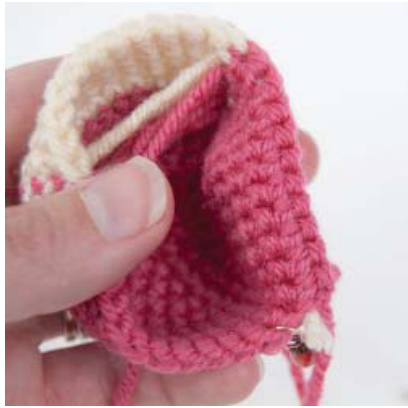
2. Holding the tail to the inside of your piece, SC right over top.
The hidden tail will look like this:
I hope this helps you get started with what can sometimes look like a very intimidating technique. Enjoy!


