TINYTOTES Design by Amy E. Anderson $\circledcirc$
Small Flat-Bottomed Felted Bags Advanced Beginner Skill Level Two Sizes - Two Shapes Worsted Weight Wool Yarn - NOT Superwash
TINYTOTES?
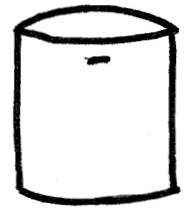
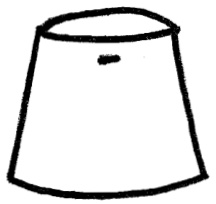
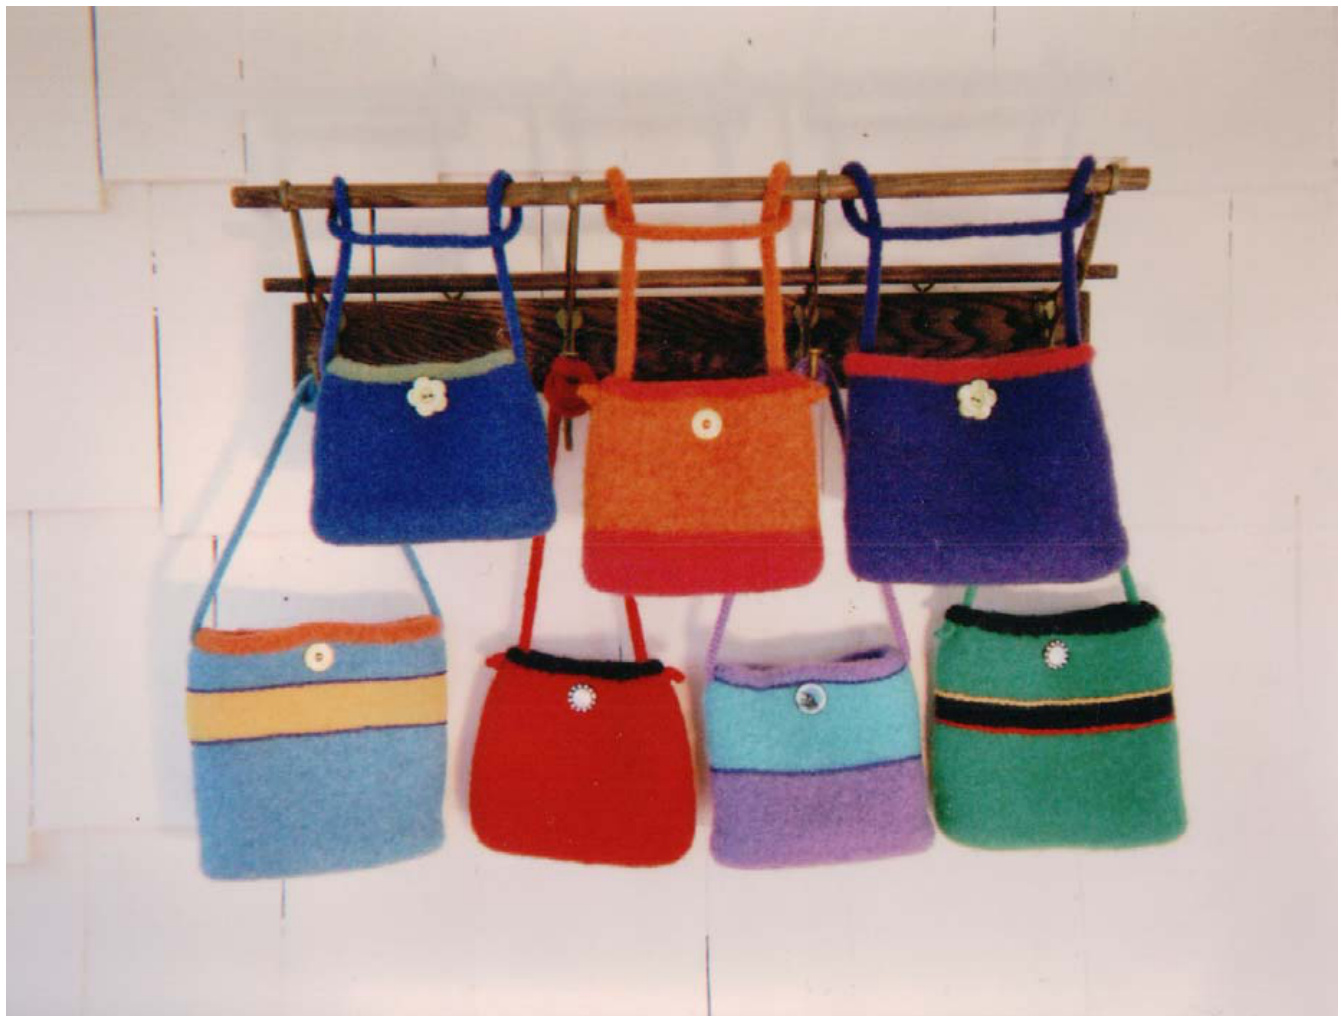
design by Amy E. Anderson If you want to use up some leftover yarn and get a head start on your Christmas presents, this pattern is ideal. The instructions are given for a flat-bottom, solid color bag with contrasting piping around the top edge. If you add stripes, keep in mind that felted fabric shrinks twice as much in the height as it shrinks in the width - in other words, your stripes will get quite a bit narrower when they are felted. If you use multiple colors, you wil get the best results if all of the yarns are the same brand - different brands felt differently. Directions are given for two shapes and two sizes. The tote has straight sides, the clutch has angled sides (see drawing, below). If only one number is given, it applies to all sizes. Needles: Size 8 and Size 6, 16" circulars Double-point needles for I-cord handles. Gauge is not important for this design. Materials: Each bag requires approx. 100 grams of worsted weight wool for the Main Color(MC) (DO NOT USE SUPERWASH!) You will need 20 yards of the Contrast Color (CC) You will need 1 button. Approximate Dimensions After Felting: Small: 6" Wide x $1\;\%"$ Deep $\times\,5\,\%^{\prime\prime}$ High Large: $6\,\%^{\prime\prime}$ Wide $\times\,3^{\prime\prime}$ Deep x 7" High
Step 1: Make the Flat Bottom:
With Main Color and size 8 needle, cast on 60 sts. Join, being careful not to twist, and knit 1 rd. Place Markers for Corners on Next rd as follows: K1, PM, K 28, PM, K2, PM K28, PM, K1, PM for the end of the rd. Note: Use a different color marker for the end of rd. Work Increases as follows: Rd. 1: Inc 1 in the st before and the st after EACH of the 4 corner markers. Rds 2 & 3: Knit. For Size Small: (68 sts total) Go to Step 2. For Size Large: Repeat Rds 1-3 twice more (84 sts total). Then go to Step 2. Step 2: Knit the Sides: For Tote Bag: Knit even on 68 (84) sts until bag measures $8^{\circ}\left(10^{\circ}\right)$ above the increases. Go to Step 3. For Clutch: Remove the 4 corner markers and place side markers on next rd as follows: K34 (42), PM, Knit to end of round marker. \*Knit even for $3\,\%^{\prime\prime}$ Work decrease shaping on next rd as follows: K2tog, knit to 2 sts before side marker, K2tog twice, knit to last 2 sts, K2tog.\* September, 2004 Repeat \* - \* once more. You will have 60 (76) sts total. For Small Clutch: Go to Step 3. For Large Clutch: Work \* - \* one more time. You will have 72 sts. Then go to Step 3. Step 3: Make The Buttonhole: For Tote: Knit 15 (19), B0 4 sts, Knit to end of round. For Clutch: Knit 13 (16), B0 4 sts, Knit to end of rd. For all: Next rd: Knit around, casting on 4 new sts to replace the 4 sts bound off on the previous rd. Knit even for another $\%^{n}$ . Go to Step 4. Step 4: Work Top Piping: Switch to Size 6 needle and Contrast Color and K 1 rd. Purl 4 rds. Next rd: BO all sts. Piping will naturally curl to the inside, making a tube. BEFORE FELTING baste the tube shut, so it can't uncurl. Handles: For a short handle, make I-cord $18"$ long. For a shoulder strap, make I-cord $30^{\prime\prime}$ long. Directions for Making I-cord: On double-point needle, cast on 3 sts. \*Knit 3 sts. Don't turn. Put the right needle in your left hand, slide the 3 sts to the other end of the needle\* repeat from \* - \* until handles reach desired length. Draw the remaining 3 sts together and tie off. Finishing: Sew the bottom of the bag closed. Weave in ends. Felt in your washing machine with hot water. You can sew handles onto bag before or after felting. Note: You may need to wash your bag more than once. Try stopping your washer before it gets to the rinse cycle, then reset it to agitate again. When your bag has felted, it will have a flat bottom. Cut a piece of cardboard for the bottom, put the cardboard in plastic wrap so it won't absorb water from the bag, and place it in the bottom of the bagWhen bag is dry,youcan remove the plastic wrap. Sew your button in place on the inside of the bag.
Abbreviations:
$\mathsf{S t}(\mathsf{s})=$ stitch(es) $\kappa=\mathsf{K n i t}$ Inc $=$ Increase $\mathsf{P M}=$ placemarker K $2\mathtt{t o g}=\mathtt{b}$ Knit 2 together SSK Rd(s) $=$ round(s) $\mathsf{B O}=$ bind off Clutch: