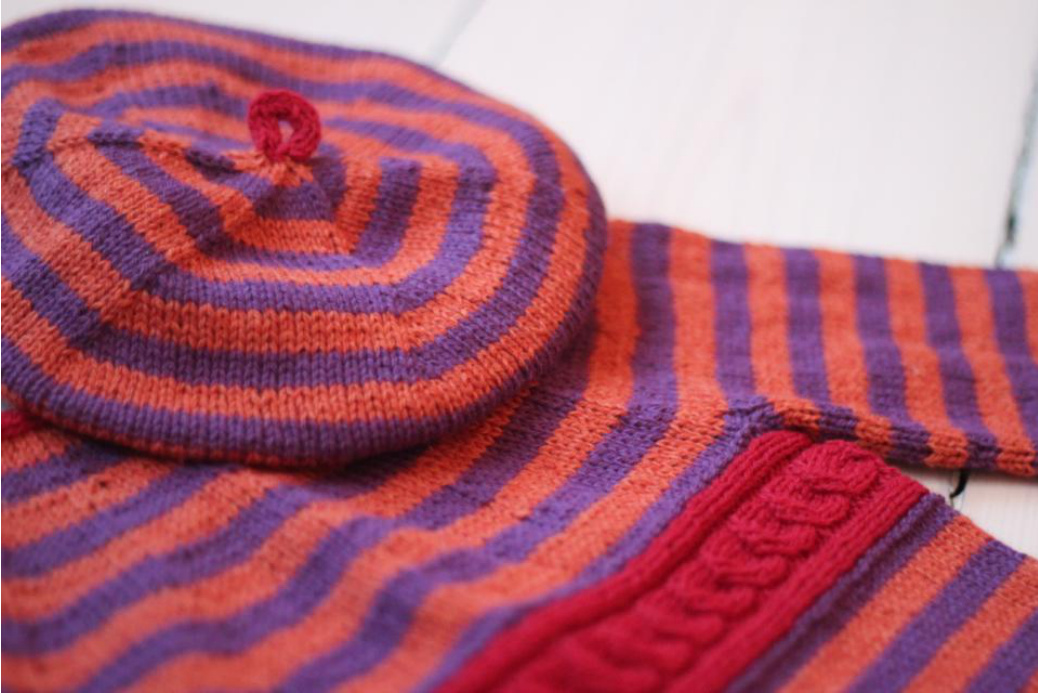
SAMLEBAND MINI BERET
I had some left over yarn from the baby cardigan Samleband by Geilsk and wanted to make a mini beret with the same cable as the cardigan. Said and done! Out of respect for the cable pattern designer Bente Geil I have not included the cable pattern below, only a link to the original pattern which could be bought through Geilsk webshop. If you do not want to buy the pattern you can off course make some other type of cable instead and use the pattern below for the rest of the beret. Yarn: Bomuld og uld 3 ply Geilsk Gauge: 28 sts 10 cm in stockinett stiches Size: 6-12 months Needles: 3 mm (and 2,5 mm) dpns Children's head size vary quite a lot so the best is to measure the head and increase/decrease the number of turns and stitches to get the best fit. Knit until the band reach around the head. Note that the band is not very stretchy; it should not be too tight on the head. When picking up stitches along the cable band the number of stitches will increase/decrease 6 sts per turn of the cable. If you want the beret to be baggier just add a number of rounds (stripes) before the decreases.
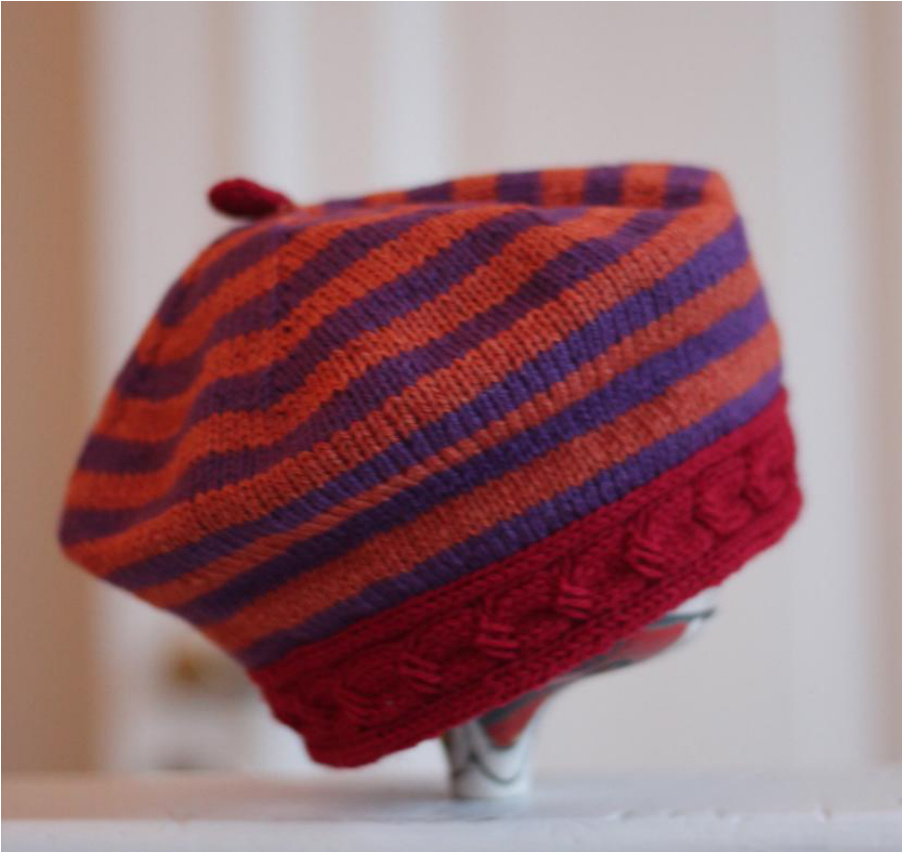

SaMLEBAND'S CaBle
Cast on 16 sts with larger needles with MC (red) and knit the cable pattern from Geilsk Samleband. Knit row 1-6, 22 times in total (approx 42 cm). If you need a bigger size just knit the cable pattern (row 1-6) a few more times. Cast off.
HEAD
With smaller needle (2,5 mm) and CC1 (purple) pick up 1 st per row along the side of the cable from the right side. In total 132 sts (or 6 sts per set of cable pattern). Place marker to mark the beginning of the round. Change to larger needles (3 mm) and start knitting in rounds. Change CC every 4th round and knit until you have 8 stripes in total (32 rounds). The work is now approx 11 cm from cast on edge.
DECREASES
Now start to decrease as follows (continue with stripe pattern): Round 1: \*k20, k2tog\* repeat until end of round. Round 2: knit all round. Repeat those two rounds 10 times in total (until you have 72 sts). (There will be one st less between the decreases on round 1 for every decrease round; the second decrease round willbe \*k19, k2tog\*). When you have 72 sts left start decreasing every round until you have 6 sts left. Next row: k2tog, k2tog, k2 = 4 sts left. http://bycaloweena.blogspot.se
I-CORD
Knit an I-cord with the remaining 4 sts for 15 rounds. (l-cord = \*k4, slide the worked sts to the right side of the dpns. Do NOT turn the work. Pull the yarn behind the stitches tightly and repeat from \*). Tuck down the I-cord and attach as a little hanger. Graft the cable band together and weave in ends. Voila! If you have any questions just send me an email! Carolina (bycaloweena@gmail.com)
ABBREVIATIONS
CC1 Contrast color 1 (purple in the pictures) CC2 Contrast color 2 (orange in the pictures) dpns double pointed needles I-cord \*K4, slide the work stitches to the right side of the needle. Do NOT turn work. Repeat from\* kknit k2tog knit two stitches together MC Main color (red in the pictures) st/sts stitch/stitches

For personal use only; cannot be copied for sale or used to make items for sale without consent of the designer. Copyright2013byCaloweena/CarolinaBalck http://bycaloweena.blogspot.se


