Haruni
by Emily Ross
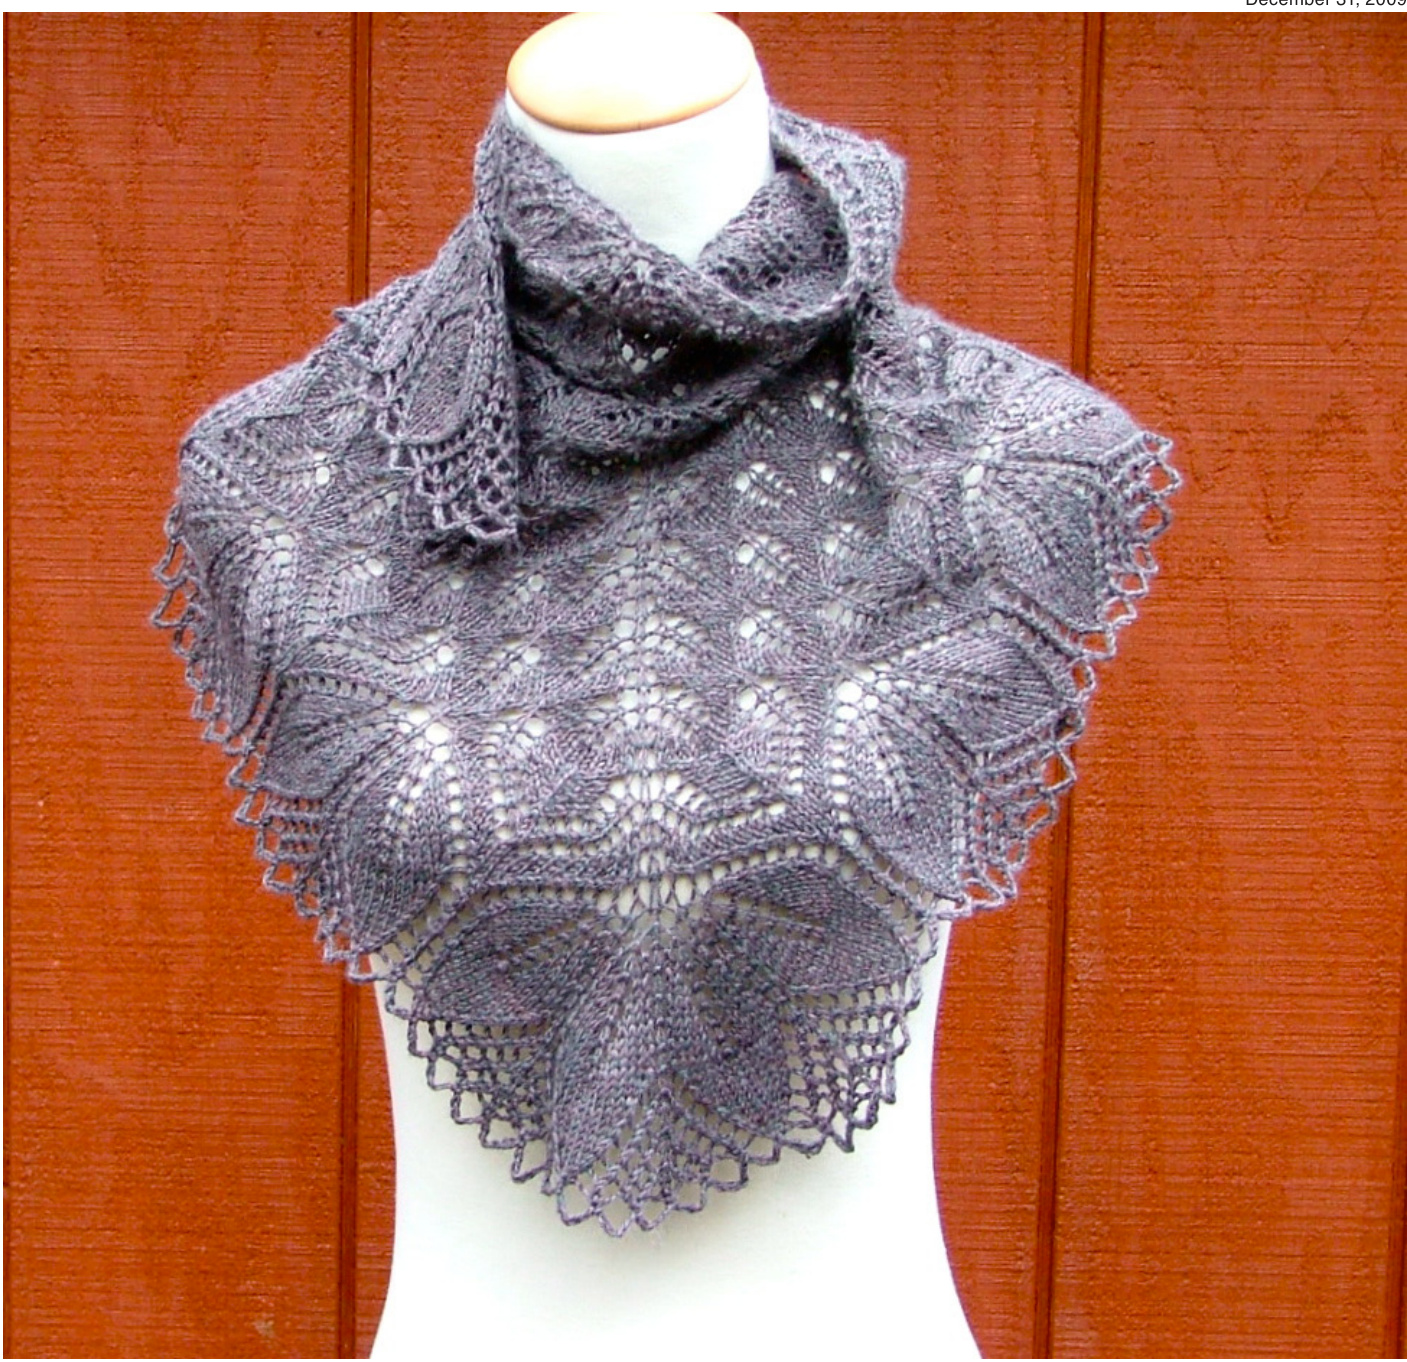
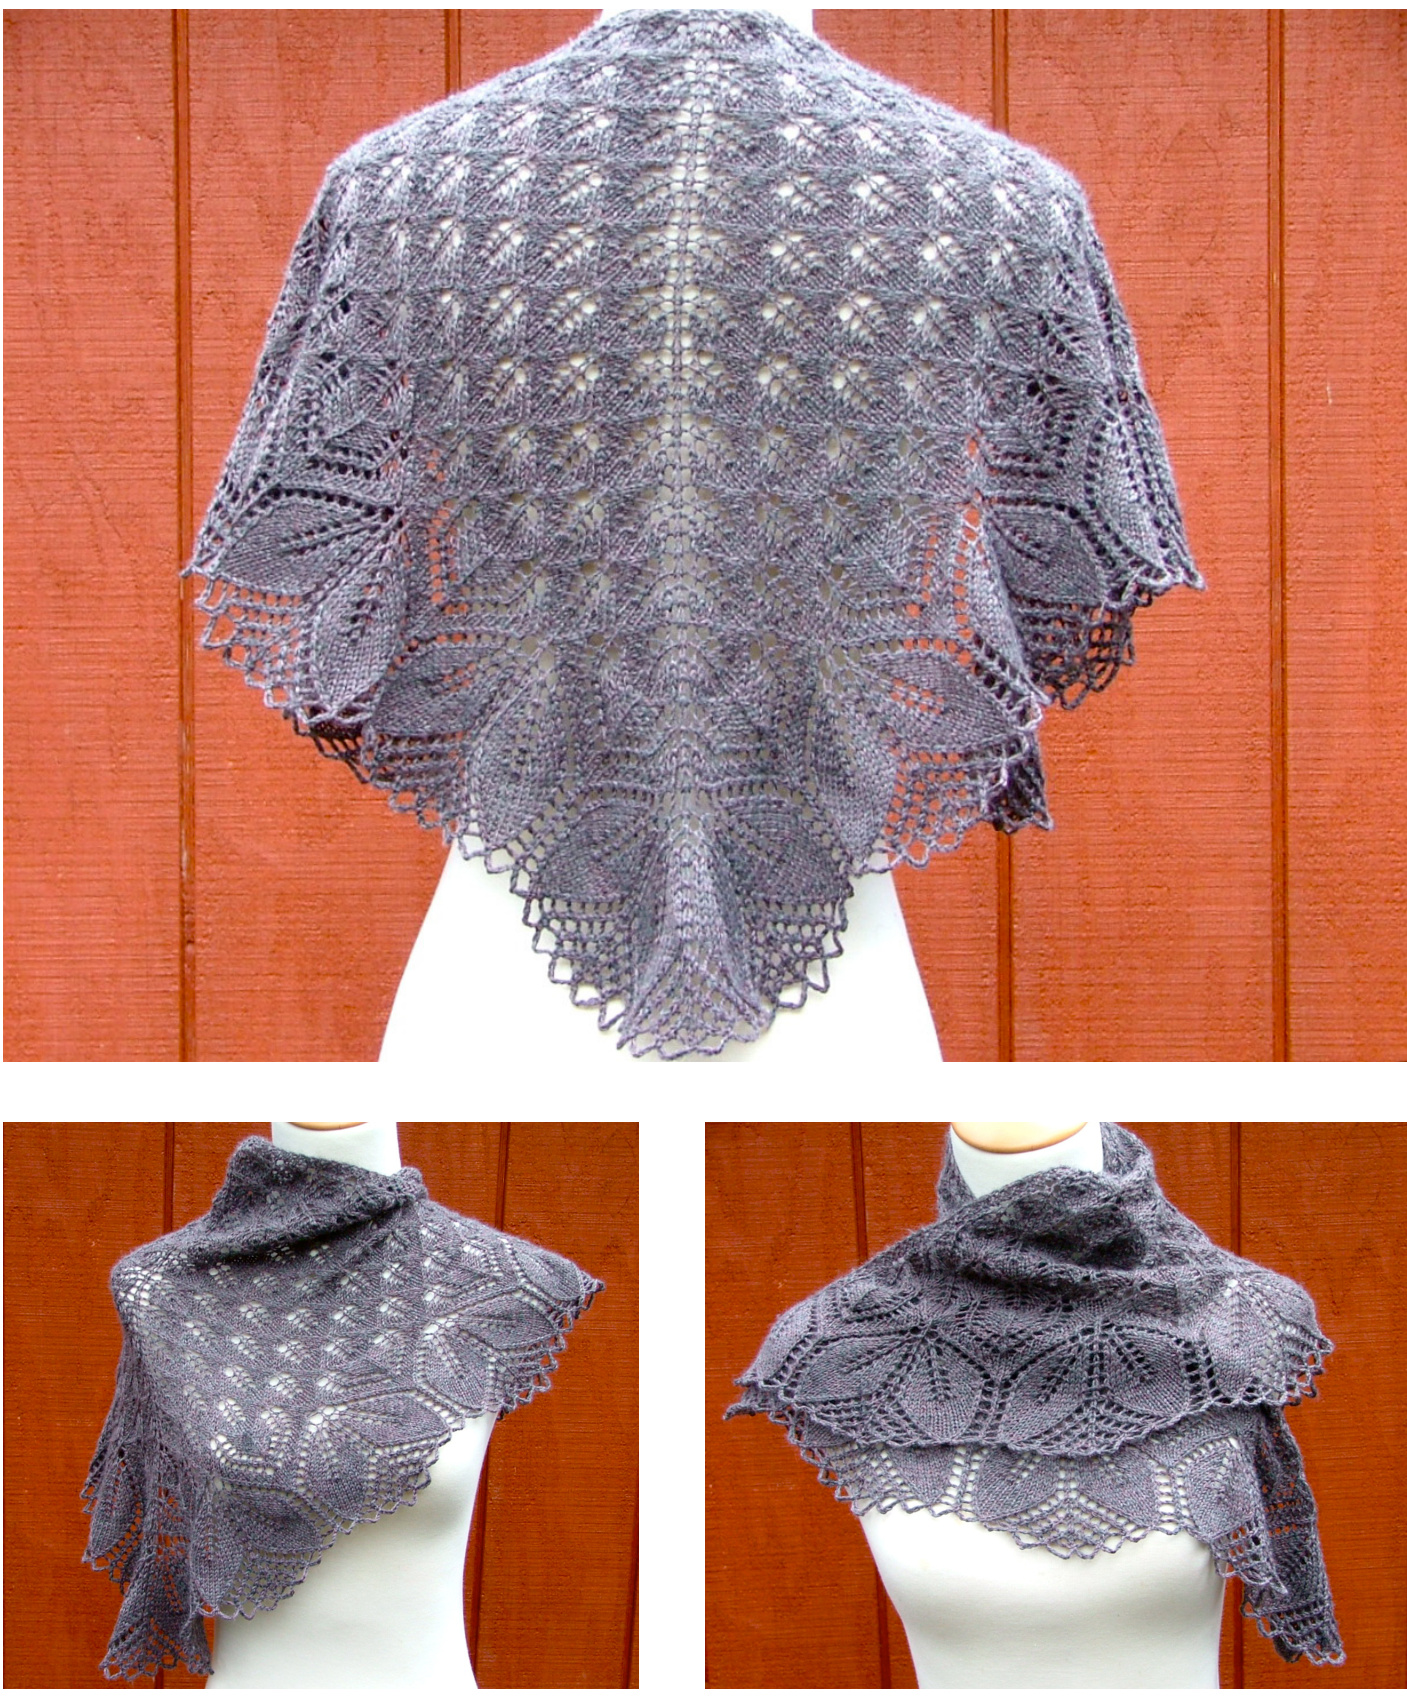
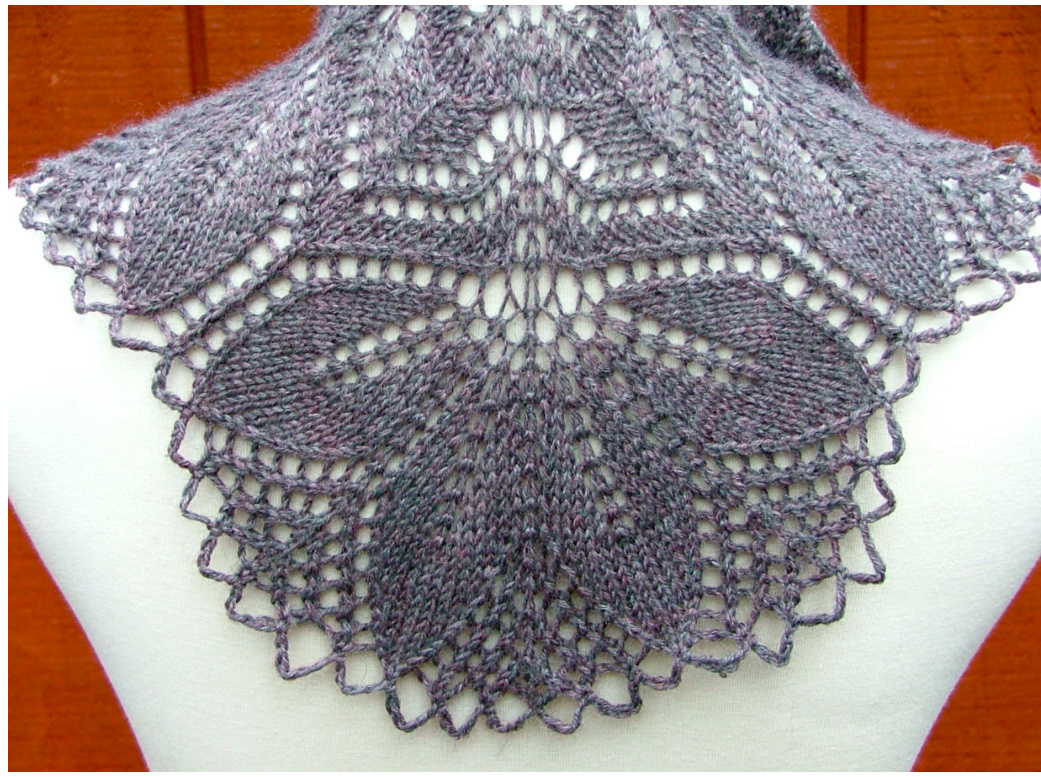
Haruni is a slightly crescent shaped triangular shawl, worked from the top down. It begins with a smallr version of the traditional fern lace motif, then transitions to an exuberantly leafy border, and is finished with a crochet cast off. The name Haruni means “grandmother"? in Quenya, Tolkien's Elvish language. This design in based on one I made for my grandmother for Christmas.
Materials
Gauge
475 yards sock or fingering weight yarn 1 long circular needle. I used size 4, but I knit quite loosely. You may prefer a 5 or even size 6. Please note that if you go up in needle size you may need slightly more yarn 1 stitch marker 1 crochet hook. As long as it is small enough to fit between your stitches and you needle, size is unimportant Blocking pins/wires 21 stitches and $18\ \mathrm{rows}=4$ inches in lace pattern, after blocking. I knit mine using sock yarn, but like most lace patterns, gauge is not vital, you can knit this pattern in a variety of yarn weights. My finished shawl, which used 460 yards of sock yarn and size 4 needles, measures $23^{\circ}$ deep, with a wingspan of 45". You can easily adjust the size of this shawl by knitting more or less repeats of the fern pattern. Please note that any change in yarn, needle size, or number of repeats will change your yardage requirements as well.
Instructions
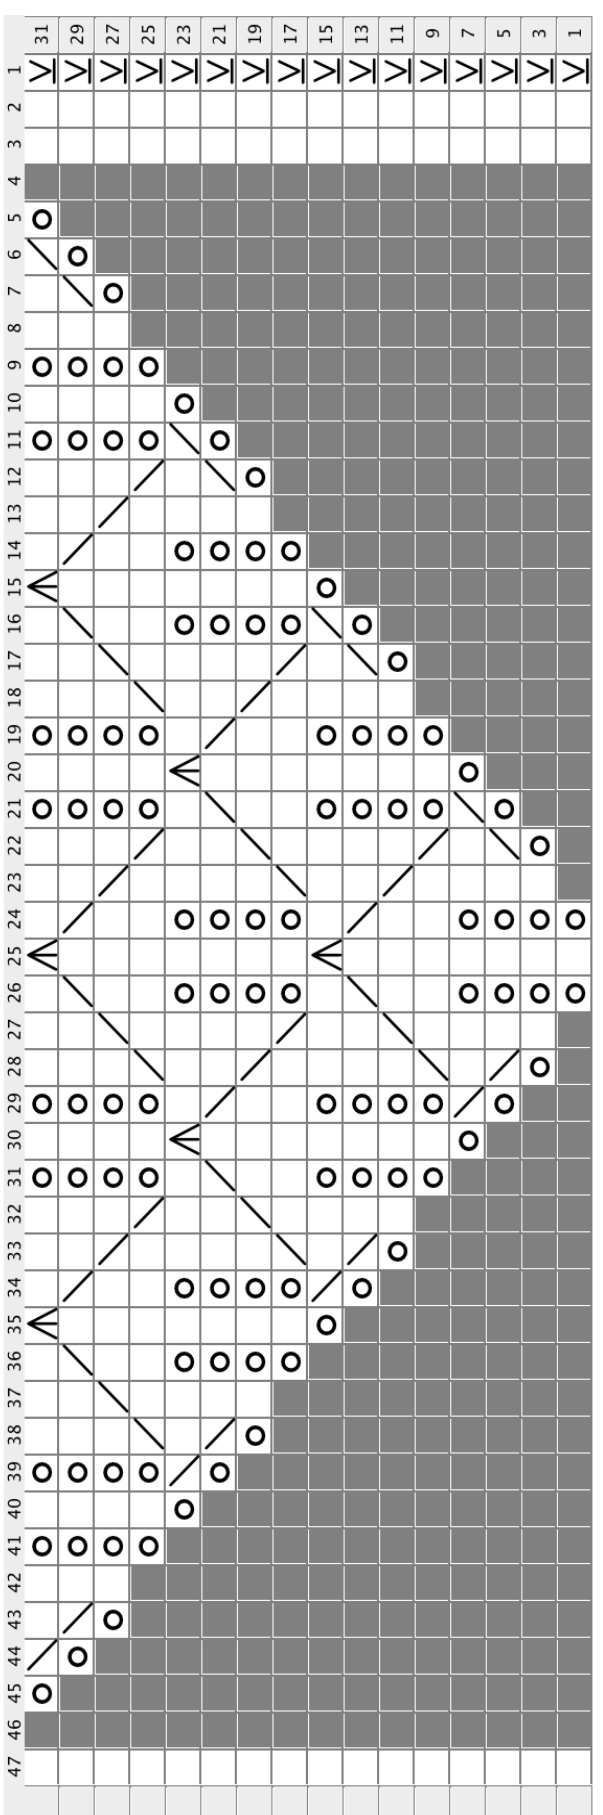
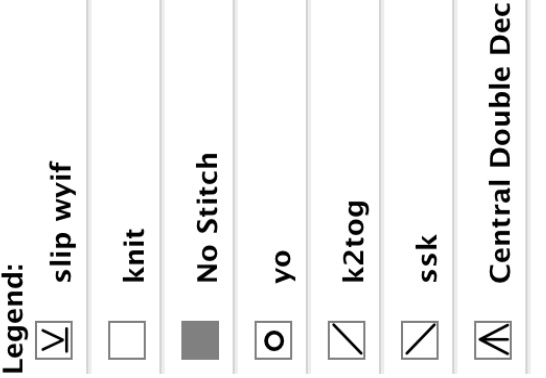
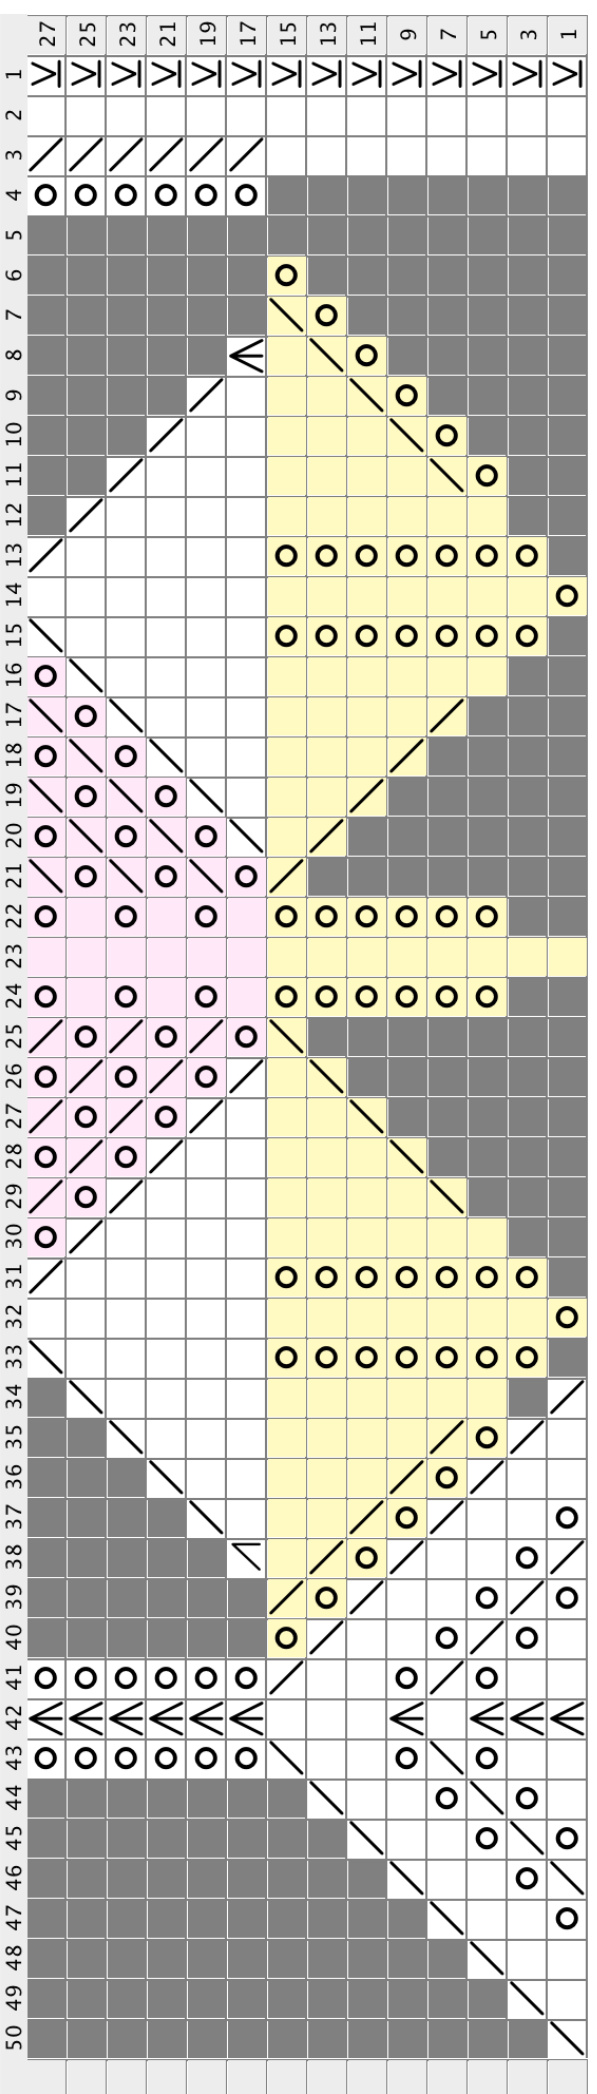
Loosely cast on 7 stitches ·Slip 1 with yarn in front, K2, YO, K1, YO, K3 Next row and all wrong side rows, slip 1 with yarn in front, K2, purl to the last 3 stitches, K3. The frst and last 3 stitches of every row form a garter stitch edging. which will help with blocking. Make sure to slip the frst stitch very loosely, so that you will be able to stretch your shawl properly when blocking Place your stitch marker in the center stitch, the one in between the 2 YOs. You will be increasing on either side of this center stitch Now you are ready to begin Chart A. This chart only shows half of the shawl. To knit across an entire row, knit the chart as written from right to left, knit your center stitch, then repeat the chart from right to left (omitting the first 3 border stitches), and end K3. All even numbered rows are slip 1, K2, purl to the last 3, then K3. Continue Chart A as established, until you have 12 “stems" on each side of your central stitch. The \*stem" is the single K stitch with YOs on either side of them. Ifyou wish to make your shawl larger or smaller, make sure you end chart A with an even number of “stems" in each balf If you have a limited amount of yarn, please note that due to the rapid increases in chart B, it will eat up roughly half your total yardage. In Chart B you will be increasing much more rapidly for the first half of the chart, then in the second half of the chart you will actually be decreasing the number of stitches per row. Like Chart A, this shows only half of the shawl. For the first 15 rows of this chart, you will be growing pairs of leaves, while decreasing the stitche: between pairs. Each half of the shawl mus begin and end with a pair of leaves. I've highlighted these segments in yellow on the chart. So, to knit a full row of Chart B, you begin reading right to left, repeating the entire chart, ending your
fnal repeat ftherst halfwith thlast yelw stithRepat forthe secnd halfofth shawl, starting and ending with a yellow segment. For rows 17-27, you will be decreasing the leaves, while only increasing between leaves, (shown in pink) not between sets of leaves. When you come to the 4 leaves (2 pairs) that make up the center of your shawl, knit the increase section (shown in pink) between each leaf. After your fnal (wrong side) row, you are ready to bind off. Using your crochet hook like a knitting needle, K4tog. Single chain 6 stitches, then K3tog. Cast off 1 stitch by passing the first stitch (on your crochet hook) over the 2nd. Single chain 6 stitches, then K3tog, and cast off 1. Continue in this manner, always knitting 3 stitches together. The initial K4tog was only for the edge stithes. Your K3tog should line up with the pattern, closing each leaf tip. If you choose to use a different cast off method, you may want to knit one more row in pattern first, to finish the decreases for the leaf tips. Whichever cast off method you choose, make sure you do it very loosely, so that you can block it properly. Sew in your starting tail, closing the gap betwee the two halves. ew in any other ends, soak, block, and enjoy! I've tried tomake this pattrn as accurate as possible, but if you nd any errors or are just plain confused, please don't hesitate to contact me. My Ravelry name is Knitterain.