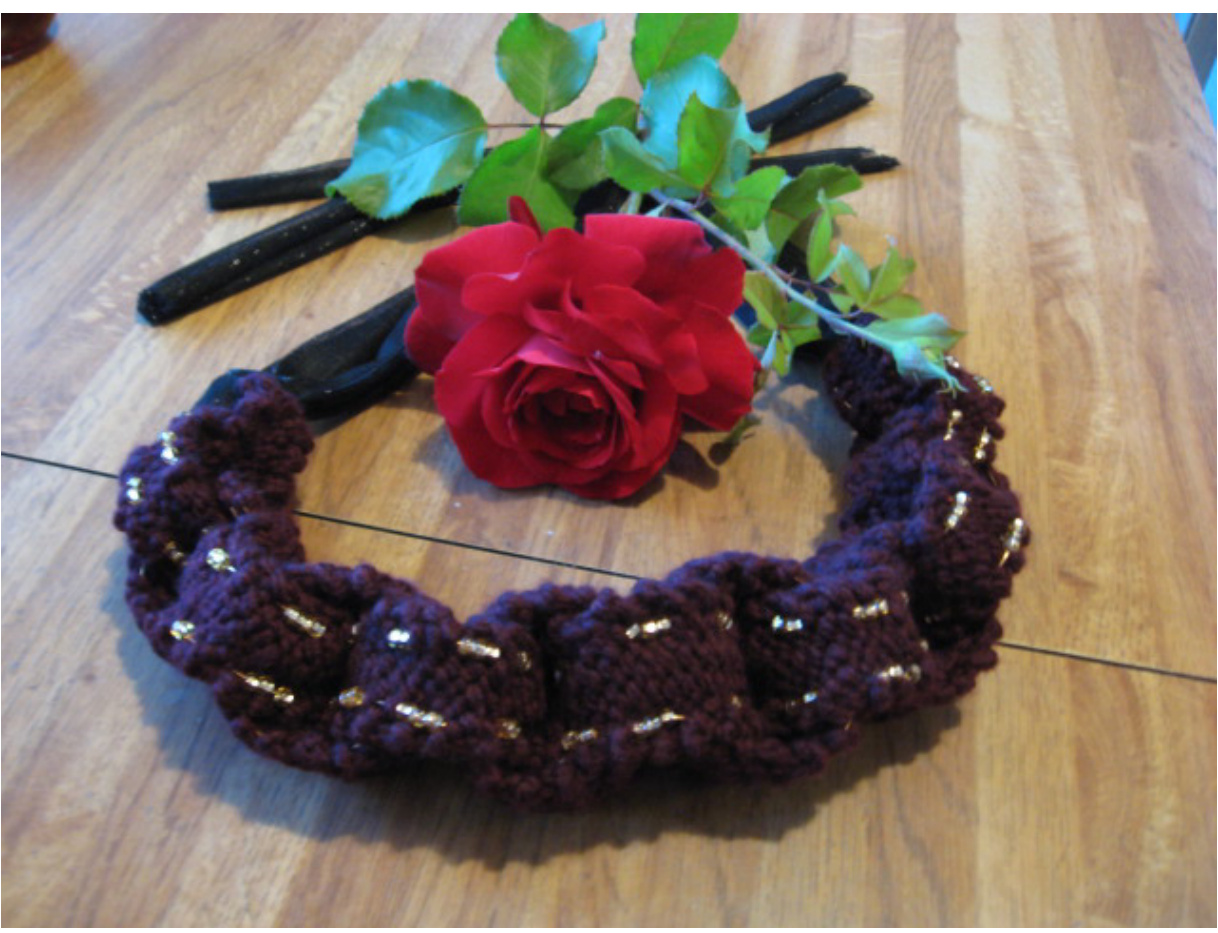
Knock Off by Carla Cappi
Remember those little paper chain necklaces we all used to make in elementary school? Well guess what? They're back in style, and not just for the kiddies anymore, they're actually high fashion. After seeing haute-couture versions of this grade-school classic on the runway as part of a very famous and well known fashion designers falline, I set out to find a way to make a knit-paper chain necklace for a fashionista friend of mine. Thus Knock Off was born, a bit of a twist on the designer versions of the necklace, featuring graduated rings that move from smallest to largest toward the center and, in true high-fashion style, feature bead and rhinestone blingitude (trust me it's a word, all the kids are saying it.) This loose choker style necklace is a simple enough pattern that even the most novice knitters can pull it off. Plus it knits up lightning fast in a chunky yarn which makes it a great last minute gift for any fashionable teen or woman in your life. Each ring features a Reverse Stockinette body with a Garter Stitch border, and brass wire serves double duty as both embellishment and to add stability to the knitted rings so they don't fold in on themselves. The model featured is more a guideline than anything. Mix up the colors, stitch patterns, ties and embellishments to make it your own!
Size
Adjustable to any size
Finished Measurements
15 inches from end to end, excluding the ties, when laid flat.
Materials
Bernat Softee Chunky $200\%$ Acrylic; 164yd/150m] 1 skein Dark Burgundy Note: Only about 60 yd/55m is needed for entire necklace. US size 8 (5mm) straight needles Tarnish resistant thin brass wire in color Gold; approx. 6 yd (for the model shown Iused Darice brand Craft Designer brass wire in gauge 26) Small glass beads in color Gold Mesh Chiffon Fabric or ribon for ties Scissors Needle nose pliers (optional)
Guage
5 sts and 6 rows ${\bf\omega}=1^{{\boldsymbol\prime}{\boldsymbol\prime}}$ in St st. Pattern Notes: this pattern can be modified ad infinitum with different fibres, weights, colors, textures, bead/rhinestone choices etc. The pliers are optional for working with the wire, however Ifind the wire is easily worked by hand.
Necklace
Large Ring (make 3): CO 6 sts Row 1 (RS): k1, p4, k1 Row 2: k Repeat rows 1 and 2 until piece measures approx. 4.5 inches, ending with a row 1. BO in St st, leaving an 8 inch tail for seaming. Medium Ring (make 6): CO 5 sts Row 1: k1, p3, k1 Row 2: k Repeat rows 1 and 2 until piece measures approx. 4.5 inches, ending with a row 1. BO in St st, leaving a 7 inch tail for seaming. Small Ring (make 6): CO 4 sts Row 1: k1, p2, k1 Row 2: k Repeat rows 1 and 2 until piece measures approx. 4 inches, ending with a row 1. BO in St st, leaving a 6 inch tail for seaming.
Finishing
Start by cutting 30 lengths of wire about 6.5 inches long. Between 20-30 small beads will be needed for each beaded ring, depending on how much bling you desire
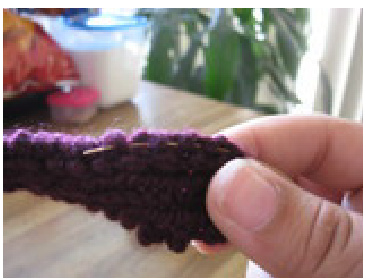
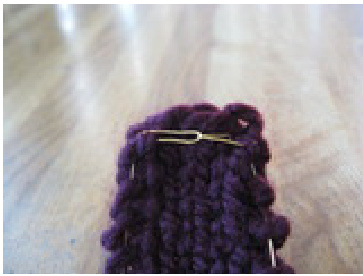
Non-Beaded Rings: Make 2 Large, 2 Medium, 4 Small Run a length of wire through the garter ridge edge on the WS of a Small Ring as shown in the picture to the left. Don't worry if the wire shows through a little bit to the RS, it'll just add to the bling factor. Repeat the same process on the opposite edge (still on the Ws of the work.) Beaded Rings: Make 1 Large, 4 Medium, 2 Small Note: to prevent the beads from slipping to the back of the work, push wires through a stitch as opposed to pushing through the holes between stitches. Starting at the end of a ring and at the edge of the RS of the work, push wire through from the back to the front and bead wire with the desired number of beads. Then push the wire to the back of the work. Push wire to the front of work again about a half an inch/1 cm from last bead and bead the wire again with the desired number of beads. Work the same, beading the wire until you reach the end of the ring, end by pushing the wire through to the back of the work. Repeat this process on the other edge. Securing the wires: On the wrong side of the work fold each wire toward the center at a 90 degree angle and then fold them back toward the edges, interlocking the wires as illustrated in the picture to the right. Clip any excess wire as needed to make sure the wires will not poke out the sides. Secure the loose bits of wire by pushing them into and under a stitch as illustrated in the picture. Repeat this process on the other end and for all rings.
Joining and Seaming: Starting at the center of the necklace with the only beaded Large Ring, whipstitch the two ends of the ring together using the CO tail and making sure the RS or beaded portion is visible on the outside. Weave the remaining tail into the Ws of the ring. Then, loop one non-beaded Large Ring through the beaded Ring and seam in the same manner as before, weaving the remaining tail into the Ws of that ring as well. Next, loop one beaded Medium Ring through the last non-beaded Large Ring and seam as before. Repeat this process, alternating between beaded and non-beaded rings for the next 2 Medium Rings, and then for 3 of the Small Rings. Repeat the same progression of rings on the opposite side of the initial beaded Large Ring. Ties: Cut the Chiffon fabric to about 6 inches wide and then trim to your desired length, or use precut Chiffon Ribbon. Loop one length through each of the last Small Rings and tie the fabric or ribbon to attach it securely to each ring as shown in the picture. Tie the necklace around your neck and flaunt your Knock Off diva style!


