Felted Toy Alphabet Blocks
by Jessica Sant originally published at Jess: Knit Climb Java blog link: www.wingedsheep.com/blog/2008/02/03/felted_toy_alphabet_blocks.html ravelry link: http://www.ravelry.com/patterns/library/felted-alphabet-blocks This is a softer more head-bump-friendly version of the classic wooden alphabet blocks. Its not exactly a quick project, and parts of it can be quite tedious, but the end result is totally worth it. I love to watch my 11-month old daughter knock over stacks of blocks that I make, giggle, and throw the blocks around. These boldly colored alphabet blocks can be used at many stages of your child's development to learn all sorts of new skills:
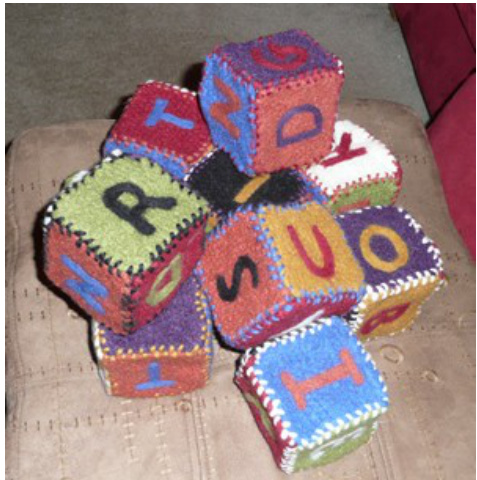
stacking and knocking down identifying colors counting letters color patterns
materials:
8 balls of Patons Classic Merino Wool in contrasting colors (paprika, black, rich red, that's blue, leaf green, old gold, royal purple, and winter white) one set of size 10.5 needles Needle Felting barb (I got the Fiber Trends Needle Felting Starter kit) Multi-needle Felting Tool (I got the Clover Felting Needle tool) 3" deep foam block, approximately 9"x12" 2" alphabet stencils tapestry needle
pattern:
To make this project you will do several things: knit, wet felt, needle felt, and sew. If you don't know how to wet felt or needle felt - don't be afraid of this projct, its actually quite easy and there will be plenty of time to practice as you'll be doing those steps multiple times. This pattern can be heavily modified to however works best for you. These are the instructions I used to create the blocks, but you may find that a slightly different method works best for you. You'lbe repeating these steps many times, experiment!
make squares:
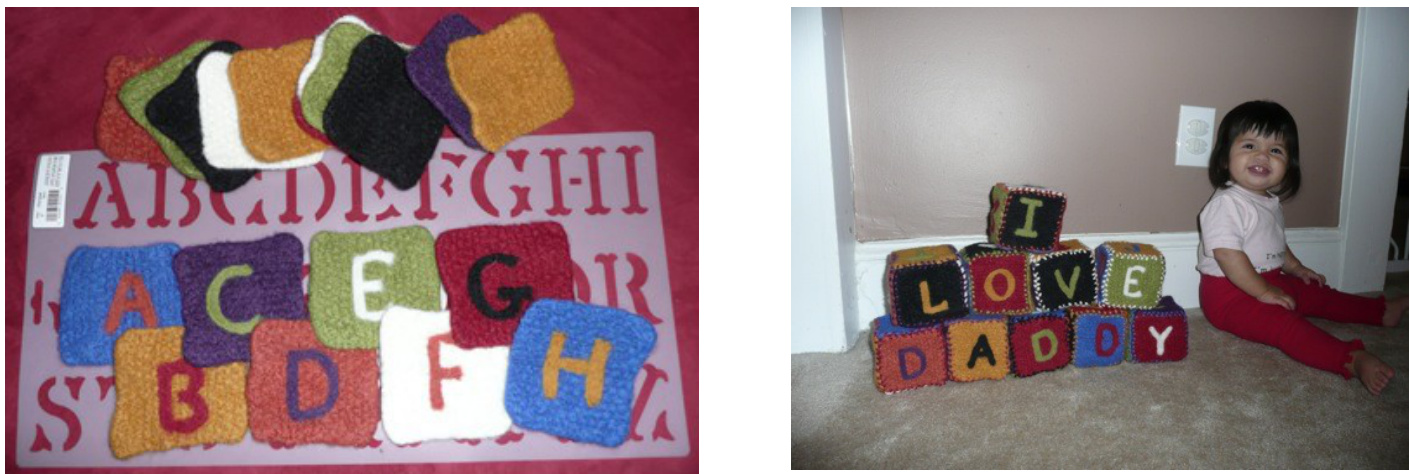
You'll need to make 6 squares for each cube you want to make. You can either make the blocks using a moss stitch or a garter stitch pattern (stockinette will curl too much while felting). I made 60 squares. Each measures about 4.75" square before felting. Make sure that your squares are actually square and not rectangular.
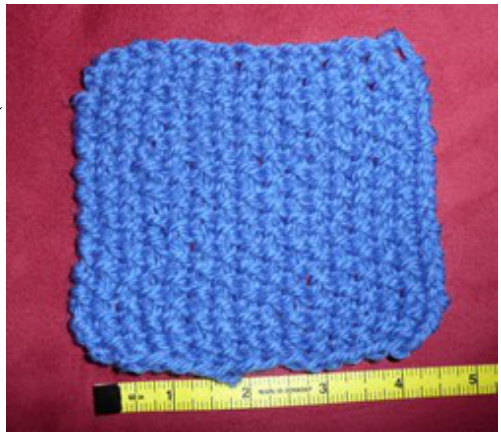
The instructions below are for a moss stitch square, simplify this by using a garter stitch: knit each stitch, do not purl. $\bigcirc$ cast on 16 stitches $\bigcirc$ row 1: $\ast_{\mathrm{kl}}$ , p1, repeat from \* $\bigcirc$ row 2: \*p1, k1, repeat from \* $\bigcirc$ row 3-24: repeat rows 1 and 2 $\bigcirc$ bind off in pattern $\bigcirc$ weave in ends. Trim tail and save excess yarn for the "roving" step.
felt squares:
I recommend making one square of each color yarn and felting them to insure that they all felt down to the same size, and to insure that they felt into a square. Different brands of yarn, and even different colors of the same brand may felt differently. Experiment! Follow any basic wet-felting instructions that you typically do. This is what I did: 0 Place al the squares in a mesh laundry bag or zippered pillow case cover. Include a heavy towel or two to help speed along the felting process. 0 Add a small amount of soap, and wash on HOT with NO spin cycle 0 Check on the progress of your felting periodically. You may need torun it through the wash more than once. 0 After the blocks have felted to the desired size, remove them from the wash and squeeze them out as best you can. $\bigcirc$ Tug on the blocks to get them to be identically sized squares. $\bigcirc$ Lay flat to dry completely.
prep roving:
You can either purchase roving, or use some of the yarn you made the squares with to make roving. I did the latter, this way the color of the letters match the color of the blocks. To make the roving:
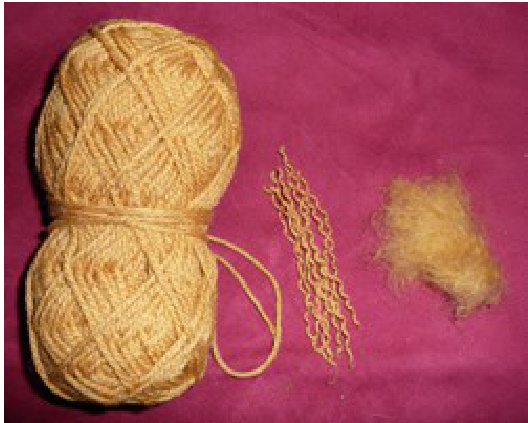
$\bigcirc$ cut the yarn into 3"-5" pieces, O unravel the 3 plys of yarn $\bigcirc$ pull apart the strands into roving.
layout cubes:
One of the cool things about designing your own alphabet blocks is that you can layout the letters however you want, so that you can spell all sorts of words and names. I used a trusty spreadsheet to slowly add letters to each cube, moving them this way and that so that I could spell everything I wanted. Then I layed out the colors so that each cube didn't repeat colors Pre-planning each of the cubes actually made needle-felting the letters much easier - I didn't have to think of what letter to make next, I just checked the file and off I went.
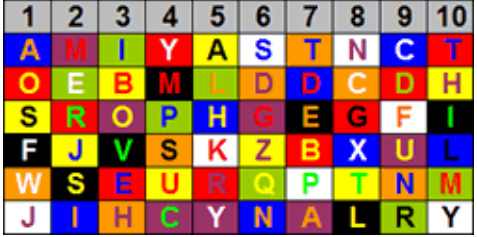
add letters:
$\bigcirc$ Center the letter stencil onto the square. $\bigcirc$ Cut the yarn to length of each side of the letter stencil. $\bigcirc$ Tack the yarn into the stencil using the single needle felting barb. O Tack the roving into the letter outline using the single needle felting barb, filling in blank space.
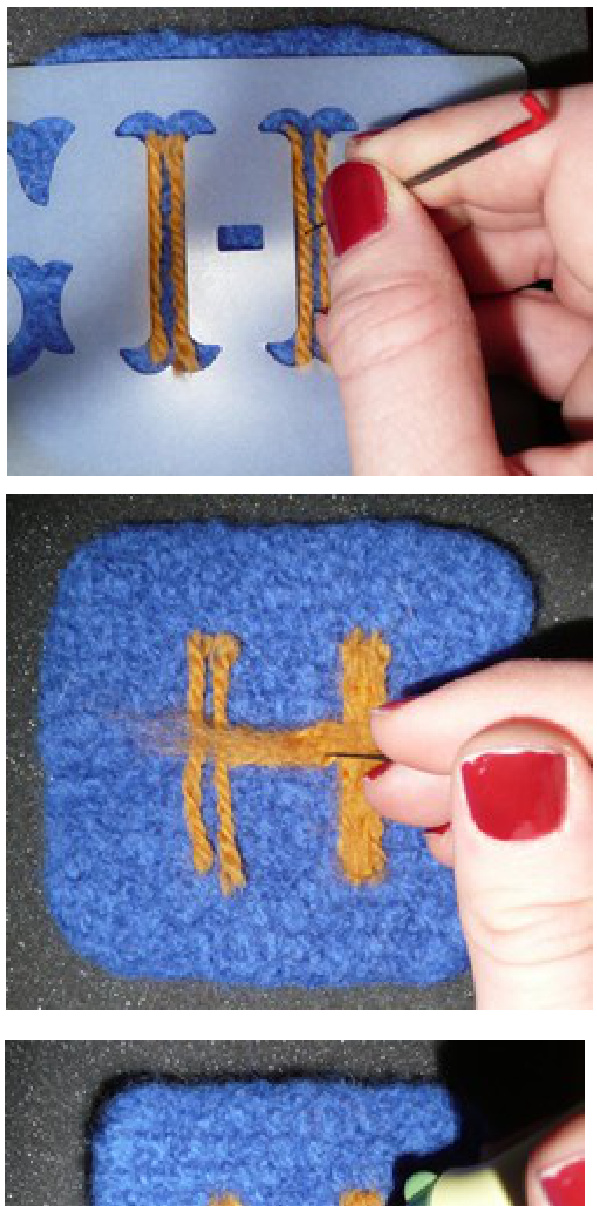
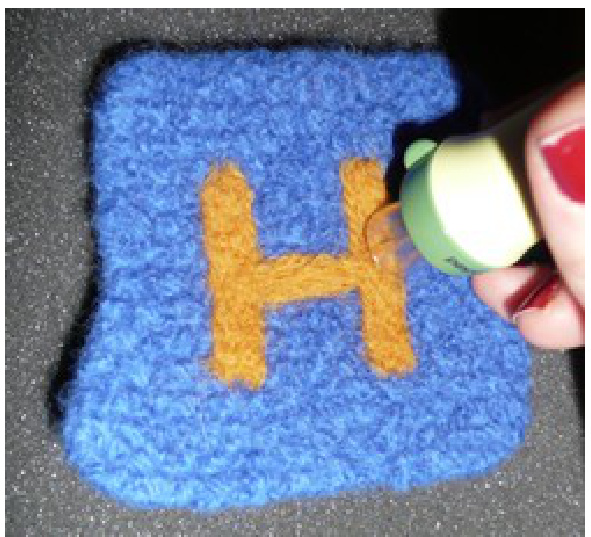
O Compress the roving with the multi-needle felting tool. This will smooth out the letter and blur the yarn outline.
prep blocks:
For my felted blocks, a cube of $3"$ by 3" fits best. O Using a permanent marker, and a ruler, mark out the cubes on the $3"$ foam block. O Using a serrated bread knife - carefully slice through the foam, being careful to cut as vertically as possible so you don't get slanted cubes. To assemble each cube, I chose a contrasting colored yarn so that the seam would show up as a nice bright accent.
assemble:

Begin assembling each cube by first safety pinning the blocks together to form the cube. O Cut a 3 foot piece of yarn and thread on a tapestry needle. Double over the yarn and tie a knot at one end. O Sew the cubes together using a "baseball whip stitch" (I have no idea if that's the correct name, but this is the same stitch they use to sew up a baseball). ■ Insert the needle on the under-side of a block and pull out the top. ■Then insert the needle on the under side of the connecting block, and pull out the top. ■Continue in this fashion around all edges of the cube, hiding the ends of the yarn inside the cube.


