Noelle Noodle's Shibori Scark Jutorial
As usual, all of my patterns (including the ones for sale) are what I call charitable copyright which means that they are intended for personal use unless you're selling the items to benefit a charity. This tutorial was created when I was doing the Funky Scarf Swap in Oct. 2006. First, the swap person I got liked the color green preferred a funky pattern to a funky yarn wanted it longer as opposed to fatter could use it for some warmth This reminds me of my beginner 3d design class aignments, how fun!! No really! My thought process: I had two skeins of some lamb's pride worsted in a dark forest green but they were leftovers from two different projects so two different dye lots. I've been wanting to try this shibori resist method for felting since I read about it in the Fall 2005 Interweave Knits. Well, technically when you knit something and change it into felt in hot water and agitation it's fulling but let's just callit felting to cut down on confusion. So..the shibori felted examples Id seen looked much better to me when they'd been used on stockinette stitches. So I'd want to use it in stockinette. And since she wanted it longer I would need to knit it lengthwise - because the knit stitches felt more vertically, they don't felt as much horizontally. So stockinette and lengthwise. I'd do it in the round! Easy peasy! Then cut it after I felt it (fyi: cutting something after knitting it is called steeking)! Woo! So here we go..
Step 1 Knitting the scarf
I cast on 200 stitches using Lamb's Pride worsted onto size 11 denise needles using a very long cable. Then I joined it in the round and knit a few rows of garter stitch. In this case it's a knit row, a purl row, a knit row, since it's in the round. Didn't seem to make much of a difference the stockinette still curled. But it's ok.
Since I was using two balls with different dye lots so I alternated the skeins every row, carrying the yarn up on the inside seam. That created the striping effect. This was totally not noticeable in the final product. I continued knitting around and around until I ran out of the smaller ball of yarn, then I did three rows of garter stitch and cast off. I didn't bother sewing the ends in, just tied knots. That's why I love felting! And now we have a giant knit circle that's rolling up into a tube! Yay!
Step 2: Adding the Resists
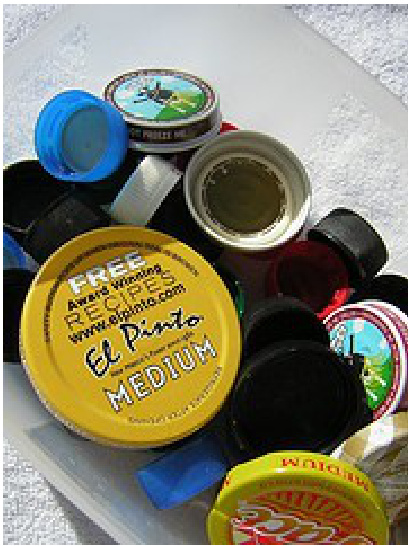
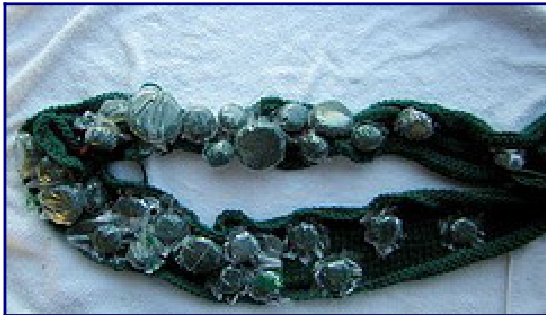
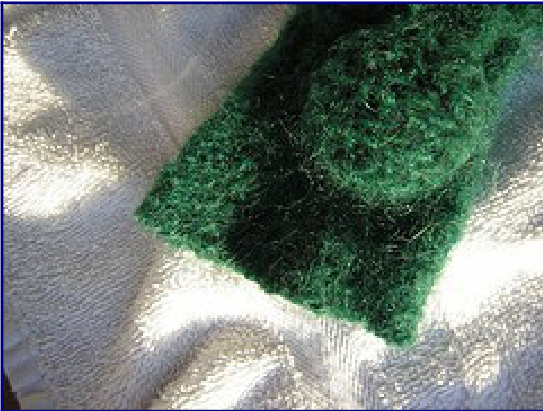
I'd been saving bottlecaps and lids for the last few months for this project. So I needed those, some rubber bands, and plastic of some kind. I found that cut up freezer storage bags worked best in the end. I put the bottlecaps on the "wrong side" of the knitting (the purl side), then covered the top, the "right side" with the plastic. THEN I used old rubber bands to secure the knitting between the plastic wrap and the bottlecap.
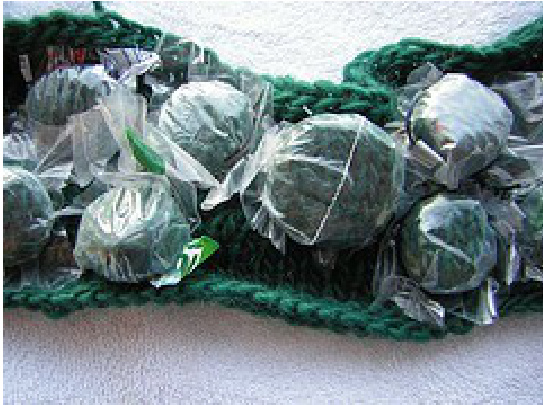
This is what the "wrong side" looked like
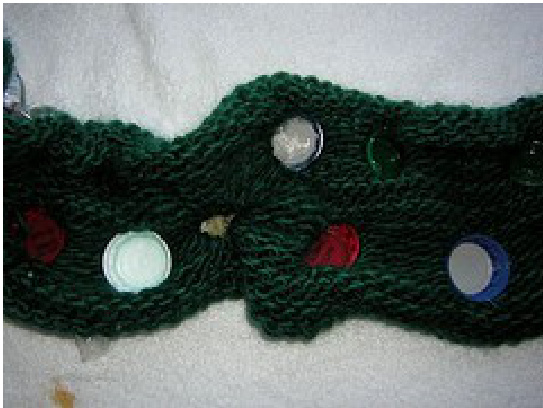
I carefully planned out the shapes on both sides of the scarf while I was attaching the bottlecaps. I already knew where the neck was going to be and where I was going to "steek" it. So the bottom edges will have more bumps in them and slowly taper off up towards the neck.

Step 3: Felting
I put the scarf in a lingerie washing bag, you know the kind with the holes in it? (I use that to cut down on the chances of fluffy bits clogging up my washing machine) And dropped it in the washing machine with my pair of "felting" jeans. These are some big old jeans of Cody's that have shrunk anyway so they make for great felting agitation in the machine. I filled the machine to the small water setting on hot with some squirts of lavender baby shampoo. And ran it about one and a half washing cycles, about fifteen minutes, checking periodically to see how it was doing. When it seemed felted enough, I ran it in a cold rinse and spin. People debate the spin cycle thinking that it causes creases in the felted product but I like to use it and I don't let it spin for that long. Then I took it out and rinsed it again just to be sure the soap was out.
Step 4: Removing resists, trimming, and drying
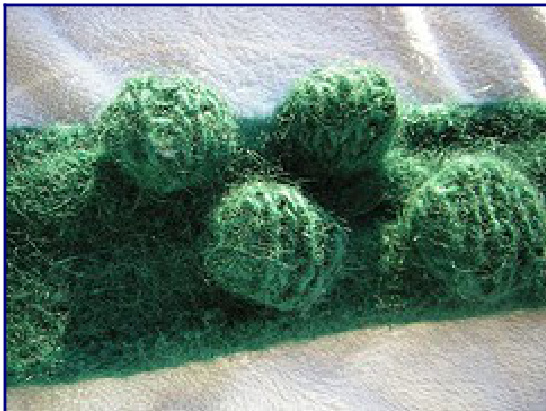
Be warned, when it came out it was a MESS. The plastic hadn't stayed on all the bottlecaps and even a few bottlecaps had come off. THAT WAS OK! It still looked pretty neat and I liked the randomness of what had stayed and what hadn't. I took the remaining rubber bands, plastic, bottlecaps, and lids out while the scarf was still wet and pliable. I also used this as an opportunity to reshape any spots that weren't right, felt any missed bits by hand, trim extra fuzzy bits I didn't like, and cut off the ends that I hadn't sewn in before. I also cut the steek with a pair of scissors and fuzzed the end up a bit. Now it's an actual scarf not a big circle! Then I hung it on a hanger and let it dry for a few days.
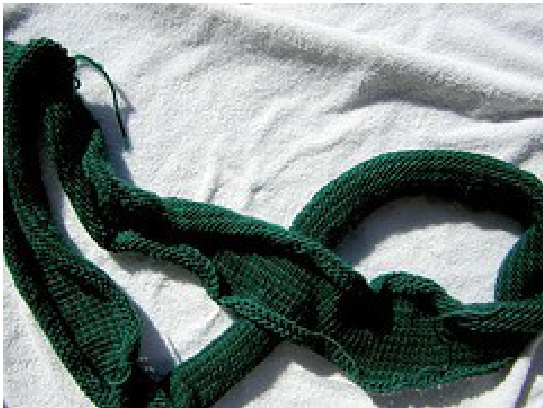
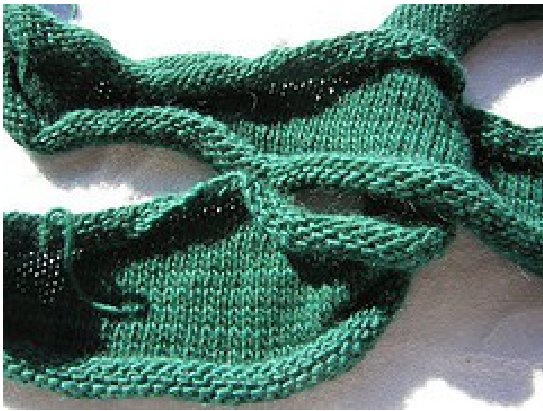
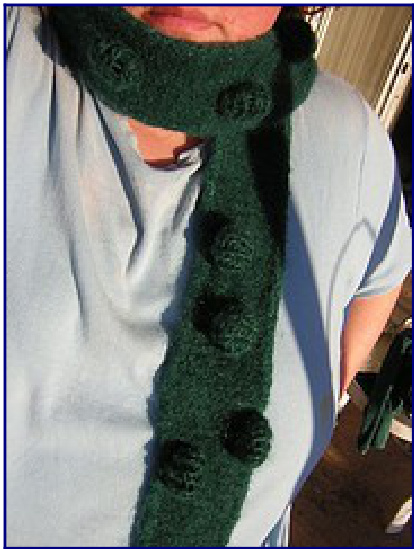
Step 5: Having a Funky Scarf!!
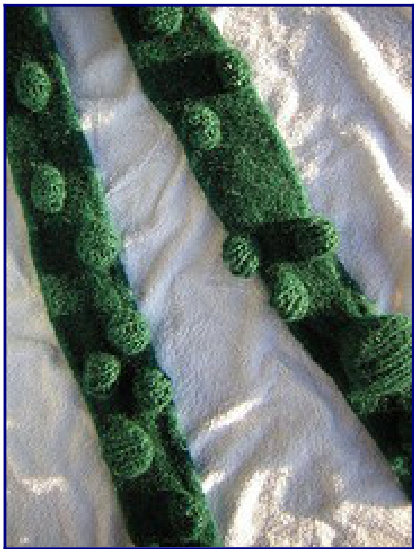
The "cut" end
ignore the painty spotty work short
You can use more than bottlecaps but anything that can be tied to the scarf and survive a good hot washing machine. This same resist method can be used for dyeing as well as felting! Didn't you wonder where the hippies came up with the idea for "tie dyes"? It's based on the shibori resist concept! You can just tie the fabric up in various ways and see what comes out! There are particularly beautiful results with silk.


