1018. Duck Crochet Afghan Pattern.
http://www.beginner-crochet-patterns.com -- more free crochet patterns http://www.JTEasyCrochet.ETSY.com - my ETSY patterns? store!
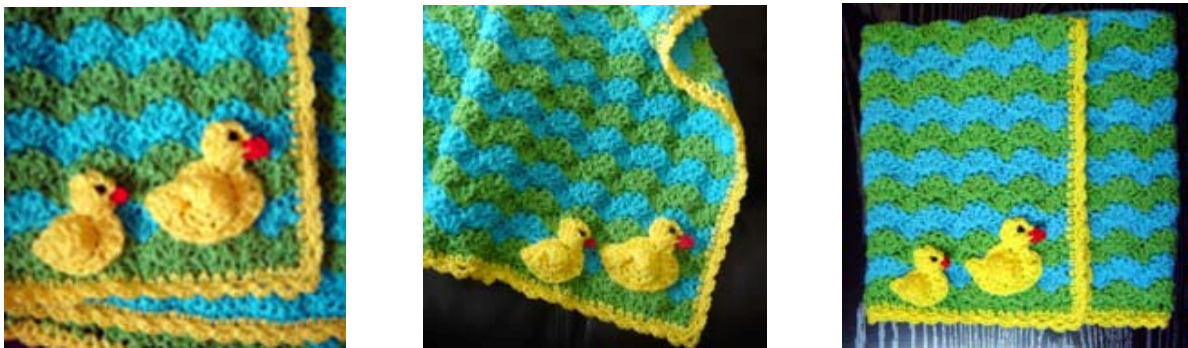
Duck Crochet Afghan Pattern is simple and easy beginner crochet pattern and I included a lot of pictures of every step of the process so even beginner can follow the pattern easily. I used the scallop stitches to create the wavy effect and i explain in details how to make them. :) The blanket reminds of a sea or a pond - you can decorate it with any sea-themed applique, not only ducks :) The Duck crochet baby blanket is approximately 28in by 28 in (71 cm by 71 cm). Yarn recommendation for the Duck Crochet afghan pattern: Red Heart Super Saver econo size: 1 skein of Turquia (7 oZ/198 g, 364 yds/333 m), 1 skein of Spring Green (7 oz/198 g, 364 yds/333 m), 1/2 skein or less of Bright Yellow. You can use any other brand of Medium weight yarn (weight category #4). Recommended crochet hook size: I 9 (5.5 mm) to J 10 (6.00 mm) Abbreviations and stitches used in the Duck Crochet Afghan Pattern: CH - chain, SC - single crochet, DC - double crochet. Gauge: 13 DC in 4 in (10 cm), 7 rows in 4 in (10 cm) (the gauge is approximate and not very important for the blankets).
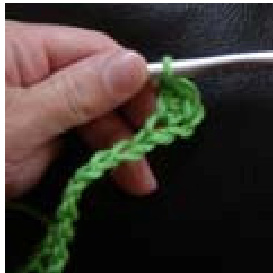
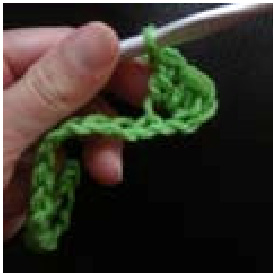
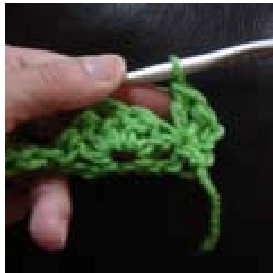
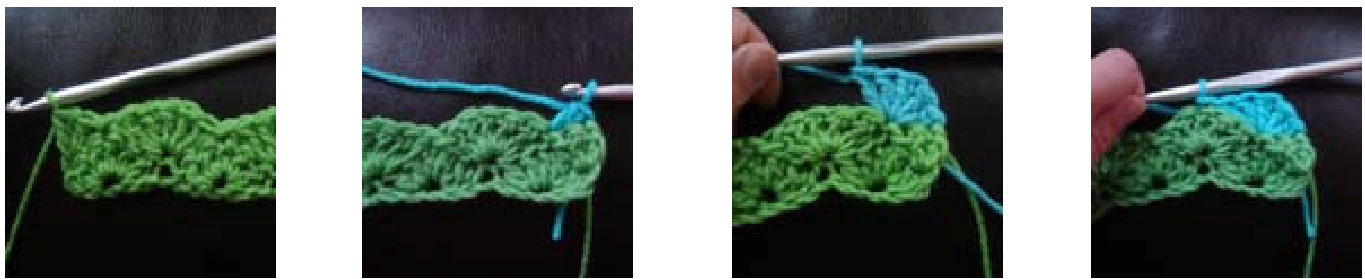
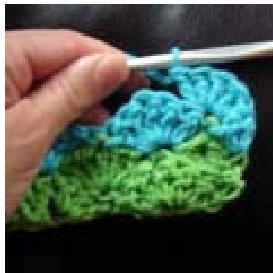
First crochet scallop: DC in the same stitch. Make a chain 26 - 26 1/2 inches long (approximately 77 stitches), DC in the 4th stitch Make 3 more DC stitches in the same one stitch. Total should be 5 DC stitches in one stitch. Slip stitch in the 3rd stitch from the stitch where you've made 5 DC. the first scallop is ready!
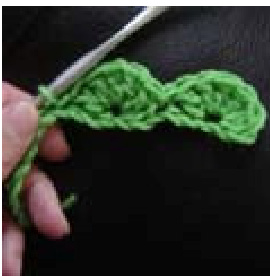
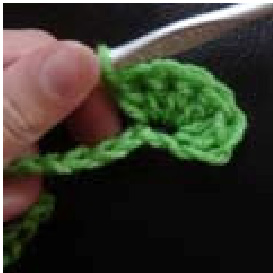
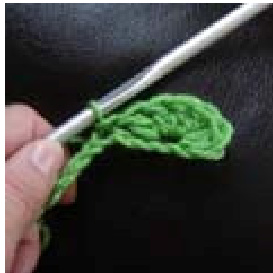
Make the second scallop: 5DC in the 3rd stitch from where the hook is, slip stitch in the 3rd stitch from the stitch where 5DC were made. Make scallops all along the chain. You will have approximately 14 scallops.The second row of scallops: Turn, CH 2,
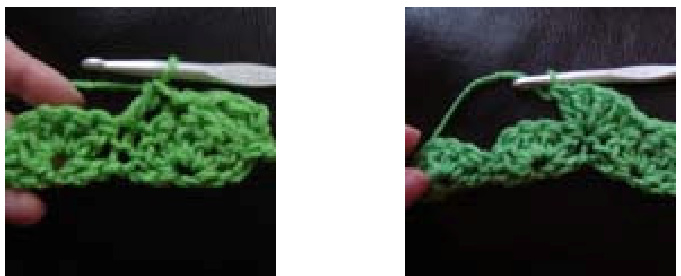
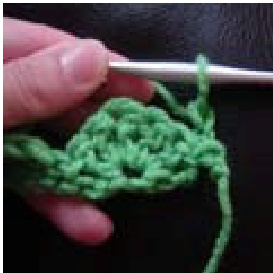
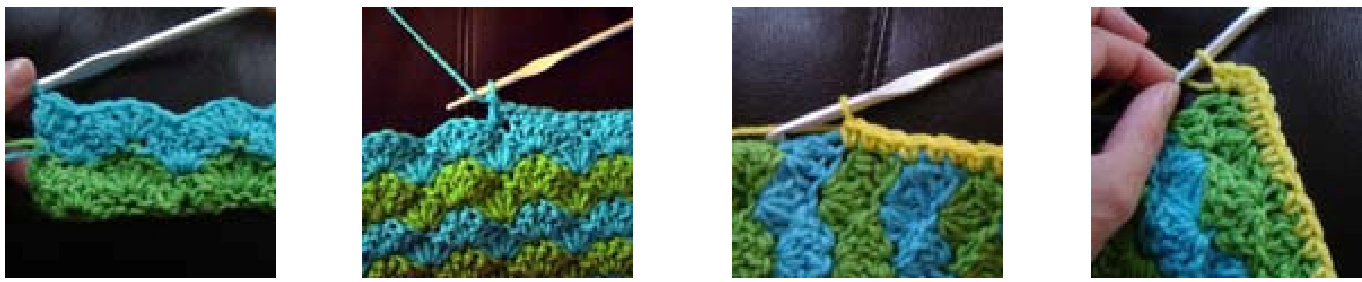
Make the scallops of the second row between the scallops of the first row (make 5DC in the slip stitch of the previous row). DC in the beginning of the CH2 Make one more DC in the same stitch. This is 1/2 of a scallop: [CH 2, 2DC, slip stitch in the 3rd stitch of the scallop of the previous row]. Every time the previous row finished with the whole scallop, the next row begins with 1/2 scallop like this.
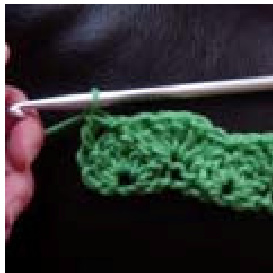
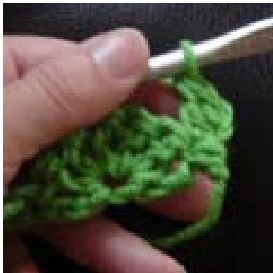
To finish the scallop make a slip stitch in the 3rd (center) DC of the scallop of the previous row. If the previous row starts with a whole scallop, finish the current row with 1/2 scallop: 2DC in the last DC of the scallop from the previous row.
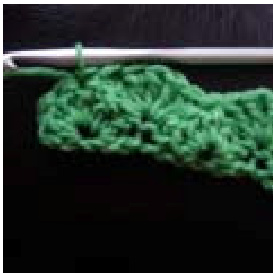
The finished 1/2 scallop at the end of the second row. Change the yarn color every 2 rows. Row #3: Turn and attach the blue yarn. If the previous row ends with 1/2 scallop, start with the whole scallop. The whole scallop: 5 DC in the slip stitch between 2 scallops from the previous row. Slip stitch in the center of the next scallop from the previous row.
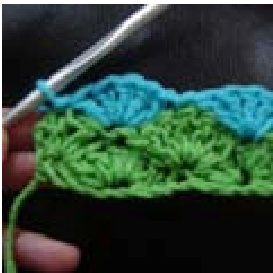
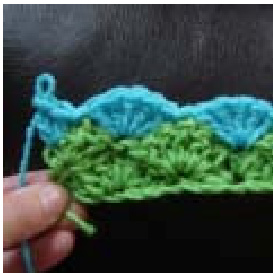
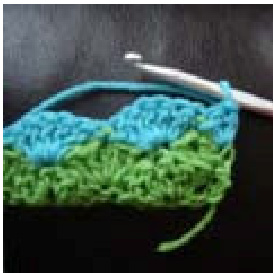
Make blue scallops along the row. Be careful with scallops and 1/2 scallops at the beginning and at the end of each row - to keep the same number of stitches from row to row. Make another row in blue color. Continue the pattern: 2 rows of green color, 2 rows of blue color.
The total number of stripes is approximately 29 (58 rows of scallops, because each stripe is 2 rows). The last row: turn, CH 1 and make SC in each DC of the previous row and DC where the slip stitch was. It will even the scalloped edge.(not completely yet, but you will make Attach the yellow yarn and made a Note: in the corner stitches make 3 row of SC stitches around the entire SC stitches in one corner stitch. blanket, finish with the slip stitch. another row of yellow)
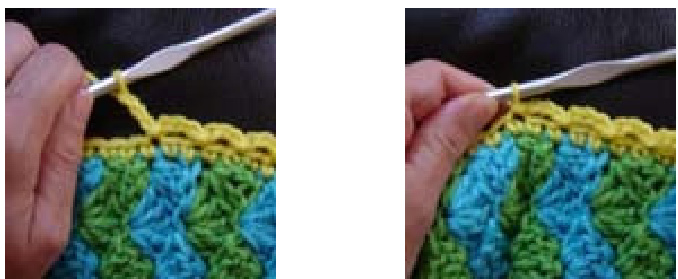
The last row in the Duck Crochet Afghan pattern: continue with the yellow yarn. [CH 3, slip stitch in the second from the hook stitch (skip one stitch)]. repeat [] all around the blanket. the blanket is ready! :)
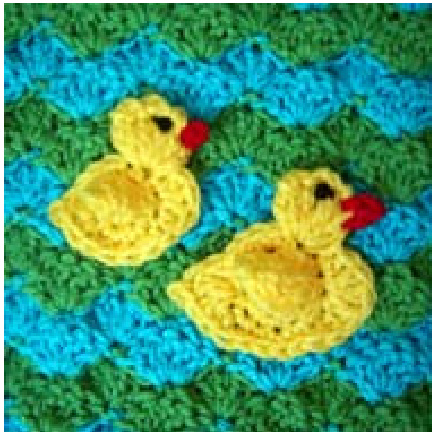
Duck Applique Crochet Pattern.
Use this 3-dimensional Yellow Duck Crochet Pattern to decorate a baby blanket, hat or bib. The extremely cute crochet ducks (the big duck applique and the small duck applique) will keep you smiling for a long time :) Recommended weight yarn: Medium to worsted weight (weight category #4) I used Red Heart Super Saver in Bright Yellow.
Recommended crochet hook size: I 9 (5.5 mm) to J 10 (6.00 mm) SC 2 (the # of stitches is AFTER the stitch's abbreviation) means: make two single crochet stitches in two stitches of the previous row. 2SC (the # of stitches is BEFORE the stitch's abbreviation) means: make two single crochet stitches in one stitch (increase).
Abbreviations and stitches used:
CH - chain, SC - single crochet, HDC - half double crochet, DC - double crochet, TC - treble crochet. The level of the Duck Crochet Pattern: Intermediate. If you are a beginner you can also give it a try -i included a lot of pictures of each step. The big crochet duck is approximately 3 1/4 in by 3 in (8.5 cm by 8 cm) and the small duck is about 2 1/2 in by 2 1/2 in (6.5 cm by 6.5 cm).
THE BIGDUCKCROCHET PATTERN.
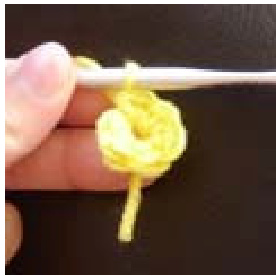
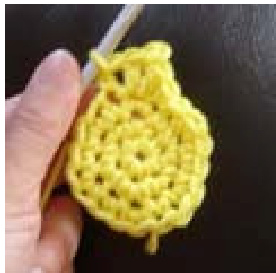
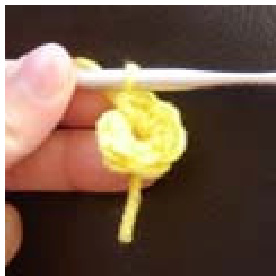
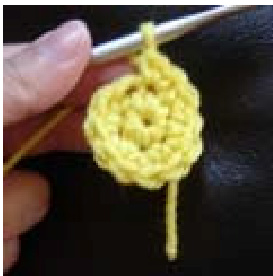
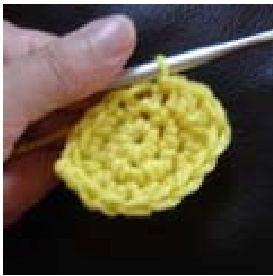
Body: CH 3, join in the ring with a slip stitch Row #1: SC 6 in the ring, total = 6 stitches.
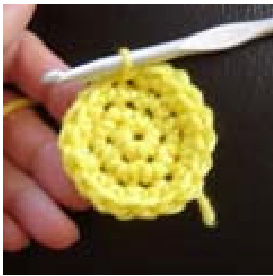
Row #2: 2SC in each stitch. Total = 12 stitches after completing of this row. Row #3: [SC in the first stitch, 2 SC in the next stitch] Repeat [] 6 times around the row, slip stitch. Total = 18 stitches. Continue with the tail.
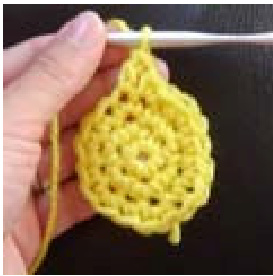
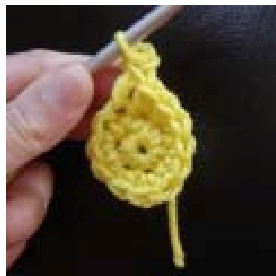
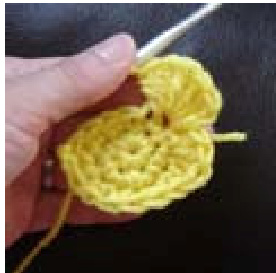
The tail: HDC in the next stitch, (DC, CH 1, slip stitch, DC) in the next following stitch (those 3 stitches are in One stitch).
Tail: HDC ,SC
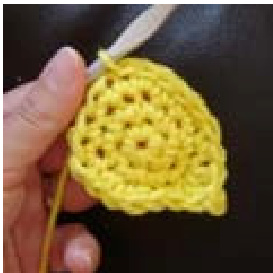
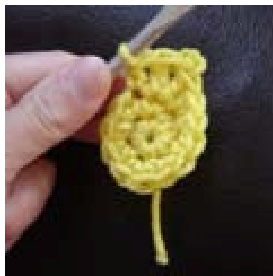
Belly: make 4 slip stitches
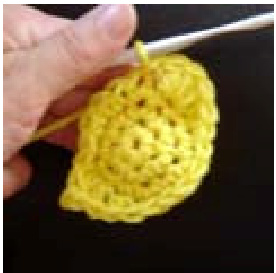
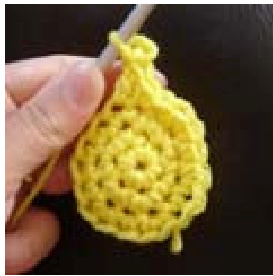
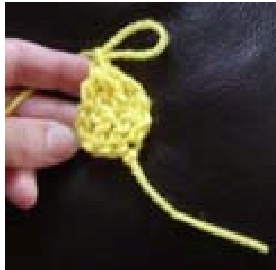
Breast: SC, HDC, 3DC in one stitch, slip stitch.
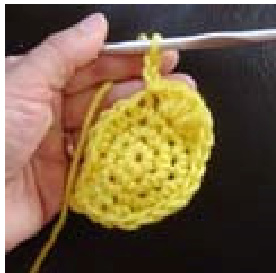
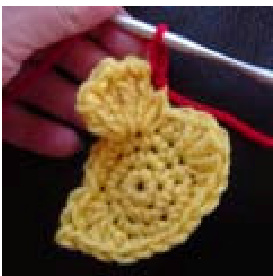
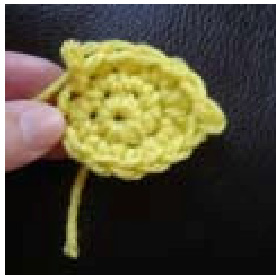
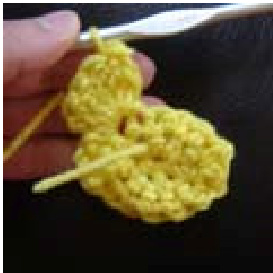
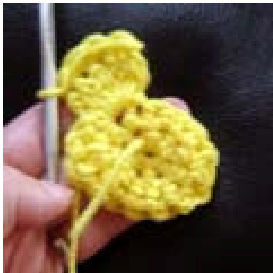
Head: CH 2
Head : 6 TC in one next stitch Head: Turn, slip stitch Head: SC, SC, slip stitch The body of the crochet duck applique is ready. Cut off the yarn, weave in the end.
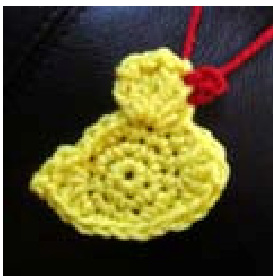
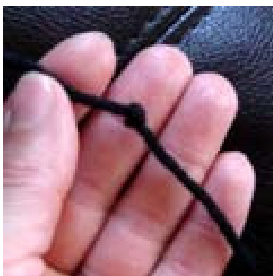
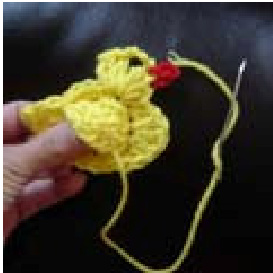
The beak: attach the red yarn. The beak: CH 2, slip stitch, slip stitch in the head. Tie 2 ends of the red The eye: make a simple knot on the piece of black yarn. Tie the knot to the head (pull the ends of the black yarn to the back). yarn in the back, cut off.
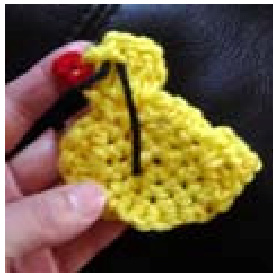
Tie the ends of the black yarn in the back, cut off.
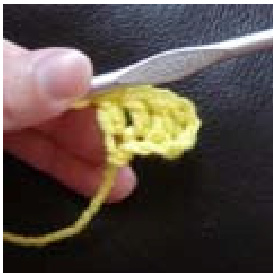
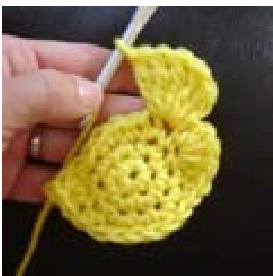
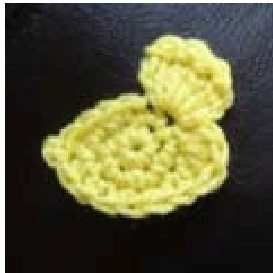
The wing: Step 1: CH 6 Step 2: DC in the 3rd stitch, DC2.
Step 3: Turn, CH 2
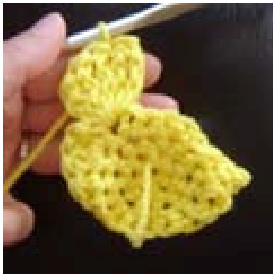
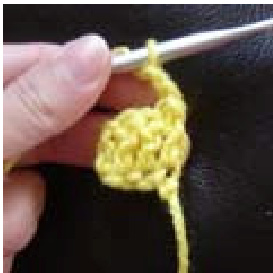
Step 4: make 3 unfinished DC stitches: begin to make the first DC, but pull the yarn through 2 loops only once leaving 2 loops on the hook. Start making another DC and again pull the yarn through 2 loops only once and leave 3 loops on the hook. repeat one more time for the third DC .
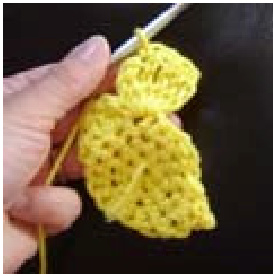
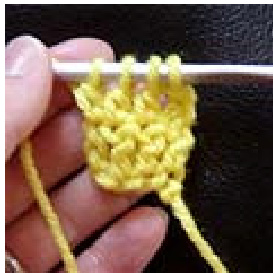
Yarn over the hook and pull the yarn through all 4 loops on the hook at once. The wing is ready.
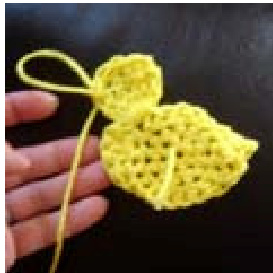
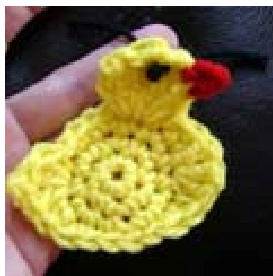
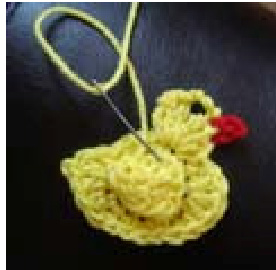
Sew on the wing to the duck (top and right sides).
THE SMALL DUCK CROCHET PATTERN.
The body: CH 3, join in the ring with a slip stitch, SC 6 in the ring. The body: 2 SC in each stitch. Total = 12 stitches after completing of this row. The tail: HDC, (all in one stitch: DC, CH 2, slip stitch in the 2nd from the hook stitch, DC). The tail: HDC, SC Belly: HDC, 3DC in one next stitch.
Belly: SC, SC, SC

Belly: Slip stitch in the next stitch.

Head: CH 2.
Head: 5DC in one next stitch.
Head: Turn, slip stitch.
Head: SC, SC, slip stitch Cut off the yarn, weave in the end - the body of the small duck is ready :)
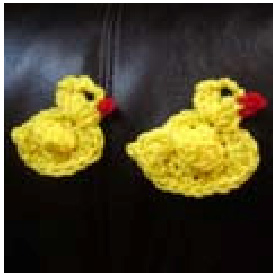
the big duck . The wing: CH 3 and make 3 DC in the first stitch of this chain. Sew on the wing to Here are two finished crochet duck appliques. Congrats! :)


