Shadow Knitting Tutorial
By Shiel Email: uoshiel@gmail.com
Copyright information:
This document has been released for your use and you are welcome to share it. You are also welcome to use the patterns within or the instructions for making your own illusions for whatever purpose you wish (in other words - if you want to sell items made with any of these charts go right ahead) - however, please do not claim the patterns within as your own work or sell these notes, patterns or charts. You are welcome to contact me with questions, comments etc @
Shadow Knitting - Part 1: Knitting Illusions
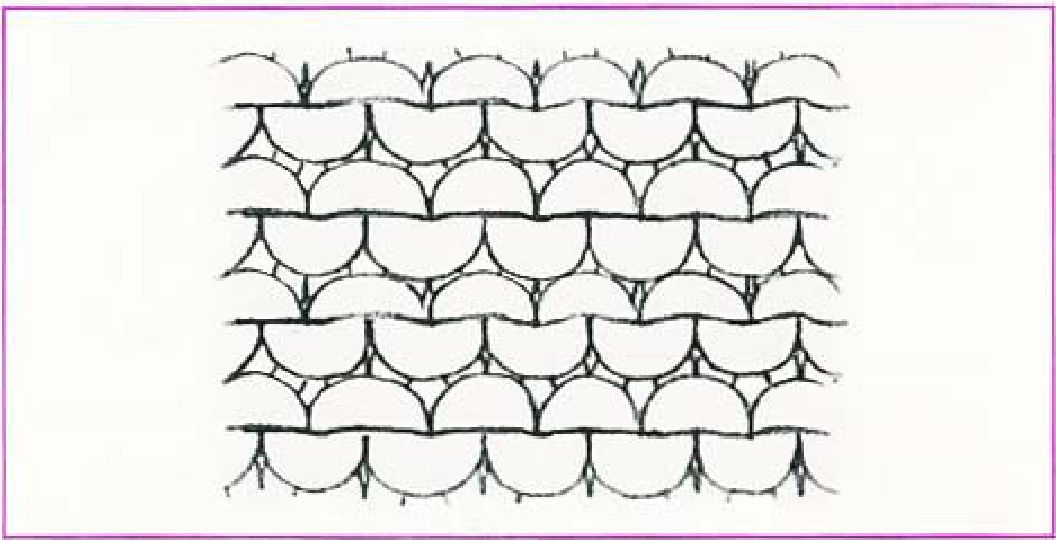
Shadow or lllusion knitting is a technique where you use two colours of yarn and hide an image within stripes so it can only be viewed from an angle. The reason it works is due to the combination of two types of knitting - garter stitch and stocking stitch. Garter stitch (knitting all rows) forms ridges in the knitted fabric:
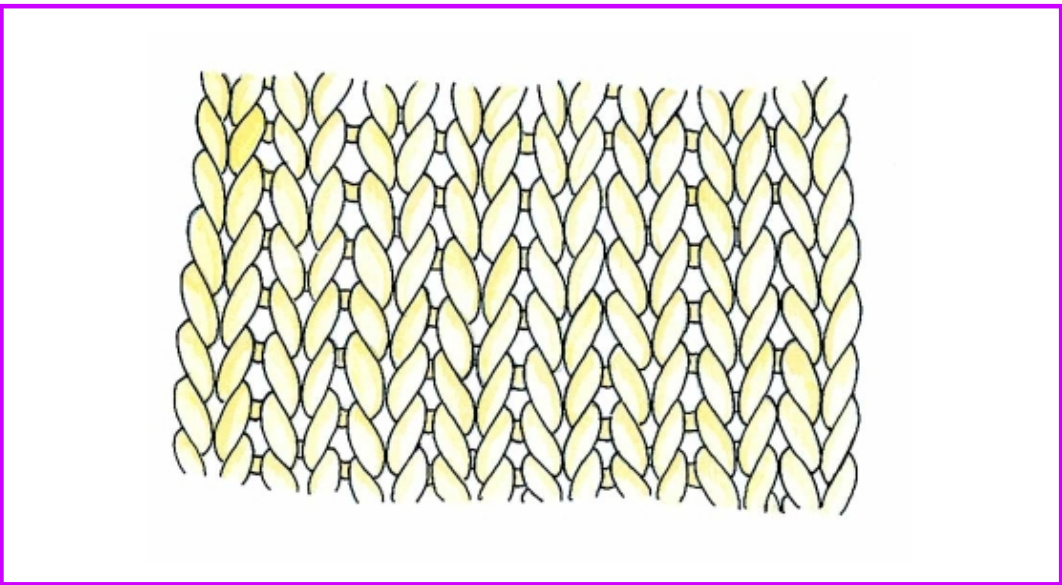
Stocking stitch (knit one row, purl one row) forms a flat fabric:
llusion knitting uses garter stitch ridges as a base, with purl stitches to flatten areas corresponding with the picture you want to knit. When you view the knitted piece from an angle, the flat areas disappear between the ridges showing your pattern. The pattern is knitted entirely on the wrong side of the fabric - the first row and every odd row is a plain knit row. As you are using two colours and swapping them every two rows, the first row when you change colours is knit, the second row is the pattern.
Reading charts
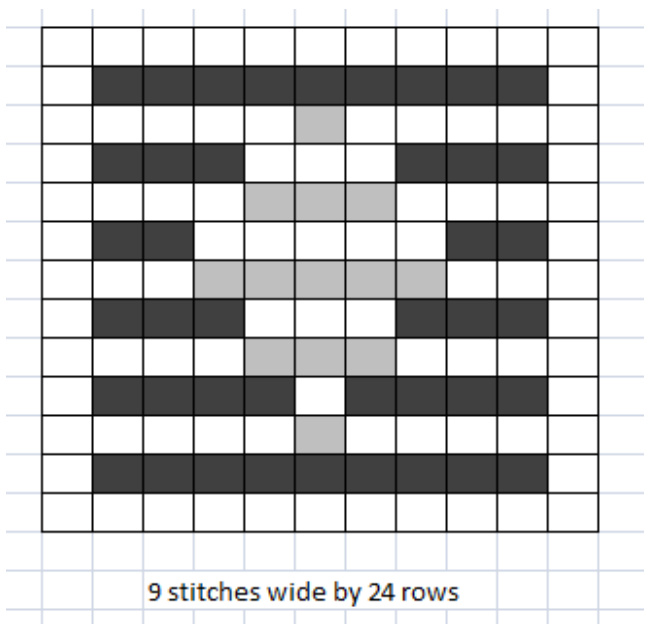
It is easier to knit illusions from charts. Both worded instructions and charts are provided for the examples in this session, but you will need to be familiar with these charts for the design section as well. Each row of the chart corresponds to one "ridge" of garter stitch (or two rows of knitting). It takes two ridges of the chart (or four rows of knitting) to complete a line from a picture - the line you see and its shadow. The examples given here are designed to be quick for anyone to knit - in order to get a feel for how illusions work and see your results quickly. As the scale is small, the pictures need to be simple. In order to increase the detail in your own designs, the pattern needs to be knitted over more stitches (the tiger shawl pictured was originally an illusion of 150 stitches by 150 ridges - it was cut down diagonally to fit on a triangular shawl).
Sample Designs Diamonds
Tile across for three repeats for a reasonable size sampler. CO 31 stitches in your darker colour (3 repeats of the pattern plus 2 stitches either side as a border). Knit two rows and join in your contrast colour. Knit one row and purl one row in the contrast colour. Switch back to your darker colour and knit two rows (the first ridge of the pattern chart).
Pattern back across the chart as follows - read the chart from left to right. All white squares are purl stitches. K2 (border stitches), (P4, K1, P4) three times, K2 (border). In the darker colour, knit one row. K2 (border), (K4, P1, K4) three times, K2 (border). In contrast, knit one row. K2, (P3, K3, P3) 3 times, K2 In dark, knit one row. K2, (K3, P3, K3) 3 times, K2. In contrast, knit one row. K2, (P2, K5, P2) three times, K2. In dark, knit one row. K2, (K2, P5, K2) three times, K2. In contrast, knit one row. K2, (P3, K3, P3) 3 times, K2 In dark, knit one row. K2, (K3, P3, K3) three times, K2. In contrast, knit one row. K2, (P4, K1, P4) three times, K2. In dark, knit two rows. For more than one repeat, knit one row and purl one row in contrast, then restart the chart (with two dark knit rows).
Small flowers
CO 19 stitches with dark colour (chart plus 2 border stitches each side). Knit two rows in dark, join in contrast colour and knit one row, then purl second row. Knit a second ridge in dark (knit two rows) to start chart. In contrast, knit one row. K2, P6, K3, P6, K2. In dark, knit one row. K2, K6, P3, K6, K2. In contrast, knit one row. K2, P5, K2, P1, K2, P5, K2.In dark, knit one row. K2, K5, P2,K1, P2, K5, K2. In contrast, knit one row. K2, P6, K3, P6, K2. In dark, knit one row. K2, K6, P3, K6, K2.

Knit two rows in dark, then one row in contrast. K2, P1, K3, P7, K3, P1, K2. Knit one row in dark. K2, K1, P3, K7, P3, K1, K2. Knit one row in contrast. K2, K2, P1, K2, P5, K2, P1, K2, K2.Knit one row in dark. K2,P2, K1,P2, K5,P2, K1,P2, K2. Knit one row in contrast. K2, P1, K3, P7, K3, P1, K2. Knit two rows dark. If repeating chart, you should only use one ridge of two rows in dark not both the top and bottom row of the chart.
Musical Notes
This design was used as part of a book cover design knitted sideways. Start at bottom of chart and work upwards. As before all right side rows are knit. Wrong side rows are below, paired so you can see the "shadow" opposite lines easily: Light: Knit Dark: P3, K12, P5Light: K3, P3, K4, P5, K5. Dark: P1, K5, P5, K2, P1, K2, P4.Light: K1, P5, K5, P2, K1, P2, K4. Dark: P1. K5, P6, K2, P1, K2, P3. Light: K1, P5, K6, P2, K1, P2, K3. Dark: P2, K3, P8, K2, P1, K2, P2. Light: K2, P3, K8, P2, K1, P2, K2. Dark: P5, K14, P1.Light: K5, P14, K1. Dark: P4, K5, P to end. Light: K4, P5, K to end. Dark: P4, K5, P to end. Light: K4, P5, K to end. Dark: P5, K3, P to end. Light: K5, P3, K to end. Continue with stripe in dark and further pattern if desired.
Australian Designs
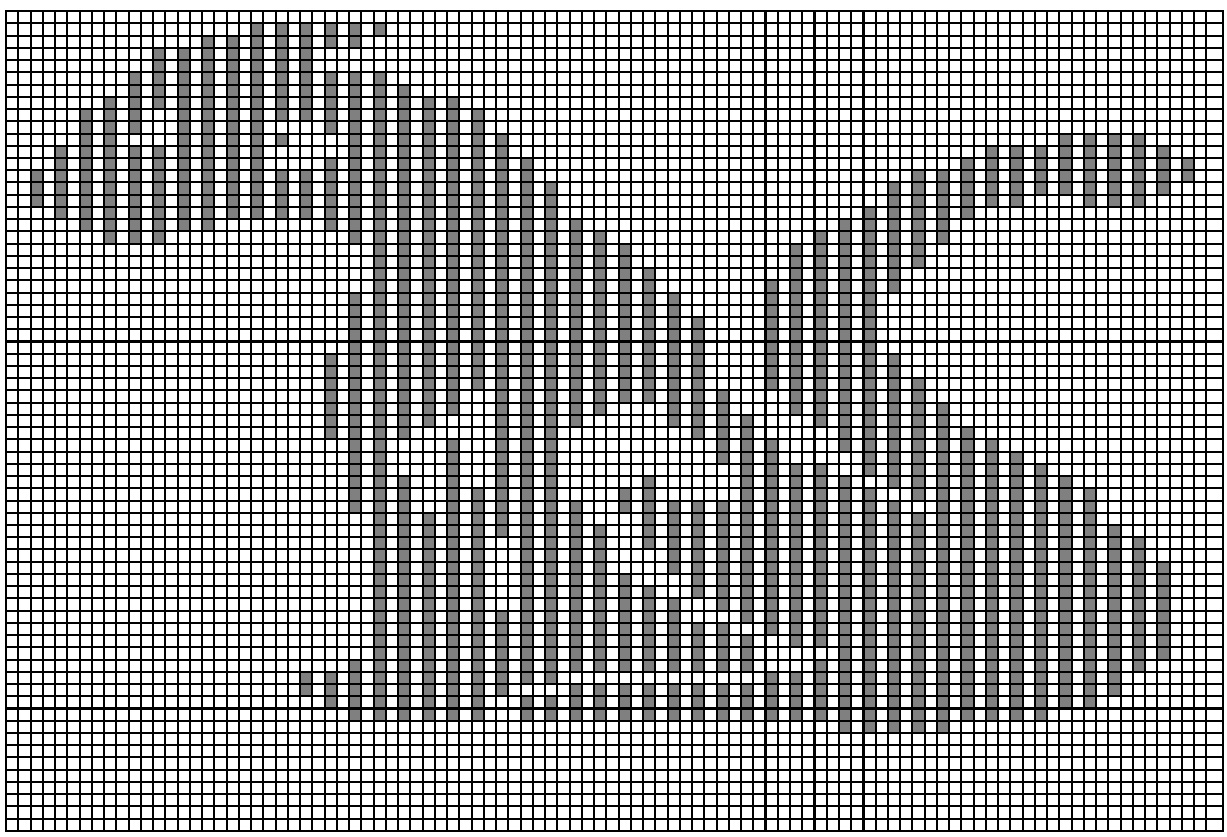
Kangaroo, emu and turtle designs - charts only. Knitted sideways as part of a vest design. Start at right edge of chart knitting bottom to top or turn page sideways and work chart from left to right in the same way as the other charts.
Shadow Knitting - Part 2: Making your own Designs
Before you start designing your project, you should consider what the illusion is for. In order to see knitted illusions, they need to be viewed at an angle. While this may not be so important for a bedspread (squares alternating the direction of the stripes are visible from any angle making it more effective), table runner, placemat, dishcloth or other item that will lie on a flat surface, clothing is a different matter. For a design to be visible when worn, the stripes must be knitted vertically so the image is visible as the person turns around. Hence the "sideways" knit designs in the previous section. There are scarf patterns available that have horizontal stripes, however, unless they are laid on a flat surface, the person wearing the scarf will be the only one able to see it without it being deliberately shown (this may be your intention, of course..). There are three options for designing your own illusion patterns.
1. Using an existing two colour chart
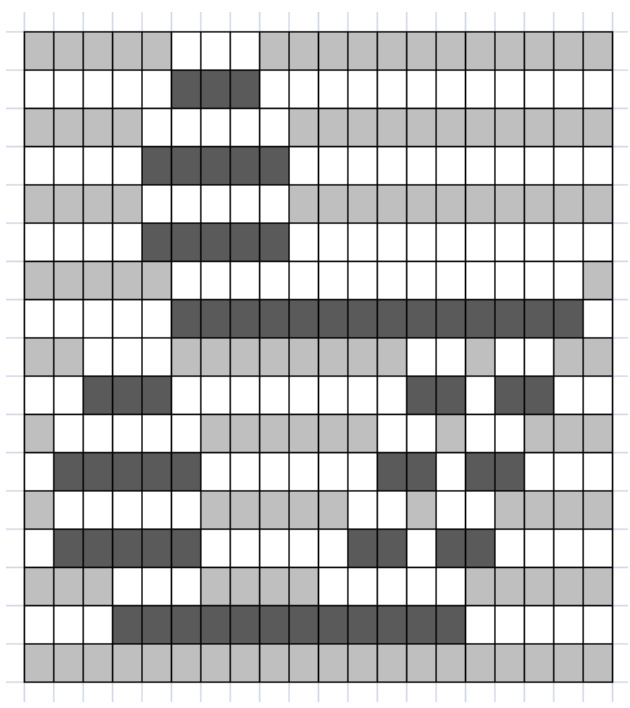
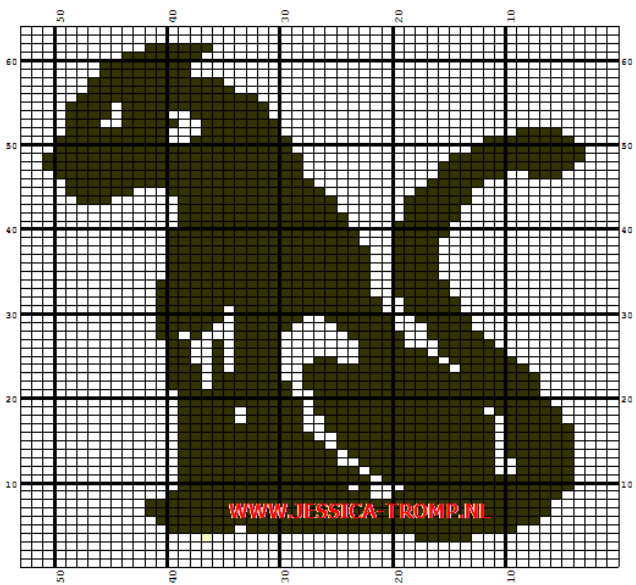
The easiest method is to start with a previously charted design used for knitting pictures (intarsia, crochet or mosaic). To convert these to illusion patterns, you simply add a column in between the rows of the picture for the second colour and draw in its "shadow" - the opposite of each column or row in your second colour. Make sure you choose a picture that is already only two colours, or will easily convert to two colours. Eg: cat pattern from:
http://www.jessica
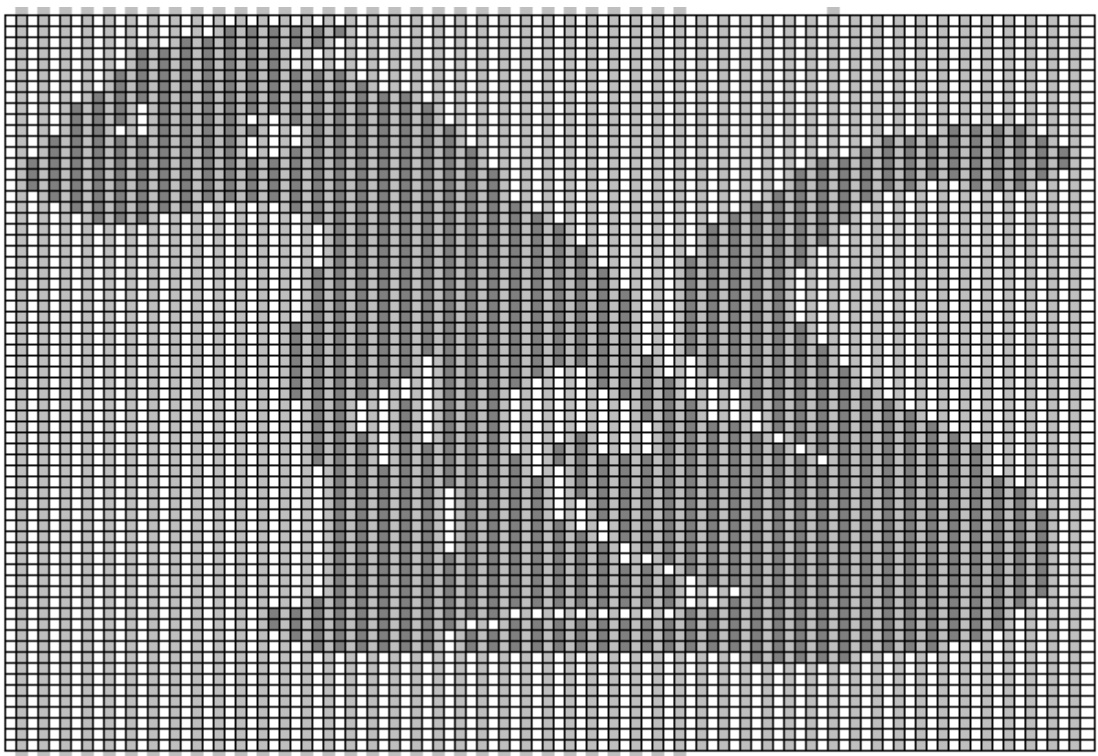
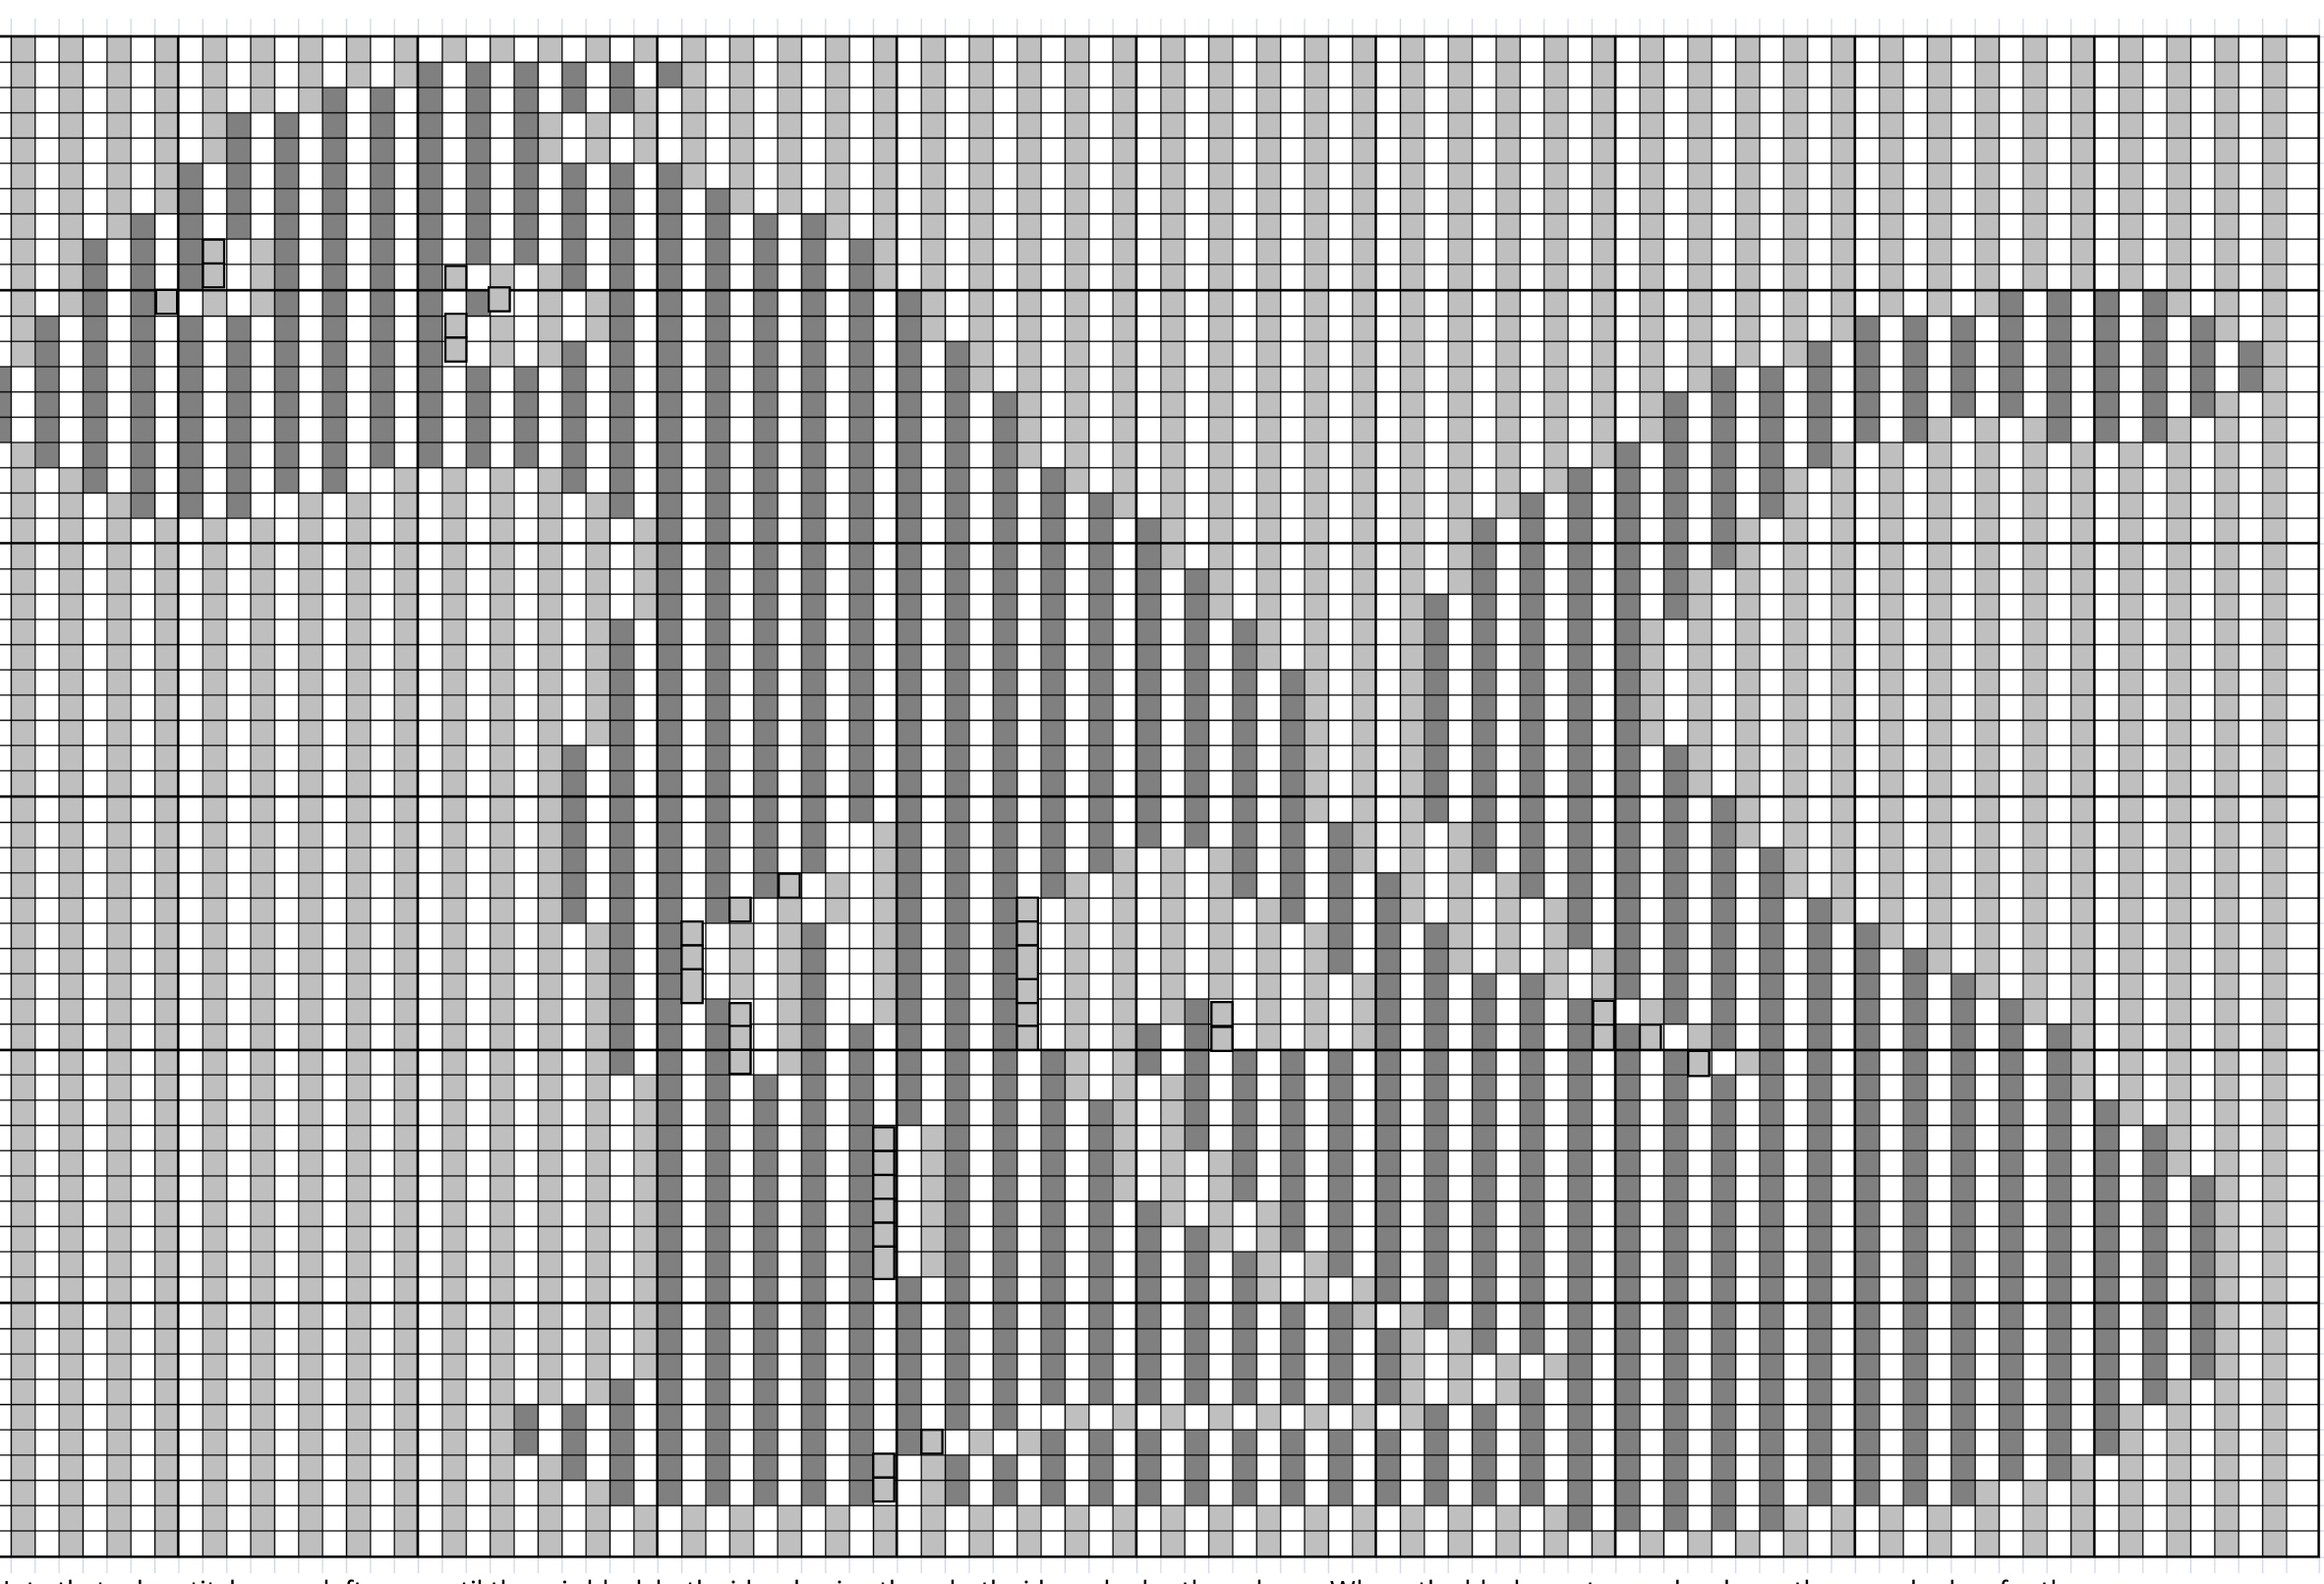
tromp.nl/1intarsiajacquardknittingmotifsgraphscolourcharts.htm I am going to make this one sideways - you can choose depending on what you are knitting. Step 1: Copy the pattern onto graph paper leaving a column between each of the columns in the picture. If you like using computers, I am using Excel to make the chart - the column width is set to 3 for the whole sheet and using the "fill" paint bucket to colour the dark squares. You can then insert a new column after each black column and clear all the formatting from it. I prefer hand drawing them on paper - you can see exactly what you are doing if the whole image is in You should see something like this (note this is not quite an exact copy). Notice that the picture is elongated slightly - when you view it from an angle it does look in proportion.
Step 2: Start filling in your contrast colour. To make it a bit easier to tell the newly added columns from the white in the picture, I coloured the whole column in grey:
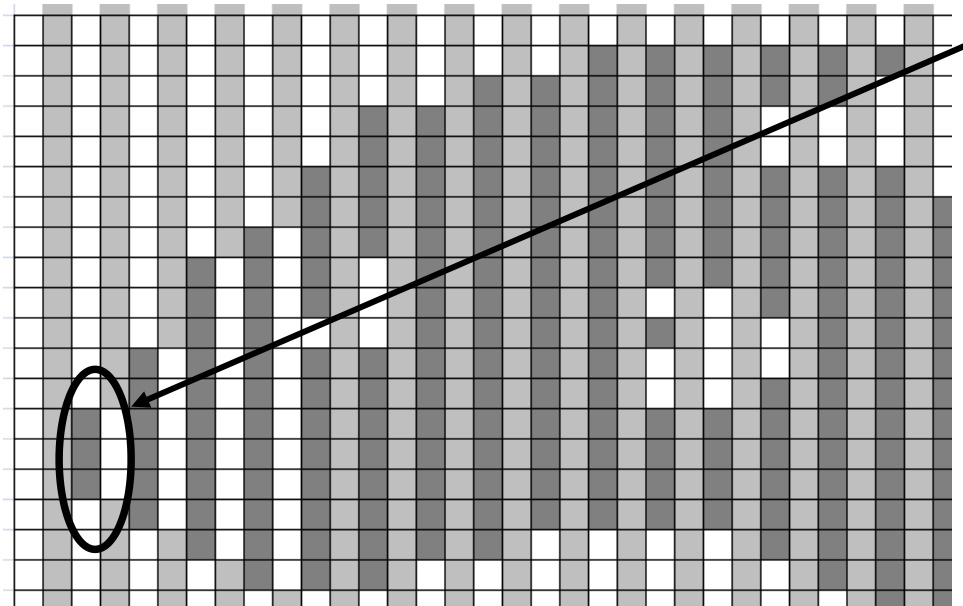
Step 3: Cut/rub out the grey that follows a black line.. for example - a zoomed in shot of the head: You can see here - only the three squares following the black line are left white. The rest of the line is grey.
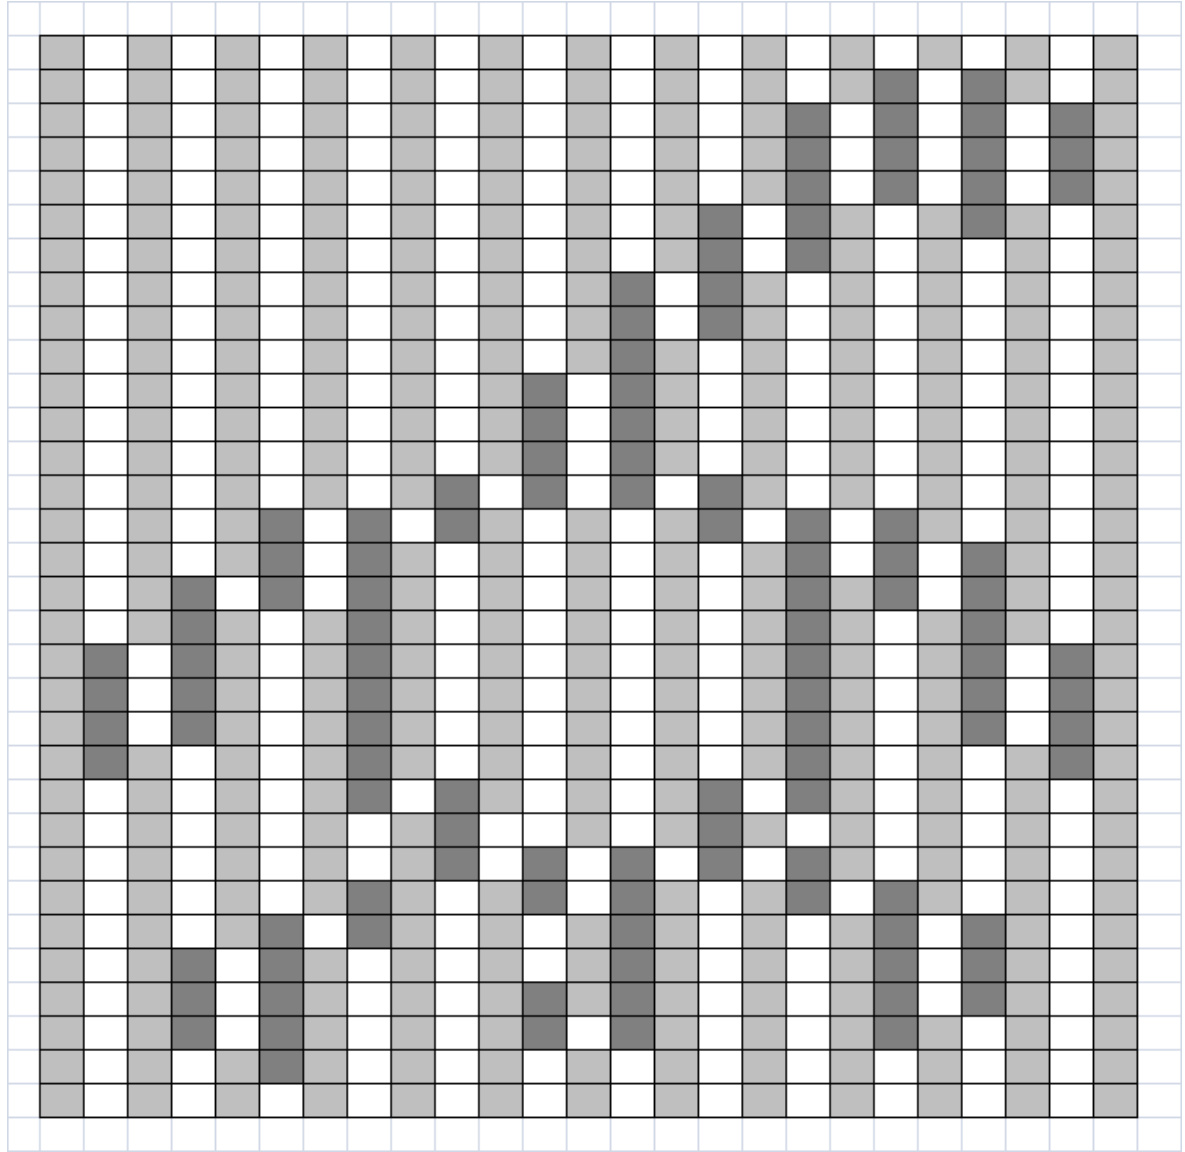
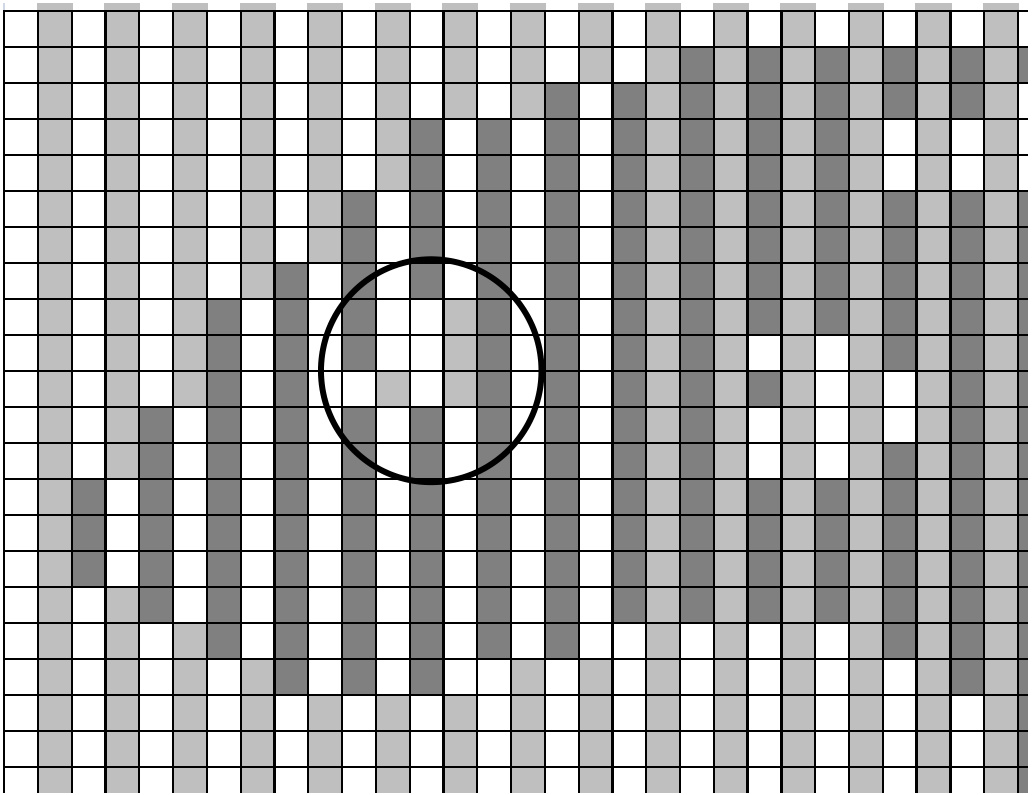
When working on paper, it is easier to add in the colour you need rather than subtract what you don't need. When you get to the white eye, we want that in grey rather than black, so colour it so there are grey knit stitches following the white gaps in the black lines. Then continue for the rest of the picture in the same way. When you are done you have a finished illusion chart You might want to mark off the tens as in the full chart on the next page to help count the knits and purls while you knit larger charts. Make sure there aren't three whites in a row anywhere.
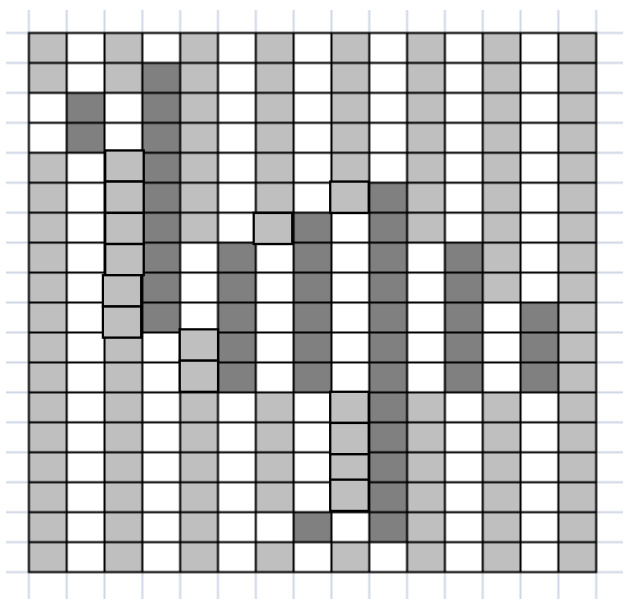
2. Using a silhouette or clipart image
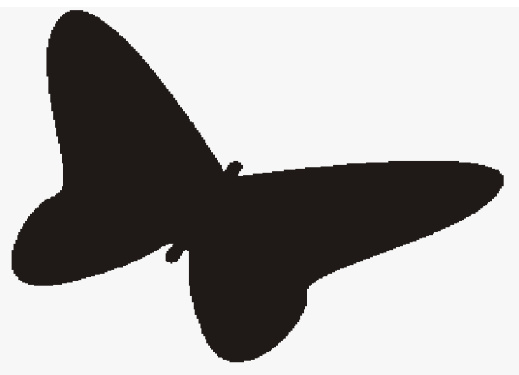
This is similar to the above, except the image is not charted yet. In this case, you will also need to choose a suitable scale for your image depending on the level of detail you want in your chart. The simpler the image used, the smaller it can be and still show the shape you want to see. For our example, take this butterfly:
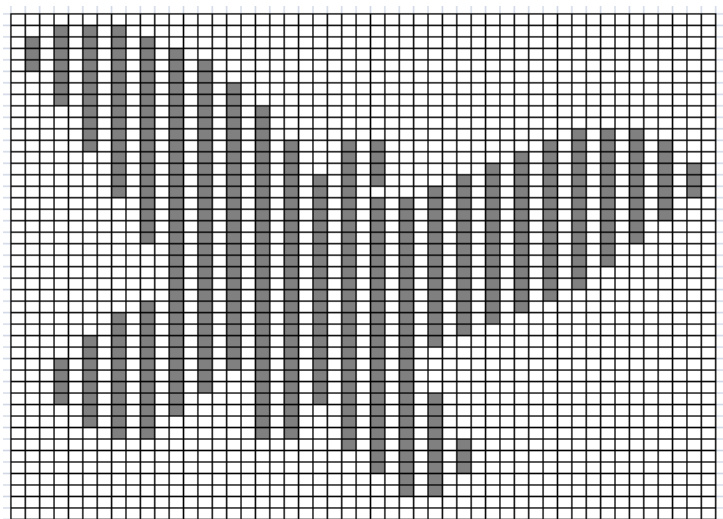
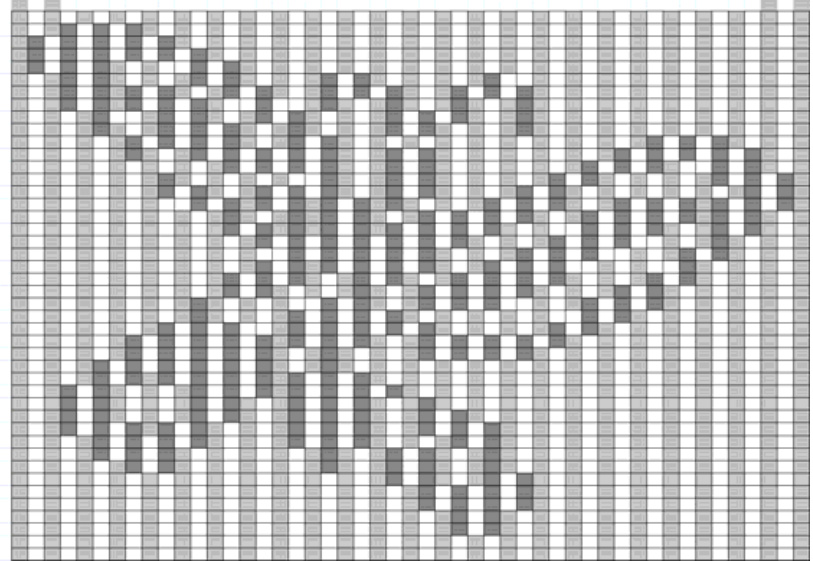
After this is done, the process is the same as for the charts Step 1: Fill in your dark colour in every second column as in the picture on the right (drawn freehand - I am no artist! But it approximates the shape ) As the image is not complicated, the number of stitches will not be as large as the cat. As a guide, the minimum width for all lines should be two stitches wide, otherwise they tend to blend into the second colour. Working on paper or in Excel, sketch/trace the outline onto your grid (or draw freehand) to get the approximate shape in a size where you can pick Out details. Step 2: Fill in your light colour around the shape in the gap columns Step 3: Add or fill in any details inside the shape with your light colour Step 4: Finish off by checking the edges are filled with grey until there is black both sides of it and there are no (or very few) lines that have three white across anywhere in the image. If there are three across, fill in with grey next to the black. Otherwise your ridges start looking like flat stocking stitch a little too much and the illusion does not work as well.
3. Use a photograph.
The process for doing this is the same as the simpler ones, except shading becomes more important. If you have both colours as ridges rather than creating shadows with stocking stitch areas then the colours blend when seen from a distance. This process is easier to adjust using a computer and is beyond the scope of today's session. There are some very good tutorials for this online at Woolly Thoughts (see link list). After you have partially or fully completed your chart, you should always test knit your design. You can use any smooth yarn for illusion knitting, as long as the needles match your gauge (or even a little tight) and the colours contrast well. Without contrast, the colours fade into each other and are not easy to see. Check each pair of rows as you go by laying the illusion flat and looking at it on an angle. Expect to make modifications @ Things always look different onceknitted. All of the patterns included in this document were made for the purpose of this session. That means.. If you go looking for "shadow knitting" or "illusion knitting" either on Ravelry or Google you will find more resources to use
Website Links
My favourite site: http://www.illusionknitting.woollythoughts.com/ They have some complex illusions for sale for a small fee and also the tutorials for turning photographs into illusion patterns. It is not an easy process, but worth persevering with for a special project. An application that makes worded illusion patterns for you from two colour pictures: http://kpg.sourceforge.net/ While it takes some preparation of your image to use, it creates good worded patterns for illusions. You need to ensure your image is in a format it can use and that its size in pixels corresponds to the size of the pattern you want (it also won't work on 64 bit windows). I played with it for awhile, but I prefer charts so shelved it for the time being. http://goodnightgram.wordpress.com/ Goodnight Gram has made quite a few illusion pieces - all free for download. http://www.ample-knitters.com/mid-xpress.htmlAny sideways knit garment is a candidate for illusion panels... this vest comes with instructions for resizing and a very easy to follow template. To make it into an illusion knit, I charted the whole vest (all the stitches) onto graph paper and added in the designs I wanted to use. There are a multitude of patterns out there... See what you can find! The best ones of all will be the ones you spend time and create.