Daisy, L Daffodil, andJigerdily: an Amulet Pouch Three Ways
by Rachel Gogan of Cerulean Tree Studios
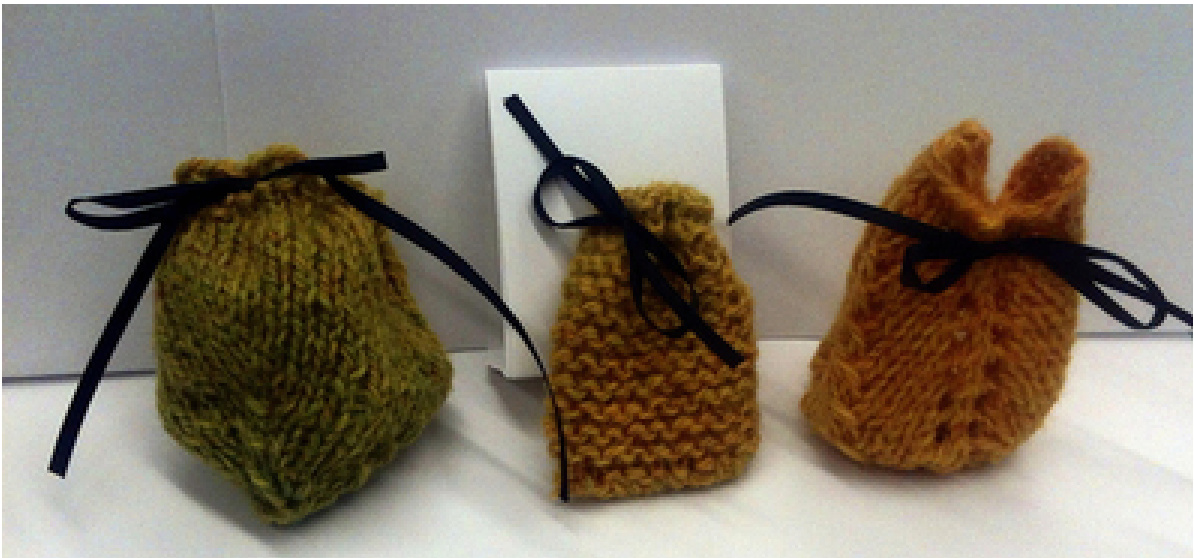
These little bags can be made as a tiny amulets to wear around your neck or as a pouch to carry stones, herbs, or any other small ritual components. I'm tucking warm-colored stones and something citrusy into mine for Imbolc as the light returns and we prepare for spring. Choose colors of yarn that symbolise spring, warmth, and renewal to you or that have special significance in your practice. I hope that you enjoy this pattern and I would love to see your finished pouches! Please feel free to share your completed projects with me via e-mail. I am also happy to help if you have any questions about the pattern. My e-mail is Caitirin@gmail.com. Happy Knitting! If you enjoy this pattern I encourage you to check out my other designs on Ravelry.com or visit my Etsy shop Cerulean Tree Studios.
Pattern Notes
For this project I have included 3 options for working the amulet bag for varying levels of knitting ability. 0“Daisy" is an easy version. The only skills you need will be cast on, knitting. binding off, and some simple sewing. O“Daffodil" is intermediate and requires casting on, knitting in the round, and decreasing. O"Tiger Lily" is more advanced and requires casting on, knitting in the round, decreasing, yarn overs with paired decreases.
Supplies Needed:
- small amount of yarn in a weight of your choice. I have used fingering weight for the samples shown here. This is a great project to use up scraps leftover from other projects. - needles appropriate to the yarn you have chosen - ritual components, stones, herbs, tufts of wool, any other items of magical significance toyou - yarn sewing needle for weaving in ends - ribbon to use as a drawstring Optional: charms or beads to sew onto your pouch. Gauge: Gauge (how many stitches you have per row and per inch) is not important for this pattern. The size of yarn and needles you choose will determine how large or small your bag is. For a dense firm pouch use smaller needles than called for, if you prefer a larger more drapey and loose pouch, use larger needles. I recommend slightly larger needles for the Advanced pattern in order to make the lace more open and pretty.
Daisy Easy Version - Knit Flat
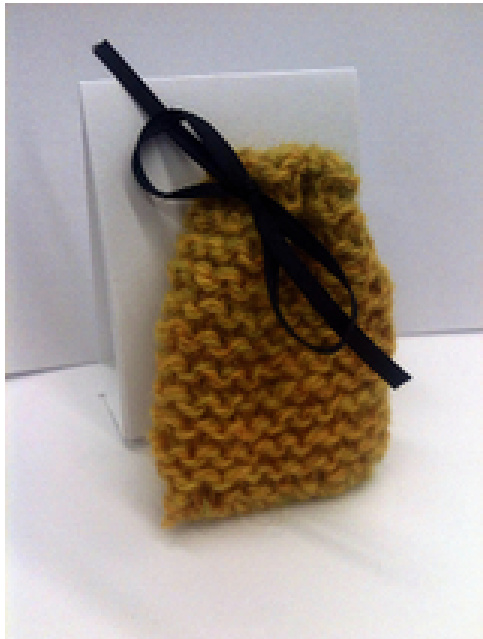
1. Cast on 20 stitches. 2. Knit all rows until the piece of knitting measures 3 inches long. 3. Bind off, leave a long tail to use for seaming. 4. Fold your knitting in half and use the tail to whip stitch the sides closed. Weave in the end of the yarn to hide it. 5. To make the drawstring use the piece of thin ribbon. Thread the yarn needle with the ribbon and pass it through the stitches at the top of the pouch. Knot the ends of the ribbon together, fil your pouch, and wear your knitting proudly.
Daffodil
Intermediate Version - Knit in the Round
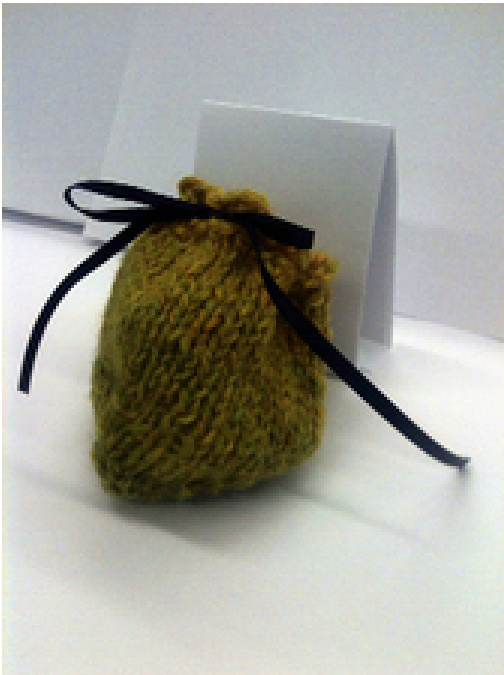
Cast on 36 stitches. Divide evenly over 3 double-pointed needles (DPNs) Join for working in the round. Place a stitch marker if you need one to mark the start of each round. (Suggestion on stitch marker placement: you can put your stitch marker in between the 7th and 8th stitch on your first needle if you need one, that way it won't slide off the end of the needle and it won't be in the way when you make the decreases. Just remember the only needle with a marker is the first.) Row 1-3 - knit all stitches Row 4 - purl all stitches Row 5-12 - knit all stitches Row 13 - \*knit 2 together, knit 10\* repeat from \* (you should have 33 stitches left) Row 14 - knit all stitches Row 15 - \*knit 2 together, knit 9\* repeat from \* (you should have 30 stitches left) Row 16 - knit all stitches Row 17 - \*knit 2 together, knit 8\* repeat from \* (you should have 27 stitches left) Row 18 - knit all stitches Row 19 - \*knit 2 together, knit 7\* repeat from \* (you should have 24 stitches left) Row 20 - knit all stitches Row 21 - \*knit 2 together, knit 6\* repeat from \* (you should have 21 stitches left) Row 22 - knit all stitches Row 23 - \*knit 2 together, knit 5\* repeat from \* (you should have 18 stitches left) Row 24 - knit all stitches Row 25 - \*knit 2 together, knit 4\* repeat from \* (you should have 15 stitches left) Row 26 - knit all stitches Row 27 - \*knit 2 together, knit 3\* repeat from \* (you should have 12 stitches left) Row 28 - knit all stitches Row 29 - \*knit 2 together, knit 2\* repeat from \* (you should have 9 stitches lefi Leaving a long tail, cut your yarn. Using the yarn needle, draw the tail yarn through each one of the active stitches and slide them off the needle. Pull tail snug to close up the hole in the bottom and weave in the tail on the inside of the pouch to secure and hide it. Using the yarn needle, thread the ribbon through the top of the pouch just above the purl row. Fill your pouch and tie the ribbon into a bow.
Advanced Version - Knit in the Round with Lace
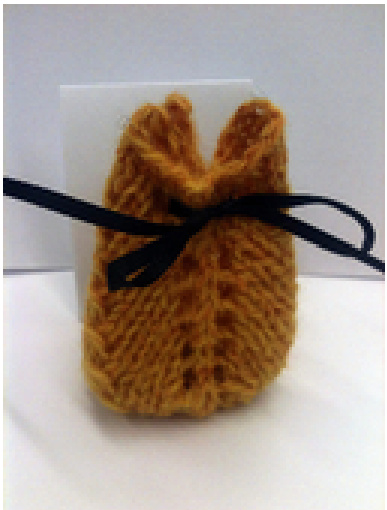
Because this has lace in it I strongly recommend using wool or another protein based fiber because they block out beautifully without a lot of work. Lace loves to be blocked and will look most beautiful if you do not omit that step. Abbreviations Used: k- knit p- purl yo- yarn over sl- slip k2tog- knit 2 together psso - pass slipped stitch over ssk - slip slip knit Cast on 36 stitches. Divide evenly over 3 dpns Join for working in the round work in seed stitch Round 1 -k1, p1 Round 2 - p1, k1 Round 3 - \*k2, yo, k2tog, k2\* repeat from \* around. This round creates yarn over holes we'll use to thread the drawstring through at the end. Round 4 - knit all stitches Round 5 - begin lace pattern which is 2 rows repeated until desired length is achieved, always end with a row 2. Row 1: \*k1, yo, k4, sl1-k2tog-psso, k4, yo\* repeat from \* (12 stitches = 1 repeat per needle) Row 2: knit all stitches Repeat these two rows until the piece is as long as you would like your pouch to be. 1 recommend at least an inch. Begin decrease rounds as follows: Row 1: \*k1, yo, ssk, k2, sl1-k2tog-psso, k2, k2tog, yo\* repeat from \* (you should have 10 stitches on each needle. Row 2: knit all stitches Row 3: \*k1, yo, ssk, k1, sl1-k2tog-psso, k1, k2tog, yo\* repeat from \* (you should have 8 stitches on each needle. Row 4: knit all stitches Row 5: \*k1, yo, ssk, sl1-k2tog-psso, k2tog, yo\* repeat from \* (you should have 6 stitches on each needle. Row 6: knit all stitches Row 7: k2tog around (you should have 3 stitches on each needle) Leaving a long tail, cut your yarn, draw the tail yarn through remaining stitches and pull snug. Weave in end to hide and secure. For your bag to look best you should block it. This is really easy with an item like this so don't skip this step if you want the lace to really look its best. Find a small cylinder like a salt shaker (be sure it's clean) or a paper clip container (that's what I used!). Being careful not to squeeze your bag, thoroughly wet the knitting in cold water. Press it flat to get most of the water out. Gently stretch the bag over your cylindrical object and allow to dry. Marvel at the magic of laceblocking. Thread the ribbon through the yarn overs in the third round. Fill your pouch and tie the ribbon into a bow.
Other ldeas for Finishing and Embellishing
- If you use wool or other protein based yarns you can knit your pouches much larger and then toss them into a washing machine on hot (with the rest of a load) and shrink your amulet pouch down. Felted pouches are perfect for adding embroidery and applique to. Just be aware that once your pouch is felted it will never stretch out bigger again ;) - If you like you can make your drawstring extra long and wear the pouch around your neck as an amulet pendant. This is ideal for carrying charms and herbal spells with you during the day. - Sew beads and charms onto your pouch to add extra ritual elements or colors or just a little bit moreshine.


