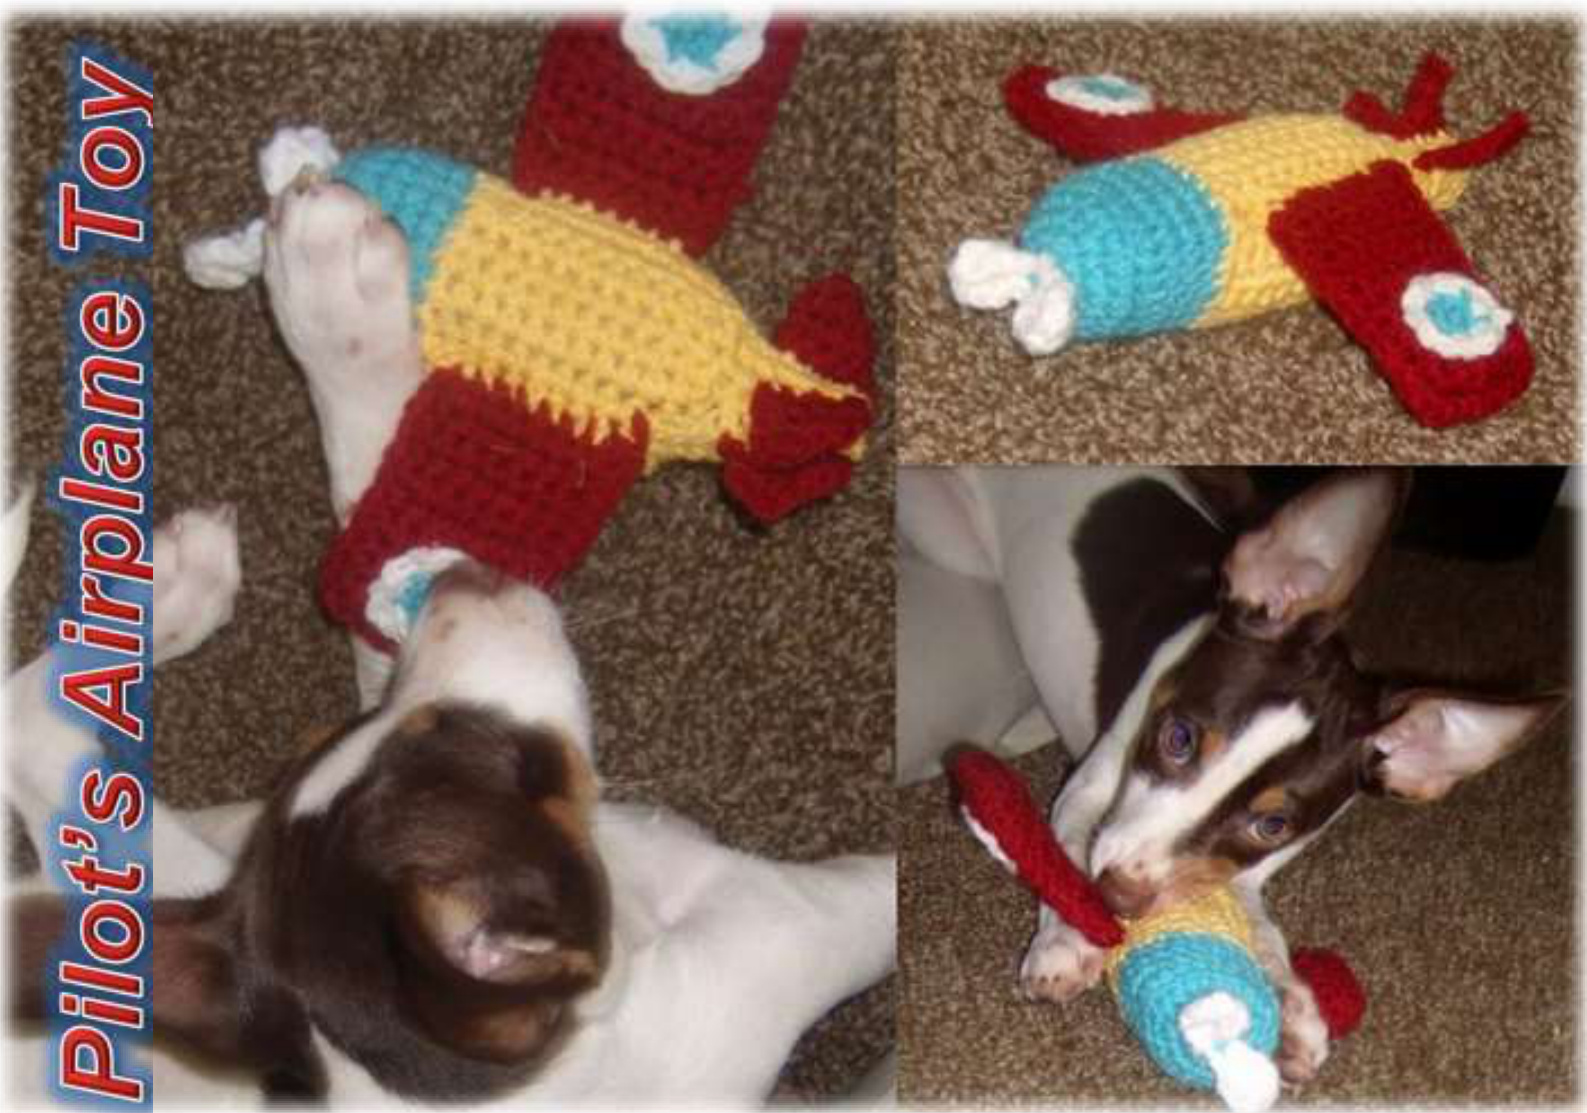
Fun dog toy designed in as a gift for my new puppy, Pilot, back when he was a puppy. Uses scraps yarn and simple stitches. Easy and fun to make, great toy forfetching! Disclaimer: This is strictly a small dog or puppy toy. It is not extra-strong like my rat toys and could be chewed by a big-toothed or skilled chewer, so please use your discretion! I did my best to design it to where there was a limited amount of sewing- none of the larger pieces are sewn- they are stitched together as you go- to prevent ripping in half via tug-games. The wing symbols and the propeller are sewn on, though. You could always leave those off if you are worried about choking.
Pattern Usage
For personal use, gifting, and donation only. If you are involved in an animal charity, please contact me with details of the charity and event for permission to sell for fund-raising. Please do not sell or duplicate this pattern or ever use items made from this pattern for personal gain.
Note from Author
This is an early pattern from me and it is not written exactly to standard. I have followed it myself many times, but that is not the same as someone else understanding what you mean. I wish I had time to rewrite all of these older free patterns so I don't have to admit it is sloppy, but that is not really a practical use of my day. I hope you will not have trouble following it, but if you are confused by anything please email me and I will try to figure it out! adoginasweater@mail.com
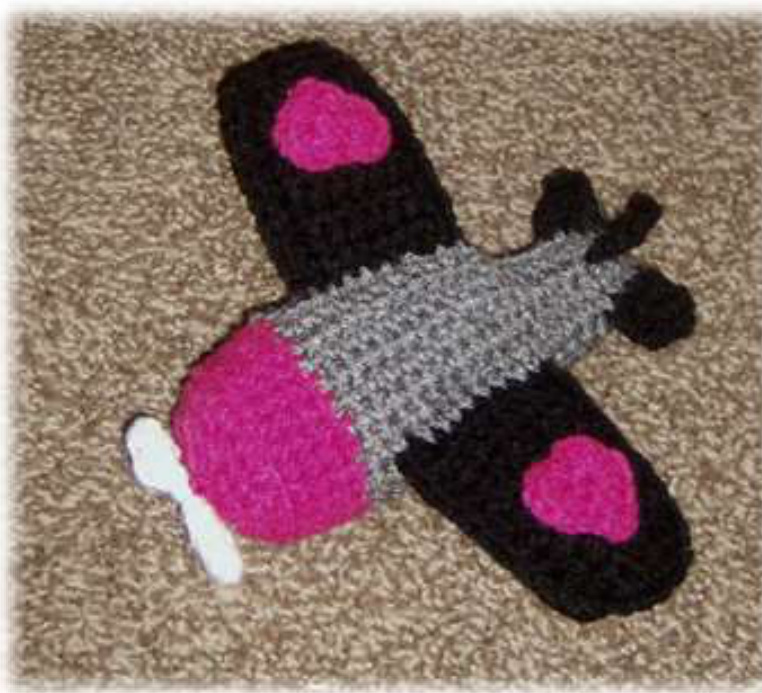
Pilot's Airplane Squeaky Toy
a dog toy pattern from A Dog In A Sweater by Jenna Wingate Skill Level: Easy. Basic stitches, though some finagling to assemble. Size: Wingspan is about 7 inches.
Materials:
wwyarn: Approx. 1 ounce each of red (A) and yellow (D) .A few yards of blue (B) and white (C) G hook Tapestry needle Polyfil Heavy Duty Squeaker (optional)
Stitches Used:
CH... chain SC... single crochet HDC...half double crochet DC... double crochet SL ST... slip stitch BLO- Back Loop Only RS... right side SC2TOG... Single Crochet 2 Together
Pattern:
-Propellor (make 1) With C, CH 7.SC in 3rd chain from hook. SL ST in next 3 chains. (SC, HDC, 3DC, HDC, SC) all in last chain. SL ST in bottom of chain over next 3 stitches. (SC, HDC, 3DC) in bottom of last chain. Join with beginning chain with a SL ST. FO and sew in ends. -Wing Symbols (make 2) With B, CH 2. 6SC in 2nd chain from hook. Join with a SL ST and FO. With C, Join anywhere with a SL ST. 2 SC in each stitch around. Join with a SL ST and FO, leaving tail for sewing. -Wing (make 4) Row 1. With A, CH 6. SC in 2nd chain from hook and in each chain. CH1 and turn. (5 SC) Row 2. 2SC in 1st stich. SC in the next 3 stitches. 2SC in last stitch. CH1 and turn. (7 SC) Row 3-10. SC in each stitch. CH1 and turn. FO on lastrow.
-Wing Assembly
Sew Wing Symbols onto 2 of the wing pieces. Note: The back side of this is not going to show, so sewthemonreallywell! Sandwich Wings together (1 with emblem and 1 plain). Join A with a SL ST at a corner and place 23SC evenly around the sides and tip, leaving the top open. Stuff all your ends inside. Repeat for other wing.
-Tail Fins (make 3)
1. With A, CH3. SC in 2nd chain from hook. SC in next CH. CH1 and turn (2SC) 2. 2SC in each stitch. CH1 and turn. (4SC) 3-4. SC in each stitch across. CH1 and turn. FO on last stitch. Sew in ends.
-Body
With D, CH21. Note: Odd number rows are all RS. Be sure all assembly points out on a RS pass. 1.SC in 2nd chain from hook and in each chain. CH1 and turn. (20SC) 2. SC across. CH1 and turn. 3, SC in the first 11 stitches. CH1 and turn. (11SC) 4. SC in each stitch across. CH1 and turn. (11SC) 5. SC in each stitch across. Pull tight when you drop down to skipped stitches. CH1 and turn. (20SC) 6-8. Repeat rows 2-4 9. SC in 1st 2 stitches. Placing wing with symbols up, SC through all layers (9SC), securing wing. Continue to SC across (pulling tight to close gap as in Row 5) Until last 4 stitches. Place Tail Fin and SC through both layers to end. CH1 and turn. (20 SC) 10. Repeat row 2 11-12. Repeat rows 3-4. 13. SC across to last 4 stitches. Place Tail Fin and SC through both layer to end. CH1 and turn. 14. Repeat row 2. 15-16. Repeat rows 3-4 17. Repeat row 9 for 2nd Wing and last Tail Fin. Be sure the Wing Symbol is facing down this time. 18-21. Repeat rows 2-5. 22-24. Repeat rows 2-4. FO leaving long tail for sewing. Sew the belly of the plane together securely. Sew around open Tail tip and pull tight to gather. Fasten securely and sew in end.
-Stuff Plane Body
Place a small amount of stuffing in Tail Section of plane. Add Squeaker, then fillfirmly with more Polyfil.
-Nose Cone
With B, join with a SL ST to front end of body. 1. CH1. SC 24 stitches evenly around. Join with a SL ST. (24 SC) 2-4. CH1, SC around. Join with a SL ST. 5. CH1, in BLO, SC around. Join with a SL ST. (24) 6. CH1. (SC2TOG, SC in the next 2 stitches) 6 times. Join with a SL ST. (18 SC) 7. CH1. (SC2TOG, SC in the next stitch) 6 times. Join with a SL ST. (12SC) Stuff Nose Cone. 8. CH1. (SC2TOG) 6 times. Join with a SL ST. (6 SC) FO, leave a tail for sewing.
-Finishing
Secure Nose tightly closed, and sew Propeller in place securely. FO and sew in end. Enjoy!
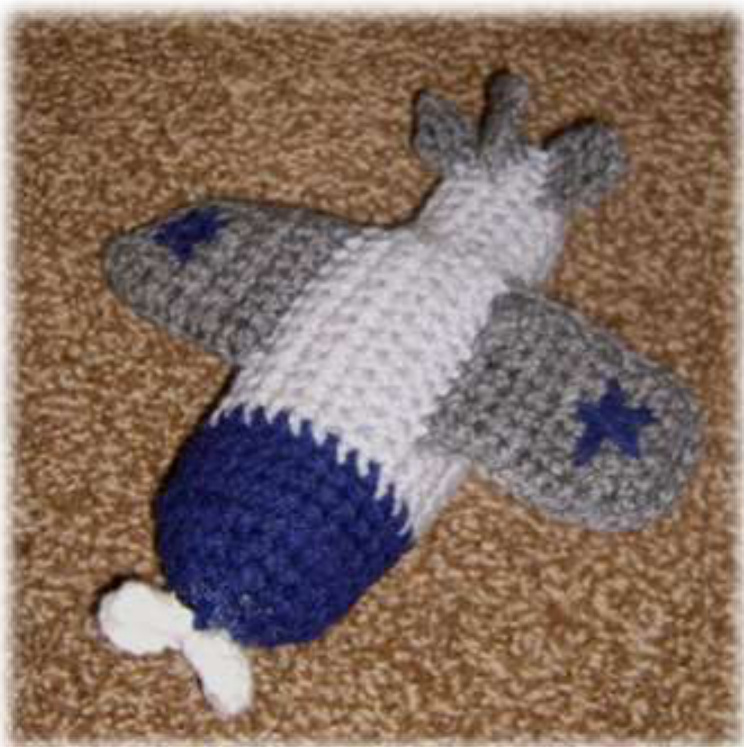
This toy can be made and decorated in so many different ways. It is not exactly aerodynamic, but it does sort of beg to be thrown across the room and yourpuppyisgonnabeTHRILLEDaboutthat!
Connect with A Dog In A Sweater
Blog http://adoginasweater.blogspot.com/ FaceBook https://www.facebook.com/adoginasweater Twitter https://twitter.com/adoginasweater Ravelry http://www.ravelry.com/stores/a-dog-in-a-sweater Email adoginasweater@mail.com


