Acanalado Fingerless Mitts Pattern by: Kaitlyn Rittenhouse - www.thecraftattic.com
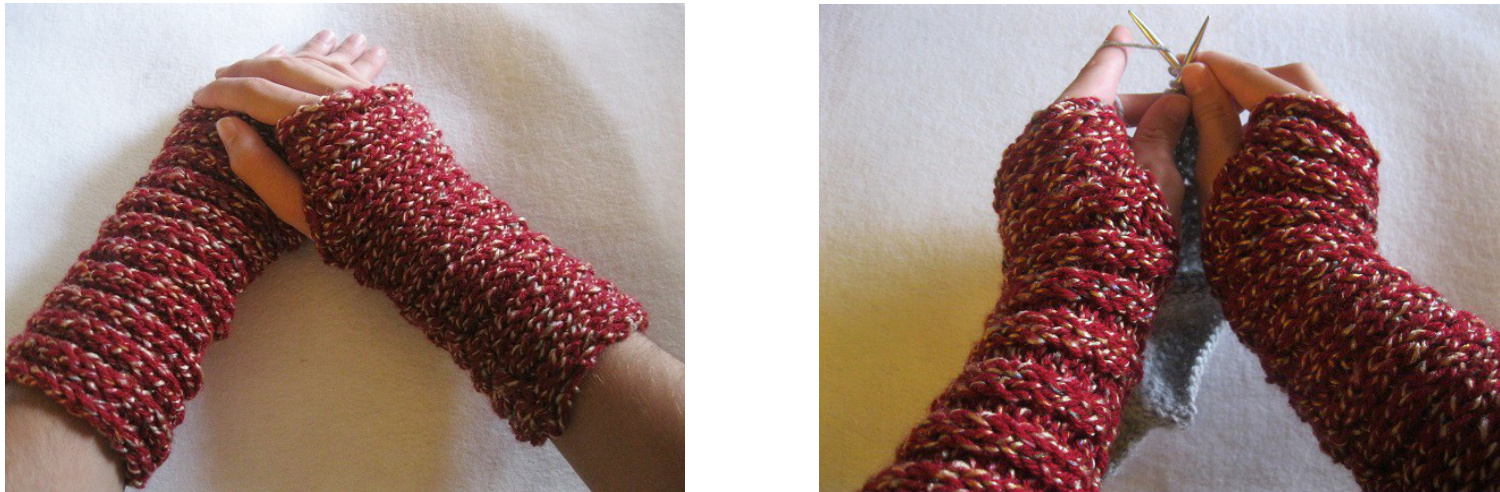
Acanalado means “ribbed" in Spanish, so I thought that name would suit the mitts perfectly. To start off, you will cast on the number of stitches recommended for your size; this will form the length of the mitt. Then you will knit the pattern until the mitts are wide enough to stretch around your hand. You will then seam the mitts, leaving an opening for the thumb, using either a crochet hook or yarn needle. Both methods are explained with detail at the end of the pattern. I hope you enjoy knitting these mitts as much as I enjoyed designing them for you! Gauge: 8 sts and 13 rows = 2" in stockinette Difficulty: Beginner Sizes: child (teen, woman small, woman large)
Materials
pair of US 8 (5.00mm) knitting needles worsted/aran weight (category 4) yarn: child - 140yds/130m/80g/3oz teen - 150yds/137m/95g/3.4oz woman small - 160yds/146m/100g/3.50z woman large - 170yds/156m/115g/4oz scissors yarn needle US F/5 (3.75mm) crochet hook (optional)
Abbreviations
CO = cast on BO = bind off k = knit p = purl sl st = slip stitch st(s) = stitch(es) FO = fasten off RS = right side Size Chart
| Size | Wrist Circumference |
| Child | 5 %2 - 6 inches |
| Teen | 6 - 6 % inches |
| Woman small | 6 %2 - 7 % inches |
| Woman large | 7 %-8 inches |
Chart information found at http://www.junebugsplace.com/standards.htm
Acanalado Fingerless Mitts (make 2):
Note: Left and right mitts are knit the same. CO 48 (52, 56, 60) sts. Row 1: \*k2, p2, repeat from \* across Finishing: Continue to knit Row 1 until your work is the suggested wrist circumference of the size you are knitting. BO, but do not FO the last loop or cut the yarn if using crochet hook to seam (if you are using a yarn needle to seam, then FO the last loop and cut the yarn leaving a long tail to sew the seam). See instructions below on how to seam with the crochet hook or yarnneedle. If using the crochet hook to seam: Fold the work in half like a hotdog bun with the RS facing inside. Insert the crochet hook into the last loop of the BO. Tighten loop around hook. Sl st the long edges of the work together until you have the desired cuff length (you can make it a fold down cuff or a single-layer cuff by adjusting the amount of sts you sl st). For the first mitt, sl st along back edge (the edge closest to you) until thumb opening is wide enough. For the second mitt, sl st along front edge (the edge farthest from you) until the thumb opening is wide enough. Sl st both edges together until you reach the end of the mitt. FO and weave in all ends. Inside-out the mitt so that the RS is facing out. If you made a fold down cuff, fold the cuff down. If using the yarn needle to seam: Fold the work in half like a hotdog bun with the RS facing inside. Whip stitch the long edges of the work together until you have the desired cuff length (you can make it a fold down cuff or a single-layer cuff by adjusting the amount of sts you whip stitch). For the first mitt, whip stitch along back edge (the edge closest to you) until thumb opening is wide enough. For the second mitt, whip stitch along front edge (the edge farthest from you) until thumb opening is wide enough. Sew both edges together until you reach the end of the mitt. FO and weave in all ends. Inside-out the mitt so that the RS is facing out. If you made a fold down cuff, fold the cuff down.


