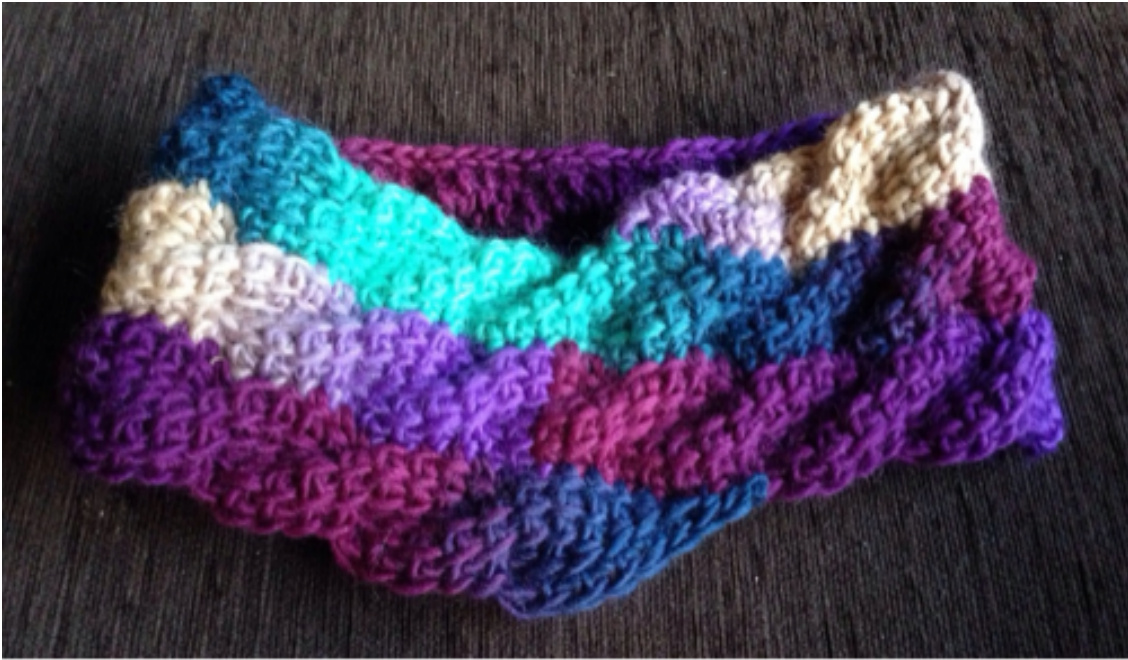
Spiral cable cowl
Design @ 2014 by Abbey Bongers of www.squigglycreations.com.au
Equipment
8mm crochet hook 8-10 ply yarn (Bendigo Woollen Mills Murano used - which I think is more like 10 ply than 8)
Abbreviations and stitches used:
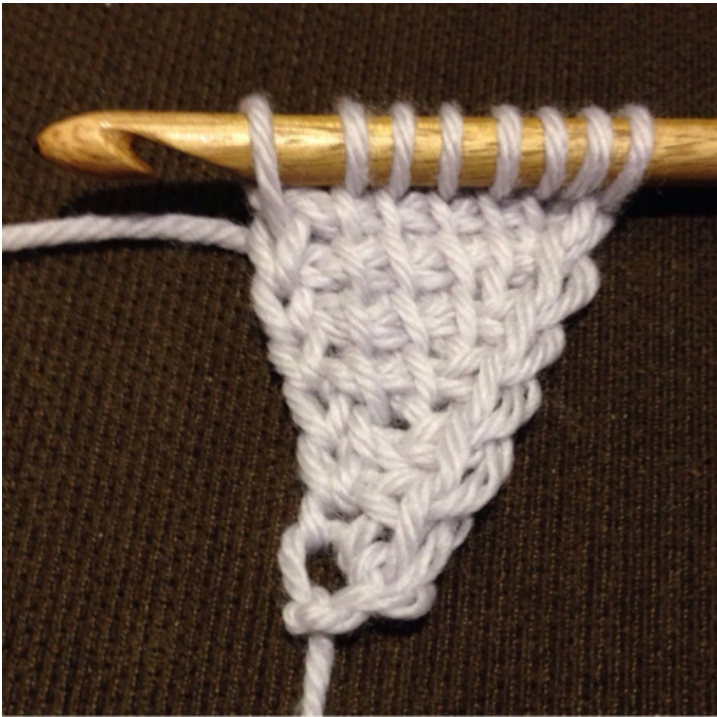
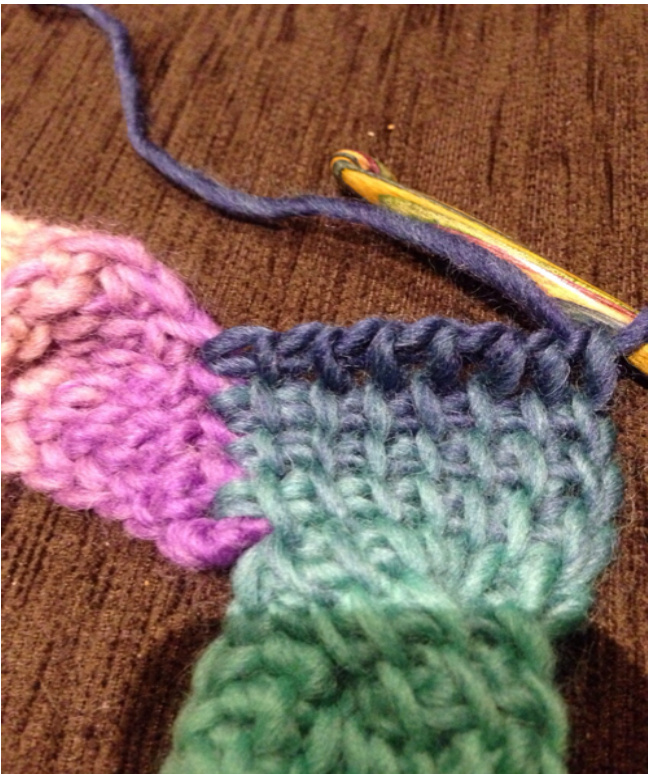
TSS standard forward (FP) and return pass (RP) on every row with the following variations: TSScable TsS increase and decrease The first section starts with 1 TsS and increases until you have 8 loops on your hook. This section will look like a wonky triangle. Rows 1-7 pictured below. Pattern Starts: Ch2 Row 1: FP: Insert hook into 2nd chain from hook YO pull through 1 loop. RP: YO pull through 1 loop, YO pull through 2 loops (standard return pass)
Row 2:
FP: YO (increase 1), Insert hook in 2nd loop from hook (which is the last stitch on the first row), YO pull through 1 loop (3 loops on hook). RP: YO pull through 1 loop, Yo pull through 2 loops twice Row3: FP: YO (increase 1), insert hook into 2nd stitch from hook (this will be the yarn over from the previous row) YO pullthrough 1 loop, continue standard TSS to end if row (4 loops on hook). Standard return pass
Rows 4-7:
Each row begins with a YO increase. Continue increasing until you have 8 loops on your hook (row 7).
Second section:
This is where the cabling starts and the increasing stops). The cabling row will be easier to do if you keep your tension loose.
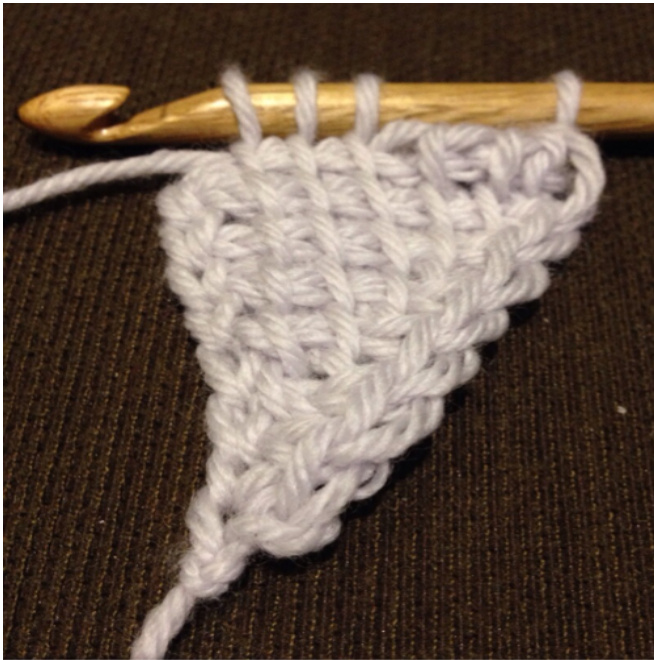
Cable row 8: TSS into the 5th loop from your hook first, then the 6th, then 7th (leaving the last TSS of the row unused for now). (Pictured left) Now TSS into the 2nd loop (YO from the row below, then the 3rd then 4th stitches. This puts a twist into the row and creates the cable. Lastly, TSS into the last stitch (8th from hook). Standard return pass to finish the cable row. (Pictured right)
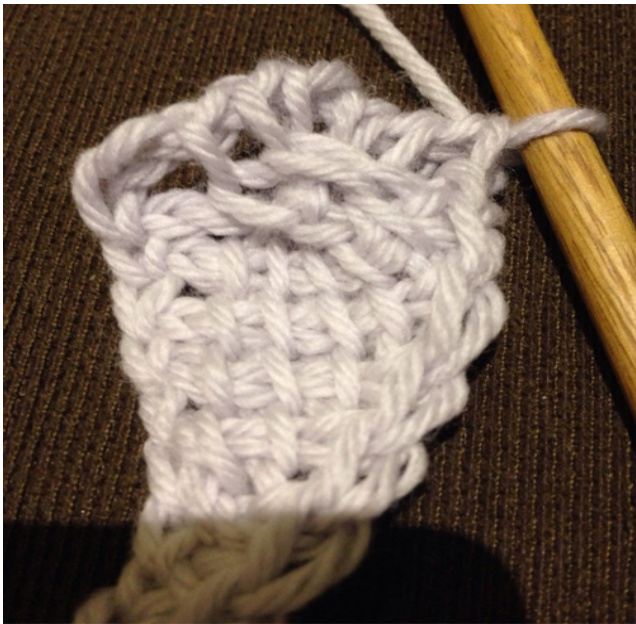
Rows 9-13:
TSS every row (8 loops still on hook on each row). Repeat rows 8 to 13 until your piece is about 65cm long, or longer if you want a bigger cowl. When you are happy with the length of the cable (which will be a circle around your neck, make sure you have finished off with a cable row at the end.
Section 3: You'll be joining your cable to the first row as follows:
First TSS row after cable row:
5 TSS then 1 decrease (hook under 2 stitches, YO, pull through one - 7 loops on hook). (Pictured left). Your return pass from herein will be slightly different. Skip the usual YO pull through 1 and instead YO pull through 2 straight away until the end of the row as normal. Next 3 rows: 6 TSS then insert hook into the ch at the start of row 2, then 3 and so on. (Pictured right). Lastly, grab hold of the work at the beginning and lay it flat as a circle (don't twist). Insert your hook into the right hand loop of row 1 from front to back, YO pull through 1 loop. You'll have 8 loops on your hook. Cable row: works the same as the previous TSS rows, only with the cable: TSS stitches 5-7 then TSS stitches 2-4 then insert hook into the last ch of the next row up at the start of the work, following on from the TSS rows you just finished. Continue your rows, joining as you go which will give you a spiral formation. 5 TSS, 1 cable, 5TSS, 1 cable and so on.
It's up to you how big you want your spiral to be. I've gone around mine 3 times. When you are ready to finish, the cowl will be finished off in a similar way to how it started but withdecreasesrather than increases.
Finishing:
On the first TSS row after a cable row, start with a decrease straight away (hook under two stitches at once, YO, pull through one loop, continue TSS as normal. Keep decreasing at the first stitch of every row until you are down to your last TsS. The last decrease will pick up the last TSS stitch as well as going into the joining cable. Then 1 SC, 1 slip stich. Weave in ends. Done!
PS: If you like the look of my timber Tunisian Crochet hook in the first few pictures, my clever Husband can make one for you too - from 6mm and bigger. Drop him an email at Haemish@ squigglycreations.com.au You can also follow him on Facebook here: https://www.facebook.com/pages/Custom-Australian-Tunisian-Crochet H00kS/1399709323593713


