Simple Star Ornament
① Dennis Marquez This is a tutorial to make a pointy star ornament. Make one for the star in your life, use multiple for Christmas Decorations. Spice them up with some buttons, beads, or whatever tickles your fancy! Let your creativeness take flight!
What do you need?
Yarn (Preferably Cotton) Hook (Hooksize to match your yarn choice) Darning Needle A happy smile on your face
Abbreviations used (American):
Ch: Chain TR: Triple Crochet DC: Double Crochet SI st: Slip Stitch HDC: Half Double Crochet SC: Single Crochet
How to make one?
Start by making a magic loop (Check youtube or google for tutorials on this!) Row 1: Ch 3, 2 DC into magic loop, Ch 1. \*3 DC, Ch 1\* for a total of 4 times. Sl st into 3rd chain of first Ch 3. You should have 5 clusters of 3 DC with a Ch 1 in between. Row 2: \*Ch 5, Sc into 2nd chain from hook, HDC into 3rd chain from hook, DC into 4th chain from hook, TR into 5th chain from hook. Sl stitch into next Ch 1 space.\* Repeat 4 more times. Bind off by making one more chain, cutting the yarn leaving a 3" tail, and pulling the loop out and tighten the chain. You did it! Your base' star is done! Now you might be happy enough with your star to leave it like this, or you might want to go a little more 'advanced' and add a border around it! This might be a little bit fidgety but if you've come this far, you should not have too many problems adding a couple of stitches around it!
Border
Row 1: Make a knot with the new color and the bind off tail as close to the bind off as possible. Put your hook through the backloop of the slip stitch to the left of your knot, this might be a bit tricky to find, but the exact location of where you put your hook is not that crucial. Pull your new color through this backloop. Now you're at the uphill bit of the point. You're going to slip stitch along the base of the chain 5 from Row 2. You should have made 5 slip stitches now. Chain 1 and slipstitch downhill through the backloops of the Sc, HDC, DC and TR. You've now reached the valley between the points. Make another slip stitch through the backloop of the slip stitch that's there. Now you just repeat this all the way around! You'll find that when you make more stars, the border goes easier and easier. When you get to the end, don't slip stitch into the first slip stitch, but cut your yarn leaving a 3" tail. Thread your darning needle with this tail and go underneath both strands of the first slip stitch from front to back. Now put your needle through the center of the last slip stitch you made to create an invisible join! Sew in all ends and you're DoNE!
Picture Tutorial!
I'm going to to take you through all the steps slowly and with the help of some pictures!
Row 1
Start off with making a magic loop. Ch 3, 2 DC, Ch 1 into magic loop to form 1st cluster. \*3 DC, Ch 1\* 4 times. Slip stitch into 3rd chain from beginning Ch 3. Pull magic loop tight!
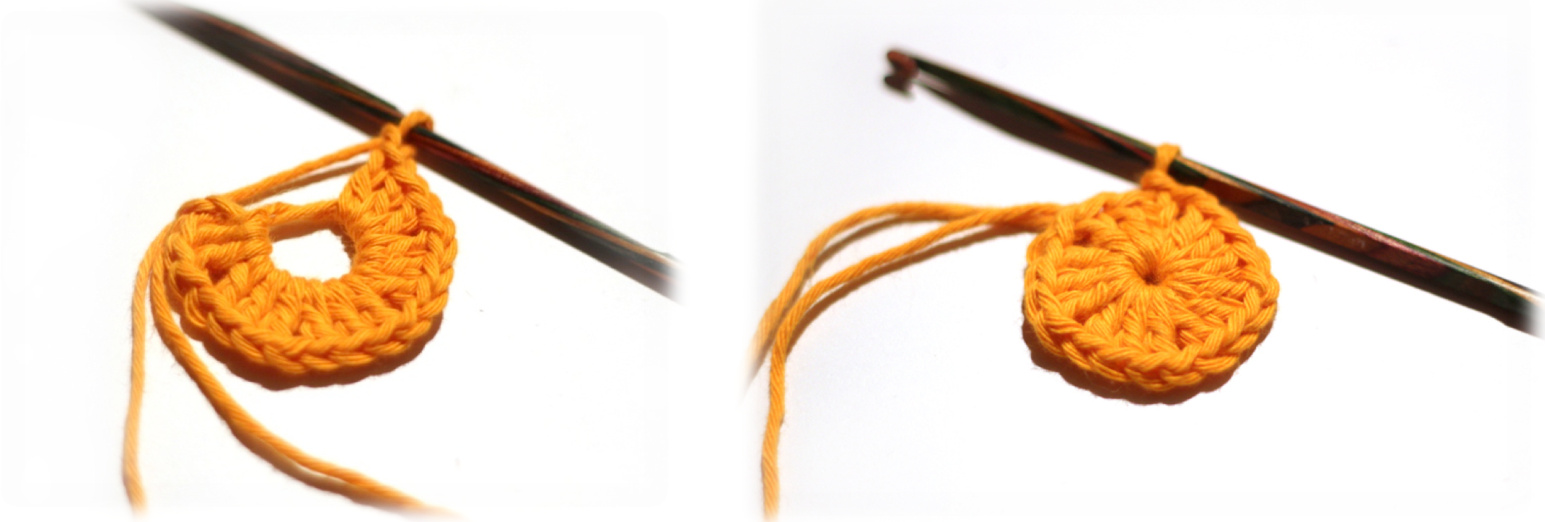
You should now have a little Pentagon made out of 5 clusters of DC's which a Ch 1 in between eachcluster.
Row 2
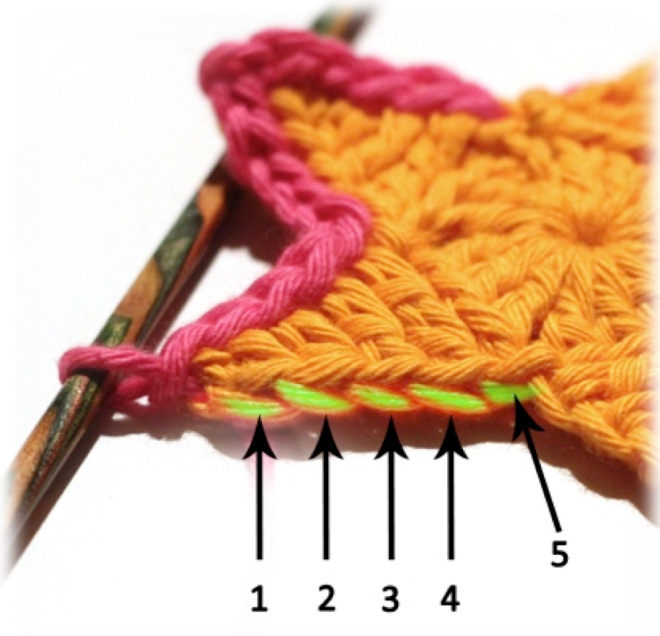
\*Ch 5. Sc into 2nd ch from hook. HDC into next ch. DC into next ch. TR into next ch. SI St into next ch 1 space.\* for a total of 5 times. In the picture you can clearly see where to make your stitches! Remember to go under 2 loops.
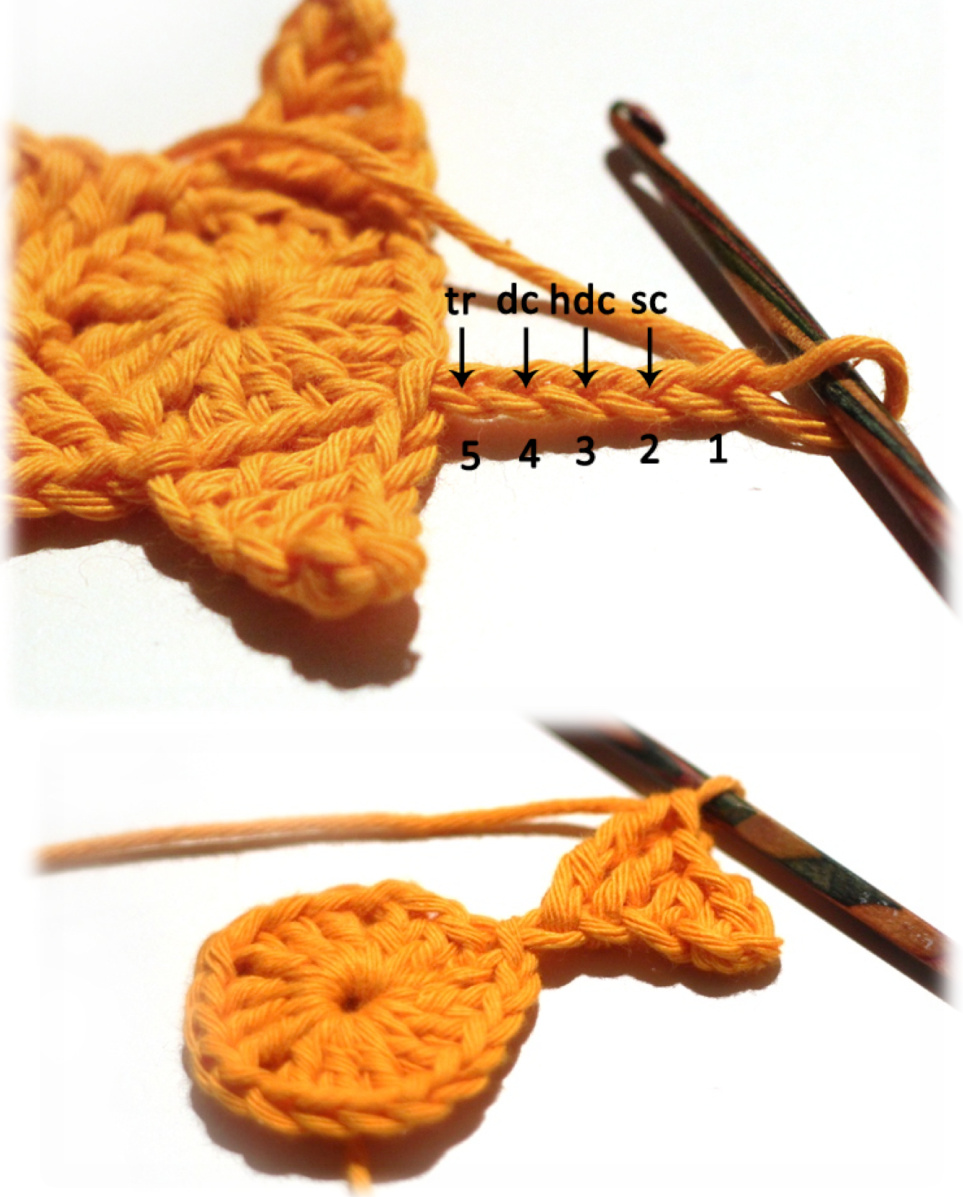
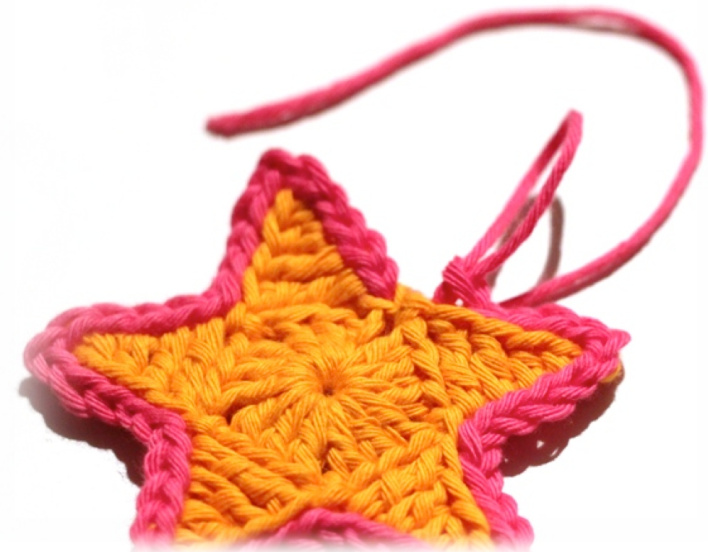
This is what a finished point looks like before you slip stitch into next chain 1 space. If you followed all the steps correctly, you just ended with a slip stitch in the last Ch 1 space and you should have 5 points to your star! Now to fasten offI recommend making one chain, cut off the yarn leaving a 3" tail , and with your hook you pull out the loop. Give a good tug on the tail to tighten thechain!
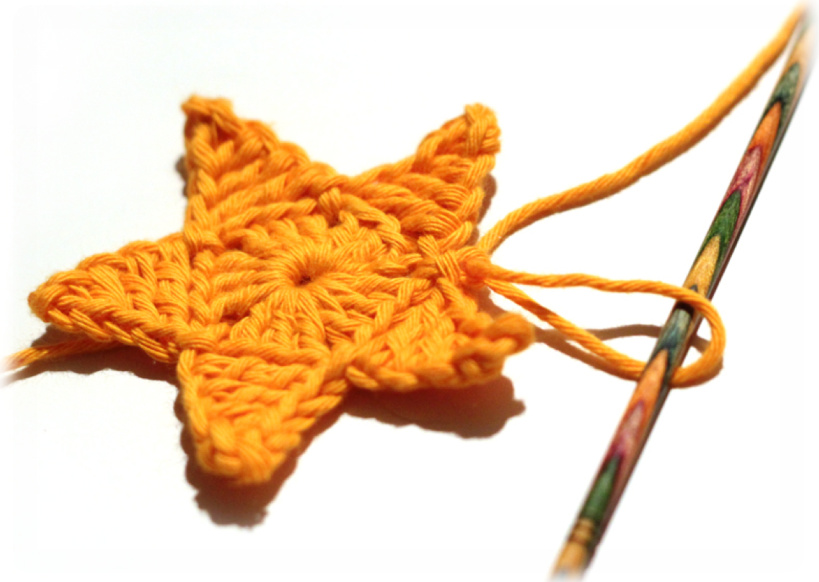
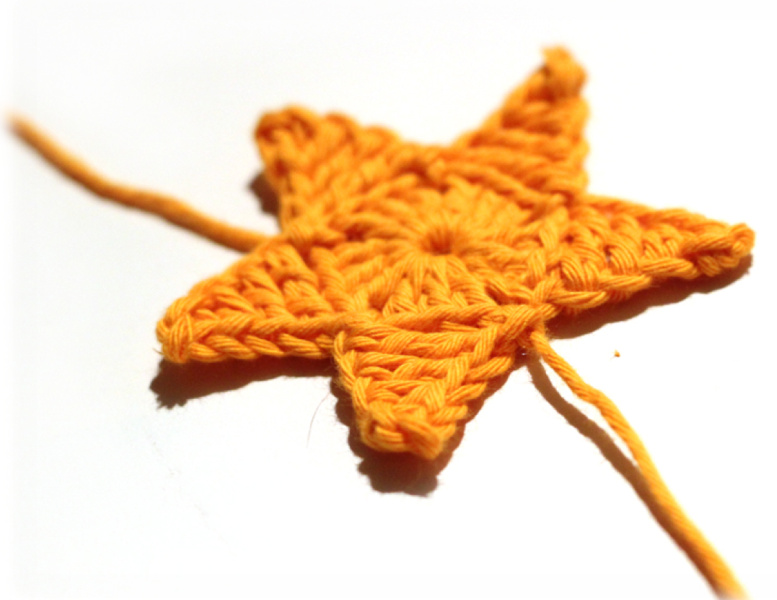
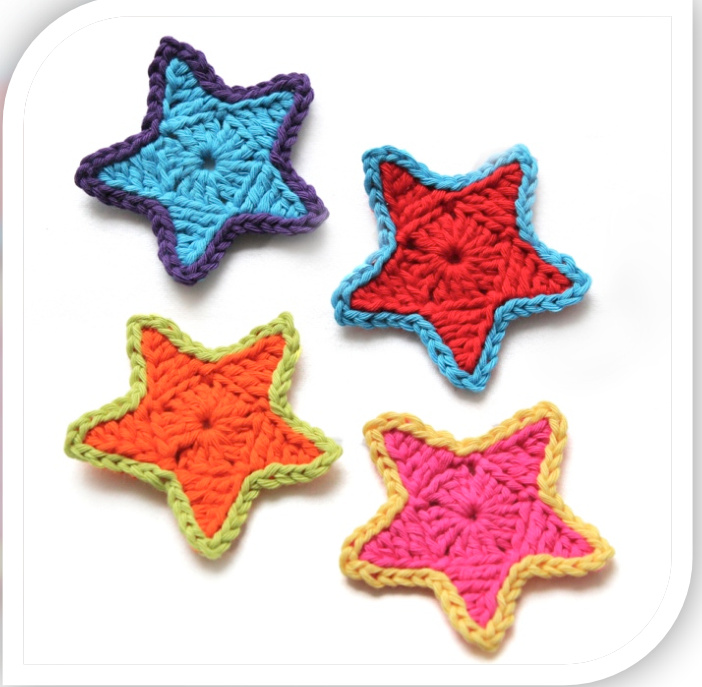
You did it! Your 'base star' is done! Now if you're satisfied enough you can go ahead and sew in the ends, make a hundred of them in any possible color and star bomb your tree with it! If you want your star to pop more, follow the next steps to add a simple border!
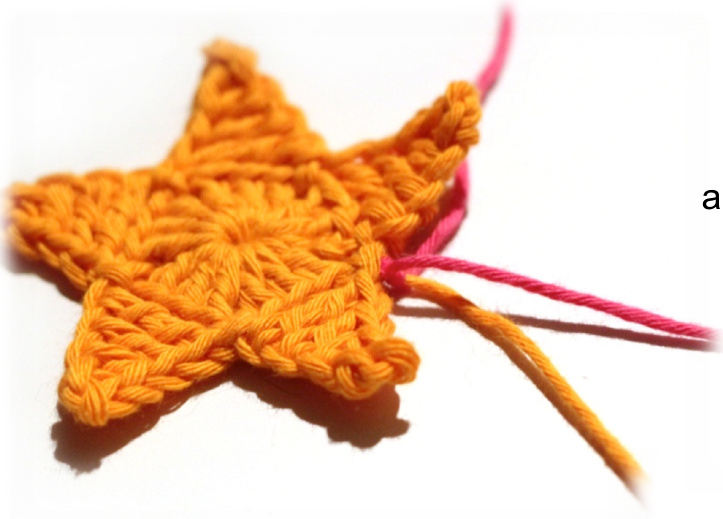
To make the border you first have to pick out a nice different color than the one used for your star. Knot the new color together with the bind off tail from your star as close to the bind off as possible. From here on all you have to do is slip stitch your way around the star. But where to put your hook? In the picture I've highlighted the loops with green to make it a little more clear! Put your hook though the backloop of the first Sl St to the left of the knot and pull your new color through. Now slip stitch your way up through all 5 chains. These should be pretty obvious since there's only 1 loop there to go under. When you've reached the top, Chain 1.
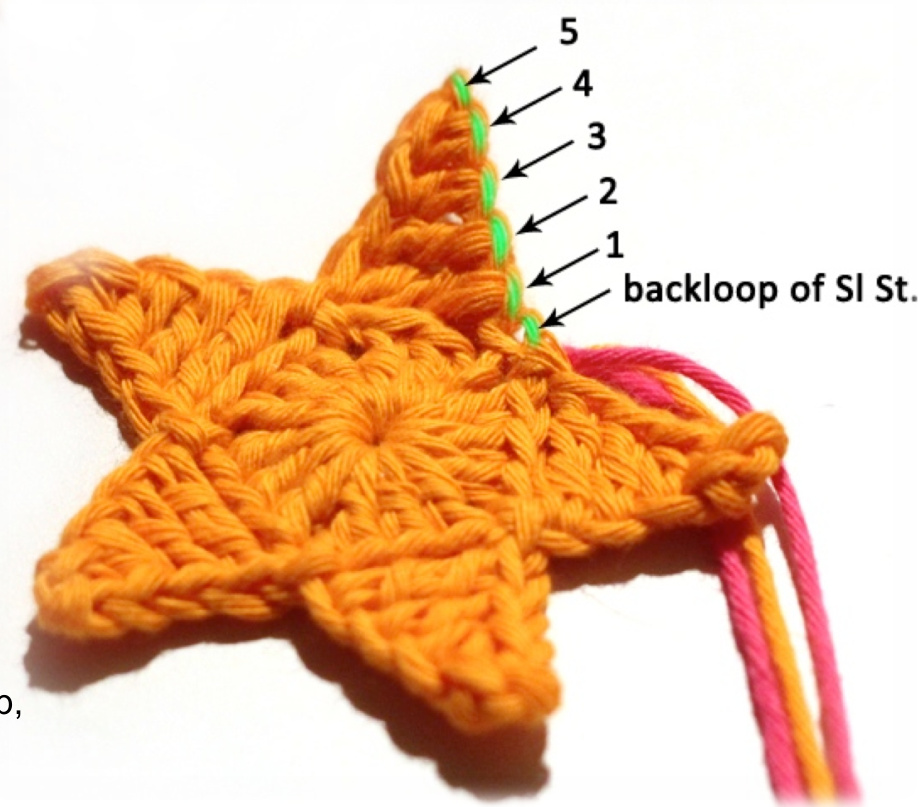
Now we're going to work our way down! Sl St through the backloops (!) of the stitches. They are highlighted again with green in the picture Notice there are 5 backloops you can Sl St into? The 5th one might be quite snug, but with a tiny bit of wiggling your hook, it should work! Now repeat your way around the star. Remember to always make a chain 1 when you get to the tip of the point so that you're star will remain pointy!
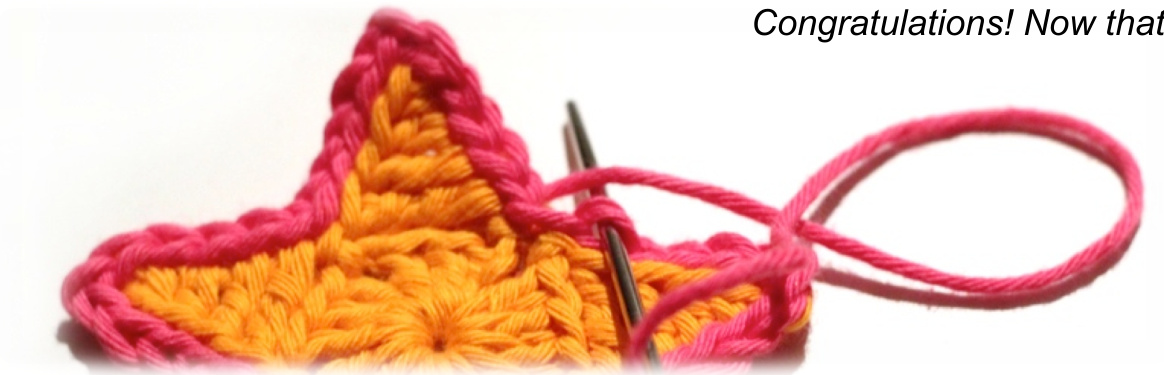
When you've worked your way around, you can either slip stitch into the first slip stitch of the round (which would result in quite a visible join) or you can go a little more advanced, and hide the join all together! This is actually very easy to do, but hard to explain! I'm going to try anyways! This is what your work should look like by now! In the picture I already cut the yarn and pulled the loopout. Now get your darning needle out and thread it with the tail.
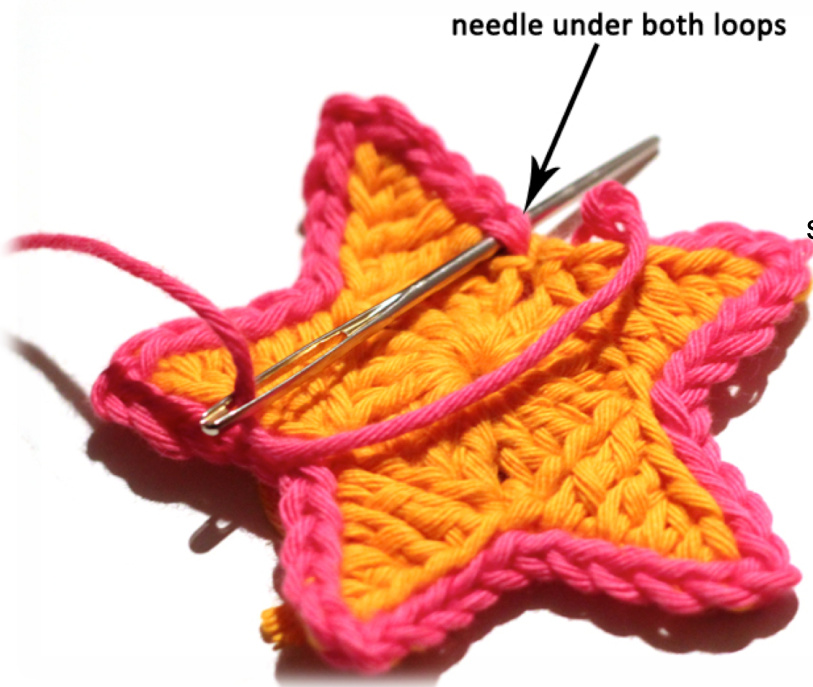
Stick the needle underneath both loops of the first slip stitch you've made. In the picture you can see very clear where the needle should go. Pull the needle all the way through but don't pull the yarn too tight yet. Now you're going to put your needle through the center of the last slip stitch you've made, the one where the tail came out of, right in the middle of it. You've basically faked a slip stitch now and you won't be able to tell where the join is! Sew in your tails and you're done!