SNAKE BABY RATTLE TOY
By Leyla Alieva
This toy uses stitches with different textures to stimulate the development of a baby's tactile sense, which is very important in the early months. It exploits the self-striping pattern of the yarn as a cue to change stitch patterns. The project is a sampler of some classic and very basic stitch patterns: stockinet, garter, seed, 1x1 rib, but it also uses more complex techniques - bobbles and loops/fur stitch. 2013 is the year of snake according to Chinese zodiac, so this toy could be a greatsymbolicgiftforbabiesbornin that year. People born under the sign of snake are said to be wise, intuitive, strong-willed. They are not outwardly emotional. Although notgreat communicators, Snakes are able to plan and scheme well ahead to make things turn out as they want. This pattern is not written in the style where each little step and stitch is written out and explained. It leaves room for experiment and imagination. Please read carefully through the whole pattern before starting the project. This pattern is not meant to serve beginner knitters. However, if you are a beginner that likes challenges and happily plunges into unknown waters, I'd be glad to help. If you have any questions, feel free to contact me at silkandwool.eu (at) gmail.com.
MATERIALS
KnitPicks Felici - 199m/50g (218yds/1.76oz); 75% merino and 25% nylon. You can use other selfstriping yarn, or make stripes yourself, using several balls of yarn in different colours. I'd recommend sport weight sock yarn that's machine washable. Machine washable yarn is great so that the toy is easily washed. Nylon makes it more durable. Using sport weight yarn and a smallsized needles will create fabric that will not let any of the stuffing out. You'll need 15-20 grams / 65-87 yds. I made 1 women's sock and 1 snake from 1 skein of yarn. My snake has 21 stripes created by the yarn. 2mm / Us 0 needles, or size that will give you a dense fabric. Use any kind of needles that allows you to knit in round with a very small circumference - dpn's, 1 circular (for magic loop) or 2 circulars ·Machine washable stuffing. I used stuffing for pillows. ·Darning needle Dark scrap yarn to embroider the eyes. Some rustling plastic from a plastic bag - optional (to stuff part of the snake for a different feel) ·Stitch marker - optional to mark the beginning of the round. ·. A small bell - optional, to make the toy a rattle, put it in with the stuffing.
SIZES
late finished measurements: circumference - 12 cm / 4.7 in, length - 30 cm / 11.8 in
STITCHESANDTECHNIQUESUSED
Cast on Knitting in round (on dpn's, two circulars or magic loop - any method suitable for very small diameters) Knit and purl Increase - knit front and back, make 1 ·Decrease-knit two together Bobbles Loop or fur stitch
GAUGE
30 sts =10 cm/ 4 in. Exact gauge is not vital for this project. If your swatch has more stitches per cm/in your snake will be thinner, if less - it will be thicker. Row gauge - 8 rounds in stockinet or seed stitch gives 1 stripe of colour (2cm/0.8in wide). Not essential either.
ABBREVIATIONS
K-knit P- purl Sts-stitches (...) - repeat instructions in brackets until the end of the round Kfb - knit in the front and in the back leg of a stitch M1- make 1, lift the bar between the stitches, put on the left needle and knit through the back leg. Bobble - k1, yo, k1, yo, k1 - all in one stitch, turn, p5, turn. [k2tog}x 2 times, k1, pass the first two stitchesoverthelast. L - loop stitch. I used double loop: knit into the next stitch, but do not slide the stitch off the left needle. Pass the working yarn to the front between the needles, make a loop around your right hand thumb, pass the yarn back between the needles, then again to the front, this time over the left hand needle, make a second loop around the thumb and pass the yarn to the back between the needles. Knit the stitch together with yarn that was passed over the right needle. Pass the first stitch you knitted over this one as you would in bind off.
INSTRUCTIONS
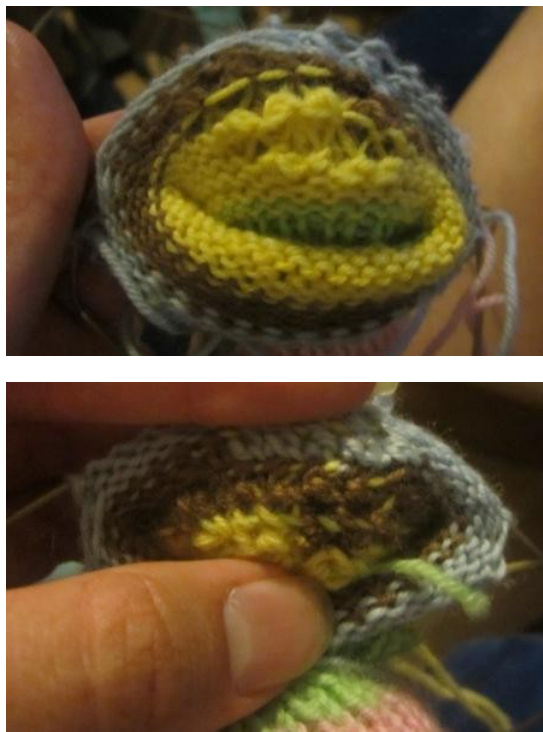
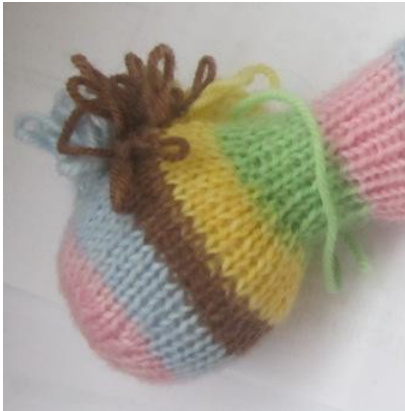
I knitted with self-striping yarn, using stripes as an indication of when to change the stitch pattern. If you have different yarn that has different length of stripes, or your gauge is different, your stripes will have different width, so you may want to change stitch pattern after a different number of stripes than stated in instructions. Use any method to knit in the round that you prefer. Cast on 4 stitches, join in the round. Optionally, place marker to mark the beginning of the round. Tail/increase/stockinet stitch section. Round1: kfb in each stitch = 8 sts Rounds 2 and 3: k all sts Round 4: (k1, m1, k1) = 12 sts Rounds 5 and 6: k all sts Round 7: (k3, m1) = 16 sts Rounds 8 -10: k all sts Round 11: (k4, m1) = 20 sts Rounds 12-15: k all sts Round 16: (k5, m1) = 24 sts Rounds 17-20: k all sts Round 21: (k6, m1) = 28 sts Rounds 22-25: k all sts Round 26: (k7, m1)= 32 sts Then knit all rounds until the end of current colour, end the round you are on. At this stage I have 3 stripes and 6.5 cm (2.5in) long tail. Garter stitch section. Round 1: k all sts Round 2: p all stitches Repeat these two rounds until there are 4 stripes / section is 6.5 cm (2.5 in) long / you're happy with the result. Bobbles section Rounds 1 and 2: k all sts Round 3: (k3, bobble, k4) Rounds 4 and 5: k all sts Round 6: (k7, bobble) Repeat rounds 1-6 two more times for a total of 18 rounds (or to your liking). Knit all rounds until the end of a current colour. For me it was two more rounds, for a total of 4 stripes, or 5 cm (2 in). I recommend stuffing the tail and garter stitch sections when you're done with bobbles. I stuffed mine not very tightly, just enough to hold the shape, so that it's soft and squishy. I used some rustly plastic from a bag to stuff the garter stitch section to add an additional stimulus. Seed stitch section Round 1: (k1, p1) Round 2: (p1, k1) Repeat these two rounds until there are 4 stripes / section is 6.5 cm (2.5 in) long / you're happy with the result. Neck / rib section Round 1: (k1, p1) itil there are 4 stripes / section is 6.5 cm (2.5 in) long / you're happy with the result. Stuff the rest of the body after finishing the neck. Head/loopstitch/ decreasesection Rounds 1 and 2: k all sts Round 3: k6, 14, k until the end of the round. Round 4: k all sts Round 5: k5, l6, k until the end of the round. Round 6: k all sts Round 7: k4, l8, k until the end of the round. Round 8: k all sts Round 9: k5, 16, k until the end of the round. Round 10: k all sts Round 11: k6, I4, k until the end of the round. Rounds 12-15: k all sts When you're done with round 15, take a look at your loop stitch area from the inside - mine was very loose, and I didn't want the stuffing to get through here. So I took a piece of yarn from the other end of the ball and enforced the area fromtheinside Stuff the neck, too, at this stage. Use less stuffing, so that the ribbing can pull in and the neck is thinner than the body. Round 16: (k3, k2tog, k3) = 28 sts Round 17: k all sts Round 18: (k2tog, k5) = 24 sts Round 19: k all sts Round 20: (k2, k2tog) = 18 sts Round 21: k all sts
After round 21 stuff the head. Stuff it much tighter than the body, so it's round in shape. While stuffing, I used a piece of yarn of the same colour as the second stripe of the neck to thread around the neck at the join with the head and pulled tightly, so that the stuffing from the head didn't go through to the neck section. When I was done stuffing the head, I let it a bit loose, but kept the yarn in place and hid the ends inside the body using the darning needle to enforce the border between theneckandthehead. Break the yarn, leaving at least 10 cm / 4 in tail. Using darning needle, thread the tail through the live stitches, take them off the needles. Pull the tail to close the opening. Weave in the ends.
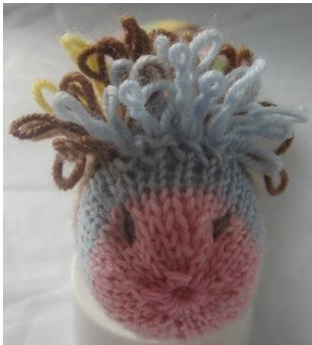
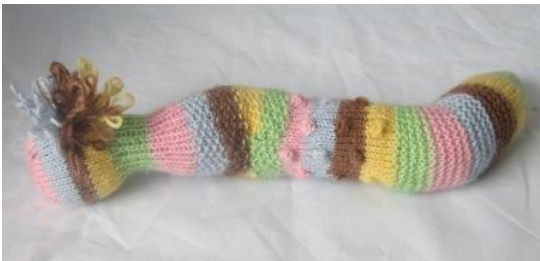
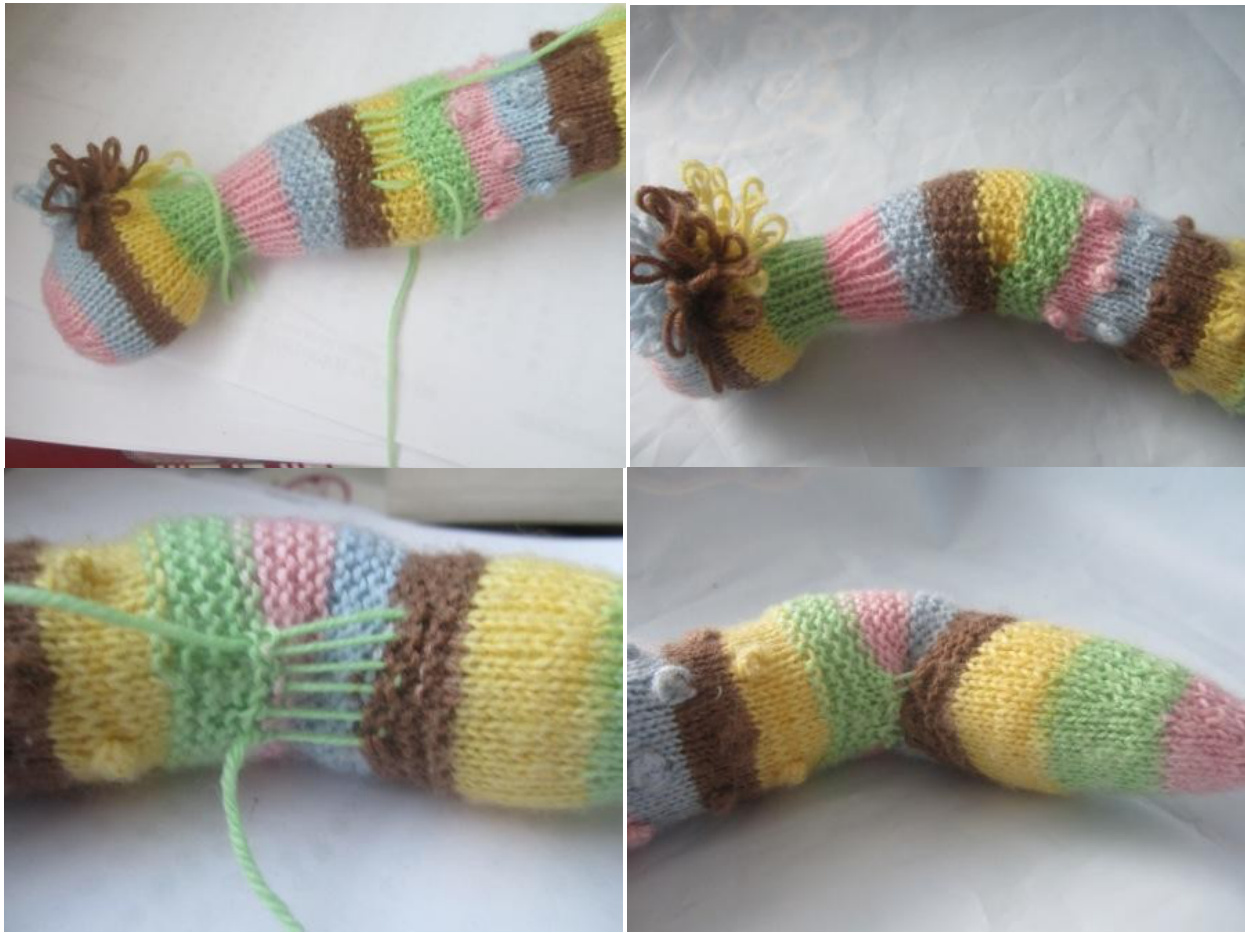
To finish off the snake, first embroider the eyes - I made just two narrow lines, but you could also do French knots. Where you put the yarn through the last stitchesandpulledserves asamouth. Secondly, you need to give the body a twist, so that the toy looks like a snake. Bearing in mind the orientation of the head choose a place where you would like body to take a turn, thread some yarn through as shown in Picture using tapestry needle, leaving tails about 10 cm/ 4in long. Then pull the yarn. The wider is the space between top and bottom stitches, the sharper the turn.
@Leyla Alieva 2012. You may use the pattern to knit items for any purpose if the designer is credited. You may share the pattern for free without limitation, provided


