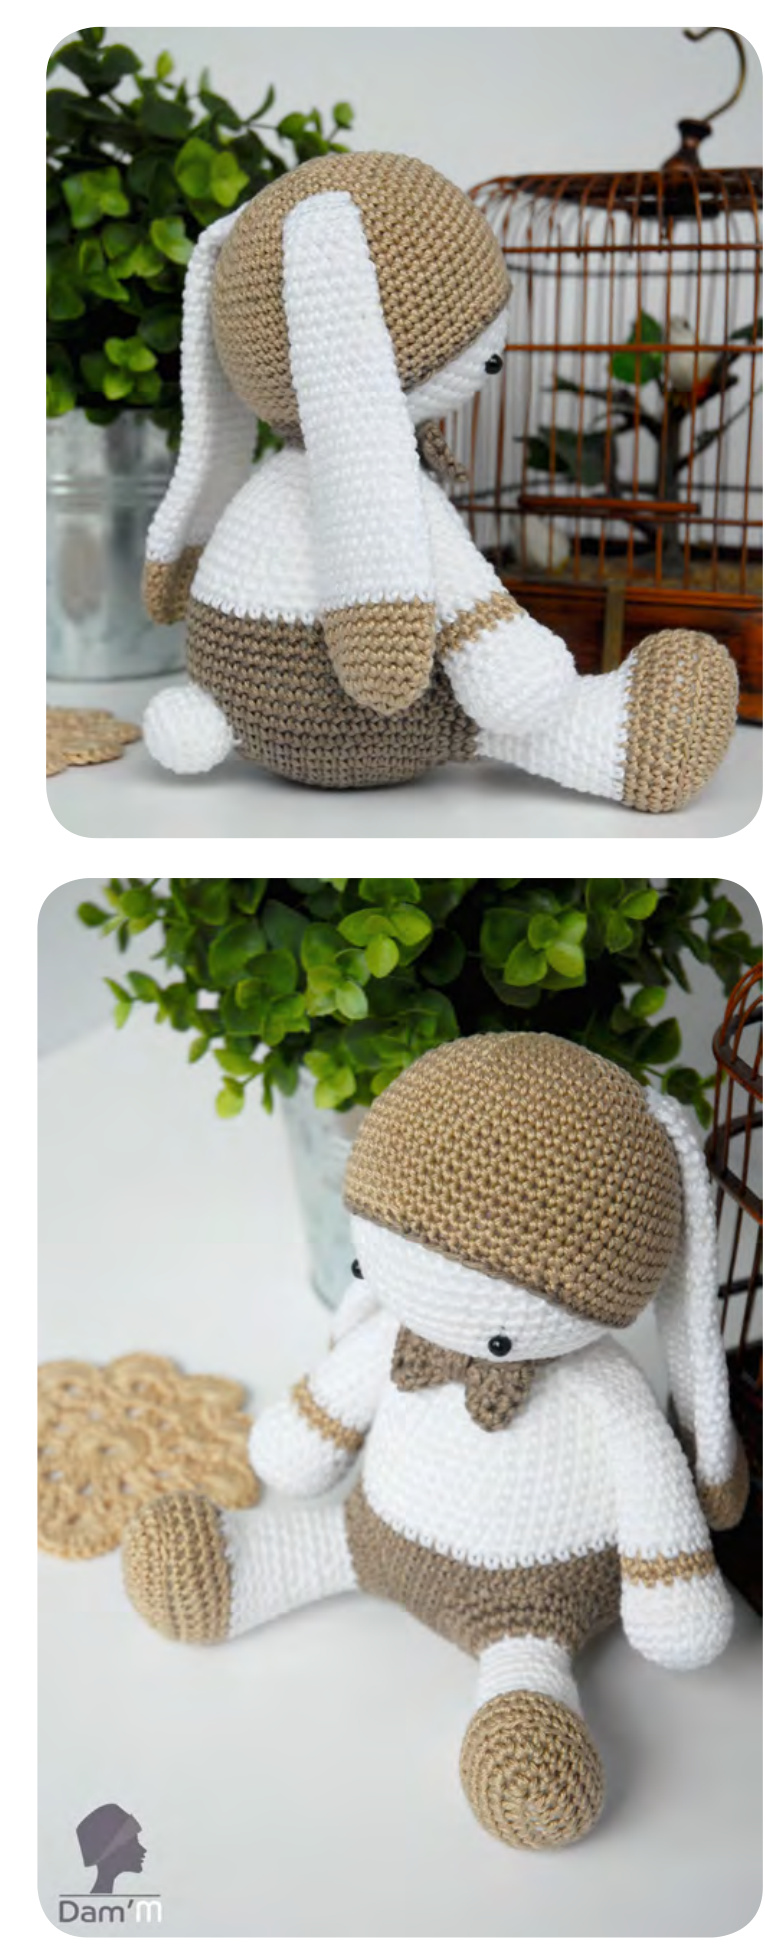
Papilloh >
By Dam'M - Alexia Giraud
BEFOREYOUBEGIN
About the hook
For a nice and satisfactory result, make sure you use a smaller hook than usually recommended for your yarn . This way you'll get a fabric tight enough to avoid small stretching gaps between your stitches once stuffed, and so the filling doesn't pop out later. Thus, if the manufacturer recommends using a 3.5mm hook for your thread, you should rather select a 3mm hook.
About the yarn
Personally, I prefer using cotton for this kind of project because of its lack of elasticity and as it won't widen after you filled in the stuffing material firmly. It also has the advantage of being very strong and of aging well over time. Should you choose to use another yarn, select it with these qualities for optimal results: no elasticity and durability. The thickness of the yarn is of little importance: with a different yarn weight the measurements of your project will simply change a little.
About the stuffing
There are many sorts of stuffing materials and the choice is yours. For best results I recommend stuffing your project firmly : don't hesitate to overstuffit as long as the yarn you're using allows it.
ABBREVIATIONS [US terminology)
MC : Main color [white] CC1 : Contrasting color 1 [beige] CC2 : Contrasting color 2 [brown] St/sts : stitch/stitches ch : chain SC : single crochet slst : slip stitch inc : increase [sc in indicated stitch 2 times] dbinc : double increase [sc in indicated stitch 3 times] dec : decrease [sc next 2 stitches together] dbdec : double decrease [sc next 3 stitches together]
NOTIONS
MC : white cotton fingering/sport [Catania] : 125 m/137y CC1: beige cotton fingering/ sport [Catania ] : 55 m/60 y CC2 : brown cotton fingering/sport [Catania ] : 45 m/50 y 2 black 6mm safety eyes Stuffing for toys Leftover yarn [for the school bag] Tapestry needle 3 mm [US 2 1e] crochet hook 1 open marker to mark beginning of rows
YARN
Catania - Schachenmayr SMC [fingering/sport] 125 m [137 y] / 50 g.
TRANSLATION
Translation by Florence [flao64] : http:/ /www.ravelry.com/people/flao64 Really, a great Thank you !!! Note : the whole pattern is worked in spiral, except the bow tie and the school bag .
SAFETY
To limit the parts that could fall off and pose a threat to young children, it is recommended to use safety eyes rather than sewn buttons for eyes. If the toy is made for a small child, choose a stuffing material that is not too thin [otherwise it might pass through the fabric and be swallowed]. Despite these precautions, it is important to note that this toy should not be put in the hands of a baby or toddler ; there is no way it could meet the actual safety standards for a toy. It should rather be seen as an object of decoration and parents should be careful to keep it out of the reach of small children.
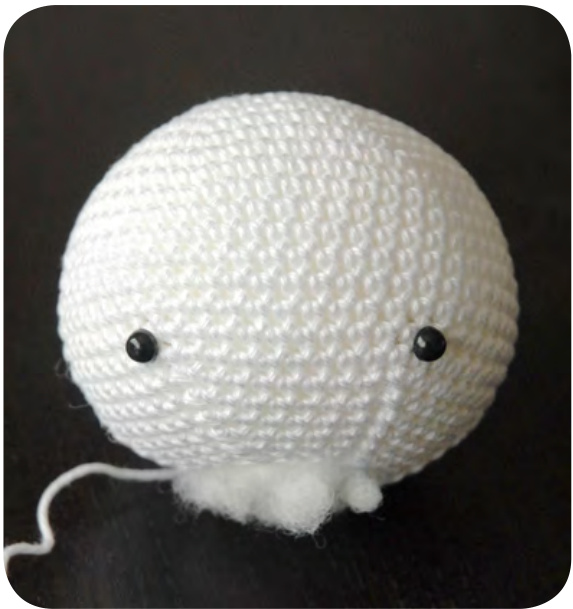
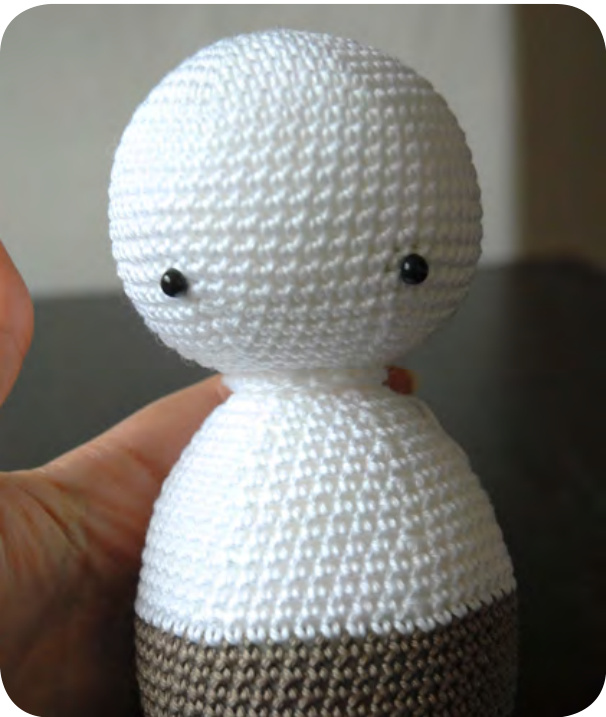
HEAD
Using MC, make a magic loop. [cf page 8] R1 : sc 6 in the loop and tighten the loop. R2 :[inc] x6 [12 sts] R3 :[sc, inc] x6 [18 sts] R4 : [sc 2, inc] x6 [24 sts] R5 : [sc 3, inc] x6 [30 sts] R6 : [sc 4, inc] x6 [36 sts] R7 : [sc 5, inc] x6 [42 sts] R8 :[sc 6, inc] x6 [48 sts] R9 : [sc 7, inc] x6 [54 sts] R10 to R18 [9 rounds]: sc across [54 sts] R19 : [dec, sc 7] x6 [48 sts] R20 : [dec, sc 6] x6 [42 sts] R21 : [dec, sc 5] x6 [36 sts] R22 : [dec, sc 4] x6 [30 sts] R23 : [dec, sc 3] x6 [24 sts] R24 : [dec, sc 2] x6 [18 sts] End with a slst, and pass the yarn through the stitch on your hook. Cut yarn, leaving a 32 inch [80 cm] tail [you'll need it to sew the head to the body]. To fix the eyes, use the decrease lines as a guide and make sure the yarn tail is at the back of the head. Place the eyes at the height of the round before the first decreases, and put the eyes one stitch outside the decrease line. Fill the head with stuffing very firmly !

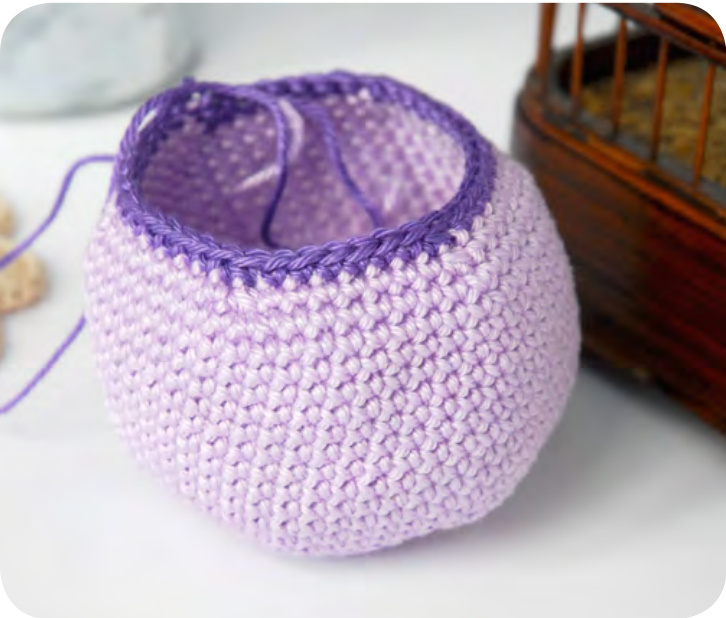
BODY
Using CC2, make a magic loop. R1 : sc 6 in the loop and tighten the loop. R2 :[inc] x6 [12 sts] R3 :[sc, inc] x6 [18 sts] R4 : [sc 2, inc] x6 [24 sts] R5 : [sc 3, inc] x6 [30 sts] R6 : [sc 4, inc] x6 [36 sts] R7 :[sc 5, inc] x6 [42 sts] R8 : [sc 6, inc] x6 [48 sts] R9 : [sc 7, inc] x6 [54 sts] R10 to R17 [8 rounds] : sC across [54 sts] Switch to MC. R18: sc across [54 sts] R19 : [dec, sc 7] x6 [48 sts] R20 to 21 : sc across [48 sts] R22: [dec, sc 6] x6 [42 sts] R23 to 24 : sc across [42 sts] R25 : [dec, sc 5] x6 [36 sts] R26 : sc across [36 sts] R27 : [dec, sC 4] x6 [30 sts] R28 : sc across [30 sts] R29 : [dec, sc 3] x6 [24 sts] R30 : sc across [24 sts] R31 : [dec, sc 2] x6 [18 sts] R32: sc across [18 sts] End with a slst, and pass the yarn through the stitch on your hook. Cut yarn. Fill the body with stuffing firmly.
HAT
Using CC1, make a magic loop. R1 : sc 6 in the loop and tighten the loop. R2 :[inc]x6 [12 sts] R3 :[sc, inc] x6 [18 sts] R4 : [sc 2, inc] x6 [24 sts] R5 : [sc 3, inc] x6 [30 sts] R6 : [sc 4, inc] x6 [36 sts] R7 : [sc 5, inc] x6 [42 sts] R8 : [sc 6, inc] x6 [48 sts] R9 :[sc 7, inc] x6 [54 sts] R10 to R21 [12 rounds] : sc across [54 sts] R22 : [dec, sc 7] x6 [48 sts] Switch to CC2. R23 : [dec, Sc 6] x6 [42 sts] End with a slst, and pass the yarn through the stitch on your hook. Cut yarn, leaving a 12 inch [30 cm] tail [you'll need it to sew the hat to the head later].
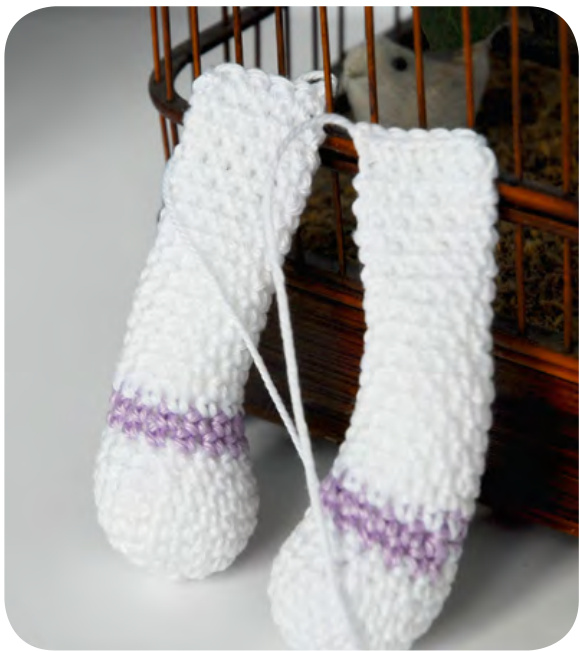
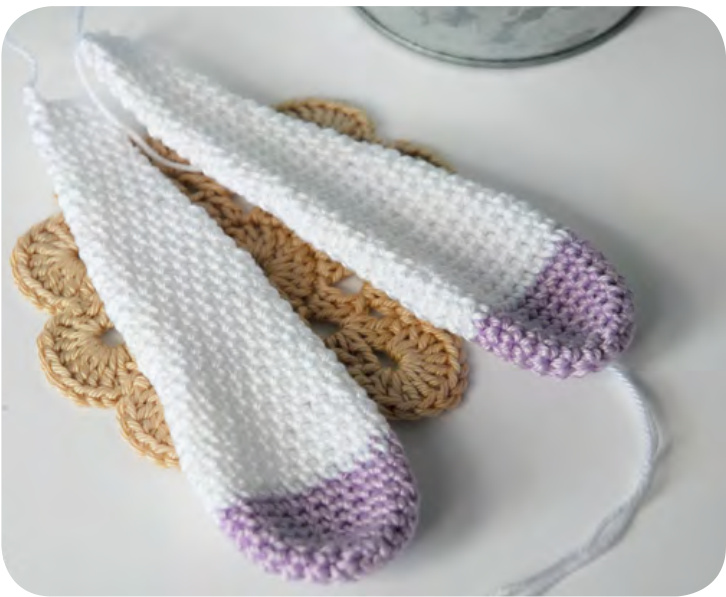
LEGS
Using CC1 : ch 6. Starting in 2nd chain from hook, sc in next 4 chains, [sc 4] in last chain. Turn to work in the starting chain from the other side, sc in next 4 chains, [sc 3] in last chain [15 sts]. You'll work the rest of the foot and leg in spiral from now on. R1 : inc in 1st, place marker in the 1st sc you just made, marking the beginning of the round, sc 4, [inc] x3, sc 5, [inc] x2 [21 sts] R2 : [inc] x2, sc 6, [inc] x2, sc 8, [inc] x3 [28 sts] R3 : inc, SC 27 [29 sts] R4 : sc 29 through back loop only! R5 to R6 : SC across [29 sts] R7 : sc 9, [dec]x4, sc 10, dec [24 sts] Switch to MC. R8 : sc 9, [dec] x3, sc 9 [21 sts] R9 : sc 9, dbdec, sc 9 [19 sts] R10 : sc 9, dec, sc 8 [18 sts] R11 : sc across [18 sts] R12 : [dec, sc 4] x3 [15 sts] R13 to R15 : sc across [15 sts] R16 : [dec, sc 3] x3 [12 sts] R17 to R18: sc across [12 sts] Switch to CC2. R19 : [inc] x12 [24 sts] R20 to R21 : sC acr0ss [24 sts] End with a slst, and pass the yarn through the stitch on your hook. Cut yarn leaving a 12 inch [30 cm] tail. Fill the leg with stuffing firmly, making sure the foot is well stuffed. Make another leg.
ARMS
Using MC, make a magic loop. R1 : sc 6 in the loop and tighten the loop. R2 :[inc] x6 [12 sts] R3:[sc, inc] x6 [18 sts] R4 :[sc 5, inc] x3 [21 sts] R5 to R6 : sc across [21 sts] R7 : [dec, sc 1, dec, sc 2] x3 [15 sts] R8 : sc across [15 sts] Switch to CC1. R9 : sc across [15 sts] R10 : dec, sc 5, dec, sc 6 [13 sts] Switch to MC. R11 to R12 : sc across [13 sts] R13 : dec, sc 11 [12 sts] R14 to R17 : sc across [12 sts] Fill the hand with stuffing very firmly, and fill lightly the rest of the arm. The following rounds won't be stuffed. R18 : deC, Sc 10 [11 sts] R19 to R25 : sc across [11 sts] Make another sc, then close the arm by crocheting 5 sc using one stitch from both sides of the arm at the same time. Pass the yarn through the stitch on your hook. Cut yarn, leaving a 12 inch [30 cm] tail. Make another arm.
EARS
Using CC1, make a magic loop. R1 : sc 6 in the loop and tighten the loop. R2 : [inc] x6 [12 sts] R3 :[sc , inc] x6 [18 sts] R4 : [sc 8, inc] x2 [20 sts] R5 : [sc 9, inc] x2 [22 sts] R6 to R8 : sc across [22 sts] Switch to MC. R9 to R12: sc across [22 sts] R13 : [dec, sc 9] x2 [20 sts] R14 to R16 : sc across [20 sts] R17 : [dec, sc 8] x2 [18 sts] R18 to R20 : sc across [18 sts] R21 : [dec, sc 7] x2 [16 sts] R22 to R24: sc across [16 sts] R25 : [dec, sc 6] x2 [14 sts] R26 to R28 : sc across [14 sts] R29 : [dec, sc 5] x2 [12 sts] R30 to R32: sc across [12 sts] R33 : [dec, Sc 4] x2 [10 sts] R34 to R36 : sC acr0ss [10 sts] Make another sc, then close the ear by crocheting 4 sc using one stitch from both sides of the ear at the same time. Pass the yarn through the stitch on your hook. Cut yarn, leaving a 12 inch [30 cm] tail. Make another ear.
TAIL
Using MC, make a magic loop. R1 : sc 6 in the loop and tighten the loop. R2 :[inc] x6 [12 sts] R3 :[sc, inc] x6 [18 sts] R4 to R5: sC across [18 sts] R6 : [dec, sc ]x6 [12 sts] R7 : sc across [12 sts] End with a slst, and pass the yarn through the stitch on your hook. Cut yarn leaving a 12 inch [30 cm] tail.
ASSEMBLING
Head & Body & Hat :
Place the head over the body, making sure the yarn tails are facing the same direction at the back of the toy. Using your crochet hook, join the head to the body with sc stitches, using at the same time one stitch from the head and one stitch from the body. Pass the yarn through the stitch on your hook. Cut yarn, and weave in the end in the back of the toy. Place the hat on the head, and sew it with a few stitches atthebackof thehead.
Arms :
Sew tightly both arms to the body, one round below the neckline.
Ears :
Sew both ears to the hat, placing them 5 rounds away from the center of the hat. Legs : Sew tightly both legs to the body. Tail: Sew tightly the tail to the body in the back, stuffing it before you've finished sewing. Weave in all remaining ends.

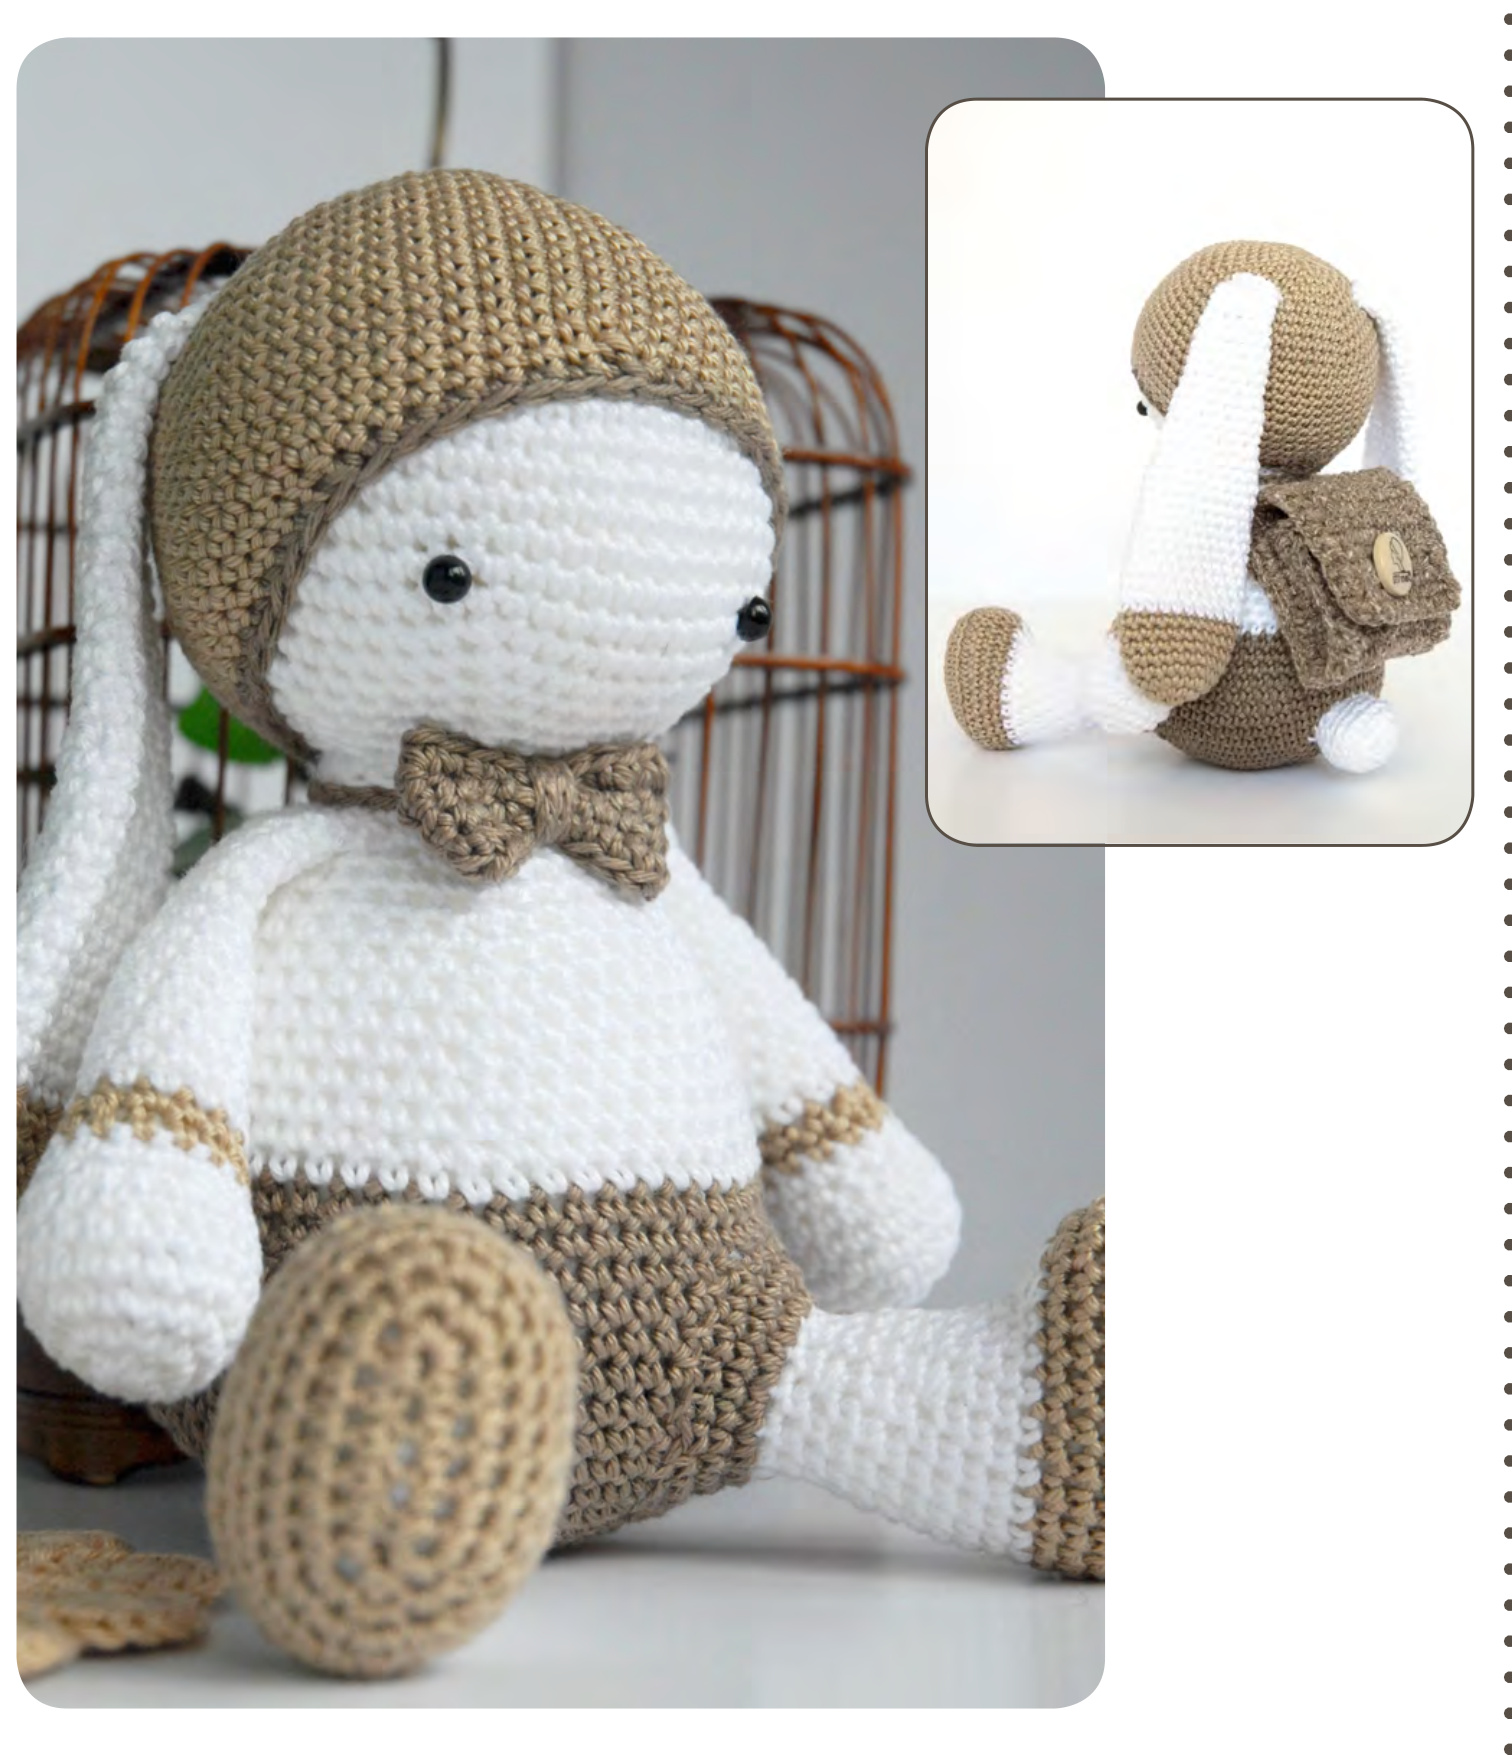
BOW TIE
Using CC2, ch3, turn. R1/R2/R3/R4: ch1, sc3, turn. R5 : ch1, dbdec1, turn R6 : ch1, dbinc1, turn R7/R8/R9 : ch1, sc3, turn R10 : ch1, sc3, turn [don't cut the yarn] For the last row [or edging], crochet around as follows : ch1, sc2, sc3 in the same st [corner], sc9, sc3 in the same st [corner], sc1, sc3 in the same st [corner], sc9, sc 2 in the same st [1st st of the row], slst in the next stitch. Cut yarn, leaving a 8 inch [20 cm] tail. At each end of the bow tie, fold back by the equivalent of one row and fix it with a few stitches. Using CC2, ch30, pass the yarn through the stitch on your hook and cut the yarn, leaving a 3O cm tail. Wrap one end of your chain 2 or 3 times around the center of the bow tie. Make a knot and strengthen. Wrap the other end of your chain around the neck and fix it under the bow tie. Pass the yarn through the neck and strenghthen firmly on the back of the head.
SCHOOL BAG
Sides
Using CC2 or leftover yarn [here, a mix of cotton and linen], ch3, turn. For the next 10 rows : ch1, sc 3, turn. Pass the yarn through the stitch on your hook and cut yarn. Make another side.
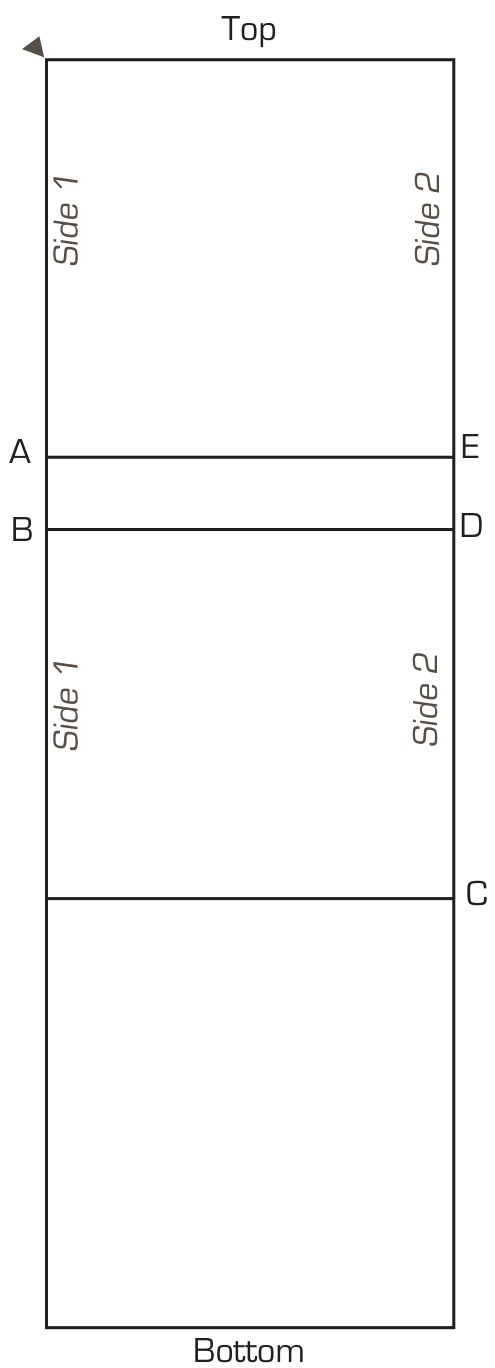
Body
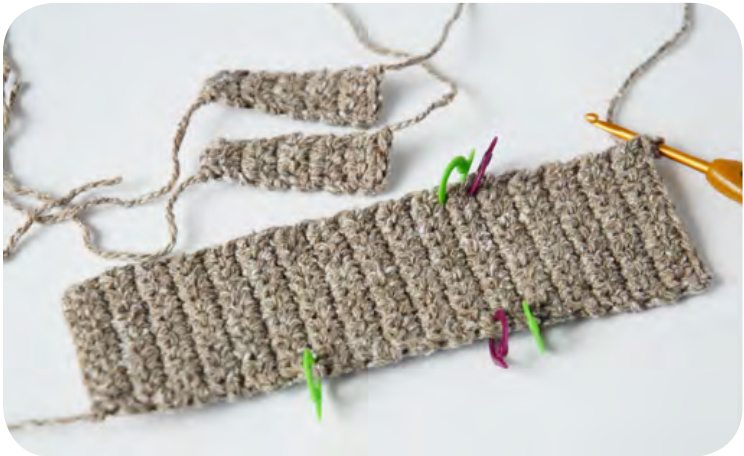
Using CC2 or leftover yarn [here, a mix of cotton and linen], ch10, turn. For the next 34 rows : ch1, sc10, turn. Without cutting the yarn, place markers like this : Marker A [MA] : 10 rows below Marker B [MB] : 2 rows below A Markers D et E [MD & ME] :the same as A et B but on the other side Marker C [MC] : 10 rows bellow D
Assembling and straps
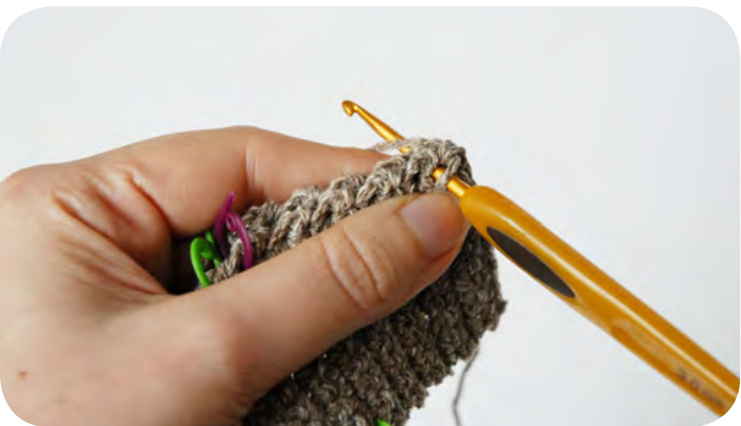
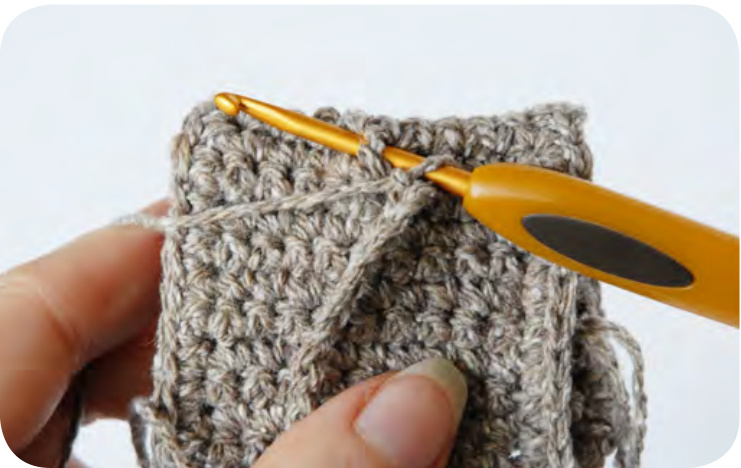
You will now join the sides to the body of the bag, working continuously around the body by joining the first side, then working in sc around the flap, and then joining the 2nd side. To make sure you place correctly the sides on the body, you'll use the markers as alignment points. Place the first side along the side of your bag between the current st and MA; You'll now crochet in both layers : sc1 in the same st as before, sc8, sc2 in the same st [corner]. Rotate your work continuing around the side of the bag, sc1, sc2 in the same st [corner]. Rotate your work again, sc9 You've successfully joined the 1st side. Continue around the edge of the flap as follows : sc11, sc2 in the same st [corner], sc8, sc2 in the same st [corner], sc11. You're now ready to join the 2nd side to the body of the bag, crocheting in both layers again. Place the second side along the side of the bag, between MC and MD, sc9, sc2 in the same st [corner]. Rotate your work, sc1, sc2 in the same st [corner]. Rotate your work, sc9. You've successfully joined the 2nd side.
Don't cut your yarn yet, you need to make the straps first: make 3 slst along the top of the side to get behind the bag, ch25, sc1 by stitching down the middle of bottom of the back of the bag [see picture], sc25, slst1 to secure the second strap along the top of the back symetrically. Cut yarn and weave in all remaining ends.
Enjoy yourself!
TO HELP YOU
Magic Ring : https:/ /www.youtube.com//watch?v=CCvJOdUfru8 Double decrease [3 sc together] : https:/ /www.youtube.com/watch?v=6lyZJOeC7Kc Invisible join [colour change] : http:/ /www.planetjune.com/blog/ amigurumi help/perfect-stripes-for-amigurumi-video/