LALNA
Pattern by YouTubeKnits
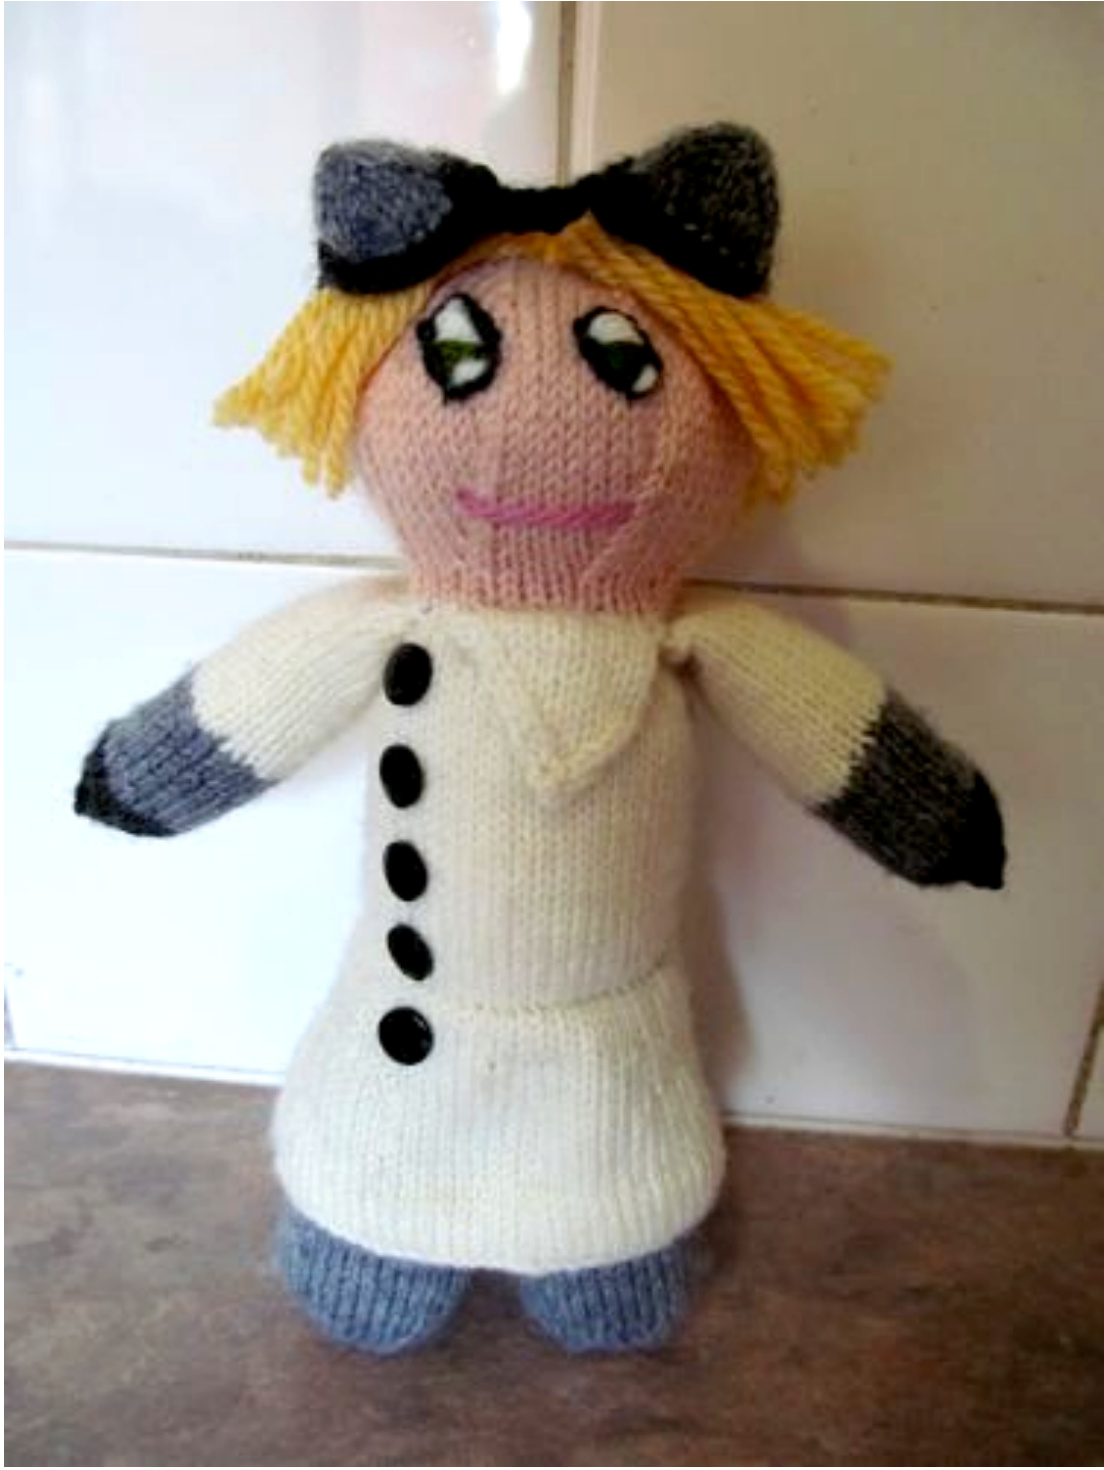
This pattern recreates the Minecraft Skin of Yogscast member Duncan (aka Lalna, aka LividCoffee). You can find the nuke-happy mad scientist here: http://www.youtube.com/yogscastlalna
DIFFICULTYLEVEL
Intermediate
FINISHEDMEASUREMENTS
Head to toe: Approx. 27cm /10.5 inches
MATERIALS
5 US #2 / 3mm double pointed needles 5 US #1 / 2.5mm double pointed needles Stitch marker / safety pin Stitch holder Fibrefill stuffing Five small black buttons Darning needle
YARN
25-50g light worsted weight / 8 ply yarn in each of the following colours- light pink, white, light grey. Small amounts of light worsted weight/ 8 ply yarn in each of the following colours- dark grey, green, yellow, black, dark pink.
GAUGE
28sts / 40 rows = 4 inches in stockinette stitch. (Note: gauge is not crucial for this project).
ABBREVIATIONS
CO= Cast on K= Knit P= Purl BO= Bind off tbl= through the back loop M1= insert right needle under the running yarn from front to back. Transfer yarn loop to left needle and knit the resulting stitch (1 stitch increased) kfb= knit into the front and back of the stitch (1 stitch increased) k2tog= knit two stitches together (1 stitch decreased) ssk= slip stitch as if to knit, slip next stitch as if to knit, then knit these two stitches together though the back loop (1 stitch decreased) sl 1, k2tog, psso= slip 1 stitch purlwise, knit the next 2 stitches together, pass the slipped stitch over the stitches just worked (2 stitches decreased)
NOTESONTHEPATTERN
· Lalna's head, body and legs are knitted in one piece, from top to bottom. The head and body are worked together, then some stitches are placed on holders while each leg is worked. Stitches are picked up and worked to create the bottom of the lab coat. The arms are knitted separately and sewn on. · It's a good idea to mark the beginning of your rounds, which can be difficult when knitting on double pointed needles. I use a split ring stitch marker or safety pin, and hook it through a stitch on or near the start of the round. You might want to move it up higher as the knitting progresses.
PATTERN
HEAD
Using light pink, CO 8 stitches. Spread stitches evenly over four needles, and join in the round. R1 and all subsequent odd rounds: K to end R2: \* K1, M1 \* to end R4: \* K2, M1 \* to end R6: \* K3, M1 \* to end R8: \* K4, M1 \* to end R10: \* K5, M1 \* to end R12: \* K6, M1 \* to end R14: \* K7, M1 \* to end R16: \* K8, M1 \* to end (72 stitches total) R17-22: K to end R23: \* K7, k2tog R24 and all subsequent even rounds: K to end R25: \* K6, k2tog \* to end R27: \* K5, k2tog \* to end R29: \* K4, k2tog \* to end R31: \* K3, k2tog \* to end (36 stitches total) Stuff head firmly with fibrefill. R32-34: K to end
BODY
R1: Change to white and K to end R2: \* K4, M1 \* to end R3 and all subsequent odd rounds: K to end R4: \* K5, M1 \* to end R6: \* K6, M1 \* to end R7-34: K to end R35: \* K5, k2tog \* to end (48 stitches total) R36-37: Change to light grey and K to end Stuff body firmly with fibrefill
LEGS
First leg R1- Using light grey, K first 12 sts. Place next 24 sts on a holder, CO 12 sts onto second needle, K remaining 12 sts of round onto third needle (36 stitches total). Join in a round.
R2-32: K to end
R33: \* K4, k2tog \* to end R34: K to end R35:\* K3, k2tog \* to end R36: K to end Stuff leg firmly with fibrefill R37:\* K2, k2tog \* to end R38:\* K1, k2tog \* to end R39: k2tog to end (6 stitches total) Break yarn, leaving a long tail. Thread yarn tail through remaining stitches and pull tight. Hide yarn end inside toy. Second leg Place the 24 stitches on stitch holder back on the needles. Using light brown, pick up 12 stitches along the inside edge of the first leg. Join in a round and knit one round even. Knit as for the first leg from # . Bottom of lab coat- pick up and knit 56 stitches around row 34 of the body (the last row before the decrease row).

R1-4: K to end R5:\* K7, M1 \* to end R6-9: K to end R10:\* K8, M1 \* to end R13-24: K to end R25: P to end Switch to 2.5mm needles. R26-31 : K tbl to end R32: BO all stitches Fold the hem inwards, using the purl row as the fold line. Using blanket stitch, sew the hem unobtrusively to the inside of the lab coat.
ARMS (Make 2)
Using white, CO 24 stitches. R1-18: K to end R-19-28: Change to light grey and K to end R29-31: Change to dark grey and K to end R32:\* K2, k2tog \* to end R33: K to end R34:\* K1, k2tog \* to end R35: k2tog to end Break yarn, leaving a long tail. Thread yarn tail through remaining stitches and pull tight. Hide yarn end inside toy.
LAPEL
Using white, CO 12 sts. Work back and forth in rows. R1 and all subsequent odd rows: P R2: K1, sSk, K9 R4: K1, ssk, K8 R6: K1, ssk, K3, k2tog, K1 R8: K1, ssk, K1, k2tog, K1 R10: K1, sl 1, k2tog, pss0, K1
GOGGLES
LENSES (MAKE 2)
Using light grey, CO 3 stitches. Working as i-cord, kfb to end (6 stitches). Divide over 3 needles and join in the round R1 and all subsequent odd rounds: K R2:\* K1, M1 \* to end R4:\* K2, M1 \* to end R6:\* K3, M1 \* to end (24 stitches) R8: BO all stitches. i-cord edging- Place one stitch from the edge of the lens onto a dpn. On the same needle, CO 3 stitches in dark grey. R1: Working in i-cord, K2, k2tog (one CO stitch and the stitch from the edge of the lens). Repeat this round, picking up stitches from the edge of the lens and working in i-cord until all edge stitches have been worked. BO i-cord and sew to CO edge.
STRAPS
Small strap- Using dark grey, CO 3 stitches. Work i-cord for 4 rows. BO and sew the ends to the inner edge of each goggle lens. Long strap- Using dark grey, CO 3 stitches. Work until strap is 7 inches. BO all stitches and sew the ends to the outer edges of each goggle lens.
FINISHING
Stuff both arms with fibrefill, leaving some space near the top of the arm. Fold arm horizontally across the seam, as shown.
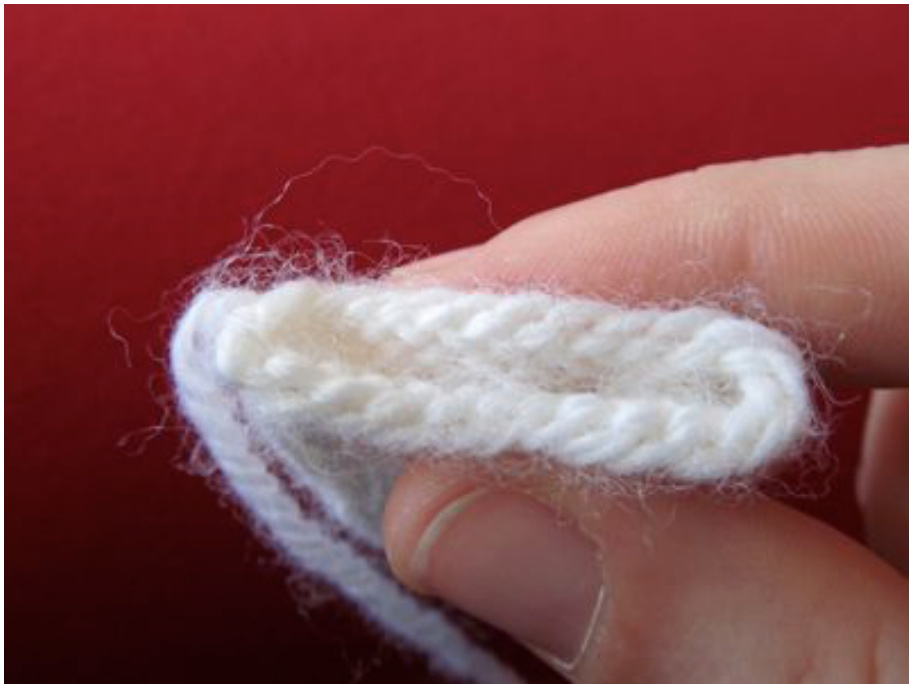
Whip stitch this edge together to create a flat seam. Using mattress stitch, sew arms to shoulders of toy. Sew lapel to the right front of the collar. Attach five buttons in a straight line down the left front of the body. Sew the hair on in a manner that will work with your chosen yarn. I made a series of loops longer than the intended length of the hair, sewed them firmly to the doll down the middle of the head, and then trimmed hair to desired length. Embroider face (use main picture as a guide). That's it! You're finished! Now go do some science! This work is licensed under the Creative Commons AttributionNonCommercial-ShareAlike 3.0 Australia License. To view a copy of this license, visit http://creativecommons.org/licenses/by-ncsa/3.0/au/ or send a letter to Creative Commons, 444 Castro Street, Suite 900, Mountain View, California, 94041, USA.


