Ninetales Pokemon Amigurumi Pattern By: Edward Yong
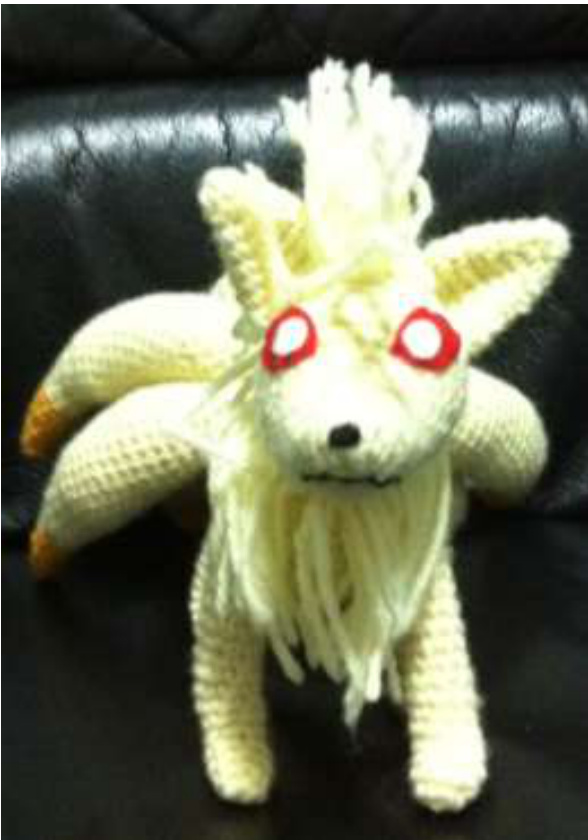
One of my friends asked if I could make Ninetales for him. I was a little hesitant because of the tails and how the stuffed piece would stand but I thought I would throw caution to the wind! Anyway, I used a 3.5mm (E) Hook and 10-ply worsted yarn. My gauge was 6sc x 7rows in a 1 inch square. This isn't really necessary as long as the yarn and hook are of the equivalent size. I worked the piece in continuous rounds unless otherwise stated.
Materials Required:
- Gold, tan, and black coloured yarn - Fibrefill - Red and white felt - 4 Pipe cleaners - 3.5mm (E) hook - Yarn needle - Sewing needle and thread Head: Using Tan Rnd 1: 6sc into magic circle (6) Rnd 2: 6sc Rnd 3: 6inc (12) Rnd 4: 12sc Rnd 5: \*2sc, inc\* x 4 (16) Rnd 6-8: 16sc Rnd 9: 8inc, 8sc (24) \*Increases create separation between muzzle and head on one side.\* Rnd 10: 24sc Rnd 11: \*sc, inc\* x 8, 8sc (32) Rnd 12: 32sc Begin stuffing the head. Continue stuffing as you work on the piece. Rnd 13-17: 32sc Rnd 18: \*2sc, dec\* x 8 (24) Rnd 19: \*2sc, dec\* x 6 (18) Rnd 20: \*sc, dec\* x 6 (12) Rnd 21: 6 dec (6) F/O and leave a long tail for sewing closed the 6st opening. Ear: (Make 2) Using Tan Rnd 1: 6sc in magic circle (6) Rnd 2: 6sc Rnd 3: \*sc, inc\* x 3 (9) Rnd 4: 9sc Rnd 5: \*2sc, inc\* x 3 (12) Rnd 6: 12sc Rnd 7: \*3sc, inc\* x 3 (15) Rnd 8: 15sc Fold the piece in half and stitch the bottom together with SC. Leave a long enough tail to attach ears to head. Neck/Chest: Using Tan, leaving a long enough tail at the beginning to attach 24sc opening to head Rnd 1: ch 24, ss into the first ch, ch1 Rnd 2-4: 24sc, ss into 1"t st, ch 1 Now begin to for the chest portion. Row 1-2: 8sc, ch1, turn Row 3: dec, 4sc, dec, ch1, turn Row 4: 6sc, ch1, turn Row 5: dec, 2sc, dec, ch1, turn Row 6: 4sc, ch1, turn Row 7: 2dec, ch1, turn Row 8: 2sc F/O and leave a long enough tail to attach this opening to the body. Body: Using Tan Rnd 1: 6sc in magic ring (6) Rnd 2: 6inc (12) Rnd 3: \*sc, inc\* x 6 (18) Rnd 4: \*2sc, inc\* x 6 (24) Rnd 5: \*3sc, inc\* x 6 (30) Rnd 6: \*4sc, inc\* x 6 (36) Rnd 7-11: 36sc Rnd 12: \*10sc, dec\* x 3 (33) Rnd 13: \*9sc, dec\* x 3 (30) Rnd 14: \*8sc, dec\* x 3 (27) Rnd 15: \*7sc, dec\* x 3 (24) Rnd 16: \*6sc, dec\* x 3 (21) Rnd 17-21: 21sc Rnd 22: \*6sc, inc\* x 3 (24) Rnd 23: \*7sc, inc\* x 3 (27) Rnd 24: \*8sc, inc\* x 3 (30) Rnd 25-29: 30sc Rnd 30: \*3sc, dec\* x6 (24) Begin stuffing and shaping the body. Rnd 31: \*2sc, dec\* x 6 (18) Rnd 32: \*sc, dec\* x 6 (12) Rnd 33: 6dec (6) F/O and leave a long enough tail to close a 6st ope Front Legs: (Make 2) Using Tan Rnd 1: 6 sc into magic circle Rnd 2: \*2sc, inc\* x 2 (8) Rnd 3: 8sc Rnd 4-5: dec, sc, 2inc, sc, dec (8) Begin stuffing the leg and continue stuff as you work the piece. Rnd 6-10: 8sc Rnd 11: \*3sc, inc\* x 2 (10) Rnd 12-15: 10sc For the Right Shoulder: Row 1: sc until you get to the front centre of the leg, ch1, turn Row 2: inc, 3sc, inc, ch1, turn Row3:7sc F/O and leave a long enough tail to attach leg to body. For the Left Shoulder: Row 1: sc until you get to the front centre of the leg, inc, 3sc, inc, ch1, turn Row2:7sc F/O and leave a long enough tail to attach leg to body. Once the legs are completed fold up a piece of pipe cleaner and add it to the stuffing in the leg. This will provide the support necessary to hold the piece up against the weight of the tail. Back Legs: (Make 2) Using Tan Rnd 1: 6 sc into magic circle Rnd 2: \*2sc, inc\* x 2 (8) Rnd 3: 8sc Rnd 4-5: dec, sc, 2inc, sc, dec (8) Begin stuffing the leg and continue stuffing as you work the piece. Rnd 6-8: 8sc Rnd 9: \*3sc, inc\* x 2 (10) Rnd 10: 10sc Rnd 11: \*4sc, inc\* x 2 (12) Rnd 12: 12sc Rnd 13: \*2sc, inc\* x 4 (16) Rnd 14-15: 16sc For the Right Shoulder: Row 1: sc around until you get to the front centre of the leg, ch1, turn Row 2: 8sc, ch1, turn (8) Row 3: dec, 4sc, dec, ch1, turn (6) Row 4: dec, 2sc, dec (4) F/O and leave a long enough tail to attach legs to the body. For the Left Shoulder: Row 1: sc around until you get to the front centre of the leg, 8sc, ch1, turn (8) Row 2: dec, 4sc, dec, ch1, turn (6) Row 3: dec, 2sc, dec (4) F/O and leave a long enough tail to attach legs to the body. Once the legs are completed fold up a piece of pipe cleaner and add it to the stuffing in the leg. This will provide the support necessary to hold the piece up against the weight of the tail. Tails: (Make 9) Using Gold Rnd 1: 4sc in magic circle Rnd 2: 4sc Rnd 3: \*sc, inc\* x 2 (6) Rnd 4: 6sc Rnd 5: \*2sc, inc\* x 2 (8) Rnd 6: 8sc Rnd 7: \*3sc, inc\* x 2 (10) Rnd 8: Switch to tan yarn, 10sc Rnd 9: \*4sc, inc\* x 2 (12) Rnd 10: 12sc Rnd 11: \*2sc, inc\* x 4 (16) Rnd 12: 16sc Rnd 13: \*3sc, inc\* x 4 (20) Begin stuffing the tail. Continue stuffing as you work the piece. You may also wish to place a pipe cleaner into the tail so they can be adjustable. Rnd 14-24: 20sc Rnd 25: \*8sc, dec\* x 2 (18) Rnd 26: \*7sc, dec\* x 2 (16) Rnd 27: \*6sc, dec\* x 2 (14) Rnd 28: \*5sc, dec\* x 2 (12) Rnd 29: \*4sc, dec\* x 2 (10) Rnd 30: \*3sc, dec\* x 2 (8) Rnd 31: \*2sc, dec\* x 2 (6) F/O eight (8) of the tails and leave a long enough yarn tail to sew the pieces together. Leave the yarn attached on the 9ih piece. Sew the tail pieces together so that it looks like a bunch of bananas with 5 tails on the bottom row and 4 tails on the top. This is how I did it: 1) Join the 5 tail pieces together for the bottom row of tail group by lining up the openings with the yarn tails pointing in the same direction. Weaving one of the yarn tails of one piece through the closest 2 stitches at the opening on both tail pieces. Continue along until all of the bottom tails are joined to form a row. 2) For the top row of 4 tail pieces, place a tail in-between each of the tail pieces of the bottom row. Ensuring to line up all the openings and that all the yarn tails are pointing downwards to the bottom row. Us the yarn tail of the top tail pieces to weave into the closest stitch at the opening on the left and right tail pieces of the bottom row of tails. 3) After all the tails pieces have been attached, use the yarn tails to weave closed any gaps between each tail piece. 4) With the attached yarn on the 9th tail, sc around edge of the tail bunch twice. This create: a base which will be used to attach the tail to the body. F/O and leave a long enough tail to attach this mass to the body. Again, the entire thing should look like a bunch of bananas.
Assembly:
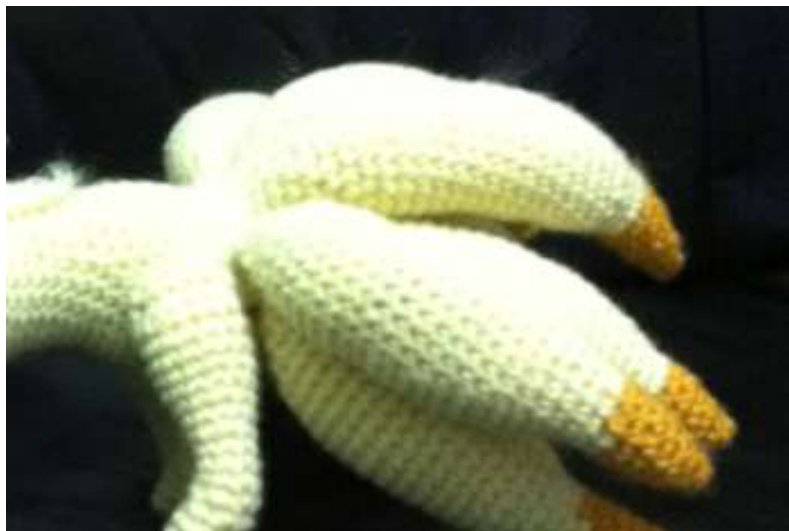
1) Attach the tails to the body as seen below. The base should be situated between Rnds 28 to 31 with 4 tails in the top row and 5 tails underneath. You may need to add stuffing to shape the posterior part of Ninetales.
2) Attach the neck/chest to the head. Ensure that the neck is situated farther back on the head and that the head is positioned properly so that the increases are on the top.
3) Attach the head and neck/chest and to the body. I just weaved in and out of each piece with the tail. Position the head so that it sits on the front of the body. Position the chest so that it is directly in the middle front of the body. Stuff the neck and chest before closing offthe opening. 4) Attach the front legs to either side of the chest. I recommend pinning the pieces to ensure the correct positioning. Stuff the shoulder of the legs before closing off the opening.
5) Attach the back legs to either side of the tail. I recommend pinning the pieces to ensure the correct positioning. Stuff the shoulder of the legs before closing off the opening.
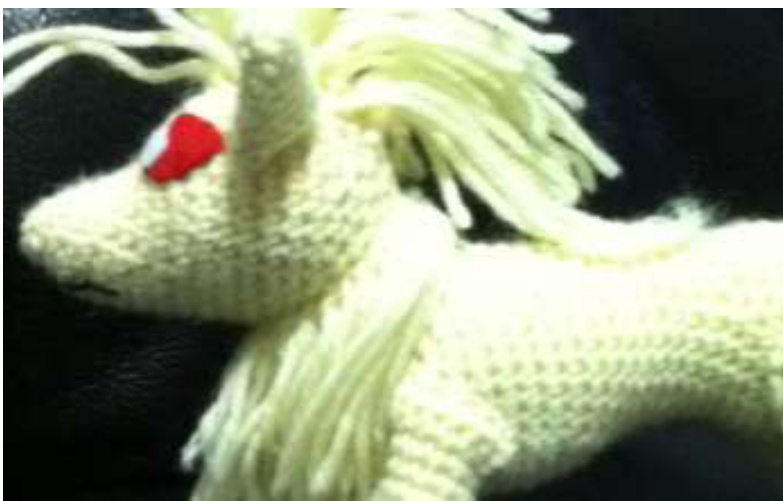
6) Using white and red felt, create the eyes. I cut out red “ovals" for the whites of the eyes and red for the pupils. Ninetales is a very demonic looking animal.
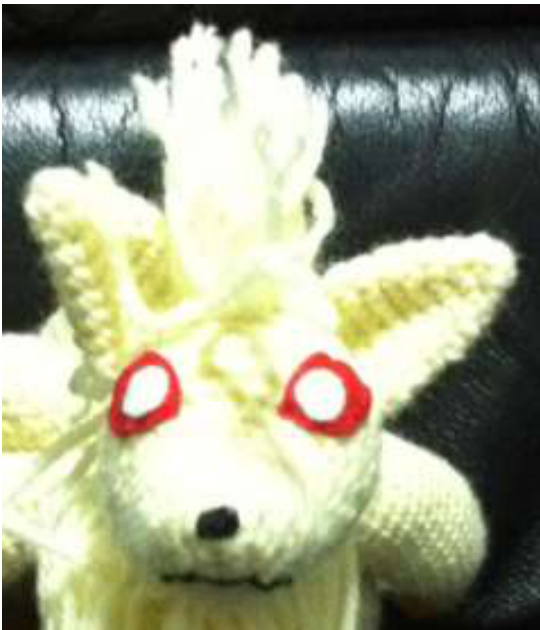
7) Position the eyes as they appear on the photo above. It should sit right on where the muzzle attaches to the head and the tip should be in line with the end of the nostril. Sew the eyes to the head. 8) Attach the ears to the head. Lay the crocheted edge of the ears to the head and attach from there. Remember to give the ears a curved shape. 9) Create the mane by weaving in various lengths of yarn (between 2 to 4 inches) between the ears and down the back of the head. I used 3 - 4 pieces of yarn per row with the longer pieces in the middle and the shorter pieces on the sides. You may wish to use glue or hairspray to style the mane. )Embroider a nose using black yarn at the tip of the head. I placed it in Rnd 1 11) Embroider a mouth using black yarn. 12) It is optional to weave the yarn around the neck. The chest piece was enough to simulate the fur but I wanted to add that extra bit (and I had a lot of left over scraps of yarn). I only attached the yarn to the top row of the neck around the head. I used longer pieces of yarn in the back of the head and gradually shortened them as I got to the front. Then I trimmed the fur to get the right look. You may use glue or hair spray to style the fur. 13) Position and shape the tails. I shaped them so they pointed downwards allowing my Ninetales to stand.

Now it's complete! Hope you enjoyed making this as much as I did. I think I reworked each piece on this little guy several times to get the right look. And just in case for legal reasons... Ninetales and Pokemon is copyright Nintendo. This crochet pattern is an original pattern by Edward Yong (September 2013). Please do not claim this pattern as your own. If you wish to share this pattern, you may link to this pattern but please do not reprint it on your site. You may keep a copy for your own personal use but you may not sell or distribute it, or sell items made from this pattern.


