copyright 2010 Ellen M. Silva copying for personal use permitted; all other rights reserved
Hat's Not Another Noro-Scarf!
Ellen M. Silva Twinset Designs I have to admit it. Even though I haven't knit one, those striped ribby scarves knit out of a long color repeat yarn like Noro enchant me with their waves of undulating color and sometimes surprising juxtaposition of hues. But five feet of 1x1 ribbing isn't my thing. Twenty inches, however, in a narrower band - definitely something I could wrap my brain around.

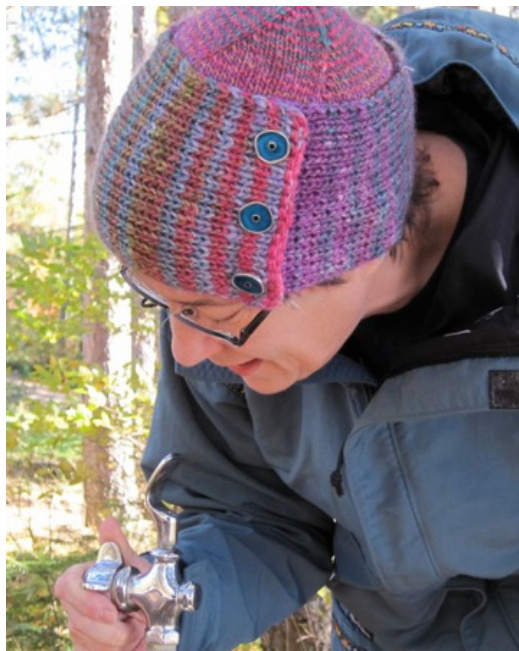
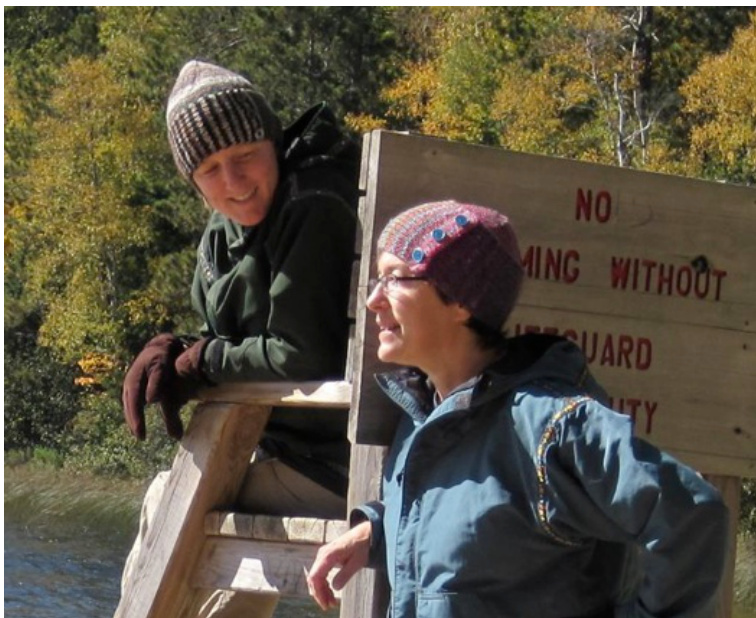
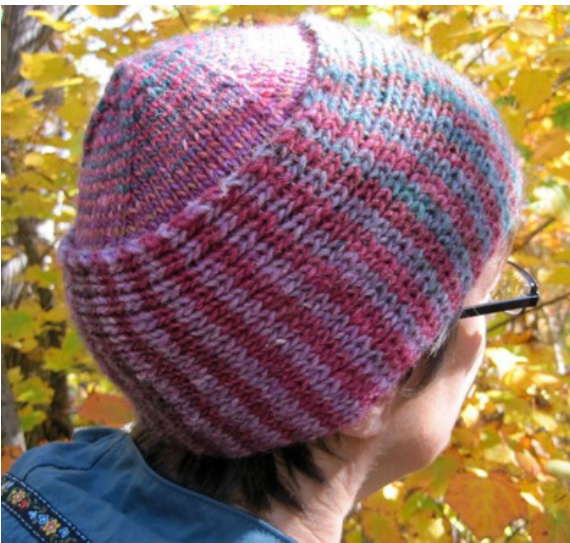
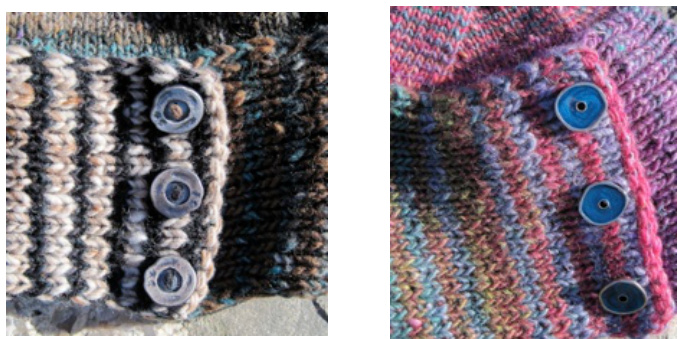
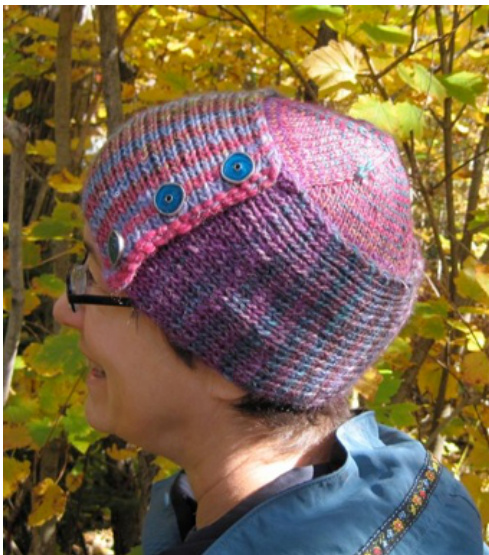
Or more accurately, something I could wrap around my brain, in the form of a self-striping hat. With a decorative cast on to establish the striping right off, a band of 1x1 ribbing forms the brim of a quick to work but satisfyingly clever hat. The ribbing, worked in alternating colorways 2 rows at a time, is stitched closed and trimmed with buttons or decorative closures of your choice. The crown of the hat is picked up along the edge of the brim. Knitter's choice as to whether to continue with the striped theme and knit with both colorways in a spiral to the center or to opt for a single yarn used to the finish. Width of brim can also be varied as one chooses. Now if I only had a scarf to match.. Photo credit: Narrow brim - Lisa Pannell, model; Ellen M. Silva, photographer. Broad brim - Ellen M. Silva, model; Lisa Pannell, photographer.

SIZE
Hat fits average adult (stretches to 24 inches)
FINISHED MEASUREMENTS
Broad brimmed hat: 21 inches circumference, 7.5 inches crown to lower edge. Narrow brimmed hat: 20.5 inches circumference, 7.5 inches crown to loweredge.
MATERIALS Narrow Brimmed Hat
[MC#1] Noro Cash Island [60% wool/30% cashmere/10% nylon; 100 m (109 yd) per 40g skein]; color: 1 (discontinued color, choose any alternate); 1 skein [MC#2] Noro Cash Island [60% wool/30% cashmere/10% nylon; 100 m (109 yd) per 40g skein]; color: 14; 1 skein copyright 2010 Ellen M. Silva copying for personal use permitted; all other rights reserved
Broad Brimmed Hat
[MC#1] Noro Silk Garden [45% Mohair, 45% Silk, 10% Wool; 101 m(110 yd) per 50g skein]; color: 45; 1 skeins (worked from center pull of skein) [MC#2] Noro Silk Garden [45% Mohair, 45% Silk, 10% Wool; 101 m(110 yd) per 50g skein]; color: 45; 1 skein (worked from outside end of skein)
Both Hats
1 set US #6/4.25mm double-point needles 1 set US #6/4.25mm straight needles (brim can be worked on two of the dpns; I prefer working on longer straights) 5 stitch markers to fit needles, 1 of which is a contrasting color Buttons or clasps as desired Tapestry needle for finishing
GAUGE
Narrow Brimmed Hat
21 sts/30 rows = 4 inches in stockinette stitch 26 sts/26 rows = 4 inches in ribbing stitch [un-stretched]
Broad Brimmed Hat
20 sts/28 rows = 4 inches in stockinette stitch 30 sts/23 rows = 4 inches in ribbing stitch [un-stretched]
PATTERN NOTES
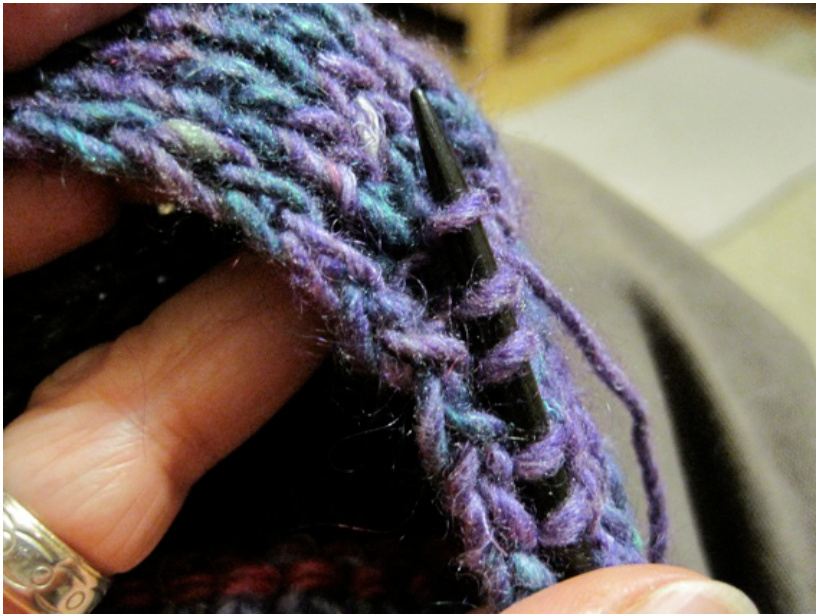
Decorative 1x1 ribbed cast on: Set up for long tail cast on, but use a doubled strand for the yarn that wraps around the thumb. Make a slip knot and place over needle. (The slip knot is not counted as a cast on stitch - do not work it. It is dropped at the end of the first row.) Create first stitch as normal for long tail cast on, pulling double tail snug around base of stitch. For second stitch, drop tip of needle between the thumb and the finger, pointing towards the palm, going under the doubled yarn that crosses to the fingers, catch the forefinger yarn, and retrace path of needle tip back to start. This results in a reversed cast-on stitch paired closely with the normally cast on stitch, both in a double strand of yarn. In fact, if you look closely, the two cast on stitches resemble a knit stitch followed by a purl stitch, setting you up nicely for 1x1 ribbing. You can see a very brief video tutorial of this technique at IwinSet Video Tutorials. I apologize for the brevity, but you can see the technique and replay as needed.
PATTERN
Narrow Brim Version Brim
Using MC#1, cast on 24 stitches using decorative 1x1 ribbed cast on. Begin working first row with MC#2, but do not cut MC#1. copyright 2010 Ellen M. Silva copying for personal use permitted; all other rights reserved Row 1: With MC#2, slip first stitch purlwise, [P1, K1] 11 times, end K1. Do not work the slip stitch used to start the cast on - drop it now (unravel and weave in ends when finishing hat). Row 2: Continue with MC#2, slip first stitch purlwise, [P1,K1] 11 times, end K1. The extra knit stitch at the end of each row is always slipped purlwise at the start of the next row, creating a smooth braided look on the edge of the brim. Row 3: Pick up MC#1 from underneath MC#2. Slip first stitch purlwise, [P1, K1] across row, end K1. Row 4: Continue with MC#2, slip first stitch purlwise, [P1,K1] across row, end K1. Repeat rows 1-4 until brim is desired length to fit around head with slight stretching plus 1 inch, approximately 20-/21 inches.Do not bind off - leave live stitches on the needle. Cut ends, leaving sufficient on one end to weave in and approximately 24 inches on the other. Choose which end to leave long based on the colors at the beginning of the brim, selecting
s closest in color to initial stripes. You will be using this end to seam the brim togethe Overlap ends with the live stitches to the inside of the circle. The decorative cast on edge is to the outside. Using long cut end, sew live stitches to the inner side of the ribbing. Keep stitching loose enough so there is some stretch across the ribbing, and catch the inner ribs so that the sewing yarn does not show to the outside of the brim.
Crown
Pick an edge of the brim to be your bottom edge, depending on which way you want your wrap to go around the head. The examples shown are worked with the wrap over the left ear, or counterclockwise asseenfrom above.
Using MC#1 (feel free to use MC#2 if you prefer, sample shows MC#1), pick up stitches around the upper edge of the brim, from the inside. Using double point needles, pick up and knit stitches in the upper edge of the second rib down from the edge. This will hide the pick up on the back side and will allow for a slight overlap of the brim with the crown. Pick up 3 stitches for every two stripes; i.e. pick up 3 stitches and skip 1, continuing around the brim until you reach where you started. Distribute the stitches evenly among your needles. copyright 2010 Ellen M. Silva copying for personal use permitted; all other rights reserved Place contrasting color marker for beginning of round. You will proceed to work the crown in stockinette with a five pointed decrease after sufficient depth is achieved. titches you have picked up. In the next row, evenly space sufficient decreases (up to total stitches decreased) so that you end up with a number divisible by 5. (Example: For 103 stitches picked up, decrease three times in the first round, approximately once every 33-34 stitches, leaving 100 stitches.)
Continue working in stockinette in the round. Work until your crown is as deep as you desire - for a good ear covering depth, the samples shown were worked to 4.5 inches before the five pointed crown decrease was started; if you prefer a shallower hat, simply start your decreases sooner. On the last round before starting the decreases, set up as below.
Crown Decreases
Set up for the crown decreases one row before starting them. From beginning of round, knit 20% of the total crown stitches, place marker. Repeat 3 times, knit final 20% of stitches, and slip marker at beginning of round. ( Example: For a crown worked with 100 stitches, there will be 20 stitches between markers and 5 markers total.) Round 1 of decrease: \*Knit to within two stitches of 1st marker. K2tog, sl m.\* Repeat \*\* four times to complete round. Round 2 of decrease: Knit all stitches. Repeat Rounds 1-2 until 25 stitches remain on needles. For remaining rounds, knit to two stitches before marker and k2tog. Repeat until 10 stitches remain. Break yarn and thread end onto tapestry needle. Run needle through remaining stitches and cinch tightly. Weave in ends, passing needle through the circle of stitches a second time for a firm close.
FINISHING
Weave in all ends. Sew buttons onto overlapped edge of brim as though it is buttoned closed. copyright 2010 Ellen M. Silva copying for personal use permitted; all other rights reserved
Broad Brim Version Brim:
Cast on 32 stitches. Complete brim as for narrow brim hat.
Crown:
For stripey effect, pick up and knit stitches with one color, following directions for narrow brim hat. At beginning of next round start knitting with second color, following directions for decreasing to a number of stitches divisible by 5 as for narrow brim hat. Alternate colors, switching yarns at the beginning of the round and picking up the new color from below the current color. This will form a jogless spiral. Begin the crown decrease rounds as soon as the hat is approximately 4.5 inches from the edge of the cast on, sattina un and nroreedina ac for narrow hrim hat For the sample, this was at the third round from the start of the crown.
Abbreviations:
K - knit P - purl MC - main color k2tog - knit two together sl m - slip marker

ABOUT THEDESIGNER
Ellen M. Silva, aka twinsetellen on Ravelry, is a chemical engineer by day and a knitter/blogger/spinner by night. Find out more about her fiber play at http:/l twinset.us, where she converses with her identical twin about their almost identical passion for the craft.


