Super Mario
By Teresa Alvarez (May 2015) About copyright: It's really something great when people like what I have designed. You can sell the final item or whatever you like, but it would be nice to reference where you have found/downloaded the pattern! If there is anything you do not understand or there are any mistakes, please, send me a message! As you can see in the way I write, English is not my first language. So, you could come across some mistakes and grammatical inconsistencies?. Sorry and my apologies!
INTRODUCTION
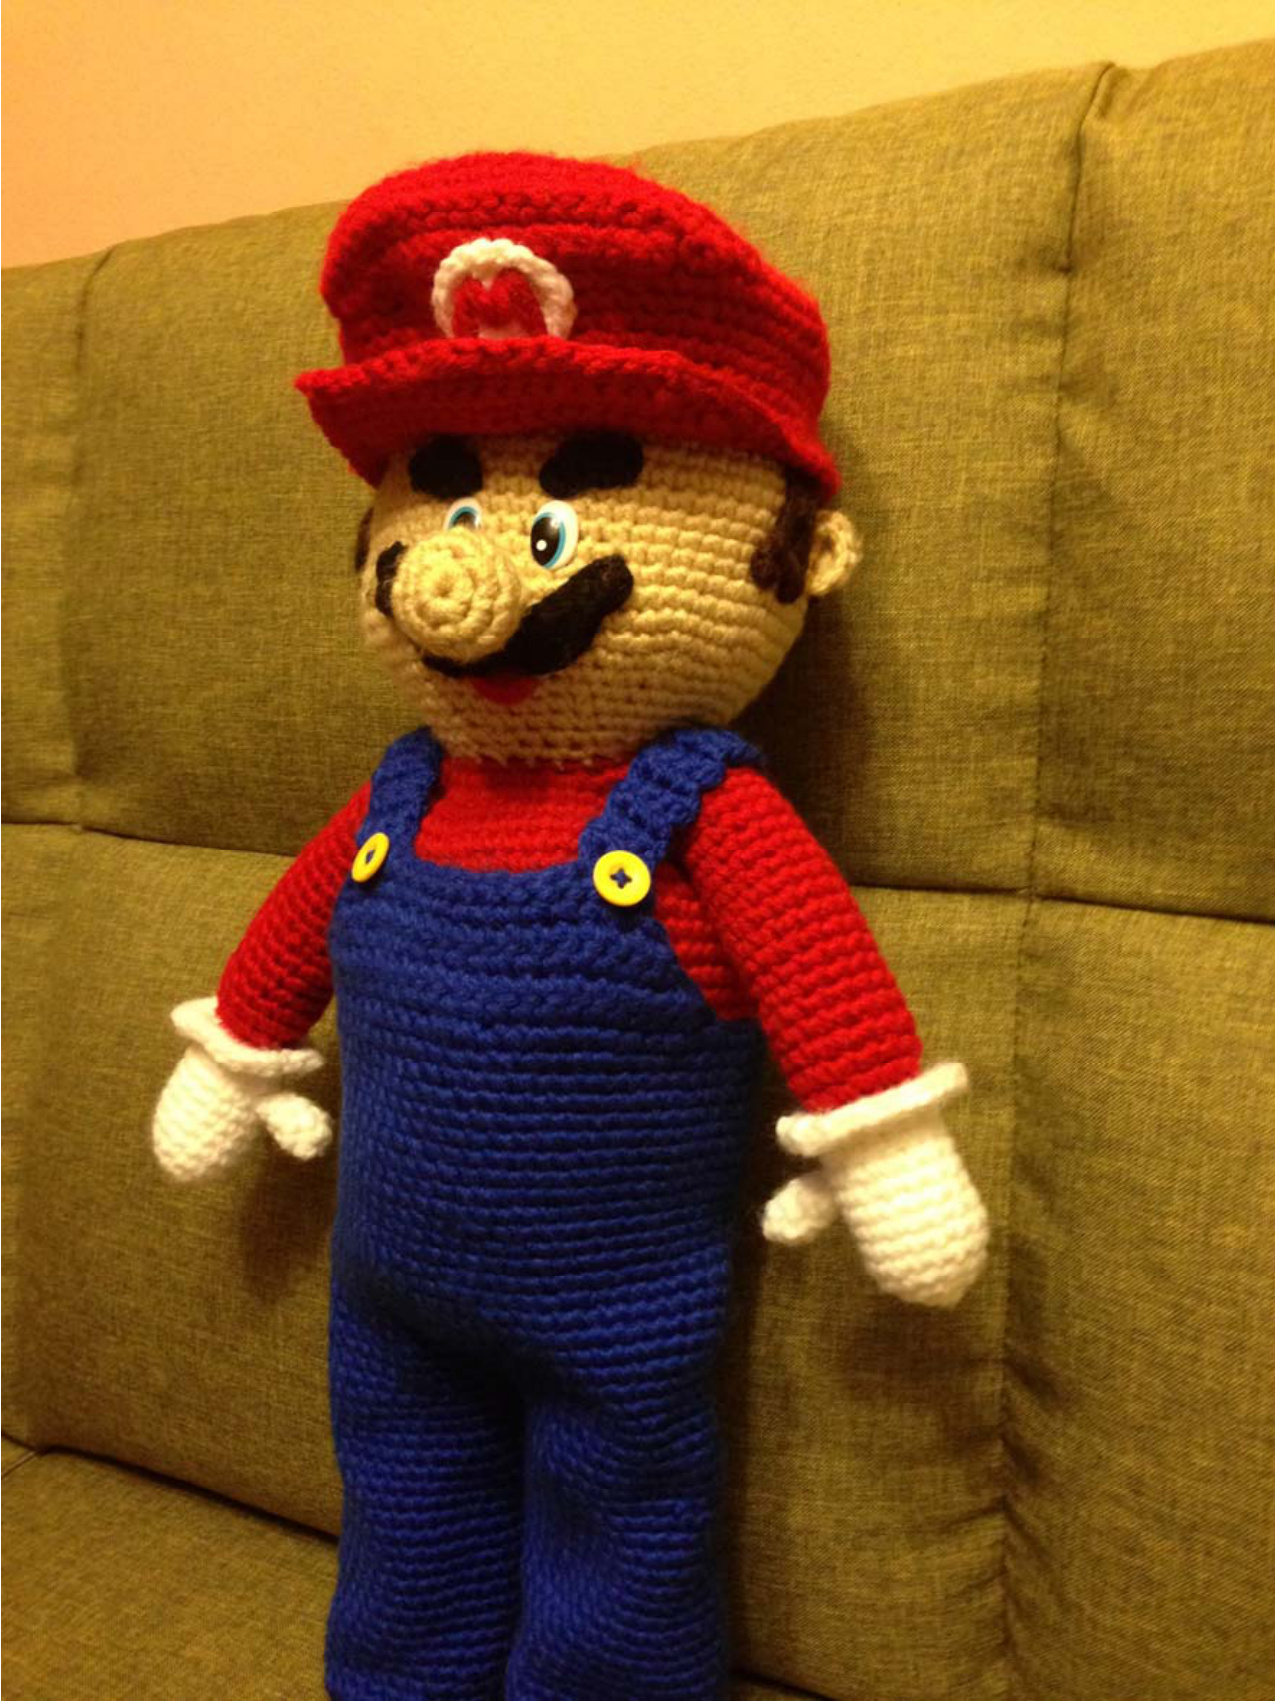
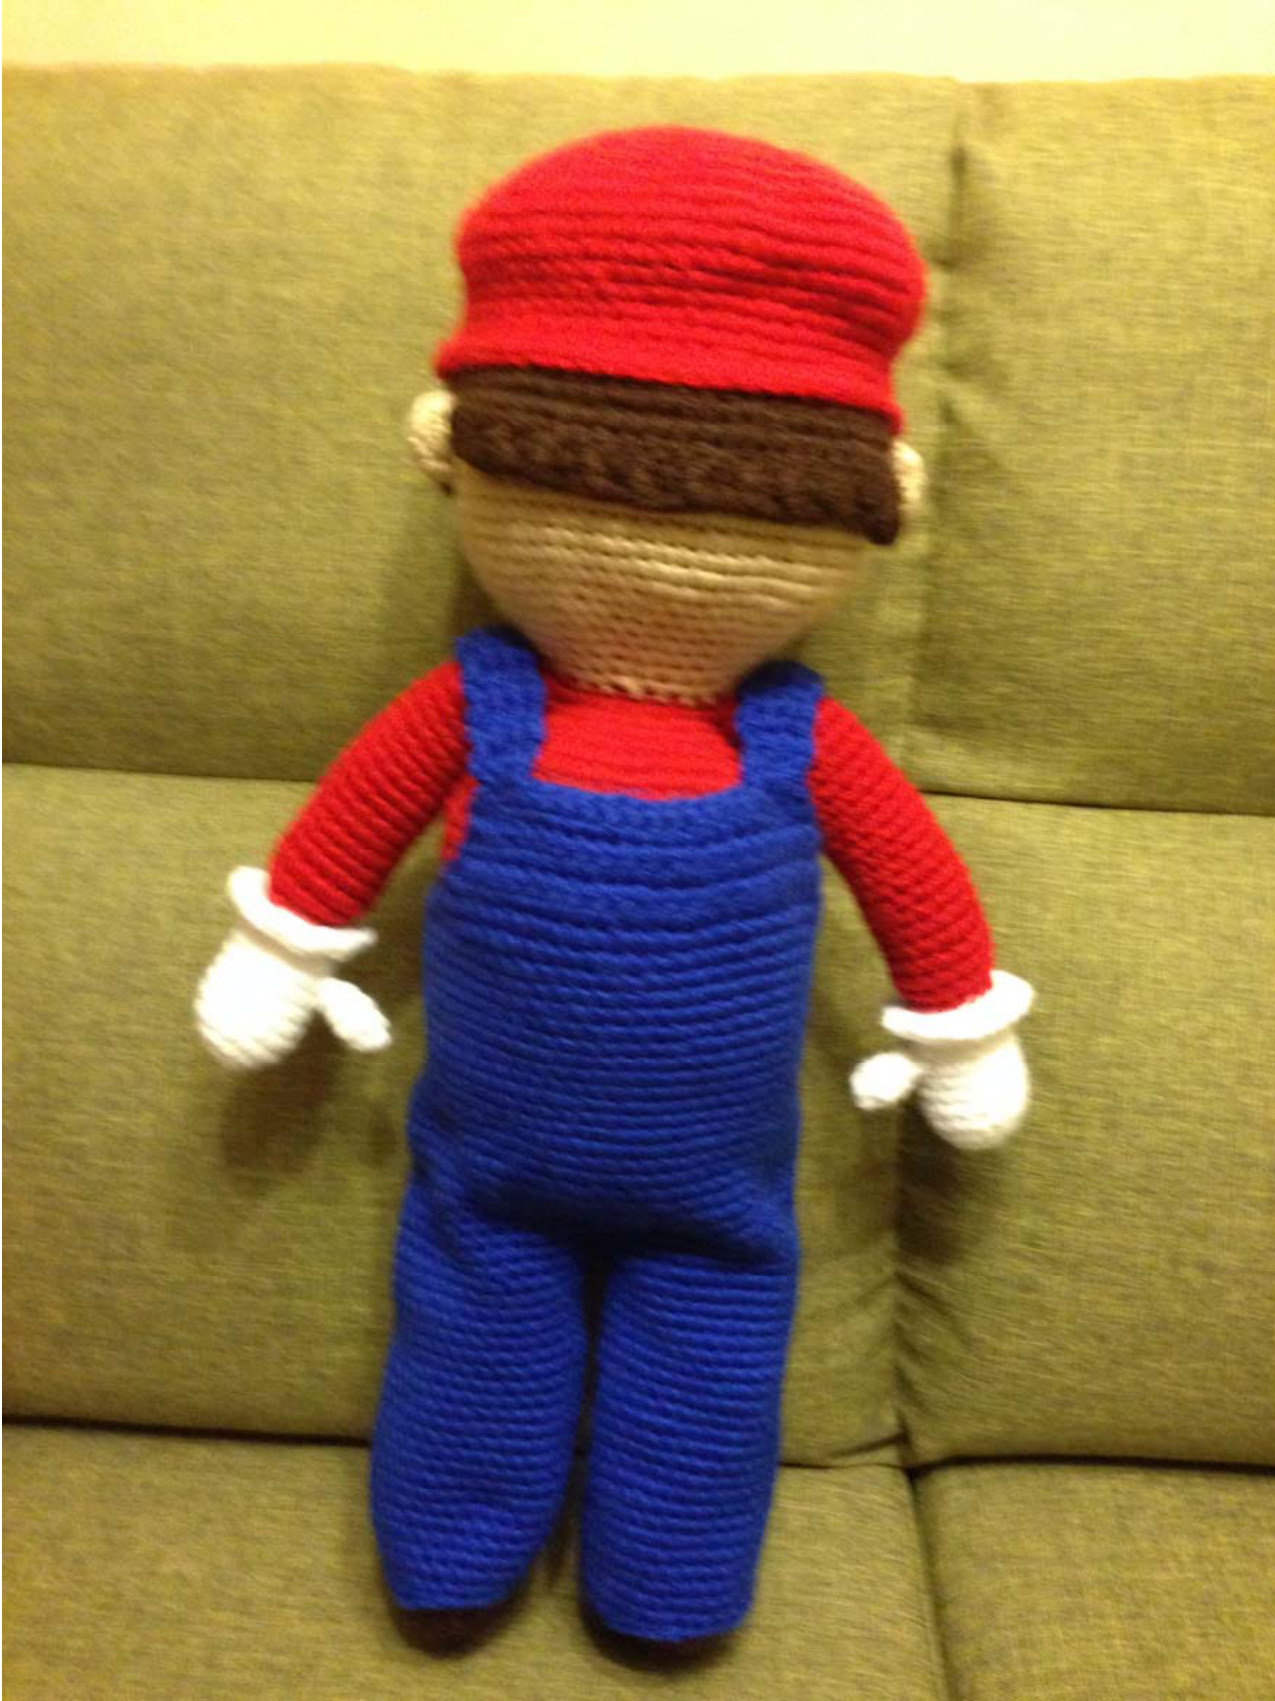
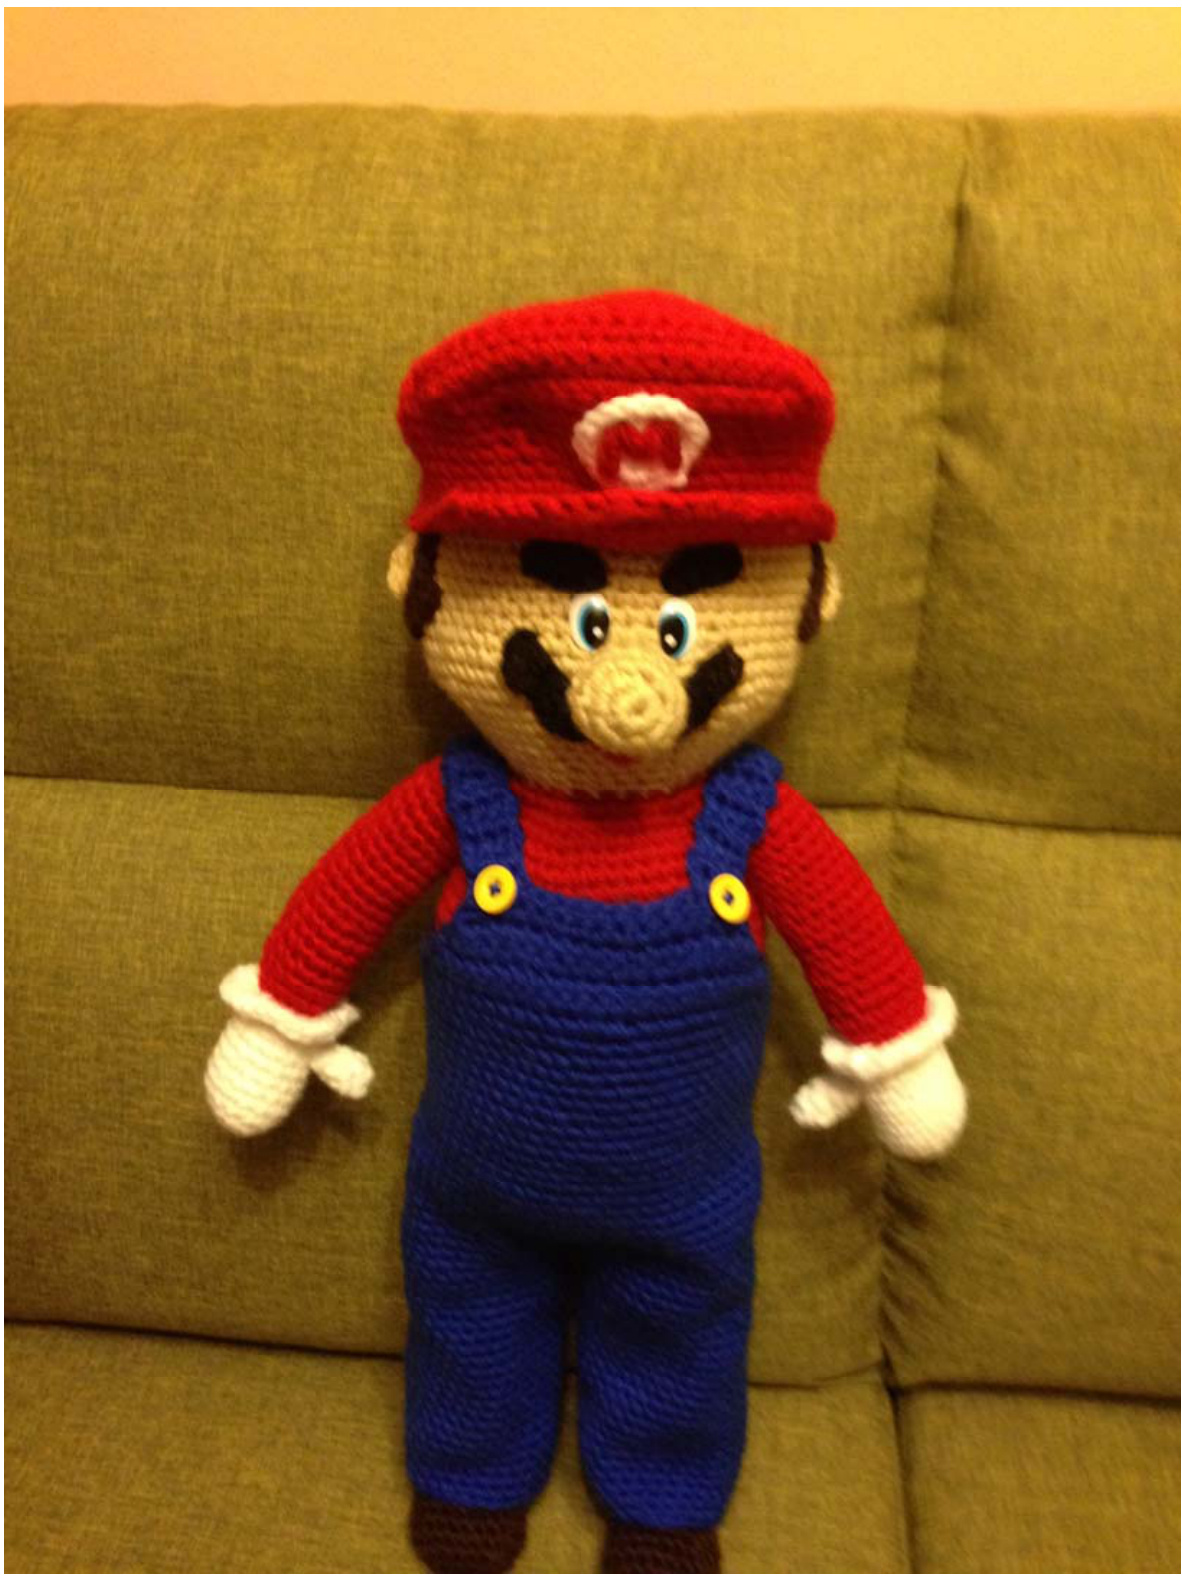
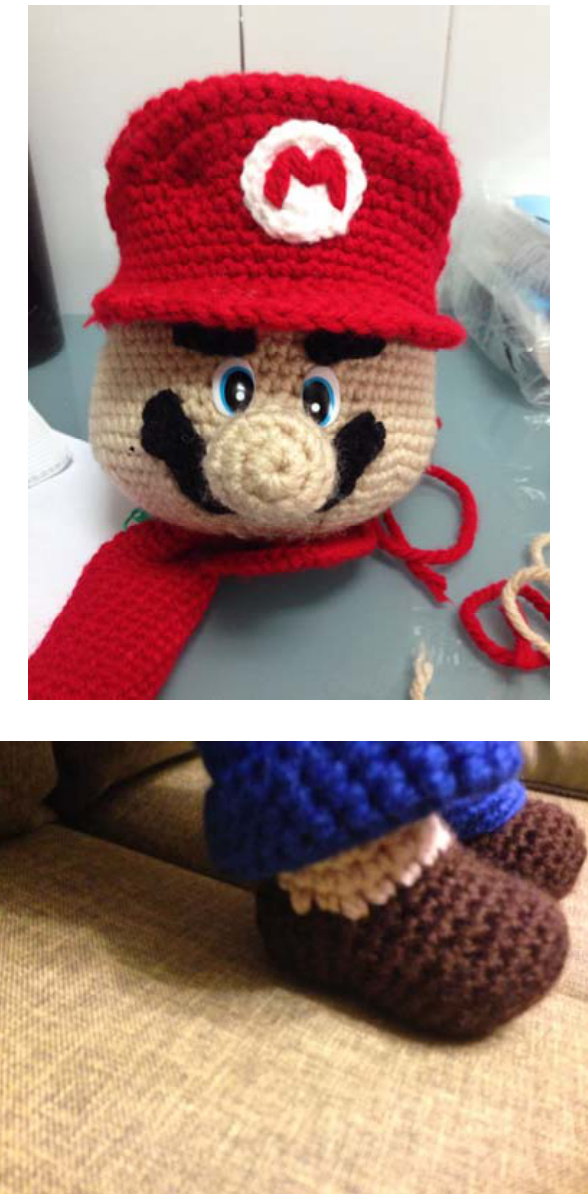
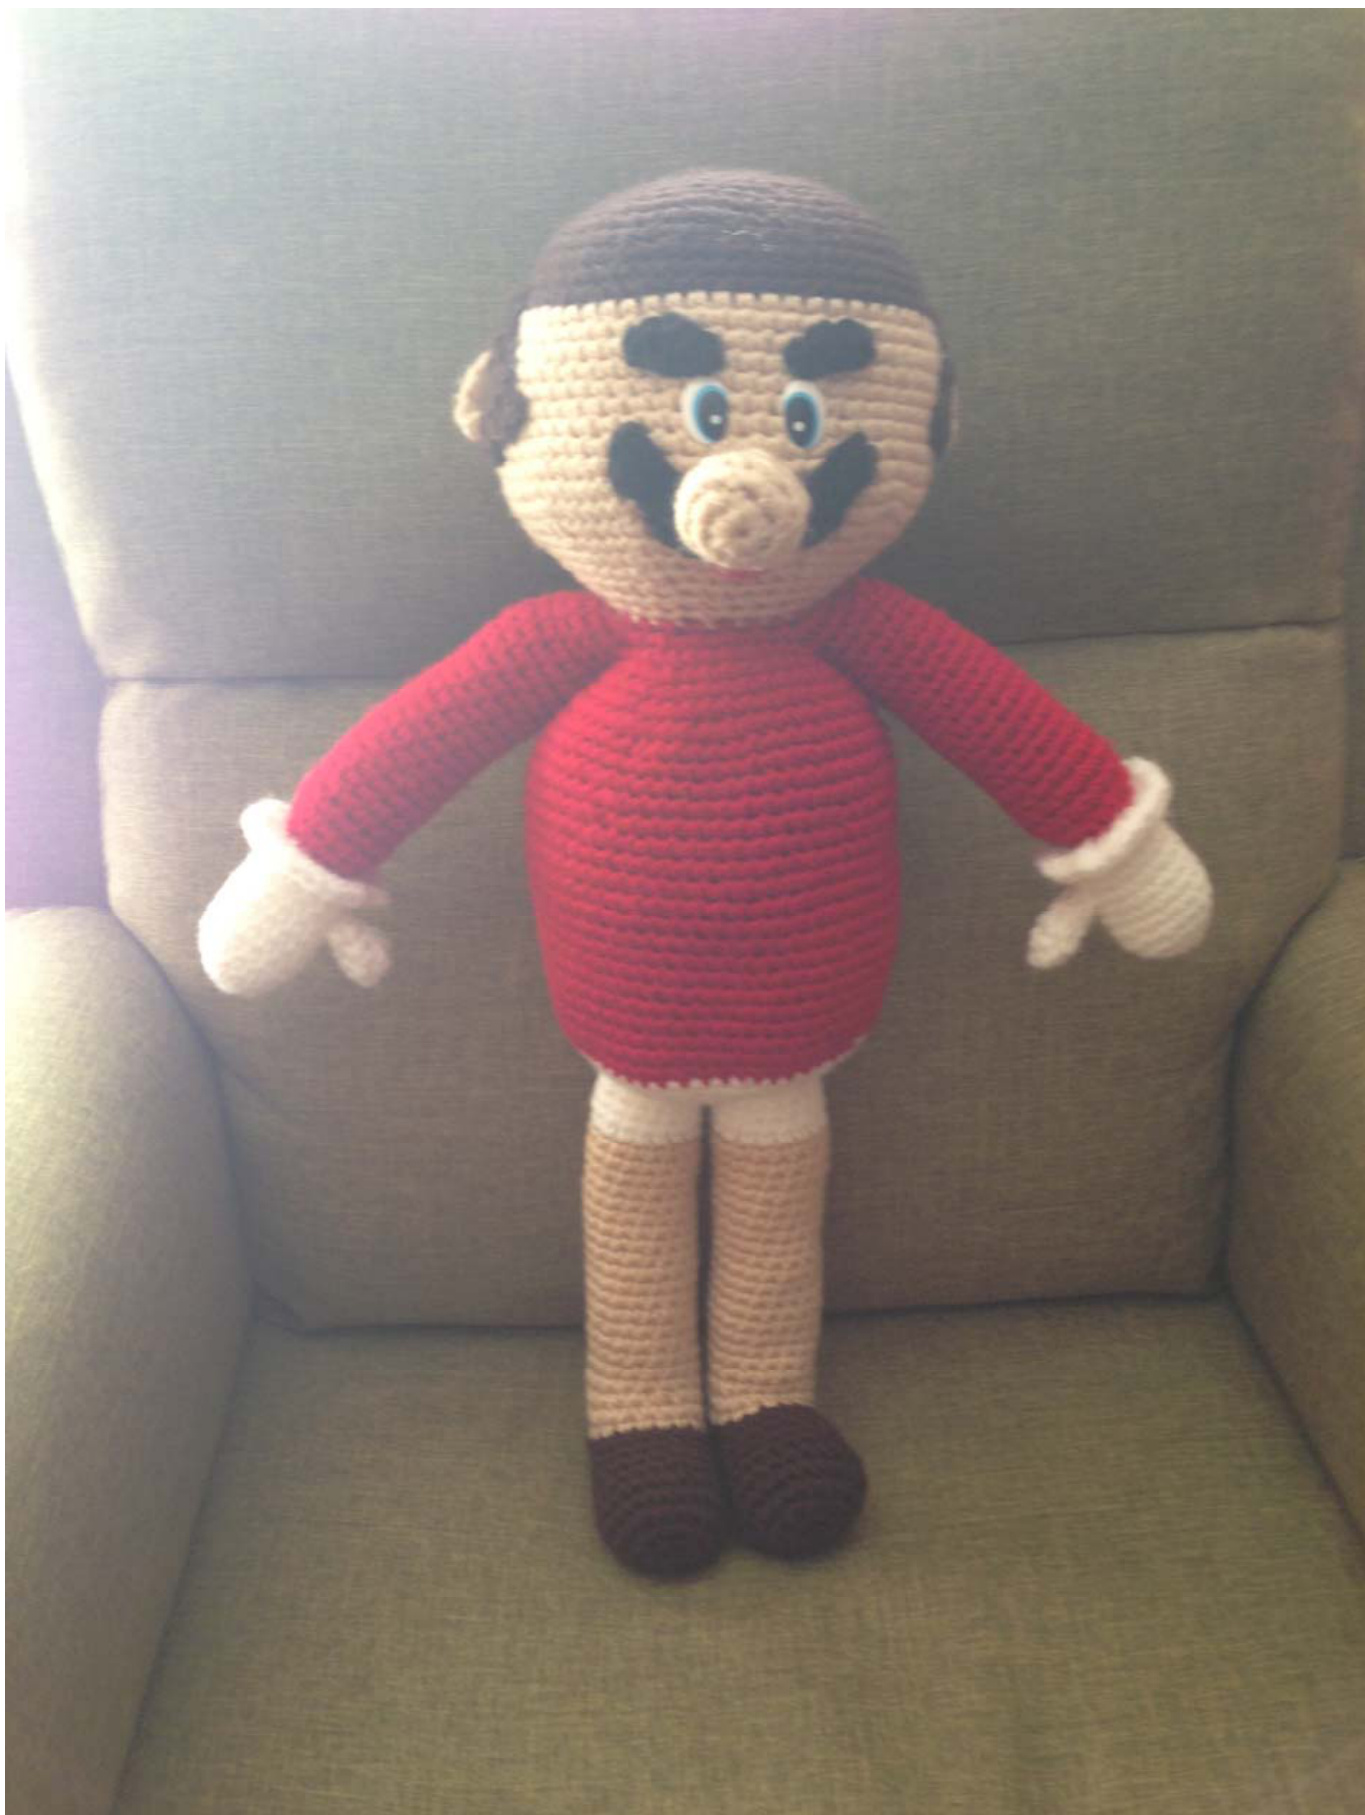
One of my niece's friends is a Mario fan: he wears t-shirts, ha has many Mario video games. He is crazy about him!. This boy is very special and I thought a giant Mario would be a good birthday's gift. There are many free patterns for taking inspiration. The one I love the most is: http://wolfdreamer-oth.blogspot.com.es/2009/08/mario-plushie.html The more difficult part to crochet and assemble is the face. The eyebrows, the moustache, ... quite a lot of details. I went for a full doll, what I mean is that the trousers can be taken off and we have a full toy with legs.
ABOUTYARN:
The yarn is Alaska from Katia (Spanish manufacturer). Yardage: 3.5 ounces (100 grams) and 126 yards (115 meters). Number of skeins: 2 red, 2 blue, 1 brown, 1 black, 1 yellow, 1 skin (cream/beige)
ABOUT GAUGE:
It is not important, as far as you are consistent with your tension.
ABOUT HOOK:
4 mm hook Remember that when making amigurumis, stitches should be tight.
YOU WILL NEED:
Yarn. Twoeyes. 2 yellow buttons Stuffing. Tapestry needle and/or invisible thread and needle
ABOUTCROCHETTERMS:
I've followed the US terminology. Stitch: st Chain: ch Slip stitch: sl st Single crochet: sc Double crochet: dc FLO: Front Loop Only BLO: Back Loop Only Sc2tog: decreasing two sc (i.e., 2 st become 1) Sc3tog: decreasing 3 sc (i.e. 3 stitches become 1) Sc4tog: decreasing 4 sc (i.e. 4 stitches become 1) NOTE: I've made all the decreases as invisible decreases
ABOUT THEPATTERN:
All the pattern is worked in spirals except the ears, so do not join at the end/beginning of a round.
LEFT EAR
Using skin color Row 1: magic ring, 5 sc, do not join. Row 2: ch1, turn, 2sc in next st, sc in next 3 sts, 2hdc in next st. Fastenoff
RIGHT EAR
Row 1: magic ring, 5 sc, do not join. Row 2: ch1, turn, 2hdc in next st, sc in next 3 sts, 2sc in next st. Fastenoff
Hair near the ears (make 2)
Usingbrown Row 1: chain7, chain 4, sc in 5th ch from hk, and in remainingsts. Row 2: ch1, turn, sc in every st, ch 4 and slst in the middle of row1 and row2. Fastenoff
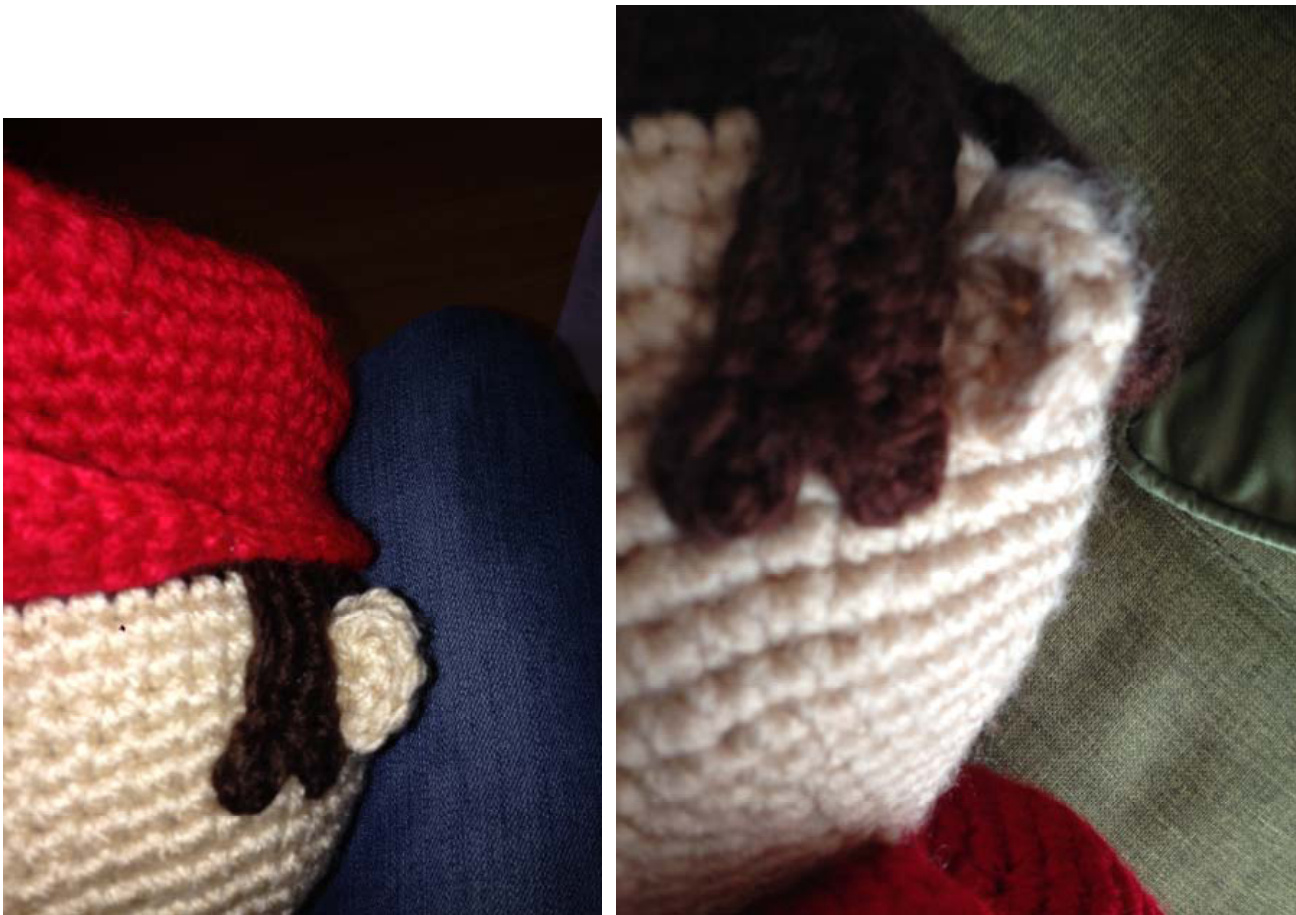
HAIR at the back of the head Using brown
Row 1: ch 24, sc in 2nd ch from hk and in remaining sts.
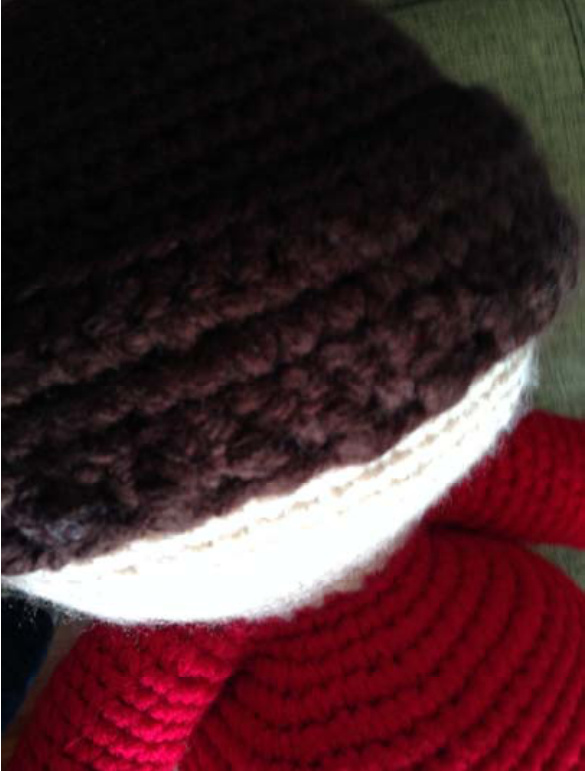
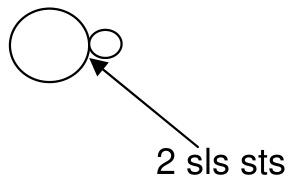
Row 2: ch 1, turn, [sc, dtr] repeat 11 times, sc. Fastenoff Sew at the back of the head. HANDS (using 2) Using white The hand has two parts: the main part and the thumb. Thumb: Round 1: magic ring: 5sc. Round 2-4: sc in each st across. Fasten off and use end to stuff the thumb Main part: Round 1: magic ring: 5sc. Round 2: 2sc in each st across. (10 sts) Round 3: [2sc, 1 sc in next st] repeat 5 times (15sts) Round 4-8: sc in each st across. In round 9 we join the thumb and the hand: Round 9: sc in each st across both blocks (except the joined part) (16sts) Round 10: sc2tog, sc in remaining sts. (15 sts) Round 11: FLO: 2sc in every st, sl st and fasten off. Stuffhand
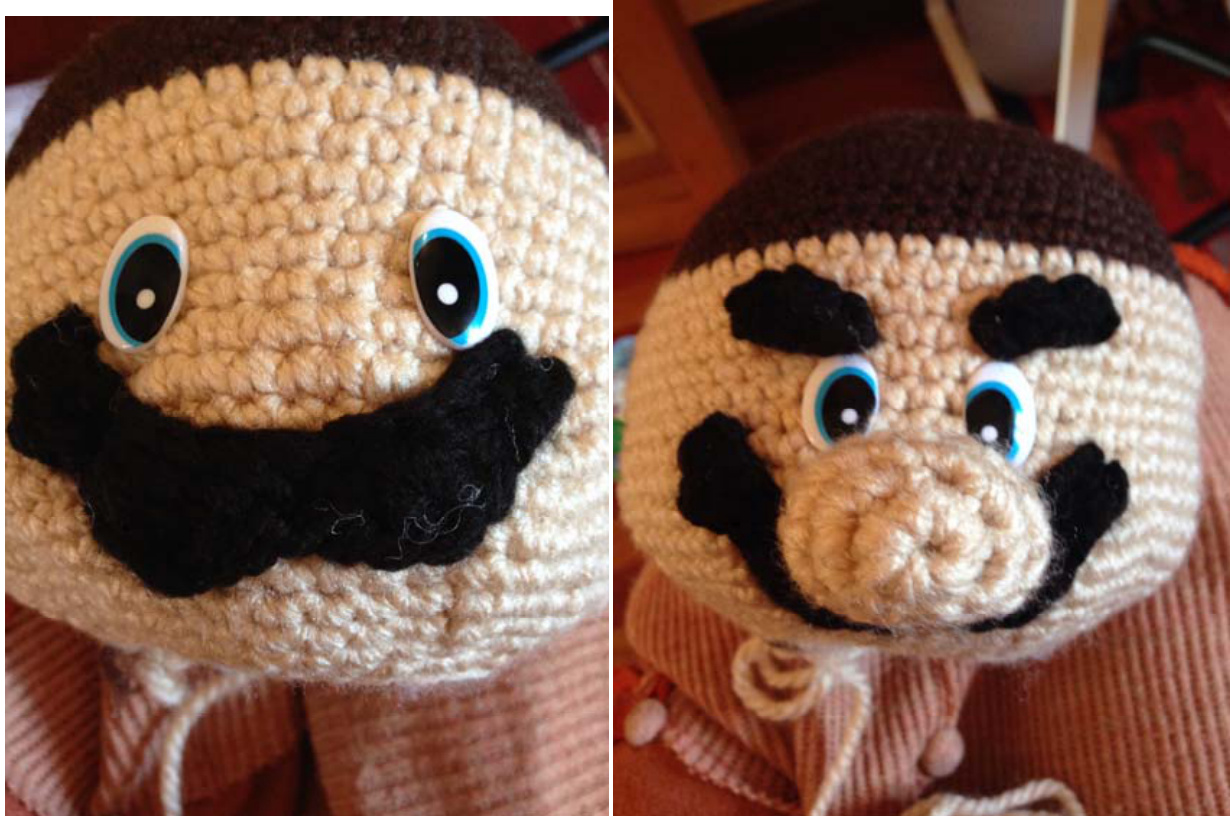
MOUSTACHE
Usingblack Row 1: ch 16. Row 2: sl st in 2nd ch from hk, hdc, slst, slst, hdc, 2dc in next st, 1hd, slst,slst,hdc, 2dc in next st, hdc, slst, hdc, sl st. Fastenoff
Left EYEBROW
Using black Row 1: ch 5 Row 2: sl st in 2nd ch from hk, 2sc in next st, hdc, slst. Fasten off
Right EYEBROW
Using black Row 1: ch 5 Row 2: sl st in 2nd ch from hk, hdc, 2sc in next st, slst. Fasten off.
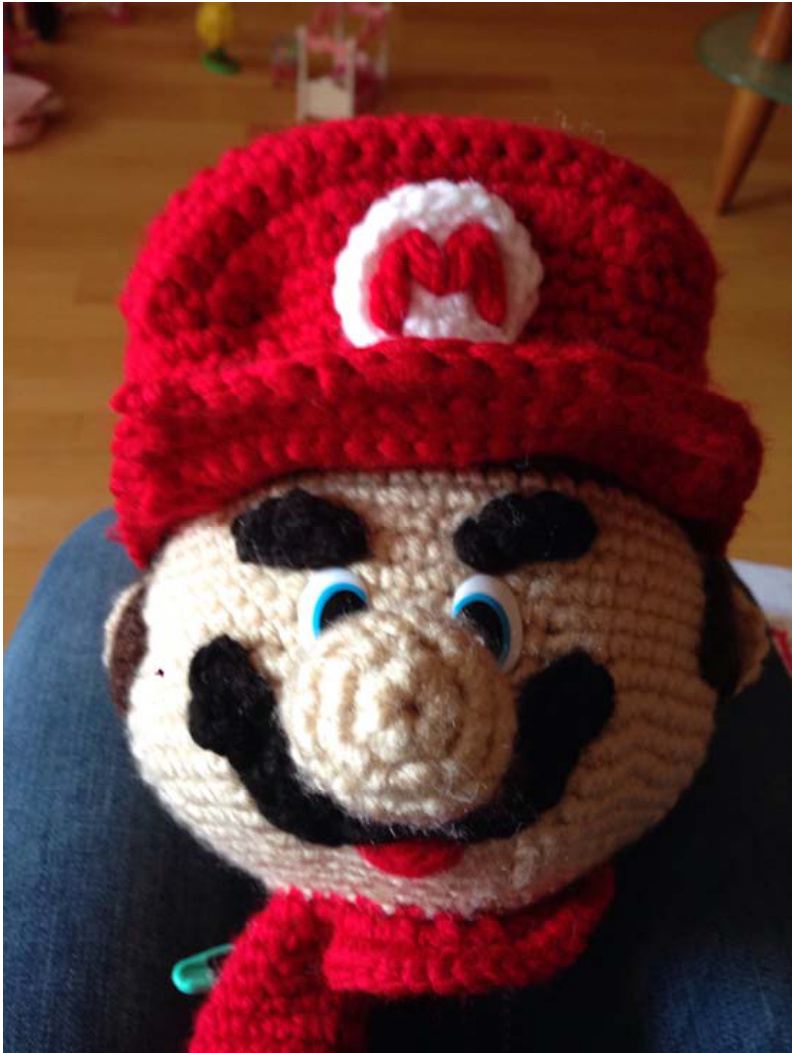
CAP
Using red
Round 1: magic ring, 6 sc (alternatively, 2 ch and 6 sc in 2nd ch from hook). Round 2: 2sc in next 6 st, (12 sts) Round 3: [2sc in next st, 1sc in next st] repeat 6 times (18 sts) Round 4: [1sc in next st., 2sc in next st, 1sc in next st] repeat 6 times (24 sts) Round 5: [2sc in next st, 1sc in next 3st] repeat 6 times (30 sts) Round 6: [1sc in next 2st., 2sc in next st, 1sc in next 3st] repeat 6 times (36 sts) Round 7: [2sc in next st, sc in next 5st] repeat 6 times (42 sts) Round 8: [sc in next 3st., 2sc in next st, 1sc in next 3st] repeat 6 times (48 sts) Round 9: [2sc in next st, sc in next 7st] repeat 6 times (54 sts) Round 10: [sc in next 4st., 2sc in next st, 1sc in next 4st] repeat 6 times (60 sts) Round 11: [2sc in next st, sc in next 9st] repeat 6 times (66 sts) Round 12: [sc in next 4st., 2sc in next st, 1sc in next 6st] repeat 6 times (72 sts) Round 13: [2sc in next st, sc in next 11st] repeat 6 times (78 sts) We have to shape the hat: taller at the front. So, we will be working some incomplete scrows. Round 14: sc in next 26 sts, turn. Round 15: sc in next 24 sts, turn. Round 16: sc in next 22 sts, turn. Round 17: sc in next 20 sts, turn. Round 18: sc in next 18 sts, turn. Round 19: sc in next 16 sts, turn. Round 20: normal round: sc in each st around (78 sts) Round 21: [sc2tg, sc in next 11 sts] repeat 6 times (72sts) Round 22: [sc2tg, sc in next 10 sts] repeat 6 times (66sts) Round 23: [sc2tg, sc in next 9 sts] repeat 6 times (60sts) Rounds 24-27: sc in each st around (60 sts) Now the front is shaped: Now we work the front of the cap. Row 1: Working the 23sts at the front, work 23 FLO sc, turn Row 2: sc in next 11 sts, sc2tog, sc in next 11 sts, turn Row 3: sc in next 6 sts, sc2tog, sc in next 6 sts,sc2tog, sc in next 6 sts, turn Row 4: sl st, sc in next 18 sts, turn Row 5: sl st, sc in next 16 sts, turn Row 6: 3slst, sc in next 3sts, hdc in next 2sts, sc in next 3sts, 3slst and sc
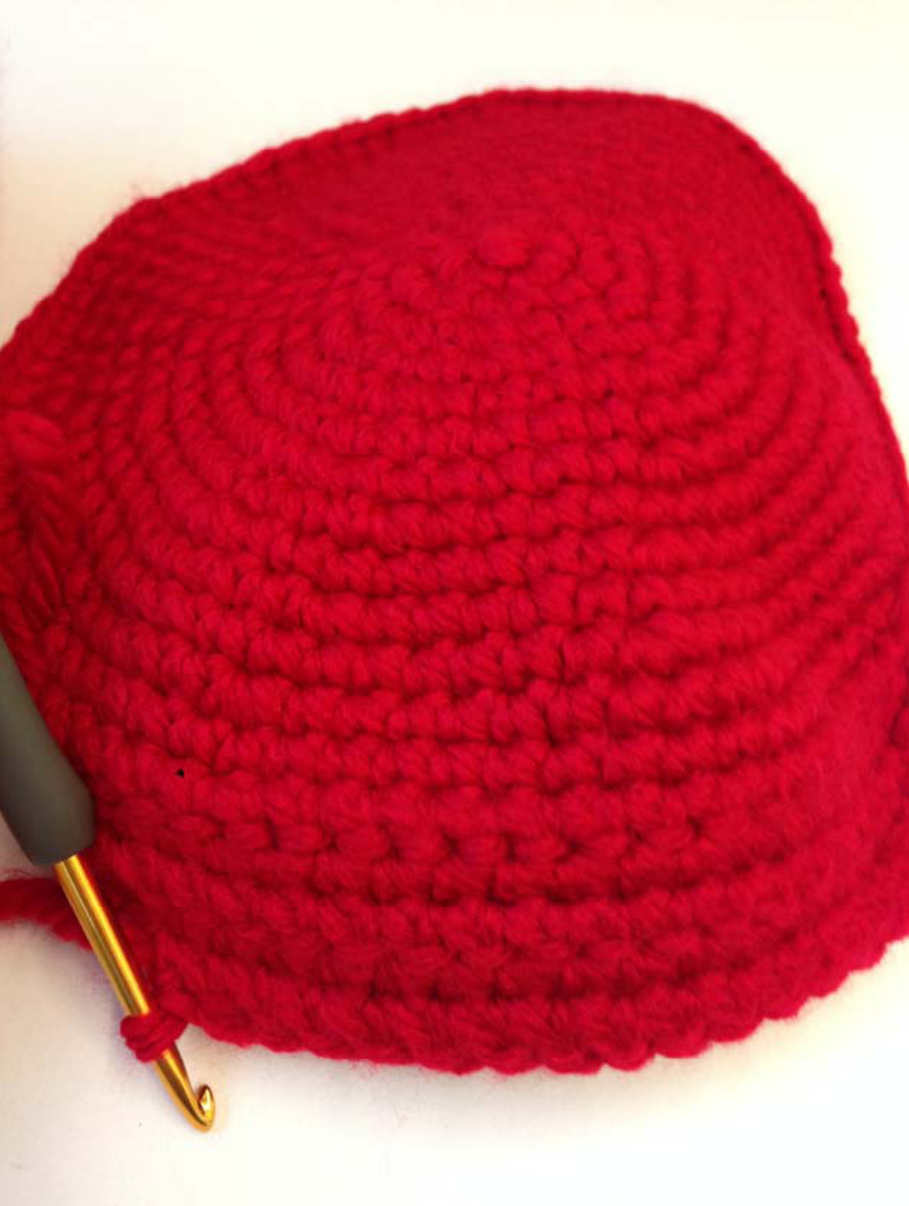
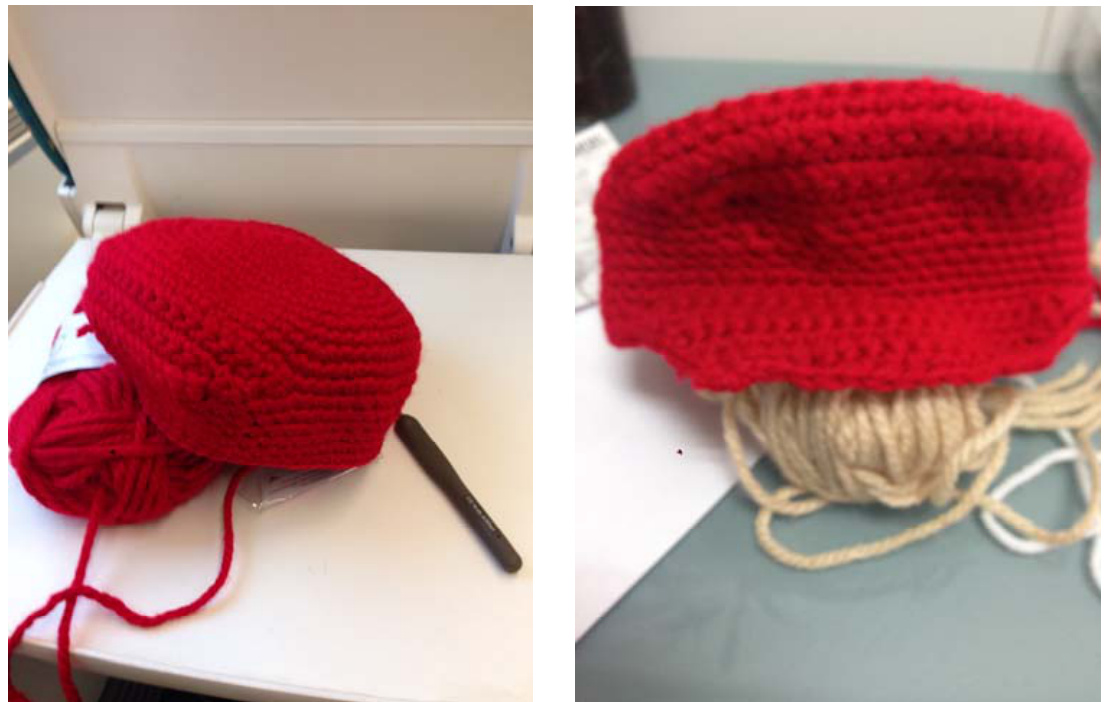
Fastenoff (the cap will be slightly stuffed for a better fit
Front embellishment, using white:
Round 1: magic ring, 6 sc (alternatively, 2 ch and 6 sc in 2"d ch from hook). Round 2: 2sc in next 6 st, (12 sts) Round 3: [2sc in next st, 1sc in next st] repeat 6 times, 3slst (18 sts) Fasten off, sew at the front. Using red, embroider the M at the white circle. Sew the circle to the cap
Feet (make 2)
Using brown
Round 1: magic ring, 6sc (alternatively, 2 ch and 6 sc in 2nd ch from hook). Round 2: 2sc in next 6 st, (12 sts) Round 3: [2sc in next st, 1sc in next st] repeat 6 times (18 sts) Round 4: [1sc in next st., 2sc in next st, 1sc in next st] repeat 6 times (24 sts) Round 5-6: sc in each st around (24sts) Round 7: [sc2tog, sc in next 4sts]repeat 4 times (20 sts) Round 8-9: sc in each st around (20 sts) Round 10:[sc2tog, sc in next 8sts] repeat 2 times (18 sts) Round 11: (we make the hole for the leg) ch 8, sk next 8 sts, sc in next 10 sts (18sts) Round 12: 8sc in the 8 chains of round 11, sc in next 10 sts (18 sts) Round 13: [sc2tog, sc in next 1 st] repeat 6 times (12 sts) Round 14: [sc2tog] repeat 6 times (6 sts) Fasten off Stuff shoe
Legs (make 2)
Round 1: sc around the hole in the shoe (20 sts) Round 2: [sc2tog, sc in next 8 sts] repeat 2 times (18 sts) Round 3-23: sc in each st around (18 sts) Change to white Round 24-27: sc in each st around (18 sts) Fasten off and use end to sew leg to the body. Remember to stuff as you go.
NOSE
Using skin color
Round 1: magic ring, 6 sc (alternatively, 2 ch and 6 sc in 2nd ch from hook). Round 2: 2sc in next 6 st, (12 sts) Round 3: [2sc in next st, 1sc in next st] repeat 6 times (18 sts) (stuff) Round 4: [sc2tog, 1sc in next st] repeat 6 times (12 sts) Round 5: [sc2tog, 1sc in next st] repeat 3 times (9 sts) Fasten off.
HEAD, ARMS and BODY
Using brown
Round 1: magic ring, 6 sc (alternatively, 2 ch and 6 sc in 2nd ch from hook). Round 2: 2sc in next 6 st, (12 sts) Round 3: [2sc in next st, 1sc in next st] repeat 6 times (18 sts) Round 4: [1sc in next st., 2sc in next st, 1sc in next st] repeat 6 times (24 sts) Round 5: [2sc in next st, 1sc in next 3st] repeat 6 times (30 sts) Round 6: [1sc in next 2st., 2sc in next st, 1sc in next 3st] repeat 6 times (36 sts) Round 7: [2sc in next st, sc in next 5st] repeat 6 times (42 sts) Round 8: [sc in next 3st., 2sc in next st, 1sc in next 3st] repeat 6 times (48 sts) Round 9: [2sc in next st, sc in next 7st] repeat 6 times (54 sts) Round 10: [sc in next 4st., 2sc in next st, 1sc in next 4st] repeat 6 times (60 sts) Round 11-21: sc in each st across. IMPORTANT: change to skin color at round 15 (60 sts) Round 22: [sc in next 4st, sc2tog using invisible decrease, sc in next 4st], repeat 6 times (54 sts) Round 23: [sc2tog using invisible decrease, sc in next 7st], repeat 6 times (48 sts) Round 24: [sc in next 3st, sc2tog using invisible decrease, sc in next 3st], repeat 6 times (42 sts) Round 25: [sc2tog using invisible decrease, sc in next 5st], repeat 6 times (36 sts) Round 26: [sc in next st, sc2tog using invisible decrease, sc in next 3st], repeat 6 times (30 sts) (Stuff head as you go) Round 27: [sc2tog using invisible decrease, sc in next 3st], repeat 6 times (24 sts) Round 28: [sc2tog using invisible decrease, sc in next 2st], repeat 6 times (18 sts) At this stage we can place the eyes, nose, eyesbrows, ..
Body and arms
Change to red Round 29: 2sc in every st (36 sts) Round 30: [2sc, sc in next 2st] repeat 12 times (48sts) Round 31: [2sc, sc in next 3st] repeat 12 times (60sts) Round 32-33: sc in each st across (60 sts) The 60 sts are spitted or divided in three parts: 15, 30 and 15: arm , body,arm:
Body:
Round 1: place 12 increases evenly spaced (42sts) Work 2-19: sc in every st across. Change to white and: Round 20: [sc2tog using invisible decrease, sc in next 5st], repeat 6 times (36 sts) Round 21: [sc in next st, sc2tog using invisible decrease, sc in next 3st], repeat 6 times (30 sts) (Stuff body as you go) Round 22: [sc2tog using invisible decrease, sc in next 3st], repeat 6 times (24 sts) Round 23: [sc2tog using invisible decrease, sc in next 2st], repeat 6 times (18 sts) Round 24: [sc2tog using invisible decrease, sc in next 1st], repeat 6 times (12 sts) Round 25: [sc2tog], repeat 6 times (6 sts) Fasten off. Sewlegstobody
Arms:
Using the 15 external stitches, work 15 rounds. Stuff. Fasten off. Sew arm to hand. At this stage, we have Mario without the characteristic dungarees:
Finally:
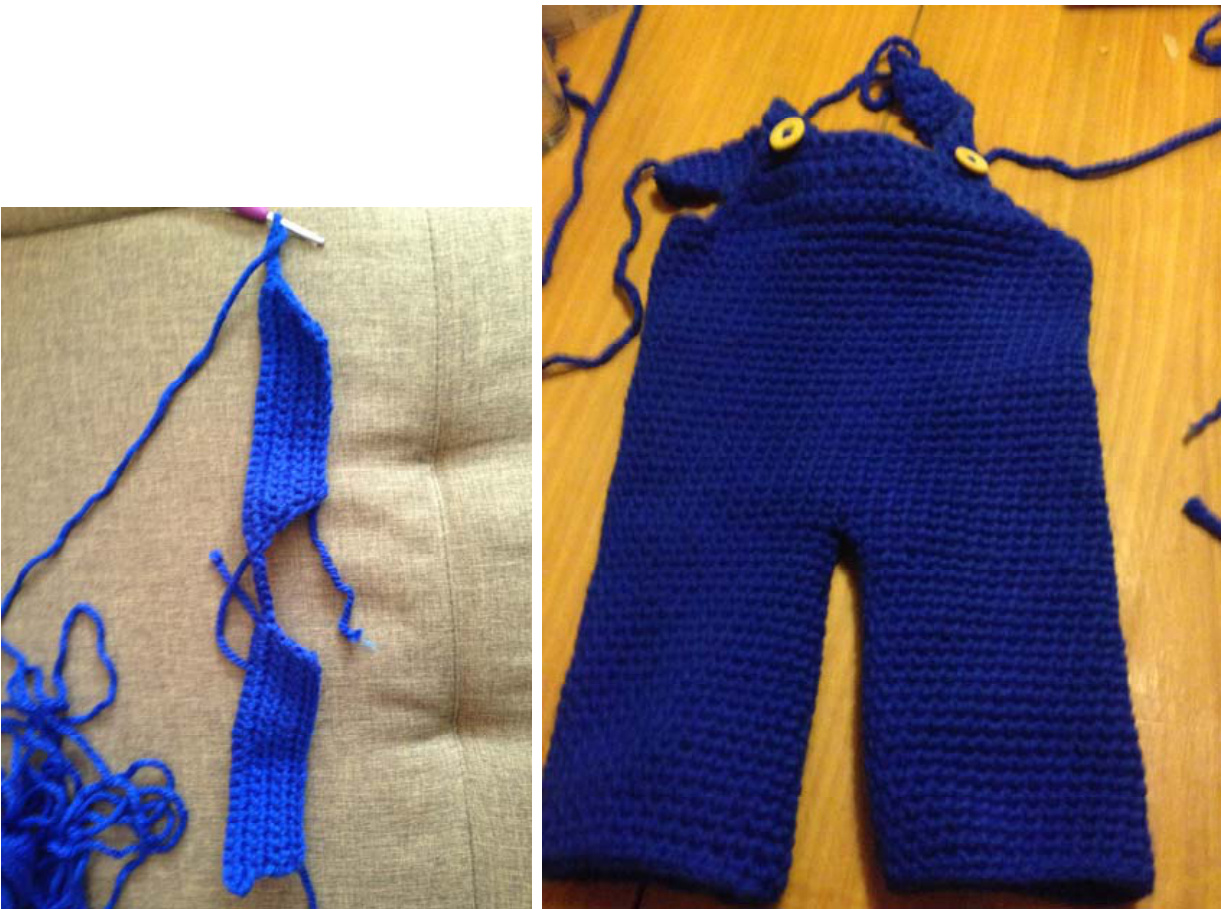
DUNGAREES Using blue First the front panel and back panels are worked, then a row for joining them. The body is worked in spiral, finally the 60 sts are divided in two parts: 30 for each leg. Front panel: Row1: ch 15 Row 2: sc in 2nd ch from hk and in remaining sts, ch1, turn (14sts) Row 3: 2sc in 1st st, sc in next 12sts, 2sc in last st, ch1, turn (16 sts) Row 4: 2sc in 1st st, sc in next 12sts, 2sc in last st, ch1, turn (18 sts) Row 5: 2sc in 1st st, sc in next 12sts, 2sc in last st, ch1, turn (20 sts) Row 6: 2sc in 1st st, sc in next 12sts, 2sc in last st, ch1, turn (22 sts) Row 7: 2sc in 1st st, sc in next 12sts, 2sc in last st, ch1, turn (24 sts) Fastenoff
Front panel:
Row 1: ch 20 Row 2: sc in 2nd ch from hk and in remaining sts, ch1, turn (19 sts) Row 3-5: sc in every st across, ch1, turn (19 sts) Row 6: 2sc in 1st st, sc in next 12sts, 2sc in last st, ch1, turn (21 sts) Row 7: 2sc in 1st st, sc in next 9sts, 2sc, sc in next 9sts, 2sc in last st, ch1, turn (24 sts) Do not fasten off Joining round: ch 6, work 24 sc in the 24 sts of the front panel, ch 6, work 24 sc in the 24 sts of the back panel (60 sts)
Round 1-25: sc in each st across
Now, each leg is worked: 22 rounds (30 sts in each round)
Braces/Suspenders
Ch 4, sc in 2nd ch from hk and in next 2 sts, ch1, turn Work 16 or 18 rows (depending on your tension) and sew them to the dungarees.