TOE-UP MINI KAL PART 1: TURKISH CAST ON AND TOE INCREASES
We have a couple of goals for this mini KAL: mastering the Turkish cast-on · finding a simple pattern for the body of the sock to highlight the gorgeous variegated yarn without looking like mud once it's knit up (Lois and I are planning to use the simple "rib" seen here: Gridiron cause it's a pretty but super easy 2 row pattern that is just enough to break up the pooling and keep our interest but not but so busy as to not allow the YARN to be the star!) You could sub any simple rib pattern like mistake stitch rib or garter stitch rib, and so on and so on....or even do a plain 2x2 rib or stockinette! · learning when to start the heel "process" on a toe-up sock for a good fit! mastering the FKD patented Short Row Heel with Mini-Flap and Gusset (and for all you SR heel haters, I promise you will like this heel, LovE the way it fits and be so pleased with yourself when you realize how easy it is and how brilliant you are for having it in your sock knitting bag of tricks you will love me forever! hehe) mastering a stretchy bind off for toe-up socks Start with the Iurkish Cast On. If you follow the tute step by step it's very easy. You can use 2 needles to start if you wish (and if it makes it easier to differentiate one needle from the other) OR just use one needle ala Magic loop!! - you can use DPNs but I find it incredibly fussy but if DPNs work for you, have at it! As I said previously, you want enough "wraps" to equal about 2 inches across which for a 64 stitch sock would be 16 wraps or 32 sts (half of the total final stitch count) You can adjust that count depending on the "pointiness" of your toes and/or your number of total stitches (ie: sportweight v. fingering weight) Once you have your "toe" established (you've knit "into the loops" THREE times - twice to knit the original loops and once to get back to your beginning point where your yarn tail is hanging) INCREASE 4 STITCHES EVERY OTHER ROUND You can do this by whatever method of increase works best for you. I personally prefer the Make 1 increase but you can use the kfb (knit front and back), the lifted increase or again, whatever increase works best for you. Continue to increase EOR until you have your desired # of stitches (64 for me) then you can begin your pattern on the next round. Don't forget the pattern will oNLY be on the instep stitches and you'll want to "center" the pattern over the instep. For the pattern I had mentioned eariler, the one that is similar to that in the Gridiron pattern the pattern will be as follows: For 64 sts, redistribute the stitches s0 that 31 are on the instep needle and 33 are on the sole needle Round one: P1, k1, repeat across, ending with P1 (all sole sts will be in stockinette) Round two: P3, K1, repeat across, ending with P3 (all sole sts will be in stockinette) Adjust the pattern to "center" your instep design as needed (for your # of sts) Continue Rounds 1 and 2 until your "foot" measures 3 inches less than your desired total foot length ie: woman's size 9.5 = 10 inch foot so knit in pattern until foot is 7 inches. Here's my pic to illustrate the above, feel free to post questions or ask for help if you need it!
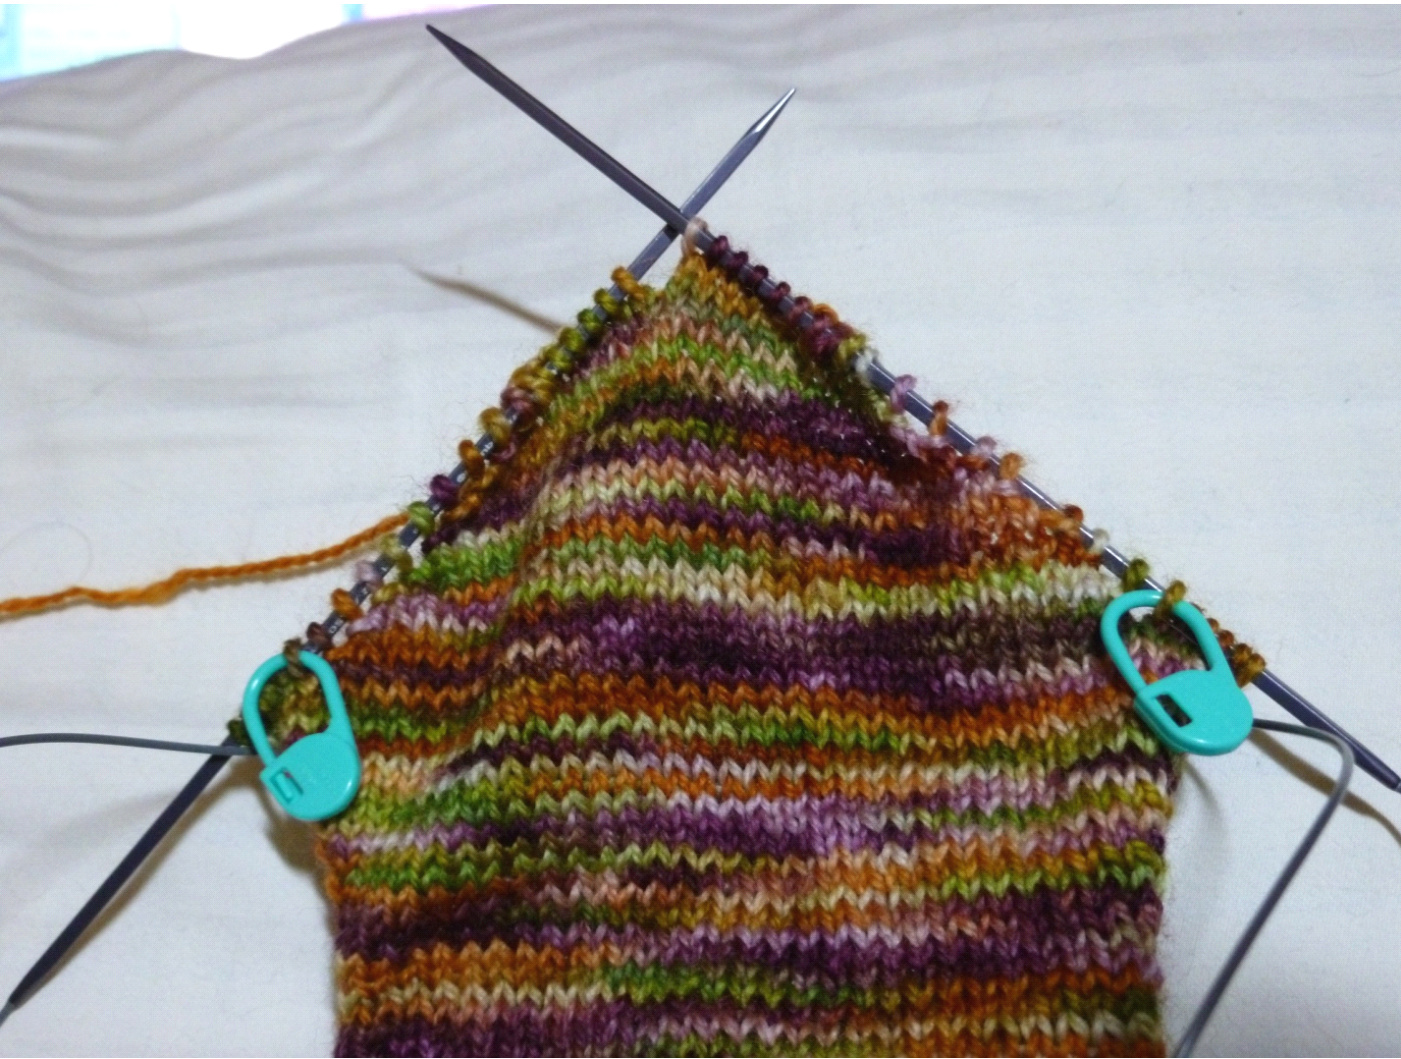
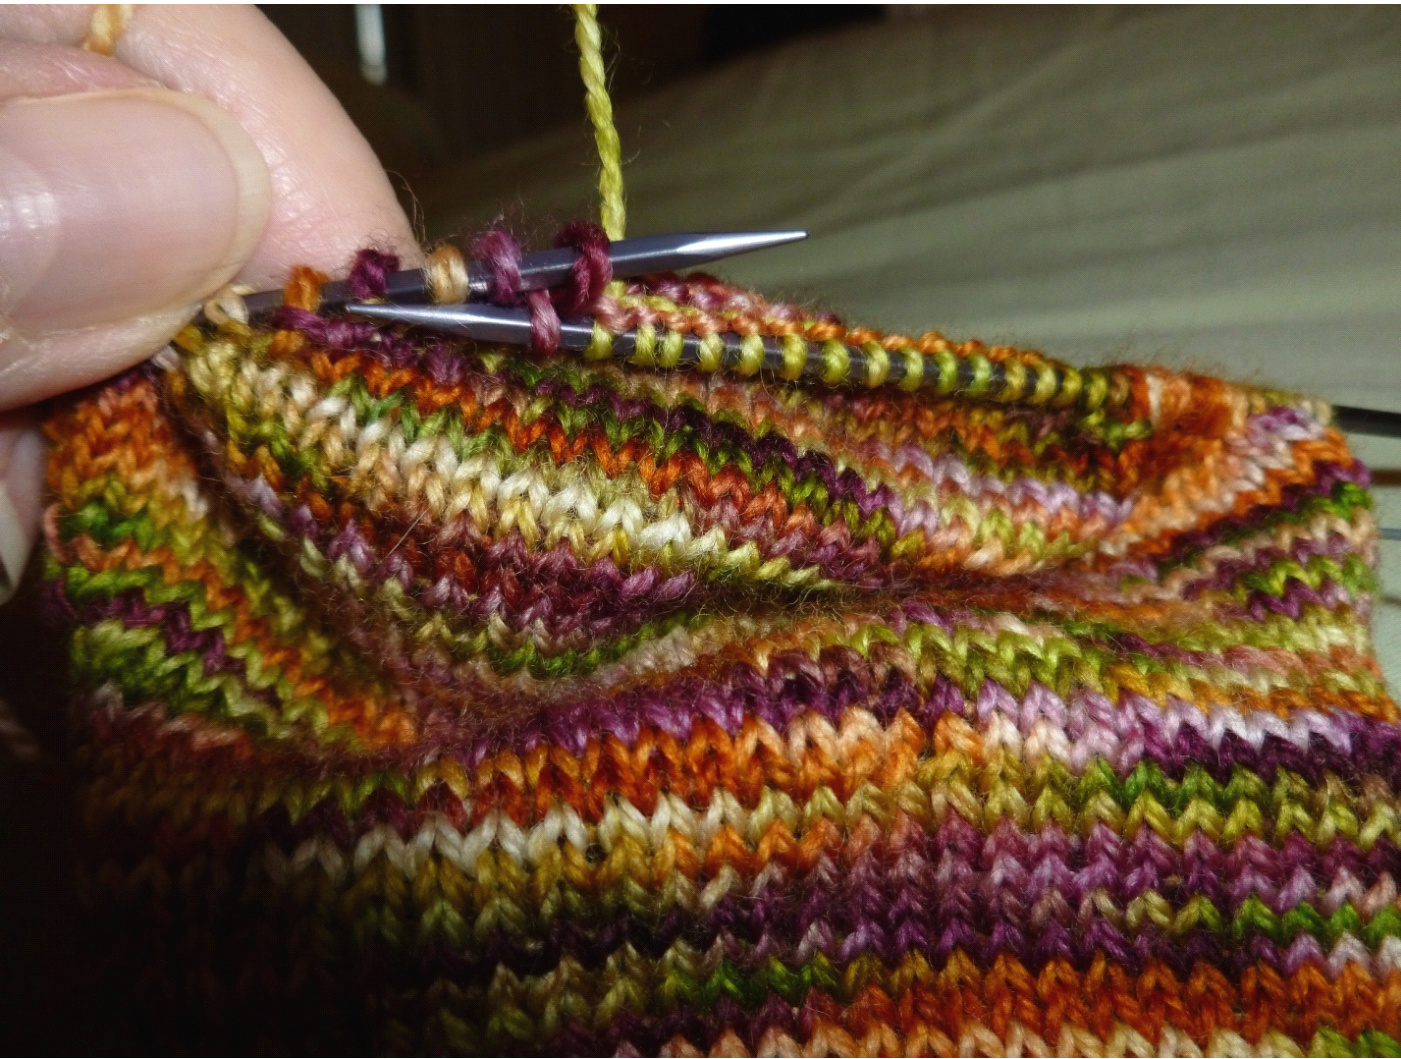
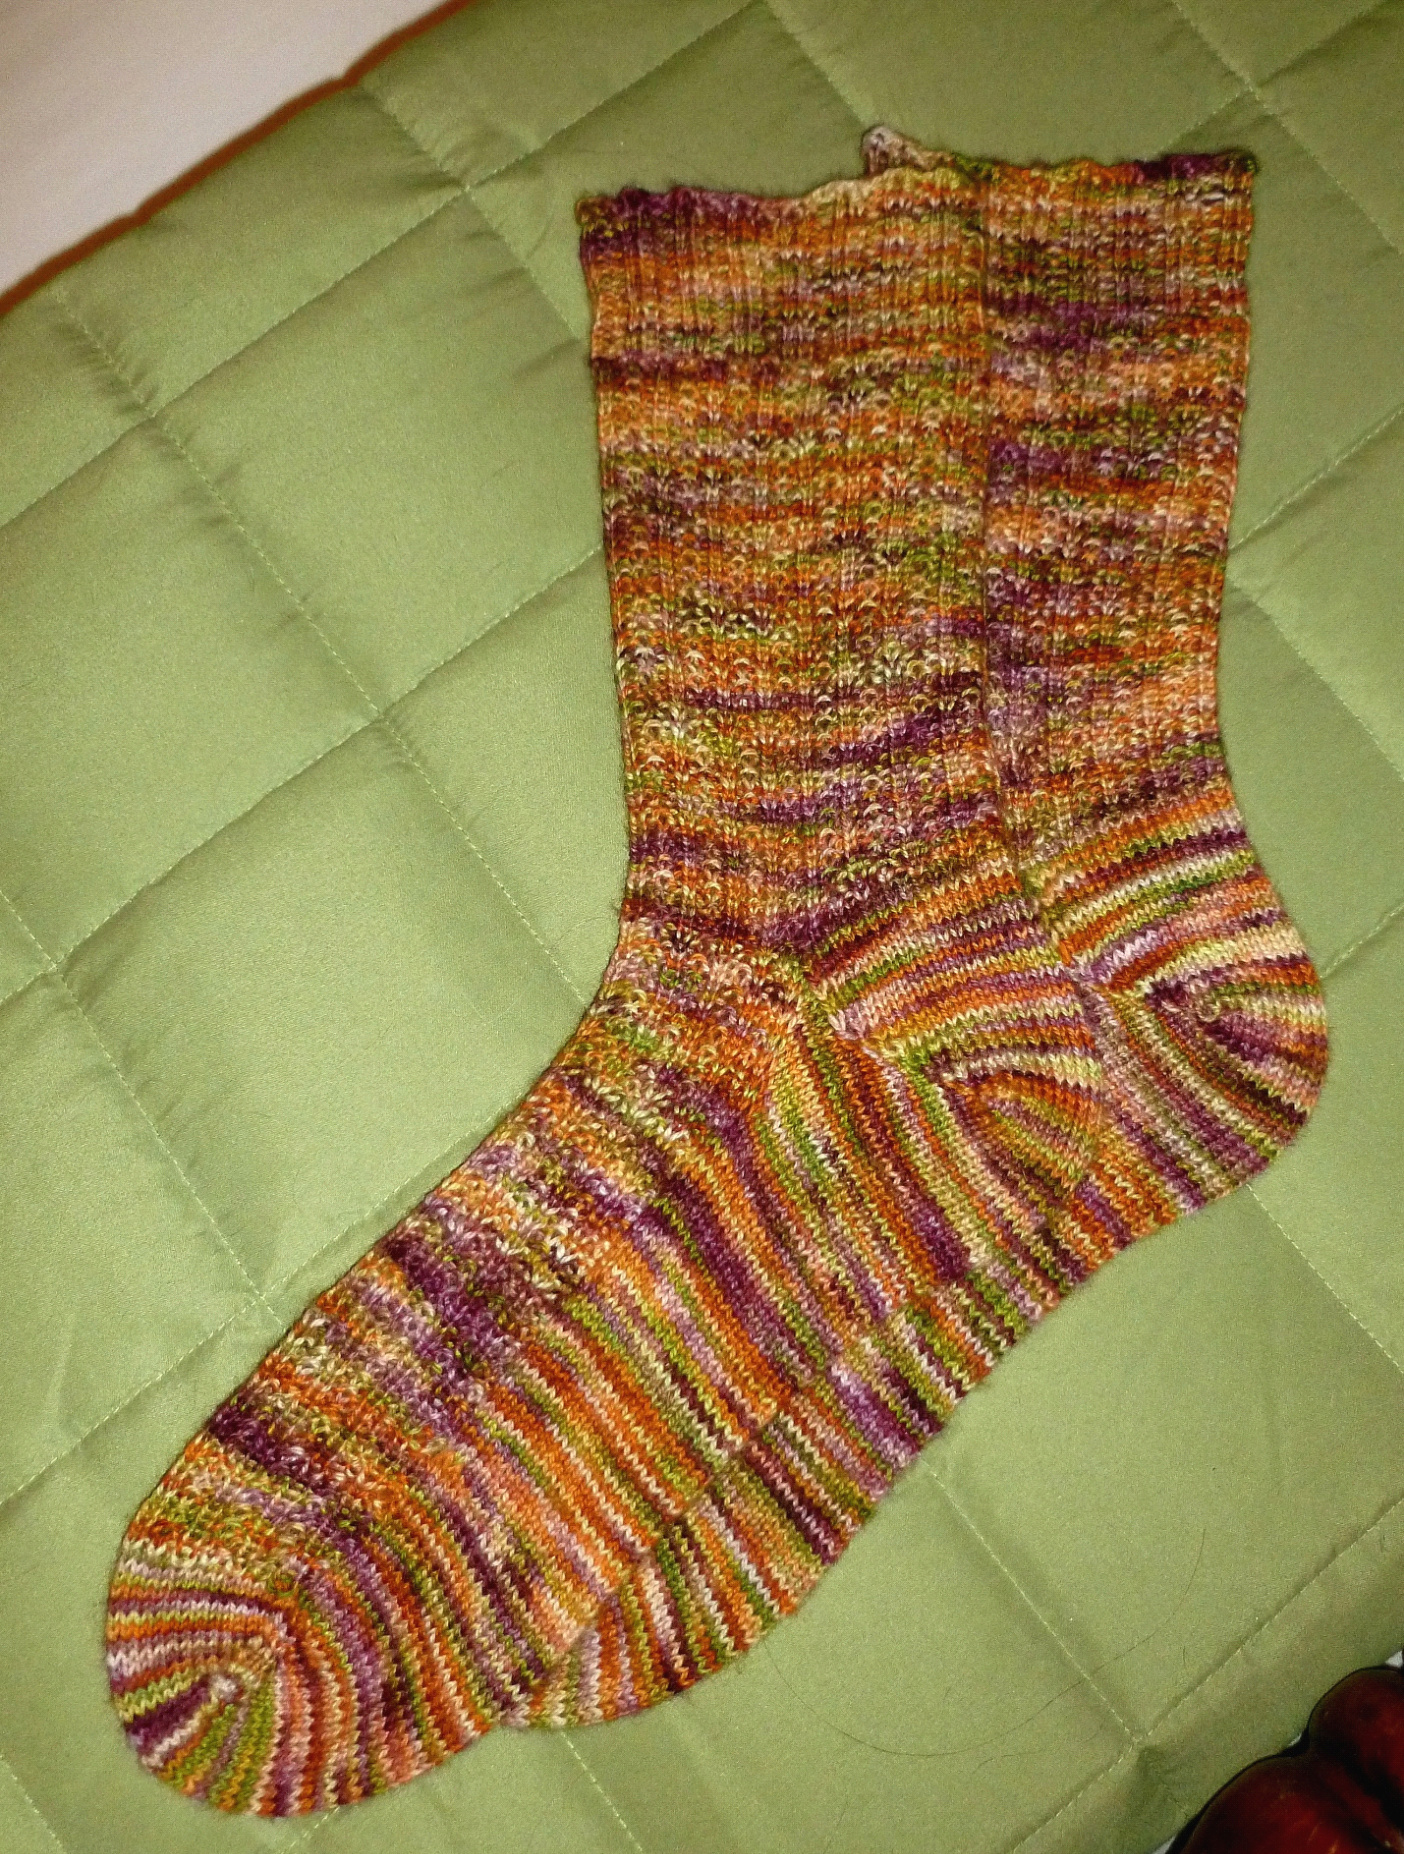
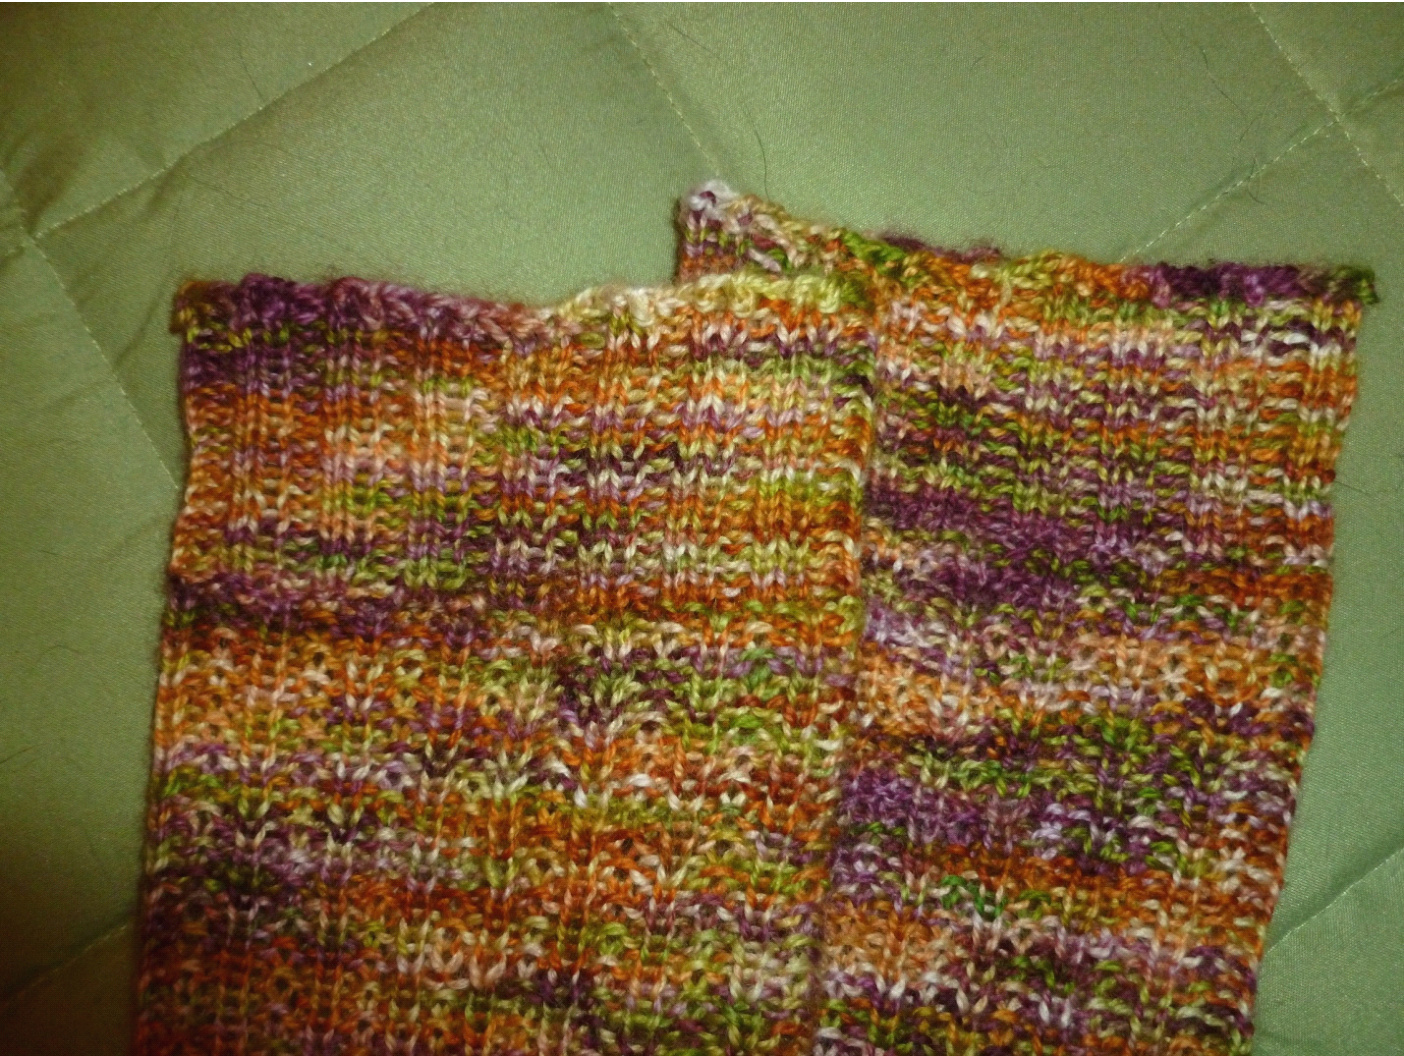
This includes TCO, toe increases to 64 sts and 3 reps of the instep pattern! And here's a closer look at my toe + 3 pattern reps:
Now go CONQUER those toe-ups baybees!! :) And once everyone has caught up to the info in this post, we'll move on to 'step 2: gusset increases"!
TOE-UP MINI KAL PART 2 : MINI GUSSETS!!
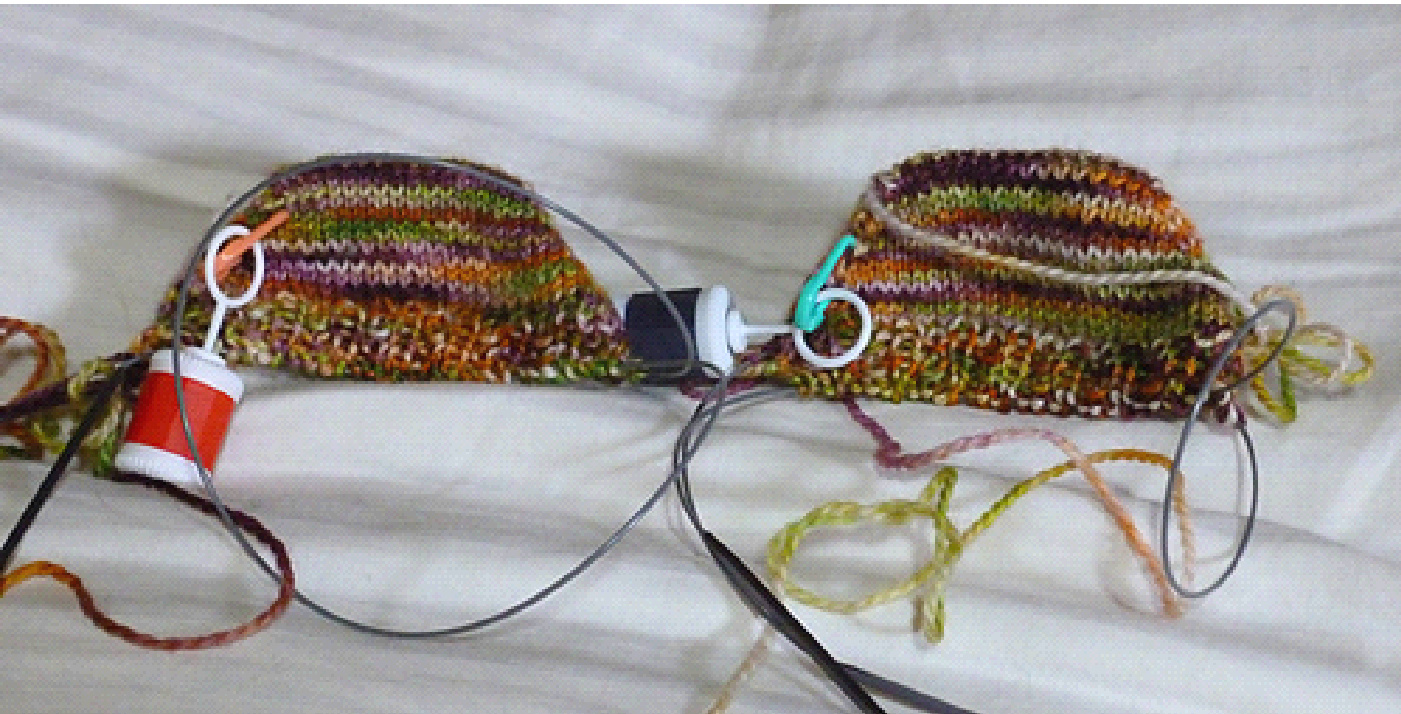
To everyone who's still with me, please forgive my absence BUT know that I was thinking about y'all A LOT and bursting with pride at so many of you who chose to join in and learn something new!! :) Your toes/socks are looking GoOD!! Now remember, I am giving general instructions for a 64 stitch, approx. 8- 8.5 spi gauge, sock yarn sock. Those that are using different numbers/sizes will have to adjust accordingly (and I'll help if you need me) So your "foot" should now be approx. 3 inches less than your total desired foot length. Err on the smaller side because a bit of negative ease is better than a loose fitting sock! Your mini-gussets are going to be about 1 inch so on the SoLE needle you will increase 2 stitches every other round for a total increase of 12 stitches/12 rounds. Round 1: Work across "needle 1" (the instep) in pattern as established. On the SOLE needle, K1, m1, k across until one stitch before the last stitch, m1, K1. Round 2: work all stitches (instep and sole) in pattern as established. Repeat these 2 rounds for 12 increases/12 rounds. You'll be adding little "wings" of stitches to each side of your sole and it should look something like this: (this was VERY hard to capture! hehe - the first six stitches on the needle are the right "wing")
I recommend EVERYoNE using the "one inch/12 rounds" gusset for your first sock. This adds room across the instep and depth to the heel cup providing a much better fit than standard short row heels and 12 rounds seems to be a good, universal fit across a broad range of sizes.
TOE-UP MINI-KAL PART 3: THE SHORT ROW HEEL (DECREASES)!!
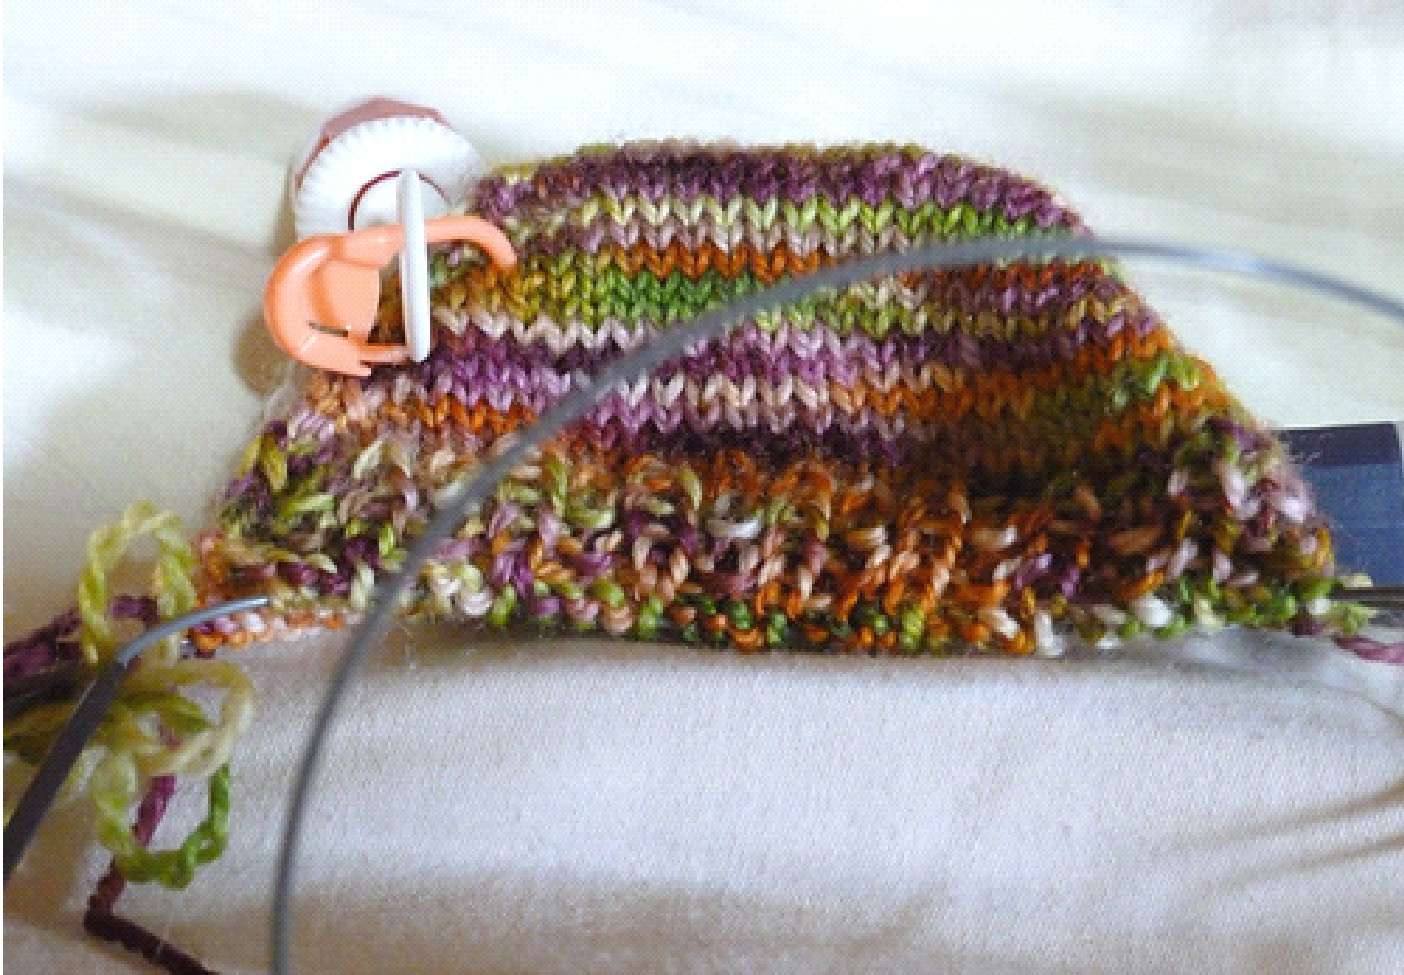
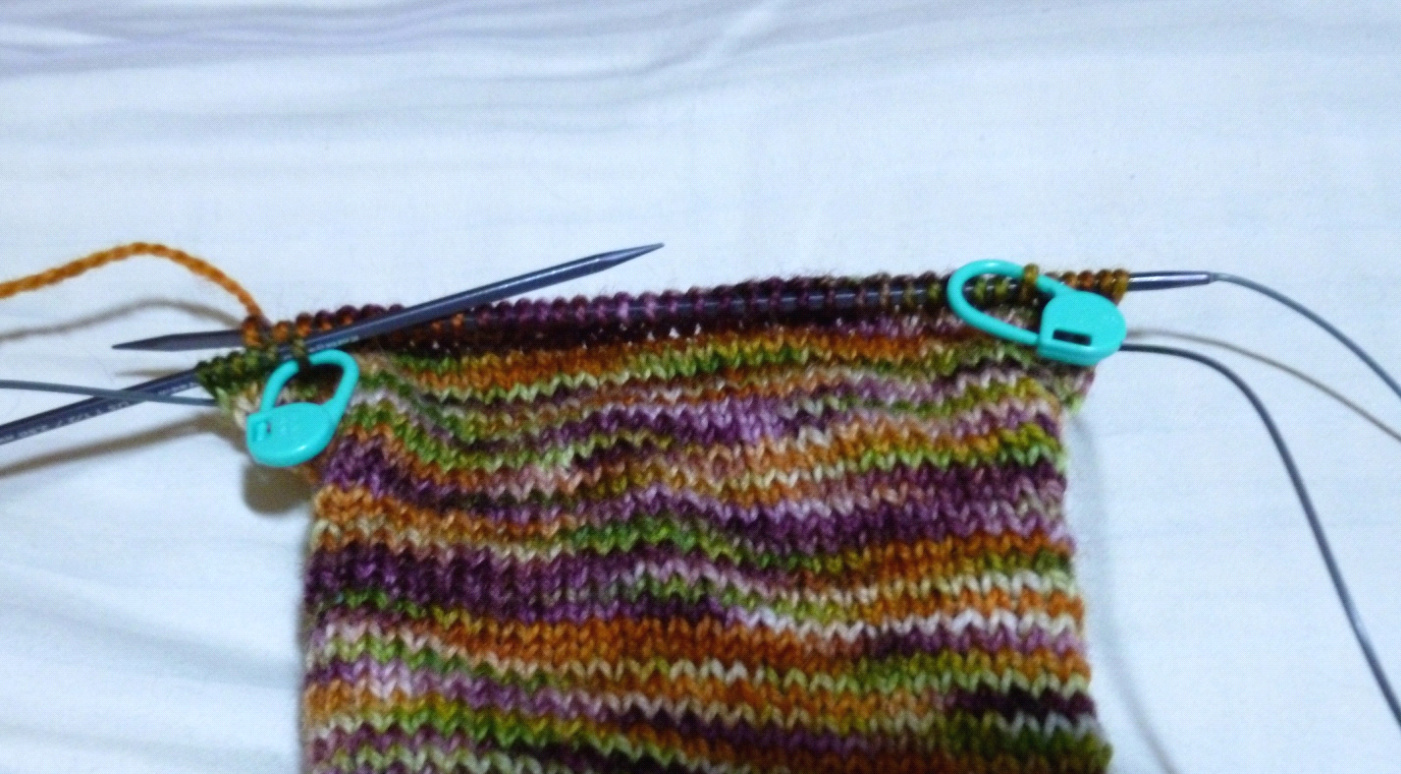
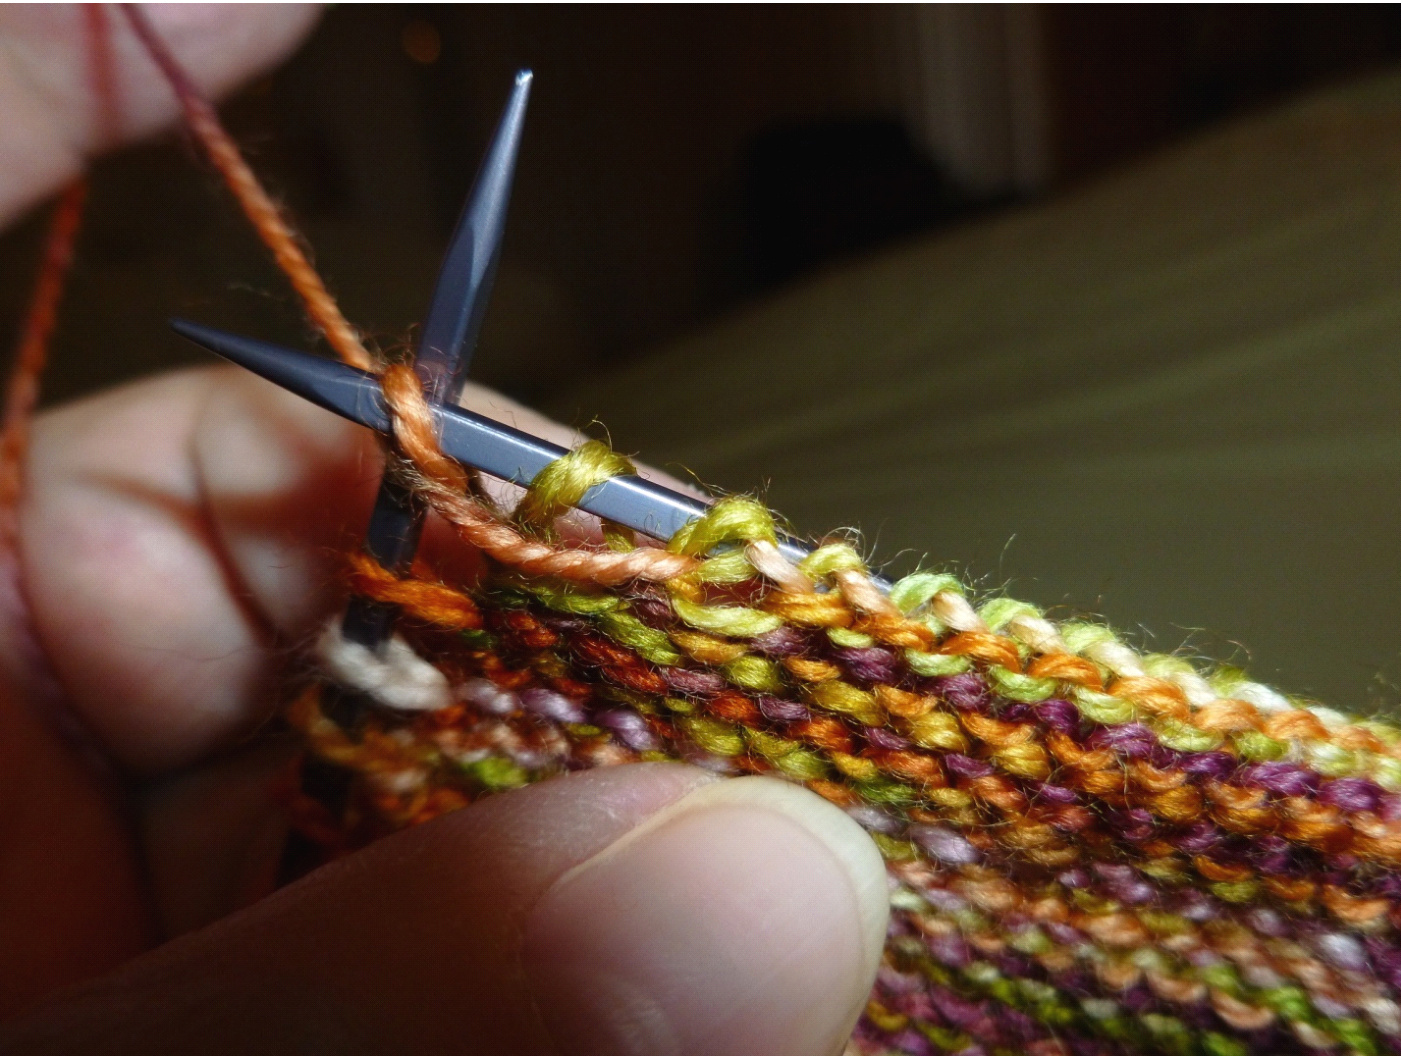
After completing the gussets you should have 12 additional rounds and 6 extra stitches on each side of your sole needle stitches, ready to begin the next round on your instep needle (needle 1). On the next round, work your instep stitches in pattern as established. (needle 1) On your sole needle (needle 2) knit your first 6 stitches and place a REMoVEABLE stitch marker THRU the sixth stitch. Once you have marked the end of your right gusset, knit across needle 2 leaving the last 6 stitches unworked. Place a second REMOVABLE stitch marker THRU the first stitch of your left gusset. This is to mark your gusset stitches which WILL NOT be included in your short row heel decreases and increases! You cannot use a "closed" marker on your needle as it will fall off if it is not THRU a stitch! If you don't have any locking stitch markers, you can use a small bit of different colored yarn slipped thru the stitch to mark each gusset section. Your sole needle (needle 2) should look like this:
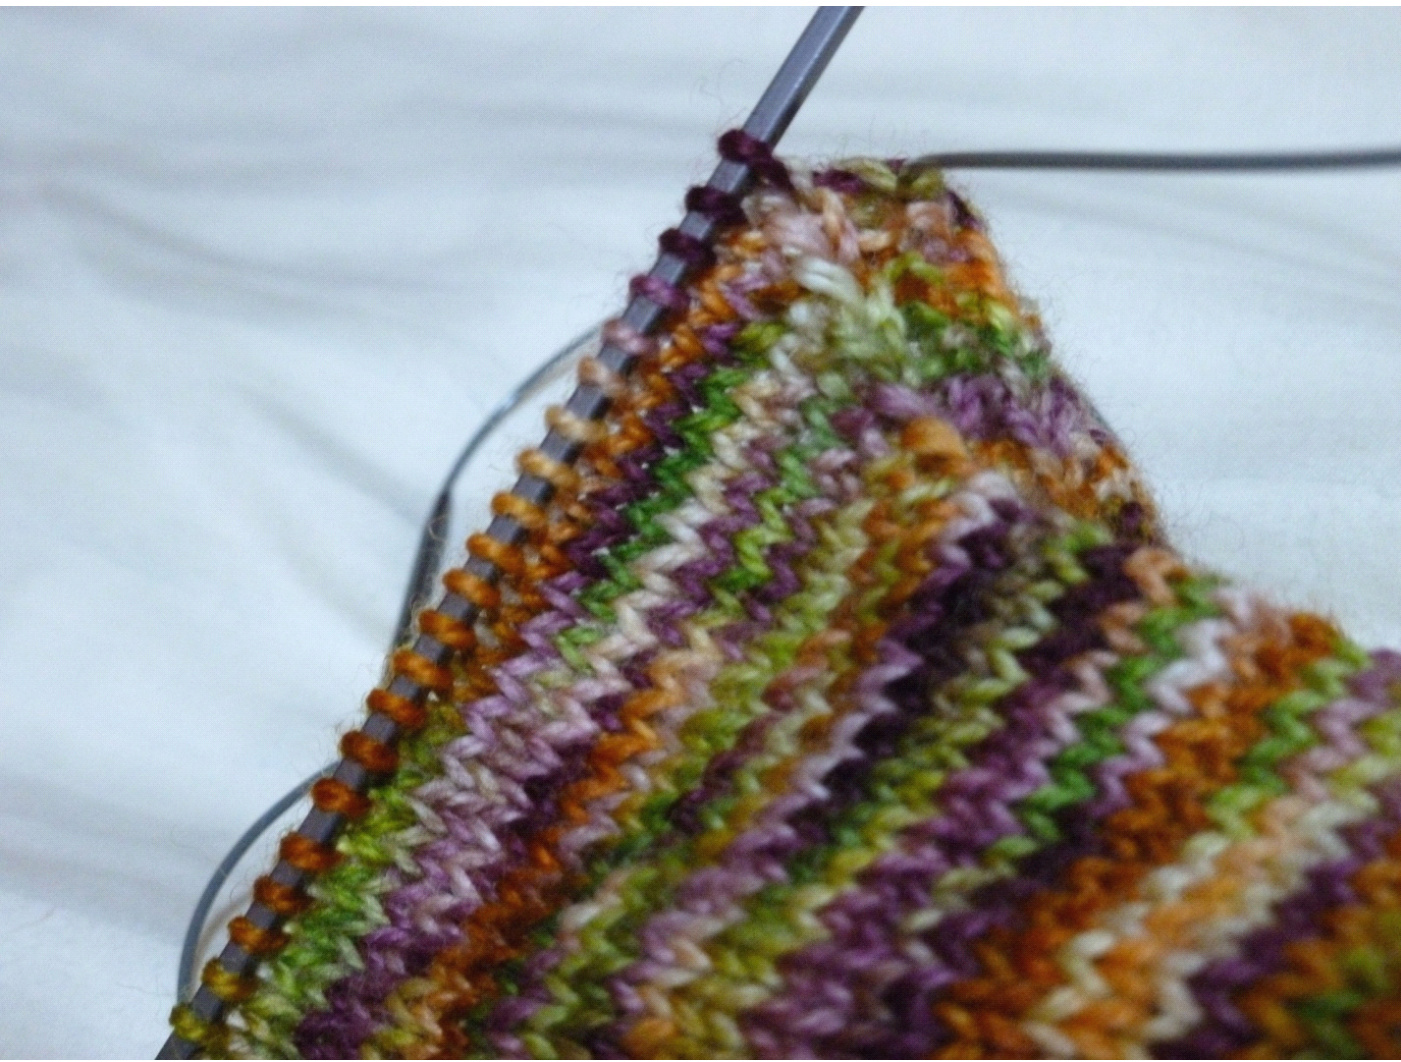
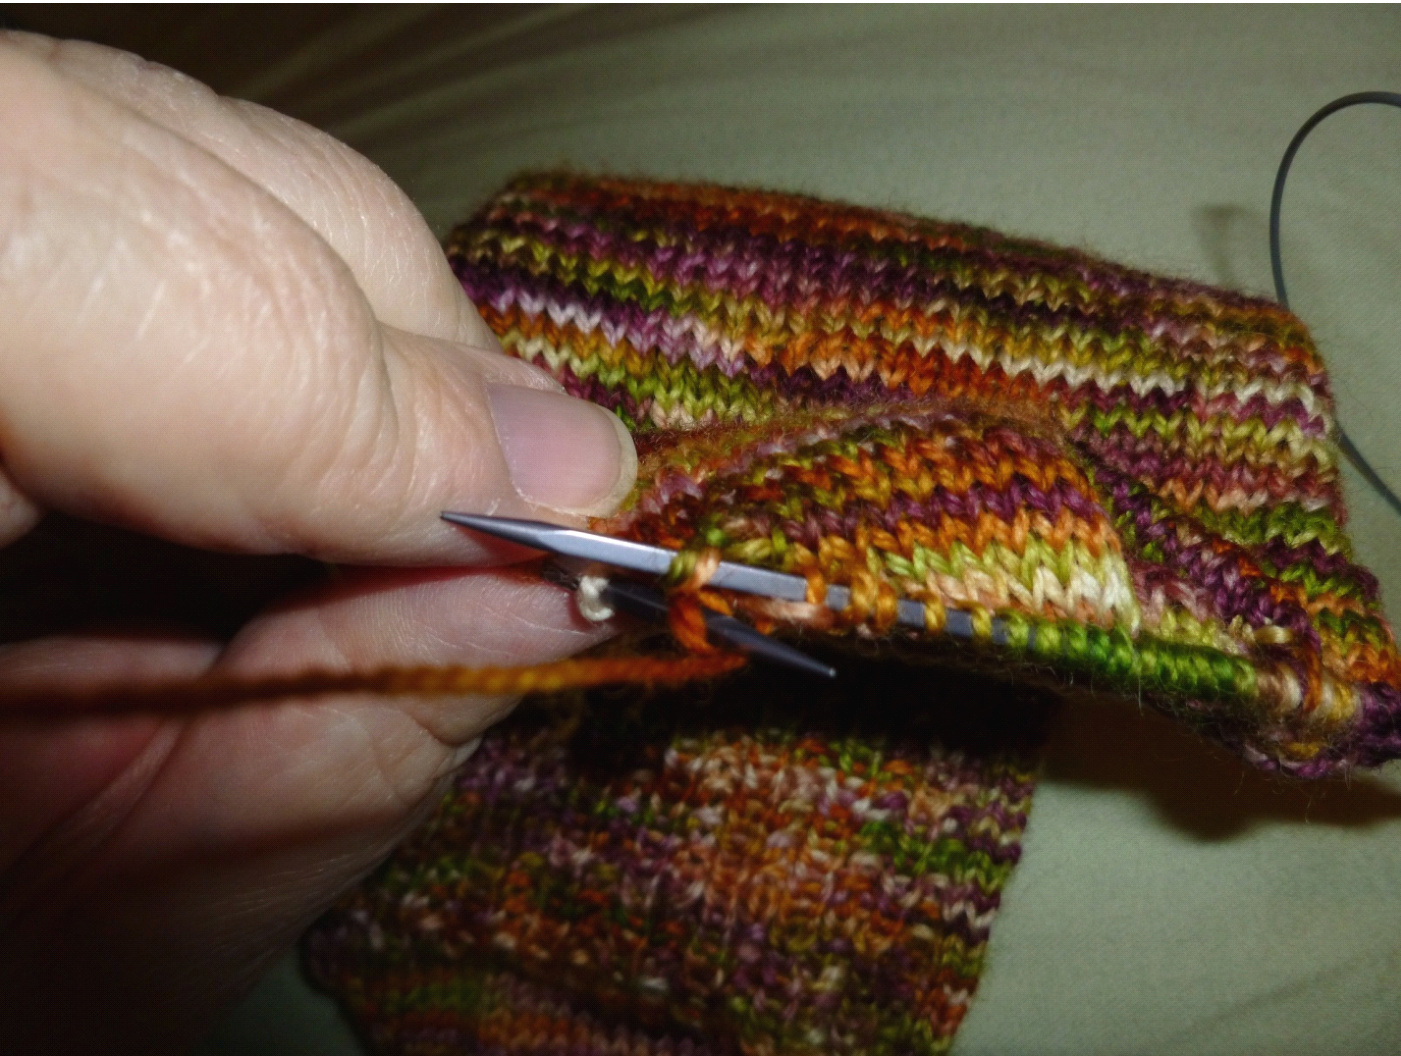
From this point, the heel stitches will be worked back and forth on needle 2. After placing your left stitch marker and the RS still facing you, work your first wrap on the last stitch before the gusset using the tutorial HERE or this tutorial Here's another great tutorial that shows you how to do wraps and short row heels. (or any tutorial/video that works for you!) I prefer this tutorial/method because I feel the "two step" process allows me to tighten up each stitch to better eliminate the dreaded holes! How I wrap my stitches is as follows: on the knit side: slip the stitch to the right needle with the yarn in back, bring the yarn forward, slip the stitch back to the left needle and turn. On the purl side: with the yarn in front, slip the stitch to the right needle, move the yarn to the back, slip the stitch back to the left needle, turn. I've tried it every way possible and basically a wrap is a wrap as long as your yarn is wrapped around the base of your stitch. What makes the difference is How you pick up the wrap Work your first wrap as above and TURN. Purl across to the last stitch before the marker and wrap this stitch, TURN. Continue to work your short row decreases in this manner until you have 15 sts (or about TwO INCHES) left unwrapped in the center of your heel and have 9 wrapped stitches on either side. Your sock should now look like this:
That's it for part 3, part 4 will be coming soon!
TOE-UP KAL PART 4: SHORT ROW INCREASES (PICKING UP THE WRAPS)
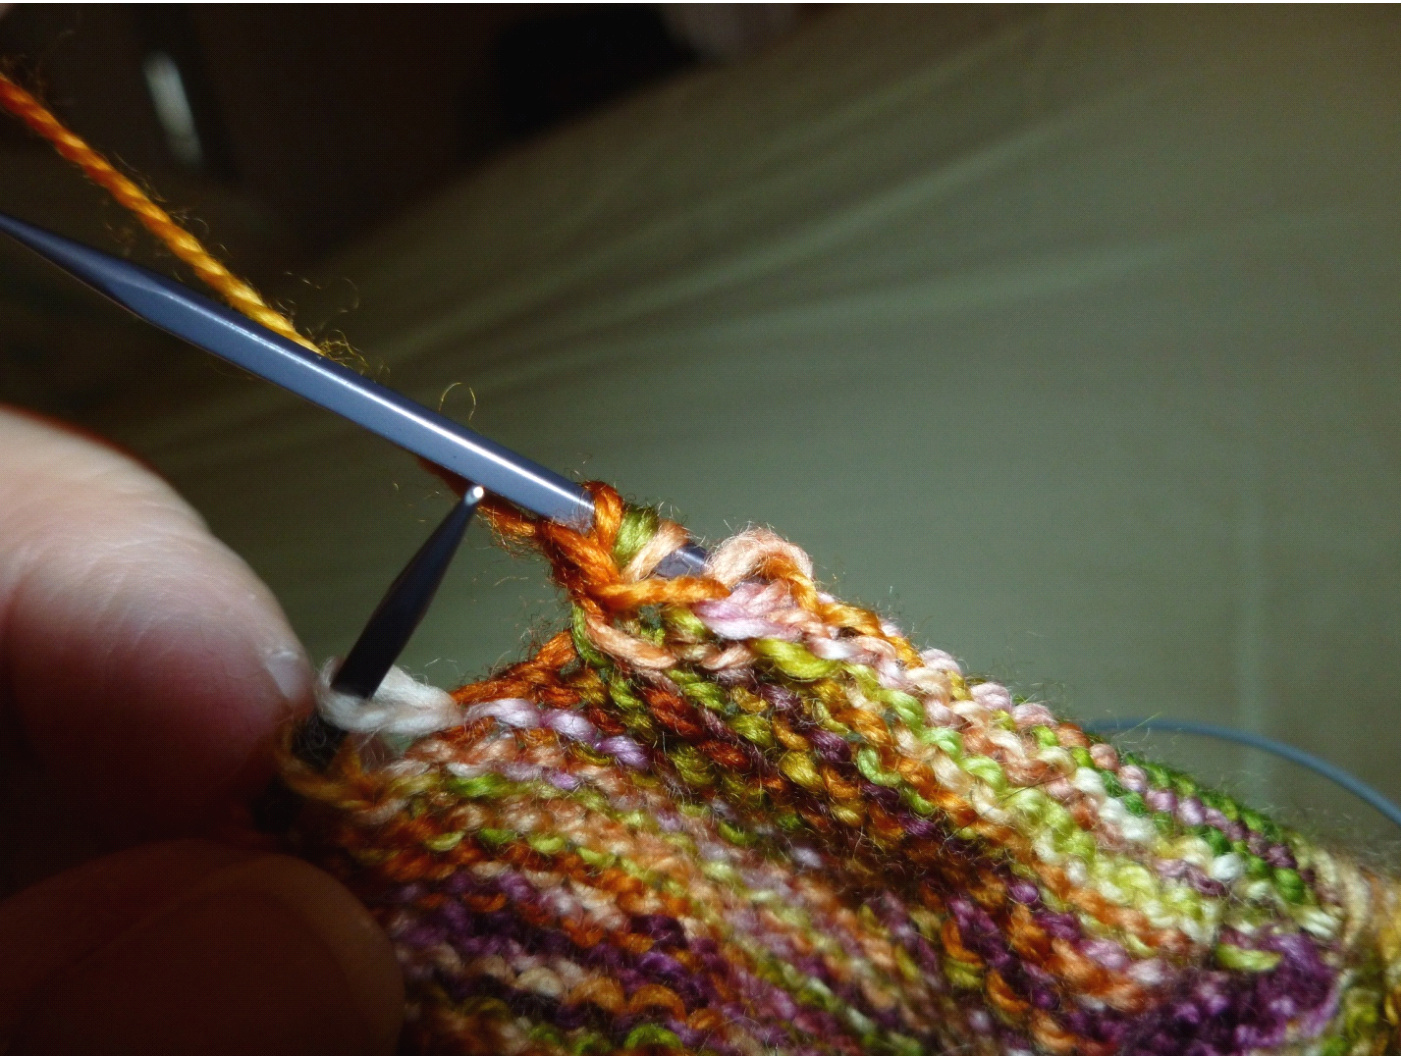
I personally prefer the method mentioned in the Misocrafty tutorial I referenced because after much trial and error I found that the "two step" method allows me to tighten up each stitch a bit more and leaves NO HOLEs!! I do however pick up my stitches by picking up the wrap by inserting my right needle PARALLEL to my left needle and heading into the stitch head on rather than from under the stitch as she does in the tute because I prefer the look of the "diagonal" being visible as it is in store bought socks rather than hidden. Plus I find that extra little "twist" of picking up the stitch with the needles parallel does wonders for tightening up the stitch and further reducing the chance of "holey heels"!! BUT Either way will work - the choice is yours! Here's a pic of how I pic up my wraps on the KNIT side: (the wrap is the left most stitch on the right needle)
Here's a pic of how I pic up my wraps on the PURL side: (again, the wrap is the left most stitch on the right needle being picked up from the back with the yarn in front)
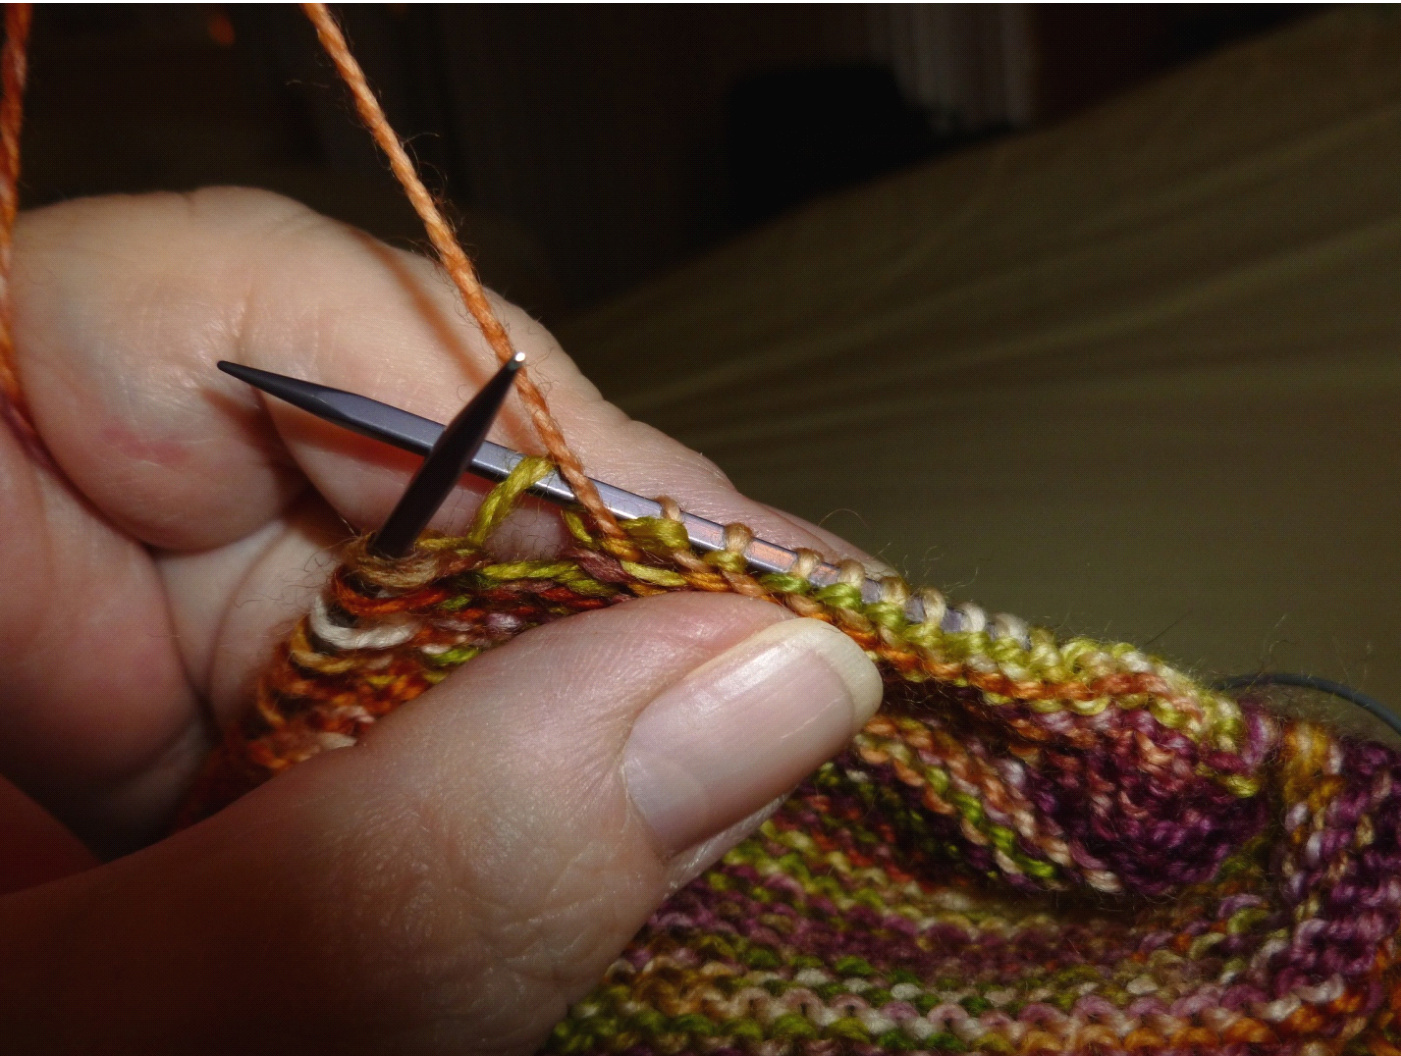
Now for your sock. On the RS (knit) I have the stitch waiting to be knit on my L needle. I pick up the wrap (either single OR double) with my R needle and let the wrap "rest" on the R needle. Then I use the tip of the R needle to knit the stitch on the L needle and move it to the tip of the R needle. Next I pull the wraps over the just knit stitch on the tip of the R needle and that wrap is complete. I then move the yarn behind the very next stitch on the L needle, slip that stitch to the tip of the R needle, pull the yarn to the front and slip the unknit and wrapped stitch back to the L needle and TURN.
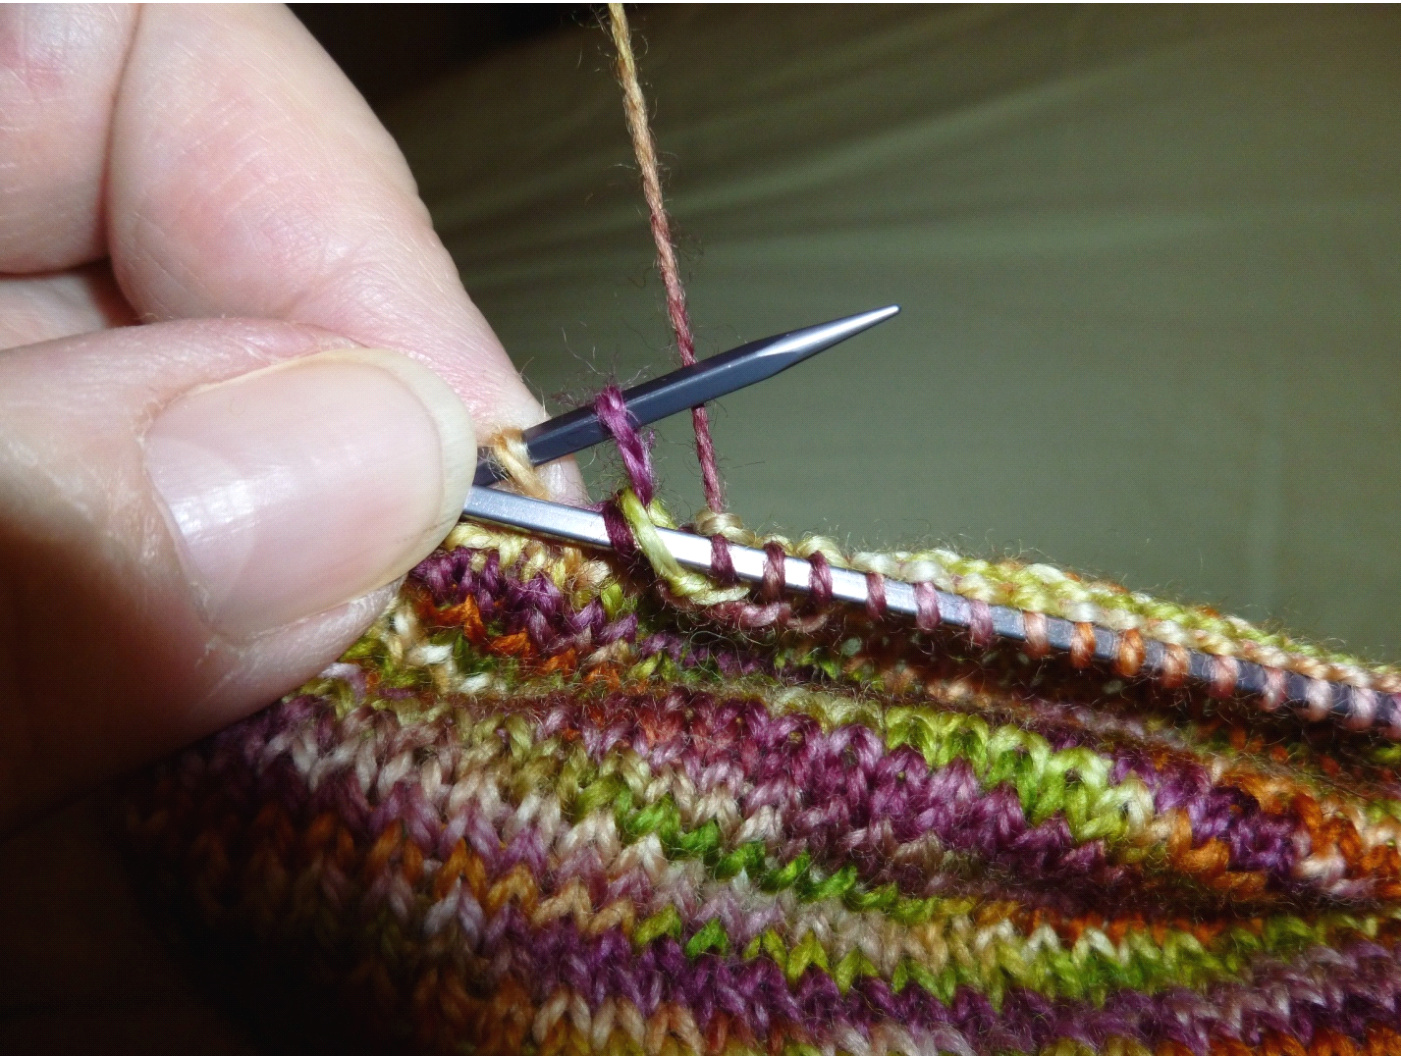
On the WS (purl) I have the stitch waiting to be purled on my L needle. I pick up the wrap (either single OR double) with my R needle and let the wrap "rest" on the R needle. Then I use the tip of the R needle to purl the stitch on the L needle and move it to the tip of the R needle. Next I pull the wraps over the just purled stitch on the tip of the R needle and that wrap is complete. I then move the yarn in front of the very next stitch on the L needle, slip that stitch to the tip of the R needle, pull the yarn to the back and slip the unknit and wrapped stitch back to the L needle and TURN.
Knit across until you reach the first DOUBLE wrapped stitch, pick up BOTH wraps leaving them on the RIGHT needle (as described above), then KNIT the stitch on the L needle, move it to the R needle and then pull BOTH WRAPS OVER the just knit stitch and give the yarn a tug to snug up the stitch. Next wrap the very next stitch on the KNIT side - this stitch will already have one wrap so you will be adding a SECOND wrap, TURN.

Purl across until you reach the first DOUBLE wrapped stitch, pick up BOTH wraps (from the front to the back) leaving them on the RIGHT needle (as described above), then PURL the stitch on the L needle, move it to the R needle and then pull BOTH WRAPS OVER the just purled stitch and give the yarn a tug to snug up the stitch. Next wrap the very next stitch on the PURL side - this stitch will already have one wrap so you will be adding a SECOND Wrap,TURN.
Continue in this manner DOUBLE wrapping each stitch as you INCREASE the heel until all but the last wrap on either side is left. Knit across to the last double wrapped stitch, pick up both wraps leaving them on the left needle BUT this time before knitting the last stitch, "borrow" one stitch from your LEFT MINI GUSSET stitches. Work an SSK with one heel stitch and one mini gusset stitch THEN then pull BOTH WRAPS OVER the SSK, TURN. Slip the first just knit stitch as if to purl then purl across to the last double wrapped stitch, pick up both wraps leaving them on the left needle BUT this time before purling the last stitch, "borrow" one stitch from your RIGHT MINI GUSSET stitches. Work a P2tog with one heel stitch and one mini gusset stitch THEN then pull BOTH WRAPS OVER the P2tog, TURN.
On the RS slip the first stitch as if to purl then knit across to 1 stitch before the gap between the heel and mini-gusset stitches, SSK using one heel and one mini-flap stitch, TURN. On the WS slip the first stitch as if to purl then purl across to 1 stitch before the gap between the heel and mini-gusset stitches, P2tog using one heel and one mini-flap stitch, TURN. Continue in this manner slipping every first stitch until all mini-flap stitches have been absorbed and your mini-flap is complete (12 rows if you are using the 64 stitch numbers!) After working your last p2tog on the WS, turn and on the last RS mini-flap round slip the first stitch and knit across to the last heel stitch. Now you are going to resume knitting in the round! Leaving the last heel stitch on the tip of the HEEL needle, pull your cable thru the heel stitches as if you are ready to knit your INSTEP

With the last heel stitch on the left needle, pick up the FIRST INSTEP stitch and either Knit or Purl these 2 stitches together, whichever your INSTEP pattern calls for! (If you used the pattern that I used, your first stitch will be a purl to continue in the instep pattern as established - Row 1 of the 2 row pattern) Work across your instep keeping in pattern as established, until the last stitch on the instep needle. Move this last instep stitch to the tip of the HEEL needle and PURL it together with the first stitch of the heel (thus keeping in pattern) and move it to the INSTEP needle. You should ONCE AGAIN have 31 stitches on the instep needle.

Knit across heel stitches, increasing 2 stitches evenly spaced to 33 stitches. This will enable you to continue the instep pattern on the heel stitches as you have now completed your short row heel with mini-flap and gusset and are ready to begin to knit your leg and cuff! (if you chose a different pattern than mine, you may or may not have to increase or decrease to add the pattern to the sole/back of the leg portion!) YAY!!! YOU DID IT!! Enjoy! And pat yourself on the back! :) And the end is in sight and PART FIVE will be along shortly! PS - If it's easier to follow my pics IN SUCCESSION with no words in between, here is a link to my Toe Up Kal Photo Album!
TOE UP MINI KAL PART 5: Leg, cuff and stretchy bind off!
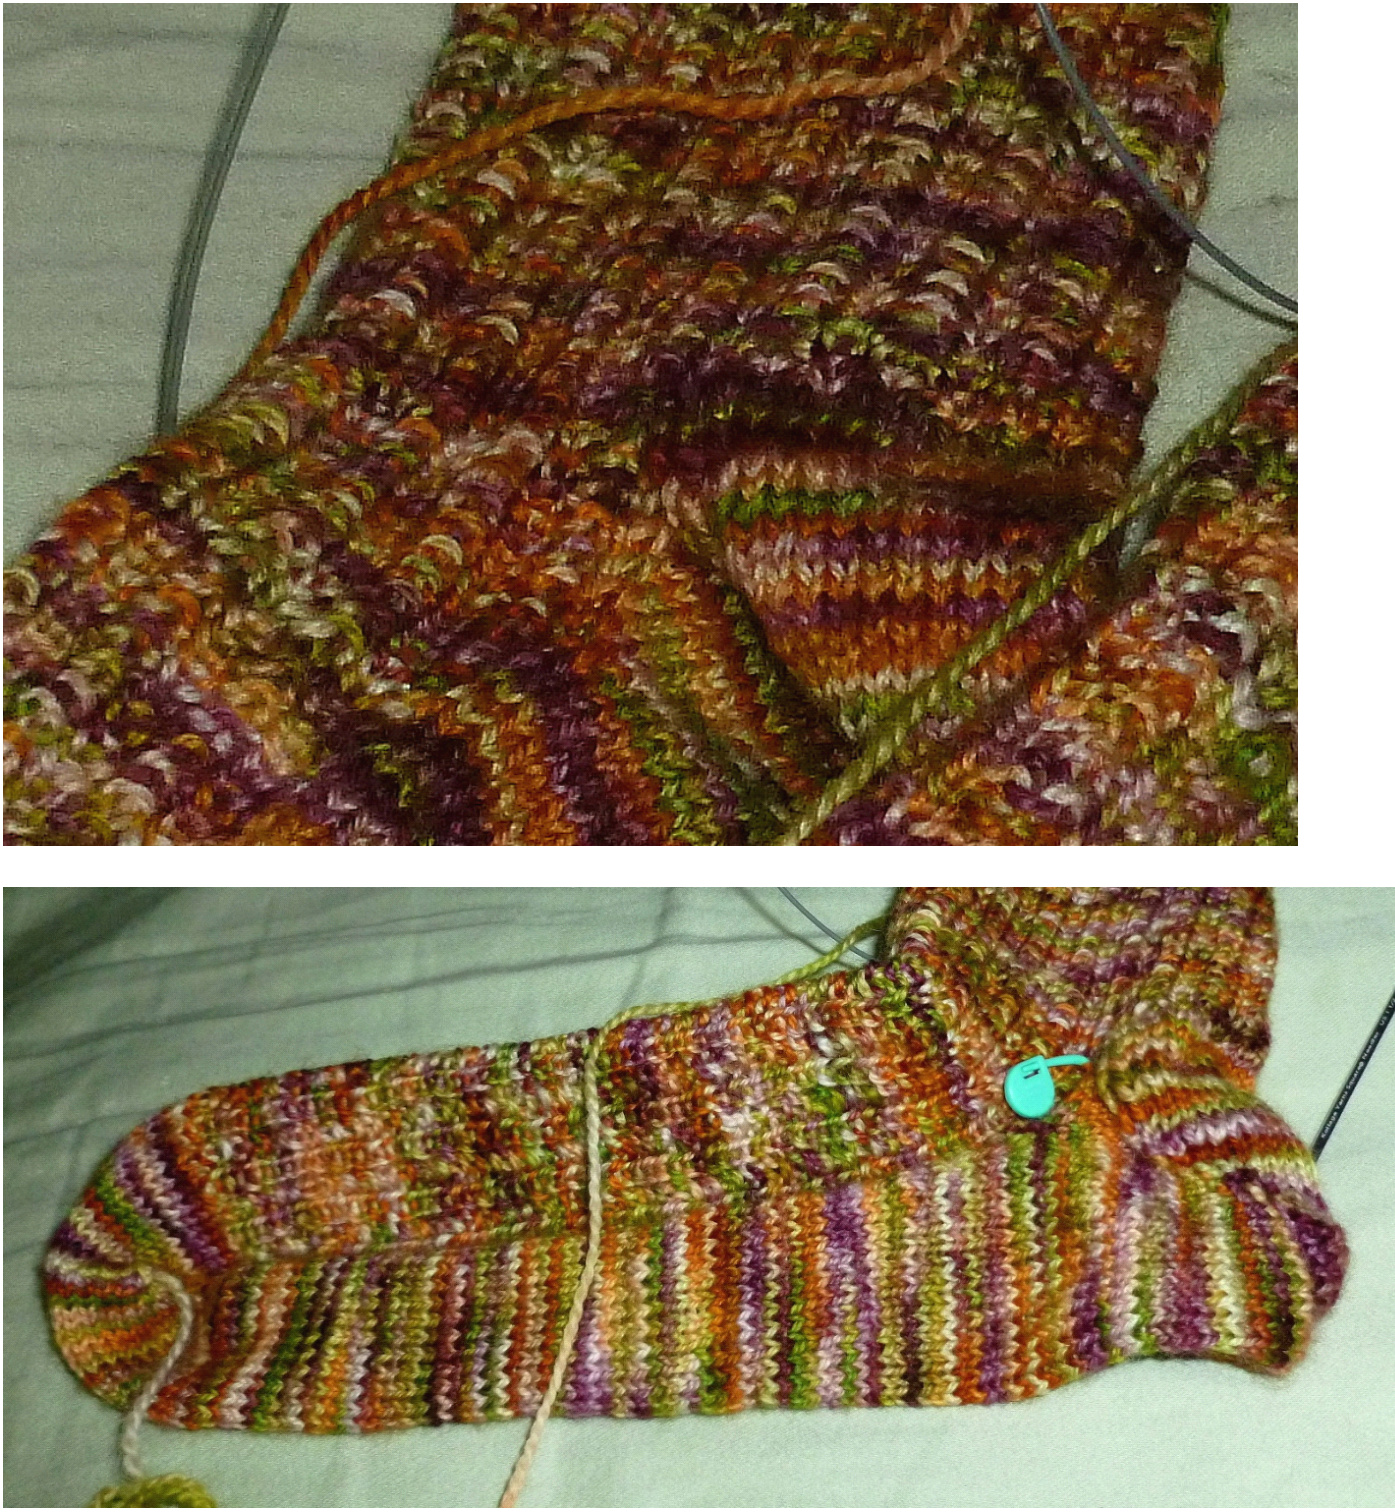
Now that you've rejoined your instep stitches and your heel stitches you can resume knitting in the round. Resume whatever pattern you had established on the instep, continuing it on the back of the leg. Don't forget, you may have had to increase/decrease some stitches in the first round to make the pattern fit your number of stitches. For example I did the 2 row pattern: Round 1 : p3, k1 - repeat from across instep ending with p3 Round 2 : k1, p1 - repeat from across ending with k1 I started with 64 sts BUT when you k2tog/ssk/p2tog at each end of the instep to resume knitting in the round with NO HOLES, you lose 2 stitches. If you are incredibly lucky, your pattern rep would work out perfectly minus those 2 sts but in the real world you KNow murphy's law is gonna kick in! So my instep was centered and both started and ended with a P3 so to begin my pattern on the back of the "leg" I had to start and end with a K1, p3 repeat across to end with p3, k1. To achieve this I had increase 2 stitches across the "heel/back of leg" needle. Here's two pics of my resumption of knitting in the round and my leg with the pattern continuing in the round:
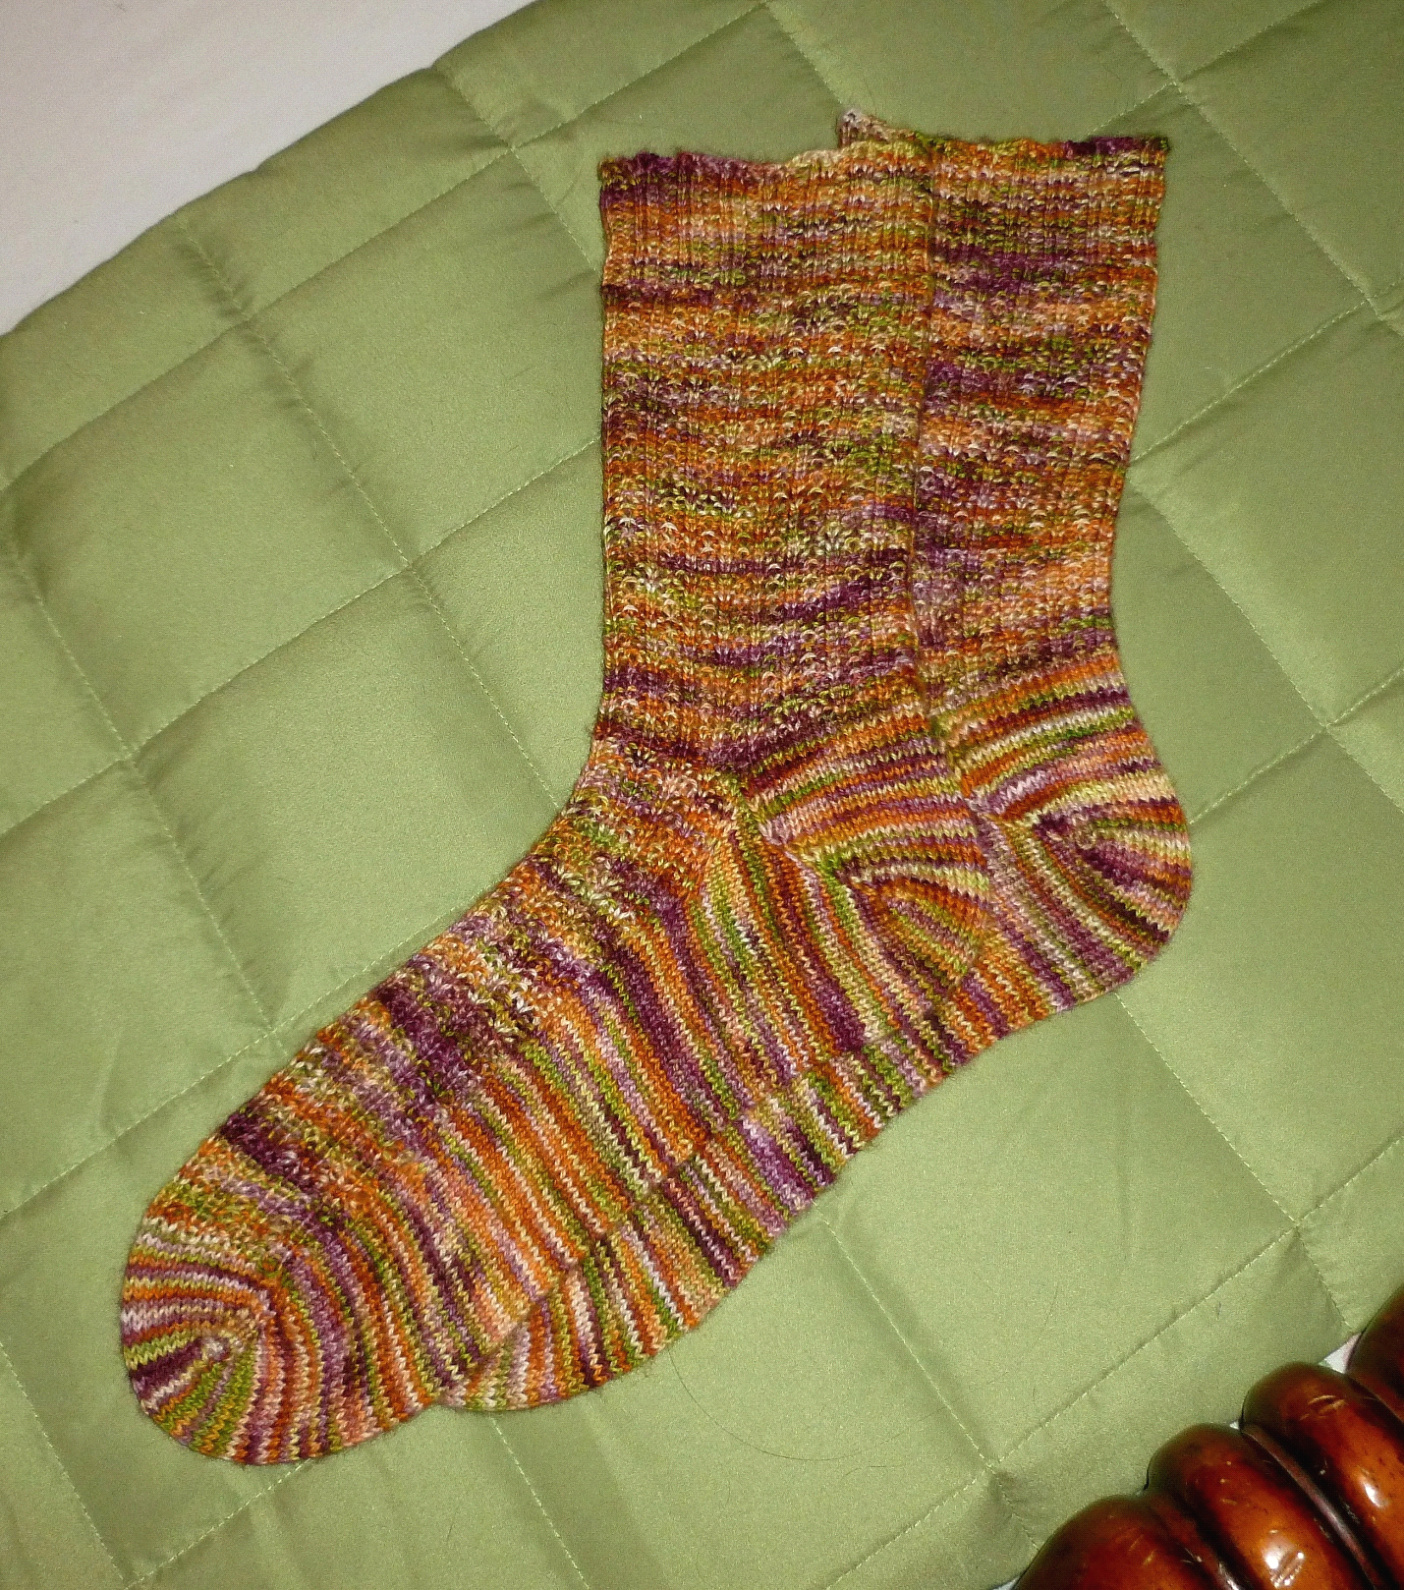
I worked approx. 5 inches in pattern (5 inches above the last row of the miniflap) Here's a pic of my completed leg.
Don't forget if you want a taller leg or have "shapely" ankles/calves you may need to increase more stitches or go up a needle size in the last 1-2 inches so your leg with fit. I then knit 20 rounds of 2x2 ribbing. You can knit the ribbing of your choice and add as many rounds as suit your personal tastes. Here is close up of my leg with my 2x2 rib cuff
Lastly, I used Jenny's Surprisingly Stretchy Bind Off. This is a very simple but effective bind off because it a) is knit in rib so it continues the established pattern b) is very easy to do once you try it!! c)It's extremely stretchy and will accommodate most legs! And d) because it follows the established rib it doesn't get all "stretched out" and "ruffled" looking as some bind offs do! Here's a pic of my sock bound off: (with the resident sock inspector giving his approval)
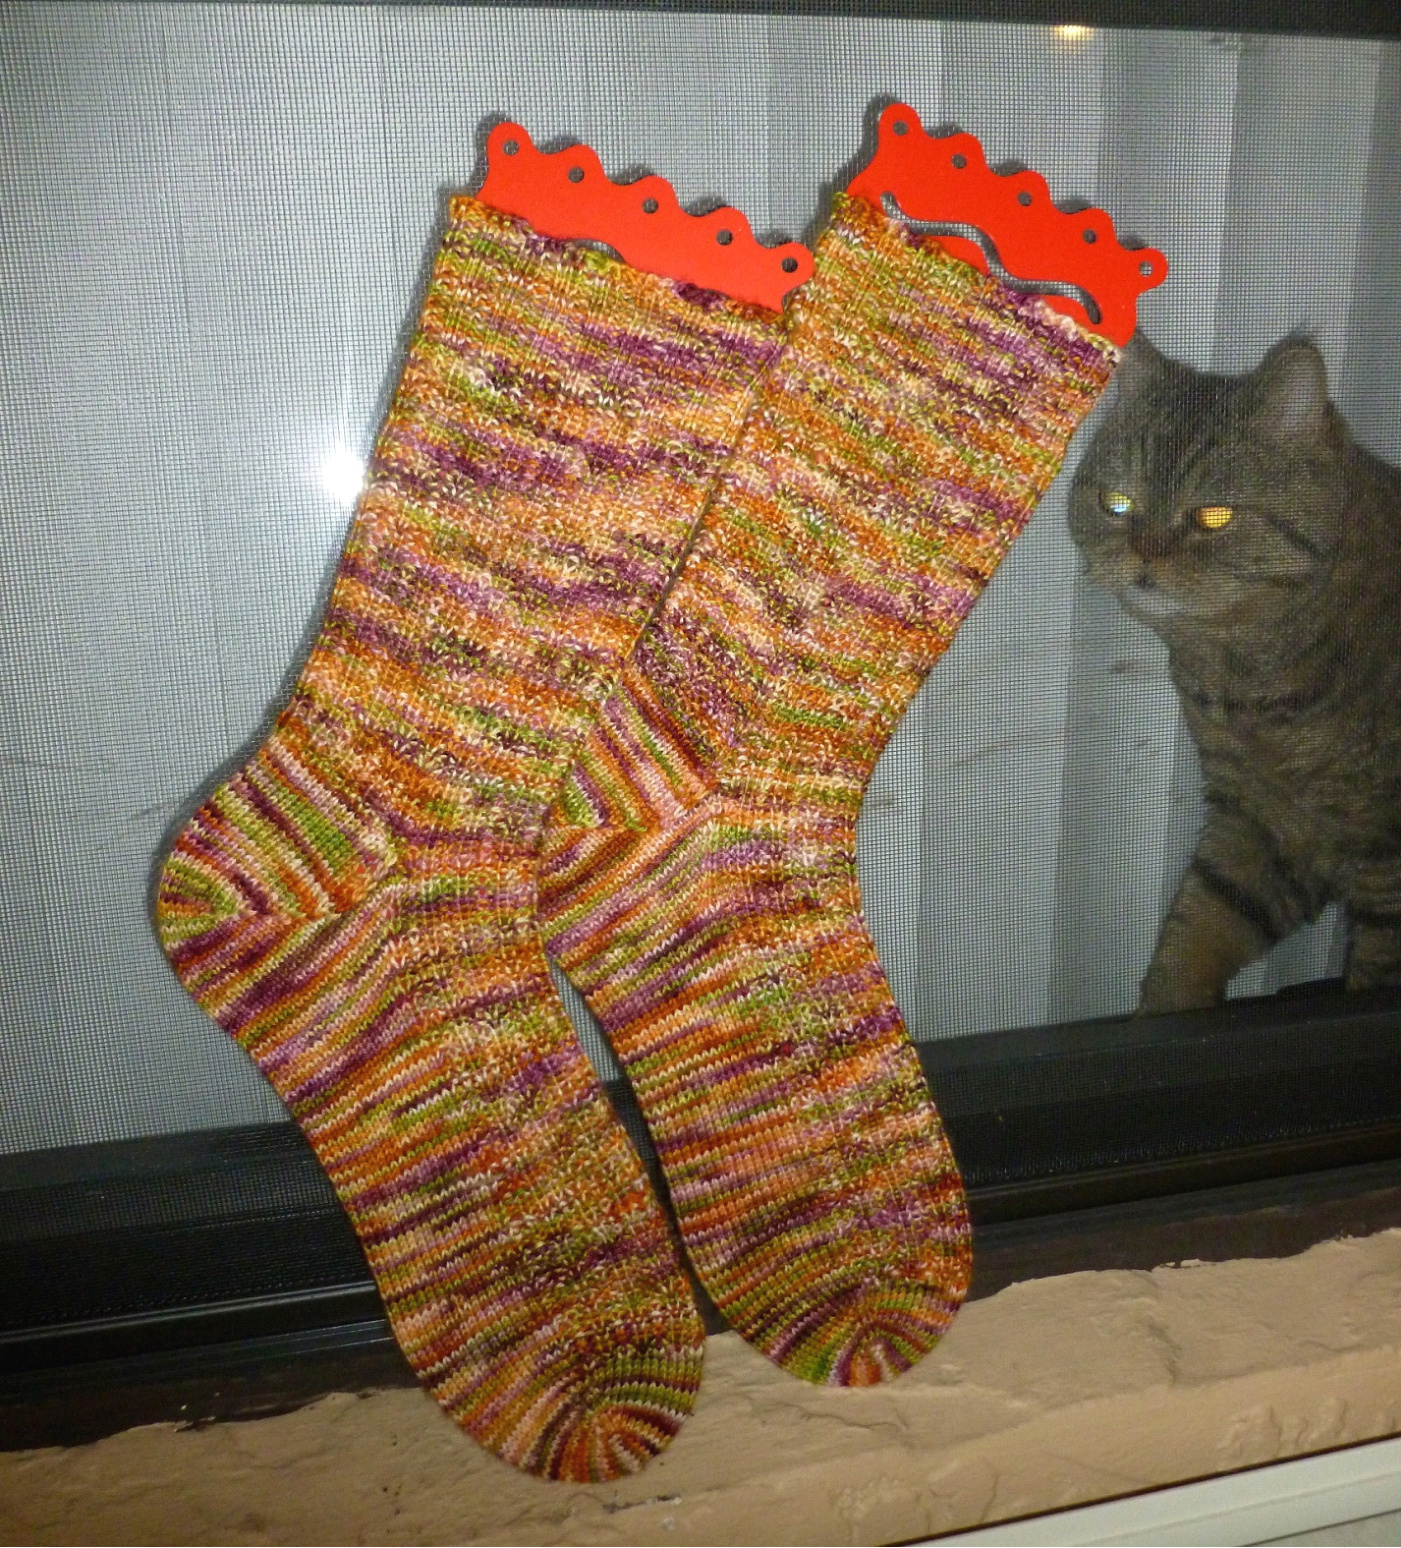
And another pic I snuck in while Sparky was attending to other pertinent cat goings on! :)
Lastly, weave in your loose ends and YOU HAVE YOURSELF A TOE-UP SOCK!!! Now wasn't that easy and painless? Plus you learned a new skill or two in the process...YAY!! Now pat yourselves on the back and enjoy your new TOE UP SOCKS WITH MINI - FLAP AND GUSSET SHORT ROW HEEL!!!


