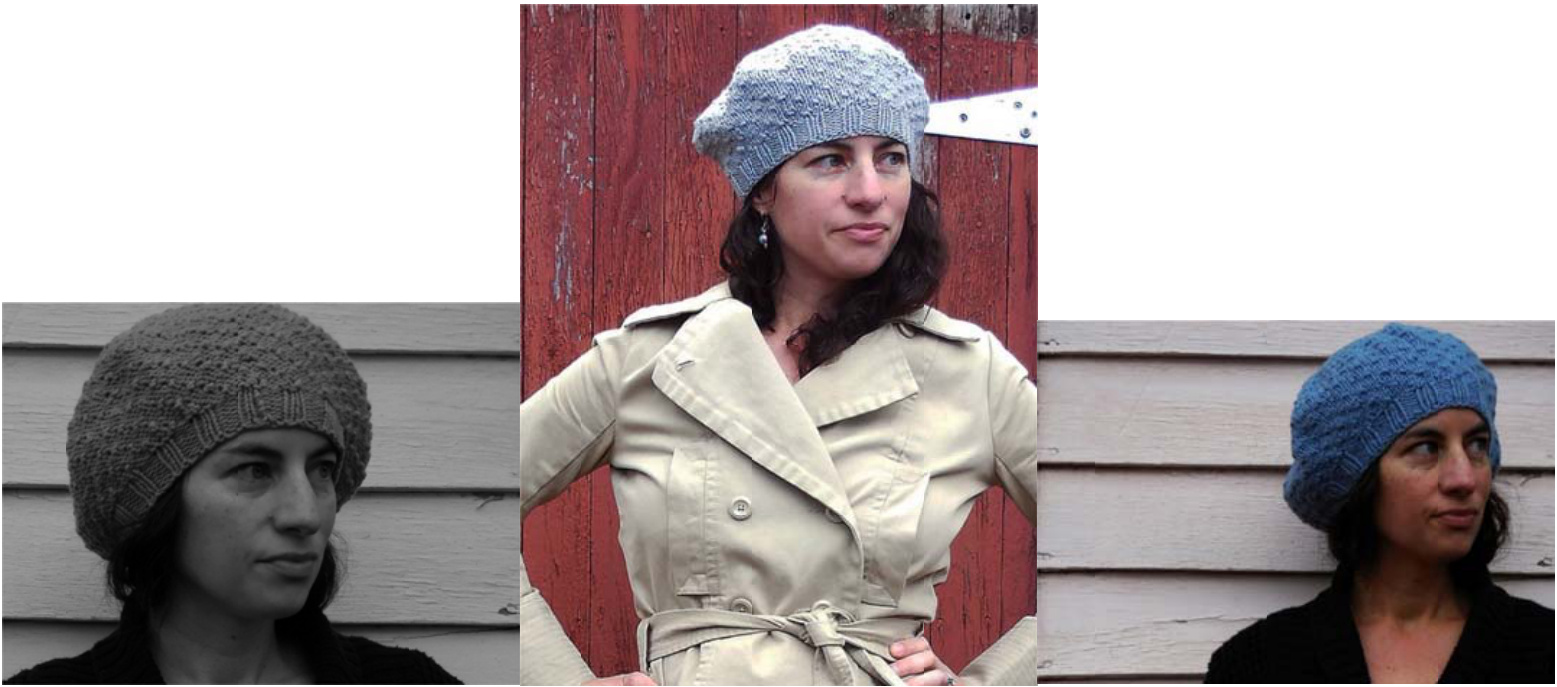
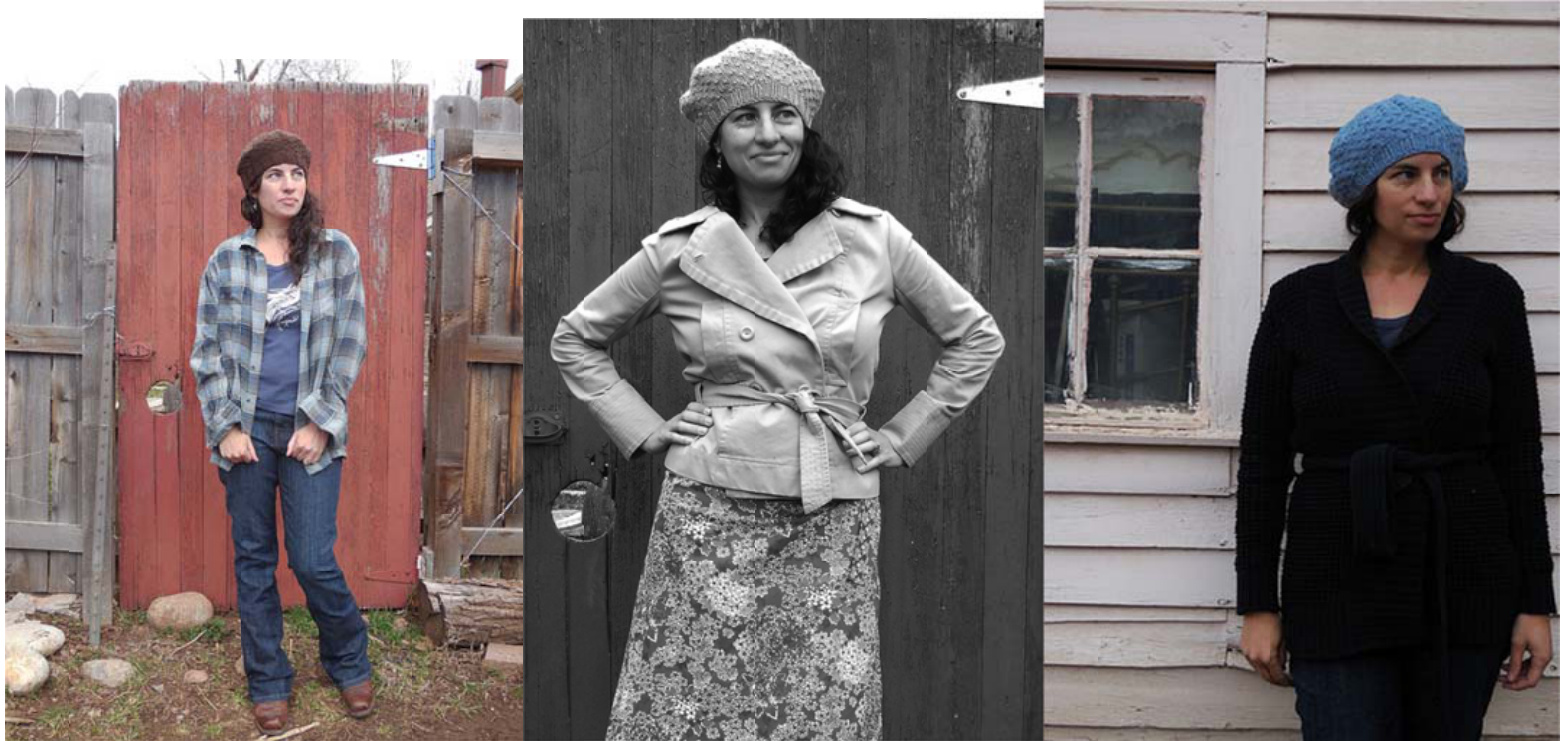
MUD SEASON BERET
By Jennifer Hodgson An adult-sized, textured, reversible beret in three sizes.
Materials:
200 yards of worsted weight yarn (large sample used almost one skein of Vermont Organic Fiber Company O-Wool Classic in Sky Blue, medium sample used most of one skein of Cascade 220 in light grey, small sample used most of one skein of Vermont Organic Fiber Company O-Wool Classic in Chocolate) set of 5 US 8 dpns and Us 8 small circular 6 stitch markers darning needle scissors Glossary: k:knit p: purl st: stitch ml: increase one stitch by inserting tip of left needle from front to back in the horizontal bar between the two stitches, then knit that stitch through the back of the loop k2tog: knit two together ssk: slip two stitches in a row knitwise then knit them together through the back of the loop sm: slip marker Gauge: 4 stitches/6 rows per inch in Rain Drop Stitch pattern in the round on US 8 dpns
Sizes: S(M,L)
"Rain Drop Stitch" pattern adapted from Barbara Walker's A Treasury of Knitting Patterns (multiple of 4 stitches): Rounds 1 and 3: knit Round 2: \*k into first stitch in the row below, keeping the original stitch on needle; then sl the new st on to left needle and knit it again; then knit the original st and pass the new st over it; k3; rep from \* Round 4: k2,\*rep from \* of row 2 to last 2 stitches; form one more raindrop and then k1 Directions: Using a stretchy cast-on method (like "old Norwegian) and US8 dpns or small circular, cast on 72 stitches and join, being careful not to twist stitches. Place marker at beginning of round. If using dpns, distribute stitches evenly on 4 needles.K2 P2 rib to end of round.Continue in K2 P2 ribbing for 1.5 inches.
Increase Round:
For small beret: \*k6,ml\* repeat from \* to end of round (84 stitches) For medium beret: \*k3,ml\* repeat from \* to end of round (96 stitches) For large beret: \*k2,ml\* repeat from \* to end of round (108 stitches) Next round: begin with round 2 of "Rain Drop Stitch." Continue in pattern for 5(5.5,5.5) more inches, ending with a round 2 or 4。
Begin decreases for crown:
Starting with the marker at the beginning of the round, space 6 markers evenly with 12(l6,18) stitches between markers. Continuing in "Rain Drop Stitch" pattern, decrease every other round (see note below) as follows: \*K2tog, work to 2 sts before m, ssk, sm; rep from\* (l2 sts decreased per round) until you have 12 stitches left.
\*\* Important Note on decreasing in pattern\*\*
The decrease rounds should occur on the plain "knit" rounds, while every other round you will be making the "raindrops" but no decreases. I find it helpful to stop counting between the "raindrops" at this point and look to the rows below instead to help me determine placement of the slanted stitches, as this ensures the visual continuity of the pattern. Also, if there is a decrease in the row below the raindrop I am about to knit, I eliminate that raindrop and just knit the stitch instead. This helps the pattern to look a little less "muddy" around the decreases.
Finishing:
On the last round K2tog to end of round. Cut yarn leaving a 6 inch tail and thread through remaining 6 stitches with a darning needle. Pull tight. Weave in ends (carefully if you want a reversible hat) and block to the size you would like. Wear it while jumping in mud puddles to restore your sense of joy, even in the middle of mud season!