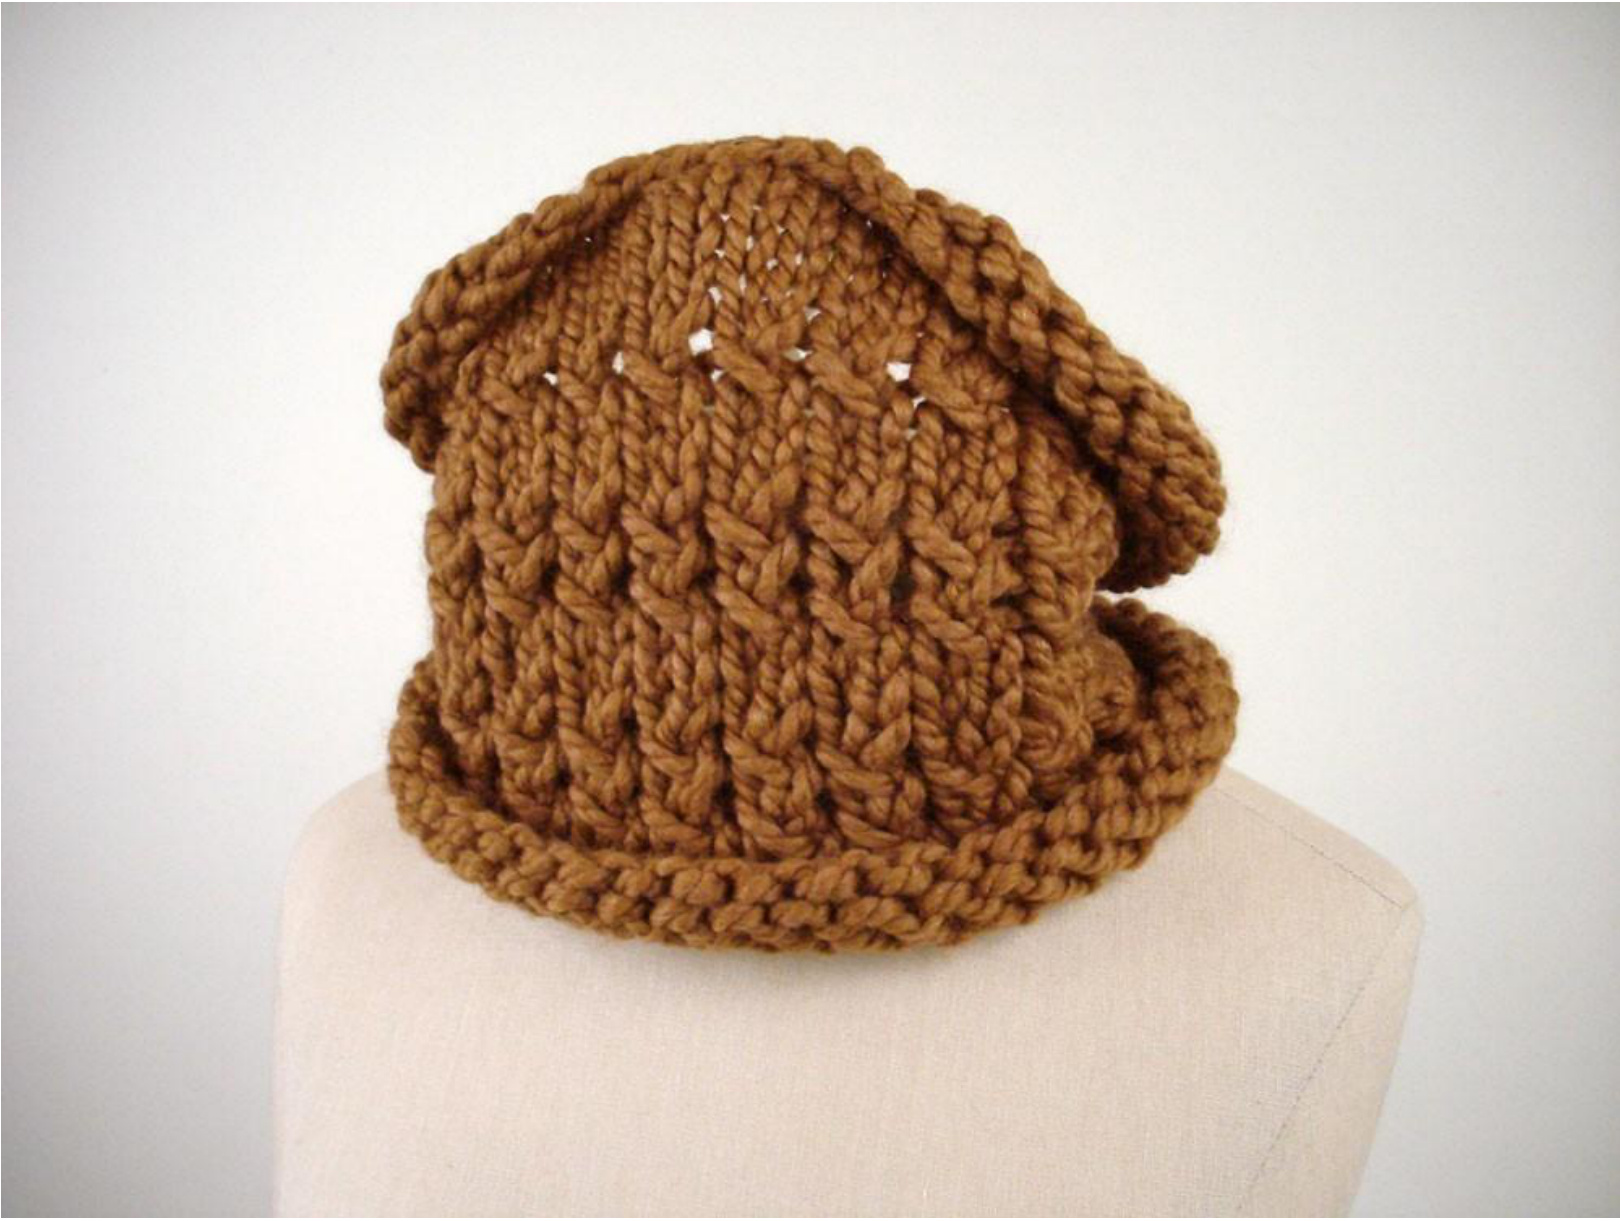
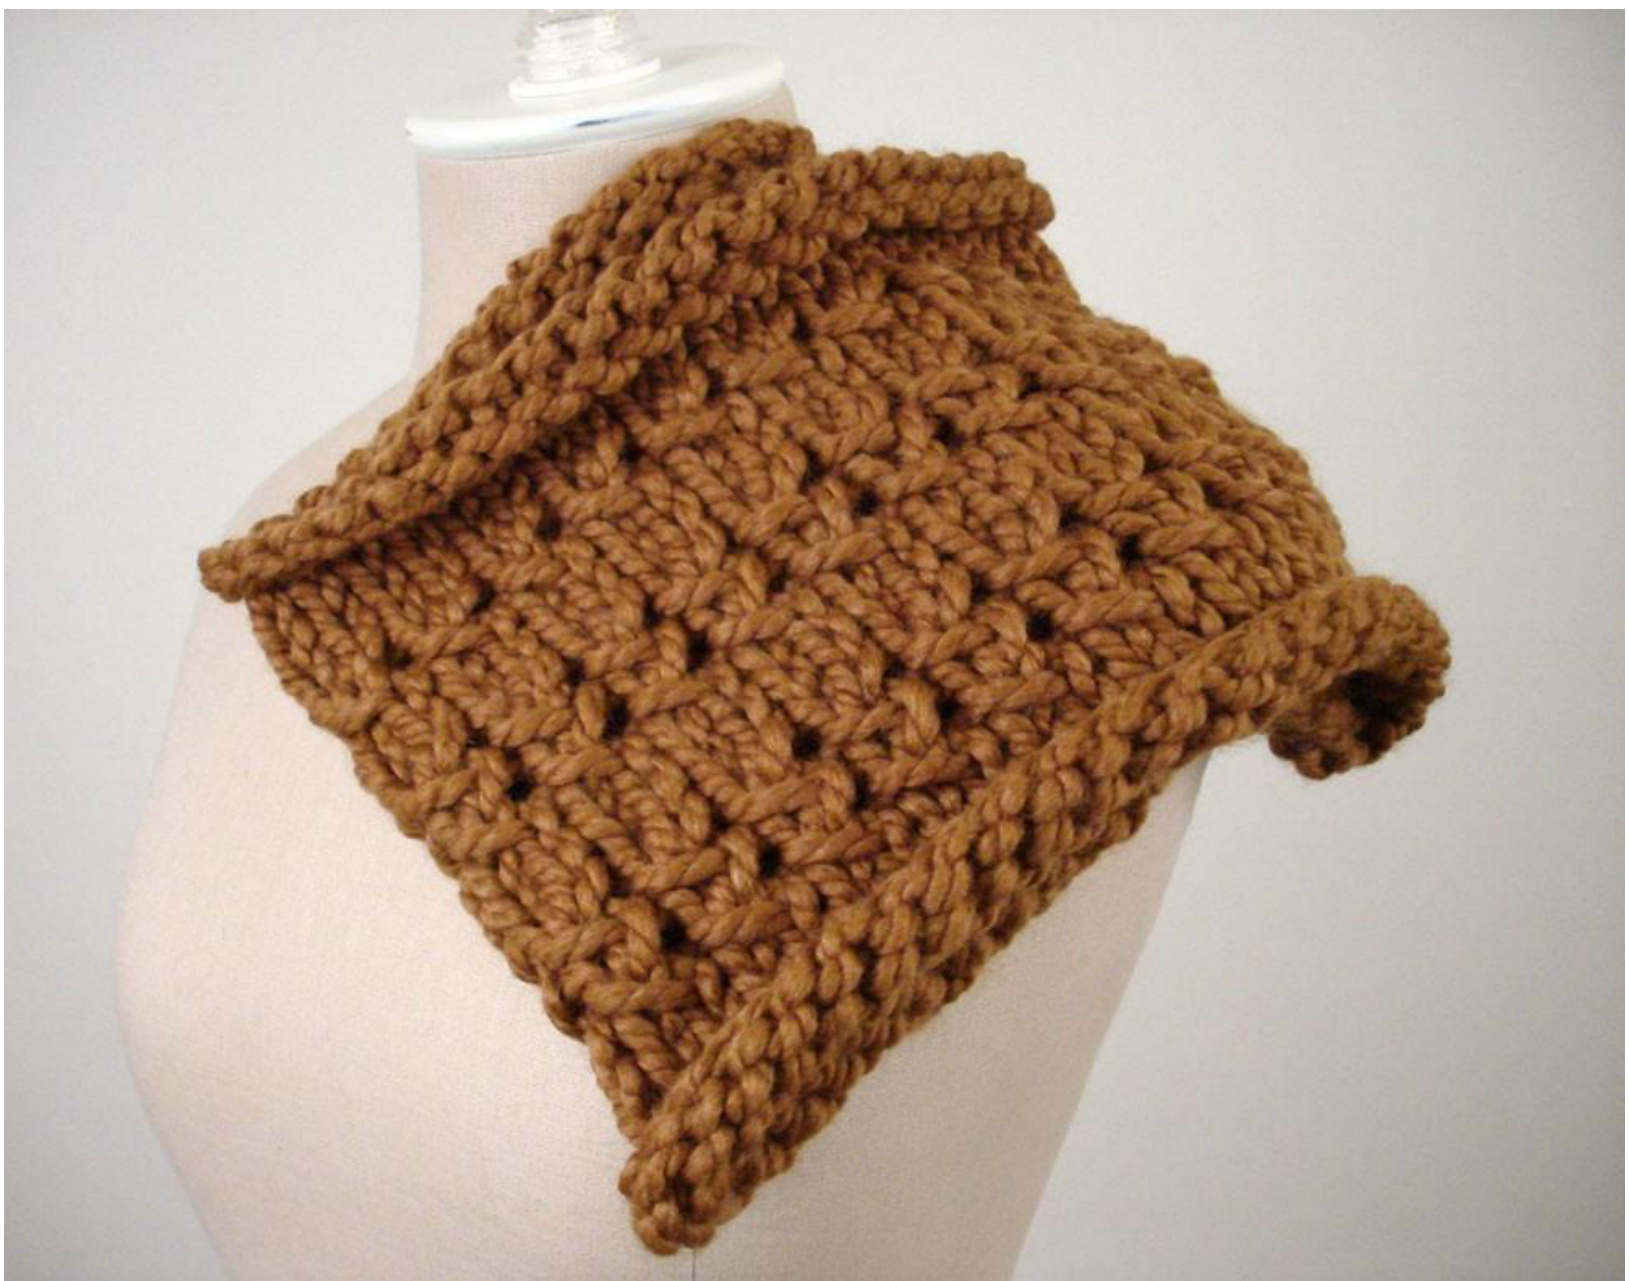
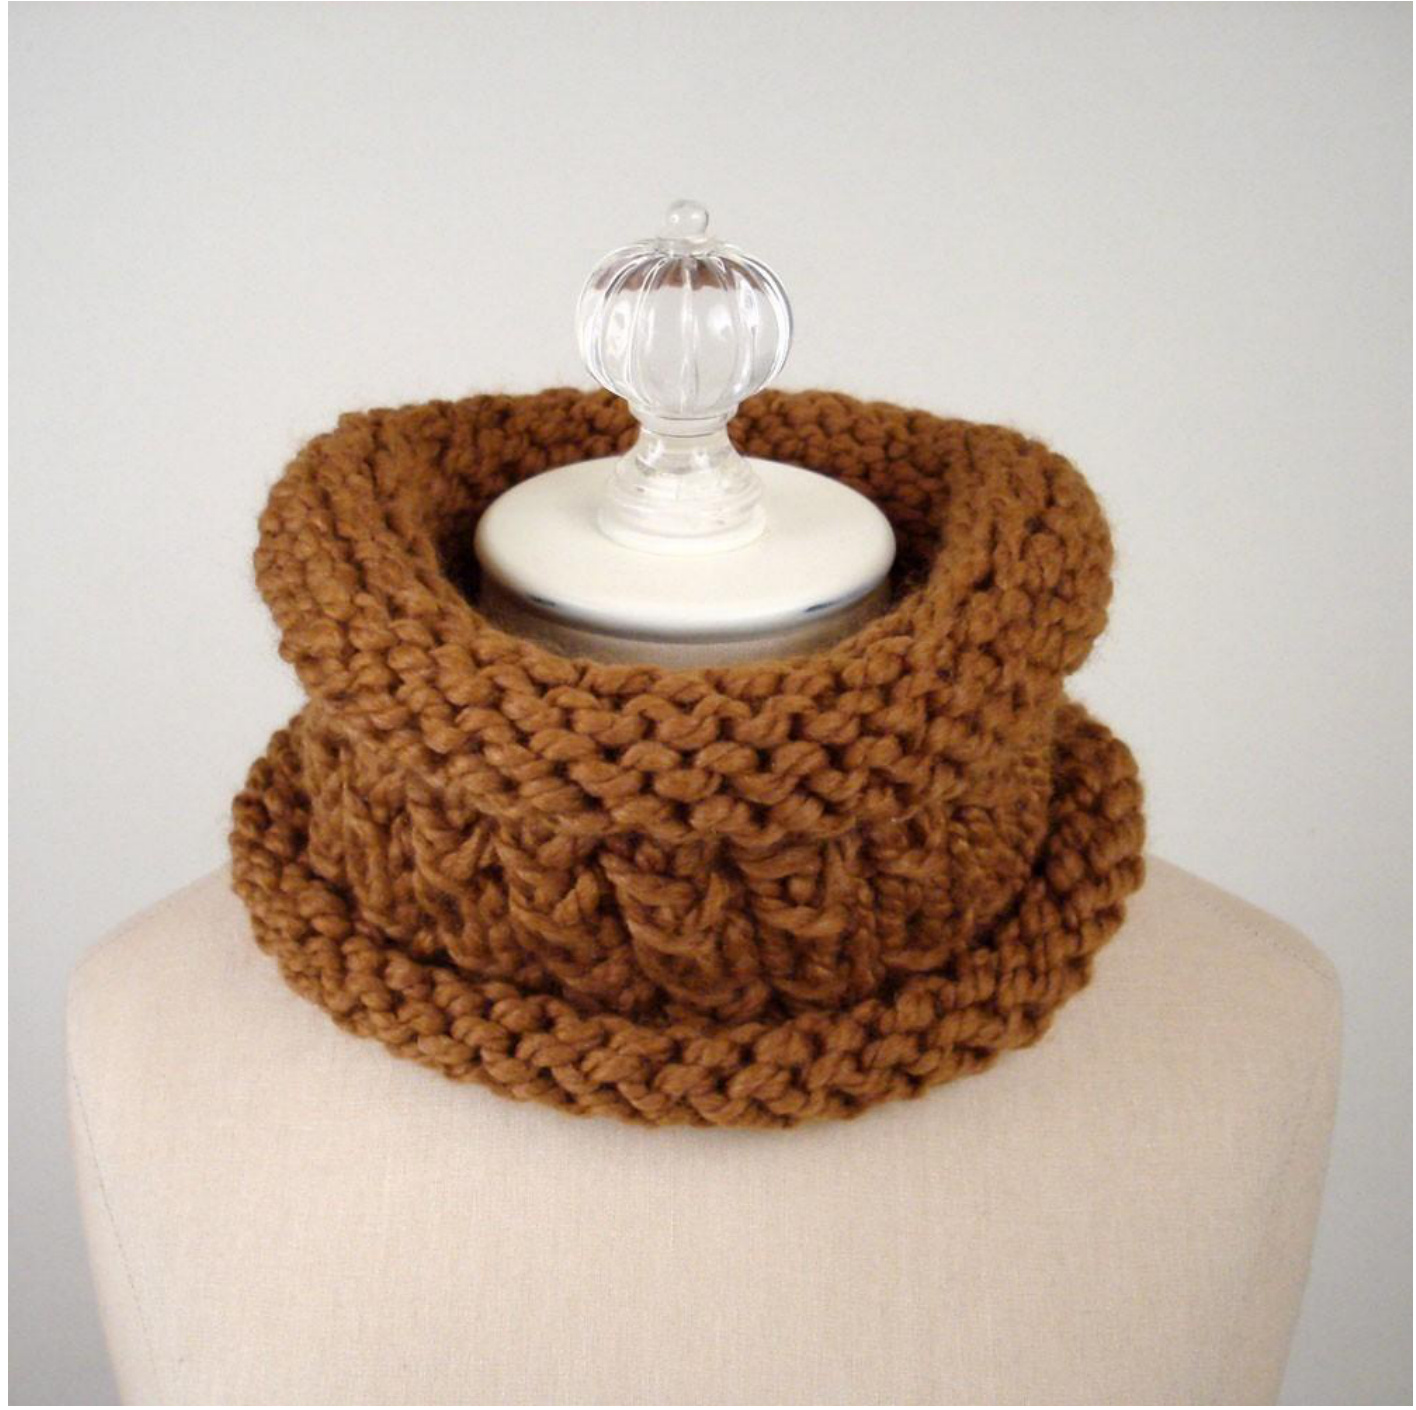
Nutmeg Cowl Pattern
By Brenda Lavell Phydeaux Designs (phydeaux.etsy.com)
June 2009, original design by Brenda Lavell
Personal, non-commercial use only. Please do not copy or distribute this pattern without express written permision.
"Intermediate”" level pattern
Size 17 knitting needles Bulky to super bulky weight yarn Includes blocking, care and storage instructions Dimensions,blocked: approx.42.5"(53.34 cm)long (21” when ends are sewntogether) $9^{\prime\prime}\,(22.86~\mathrm{cm})$ wide when flattened
Materials
\~72 yards Lions Brand Wool-Ease Thick and Quick acrylic/wool yarn, or other super bulky yarn to give you the stated gauge Size 17 needles One large size tapestry needle or a crochet hook Gauge $4^{\prime\prime}=$ eight stitches x 10 rows, in pattern, blocked.
Abbreviations
BO: bind off CO: cast on k: knit p: purl psso: pass slipped stitch over rep: repeat sl: slip RS: right side WS: wrong side
NOTE
Entirely due to a lack of circular needles in size17 in my stash whenI created this, I knit this cowl using straight needles and sewed the ends together using a tapestry needle. This pattern uses straight needles; however, if you are more comfortable knitting with circular needles, by al means do so!
Purl Bind Off
Wrong side: p1, \*p1, then passfirst stitch over the second; repeat from \*
Instructions
1. Using method of choice (I recommend the cable cast on), CO 42 stitches. 2. Row 1 (Rs): k1, \*k1; rep from \* to end. 3. Row 2(Ws): p1, \*p1; rep from \* to end. 4. Repeat rows 1-2 (stockinette stitch) for four additional rows (six rows total). 5. Row 7 and 9: k1, \* s1, k1, yo, psso both the k1 and yo; rep from \* to end. 6. Row 8, 10 and 12: p1,\*p1; rep from \* to end. 7. Row 11 and 13: k1, \*k1; rep from \* to end. 8. Repeat rows 7-13 two more times. 9. Repeat rows 1-2 for six rows. 10. BO on wrong side, leaving a long thread before cutting yarn (at least three times the length of the ends that you'll be sewing together). 11. Block your cowl/neckwarmer (see below) before sewing sidestogether, encouraging the top and bottom to naturally curl! 12. Using your tapestry needle or crochet hook, stitch the ends (right and left side) together. 13. Weave in ends. 14. Wear and enjoy!
Blocking
Excellent blocking instructions for allfibers exist here: http://www.knitty.com/issuewintero2/FEATdiyknitter.html. For wool, fill a clean basin with cold water, dissolving the recommended amount of fiber soaking product (both Eucalan and Soak are excellent; both are non-rinse and contain lanolin to increase your fiber's strength, durability and critter protection). Gently immerse your scarf, but don't agitate or squeeze (you don't want to accidentally felt or damage your new creation!). Allow to saturate and soak for at least 15 minutes. Lift with both hands from the basin, gently pressing water out (don't be alarmed if the water is tinted from dye) and place gently on a clean and dry towel. Gently press and blot moisture from your scarf, then find a flat place you can line with clean/dry towels and/or hefty-type bags (following the directions from the above site). Very gently shape your scarf into the desired dimensions. For this neckwarmer, I gently shape into the desire dimensions. Then I gently and evenly stretch the piece down its length across its width, while checking and adjusting any stitches needing that attention. This is your opportunity to fix uneven or funky stitches, before your neckwarmer dries. Make sure you also block for straight edges and sharp corners (you can pin in place using rust free pins, like quilter pins). Let dry - might take just one day or less in warm air, may take longer in cooler or more humid conditions. And then wear and enjoy!
Care
Handwash cool or cold water, blot to remove moisture,lie flat to dry thoroughly OR dry clean. Clean before storing during warmer weather! You may wish to store with insect/ critter deterrents (lavender, cedar, other natural solutions), but avoid mothballs/chemicals, which may stain/damage your scarf. Storing in plastic containers orbags may not allow your natural fiber scarfto breath, which may yellow the fiber. Wrap in acid freetissue paer before storing, and if youdo store in plastic, leave smallholes to allow air exchange (while not large enough for critters).
This pattern entitles you to:
One copy for youruse only (you may knit this for yourself or as a gift, but not to sell or reproduce via copies or on the web) Updated patterns (in case I revise or correct) Want multiple copies for an event or class? Contact me for discounted bulk purchase! brenda@phydeauxdesigns.com
Interested in special discounts on all Phydeaux Designs products, including patterns?
Subscribe to the newsletter! Sign up here: http://brennneda.blogspot.com. You must complete the subscription process by responding to the optin email that will be sent to your email's inbox. Your email address is never shared or sold. I rarely send out more than one, maybe two, newsletters each month (and two is only for super specials or exciting news!).