KNIT PATTERN
Last-Minute Mitts
Fast, Easy & Reversible | by Barbara Spencer Hawk
HIGHLIGHTS
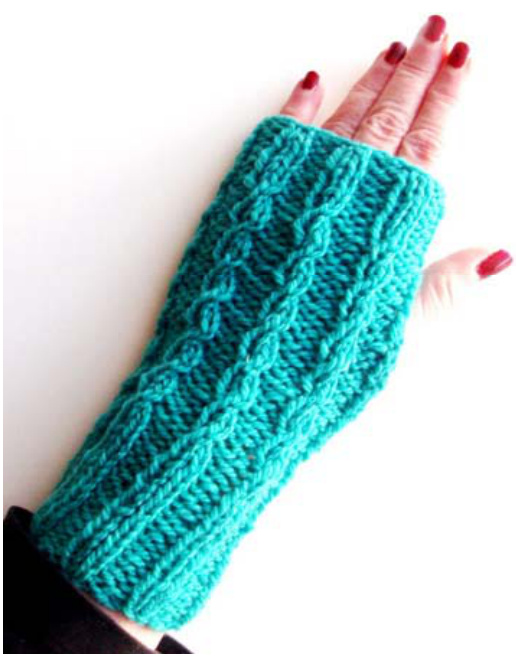
This pattern creates a pair of fast, easy and reversible fingerless mitts ideal as a last-minute gift or a quick, cozy knit when the weather turns Chilly. One side features a simple two-stitch cable while the other has an attractive 2x2 rib. The cable rib stitch is easy to execute and does NOT require a cable needle. The project is worked flat on short needles, so it's extremely portable. The mitts are stretchy enough to hug your hand without additional shaping. The simple thumb openings make it easy to slip your hands free, slide the mitts down and wear them as wristers or cuffs. The pattern includes directions for three sizes. It's written for worsted weight yarn, but it adapts well to sport, DK, aran and even sock yarn carried double. For best results choose yarn with some natural stretch and spring. This project is suited to any knitter who can cast on, knit, k2tog, purl, slip stitches and bind off. 2014 @ Barbara Spencer Hawk. Knitting I Work in Progress. All rights reserved. Fast & easy knit Reversible stitch Worked flat Great stashbuster Three versatile sizes
FUNDAMENTALS
YARN Worsted weight NEEDLES US 8 (5.0 mm) straight or DPN GAUGE(Approx.) 5 to 5.5 sts per inch in pattern (unblocked) 4 to 4.5 sts per inch in pattern (blocked) 6 rows per inch in pattern (blocked)
DIMENSIONS
See the Quick Reference section for sizes, dimensions, stitch counts and yardageestimates.
NOTES
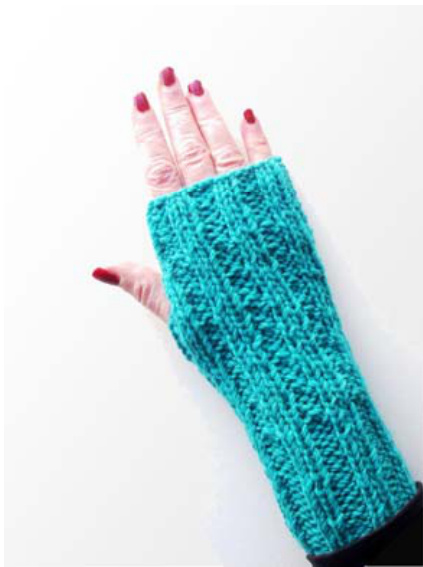
The stitch is a modified rib, so it's stretchy and accommodating. Knit and block a swatch to establish your gauge in your selected yarn. For best results, use yarn with a bit of memory (wool or wool blends work well) and slightly larger needles than might be typical. Last-MinuteMitt:RibbedSide YARNSHOWN Merino 2-Ply (Morehouse Farm) 100% merino Pacific Blue
QUICK REFERENCE
All calculations are based on worsted weight yarn worked with the identified needle sizes. Palm circumference provides a general guideline for choosing a size. All dimensions are approximate. Yardage estimates are generous.
| Size(Approx.) | PalmCircumference | CastOn | Dimensions(Blocked) | YardsEach | YardsTotal |
| Small (S) | 4.5-6.5ins | 26sts | 5.5 ins wide x 8 ins long | 40-45yards | 80-90yards |
| Medium(M) | 6.0-8.0ins | 30sts | 6.5 ins wide x 8 ins long | 45-50yards | 90-100yards |
| Large (L) | 7.5-9.5 ins | 34sts | 7.5 ins wide x8 ins long | 50-55yards | 100-110yards |
PATTERN
The mitts are worked flat. The instructions include extra stitches to create a neat, chained edge and to make seaming easy.
MAKE MITTS
With US 8 needles, cast on 26 (30, 34) sts. A stretchy CO works well, but use whatever CO you prefer. Leave a long tail for seaming.
RIBBED CUFF
Execute the following sequence 8 times: Row 1 (RS) I K1tbl, p1, \*k2, p2,\* end k2, p1, sl 1 pwise wyif. Row 2 (Ws) I K1tbl, k1, \*p2, k2,\* end p2, k1, sl 1 pwise wyif.
Work in Progress BODY Execute the following sequence 7 times: Row 3 I K1tbl, p1, \*k2, p2,\* end k2, p1, sl 1 pwise wyif. Row 4 I K1tbl, k1, \*p2, k2,\* end p2, k1, sl 1 pwise wyif. Row 5 | K1tbl, p1, \*k2tog, leave sts on LN, k first st again, slip both sts off needle, p2,\* end k2tog, leave sts on LN, k first st again, slip both sts off needle, p1, sl 1 pwise wyif. Row 6 I K1tbl, k1, \*p2, k2,\* end p2, k1, sl 1 pwise wyif.
RIBBED EDGE
Execute the following 3 times: Row 7 I K1tbl, p1, \*k2, p2,\* end k2, p1, sl 1 pwise wyif. Row 8 I K1tbl, k1, \*p2, k2,\* end p2, k1, sl 1 pwise wyif.
BIND OFF
BO in pattern, end k2tog tbl, BO Pull yarn through loop. Leave a long tail for seaming.
MAKE ANOTHER MITT
Repeat the Make Mitts directions to knit a second mitt.
TIPS &TRICKS
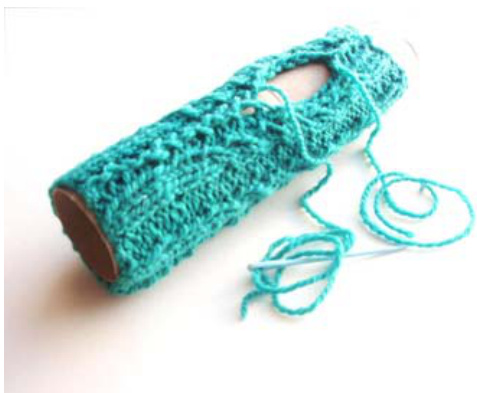
Experiment with different yarn weights and needle sizestoachieve alookandfitthat appealstoyou. For a looser fit, use larger needles or knit a larger size. For a snug fit, use smaller needles orknit a smallersize. Work additional pattern sequences in the cuff or body to increase length. Make the mostofyarnfromstashby working the cuffs and/or ribbed edge in a contrasting color. Insertastripebetween thecuff andbodyor body and ribbed edge: Join CC on RS; knit every stitch.Work row 2in CC,then switch back to MC and follow the pattern. To make seaming easier, use a paper towel tube or something similar as a temporary sewingform.
SEAMMITTS
To do this: 1. Decide where you want the thumb opening to be. 2. Mark the top and bottom of the opening with stitch markers. 3. Use CO yarn tail to seam from bottom edge up to thumb opening. 4. Use BO yarn tail to seam from top edge down to thumb opening. Weave ends. Steam or wet block if desired.
ABBREVIATIONS&SYMBOLS
\*\* repeat this sequence p purl BO bind off pwise purlwise CO cast on RS right side / front CC contrasting color sl slip k knit sts stitches k1tbl knit through back loop tbl through back loop k2tog knit two together WS wrong side / back LN left needle wyif with yarn in front MC main color
PATTERNS
For more patterns, visit Barbara Spencer Hawk Designs (Ravelry) and to see designs in development, visit Knitting I Work in Progress.


