Facial Scrubbies
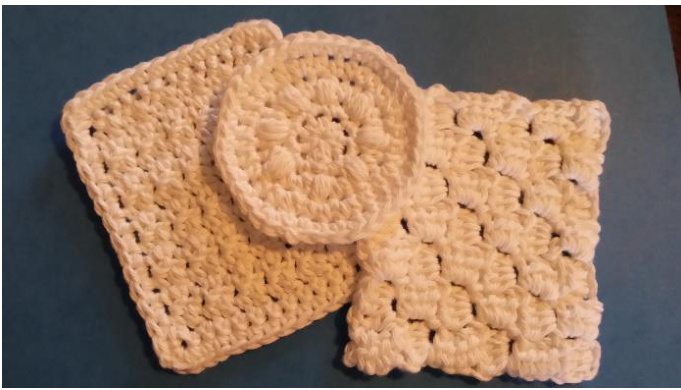
These scrubbies are small and the perfect size for washing your face and exfoliating.
Supplies:
4 ply Cotton Yarn (I used I Love This Cotton in white) F/5-3.75MM Hook G/6-4.25MM Hook Yarn Needle Scissors
Abbreviations:
ch=chain st=stitch sts=stitches slst=slip stitch sp=space rnd=round rw=row sc=single crochet hdc=half double crochet sk=skip pst=puff stitch - This is a modified puff stitch-yarn over, insert hook yarn over pull up loop in same space x3, yarn over pull through 6 loops on your hook, yarn over pull through the 2 remaining loops on hook. You will also need to know how to work in a magic circle and do a foundation sc. If you don't know how to do this stitch, you can find a video tutorial through this link. (copy and paste into your browser) https://www.youtube.com/watch?v=8sIJXTx7ilQ
Round Scrubbie:
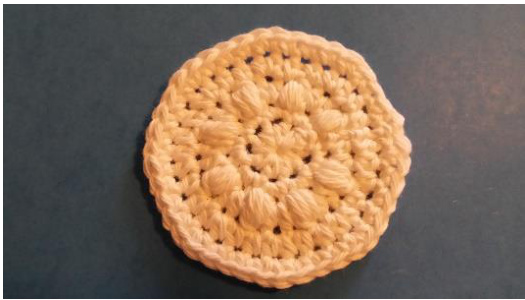
With smaller hook create a magic circle, 8 hdc in magic circle, slst in first hdc. (8sts Rnd3: ch 1, pst in same sp as ch 1, 2hdc in next st, \*pst, 2 hdc in next st\* repeat \* to \* around, slst in first pst. Rnd4: ch 1, hdc in same sp as ch1, hdc in next st, 2 hdc in next st, \*hdc in next 2 sts, 2 hdc in next st\*, repeat \* to\* around, slst in first hdc. Rnd5: ch1, sc in same sp as ch1, sc in next 2 sts, 2 sc in next st, \*sc in next 3 sts, 2 sc in next st\* repeat \* to \* around, join w/slst in first sc of round, fasten off and weave in ends. Final product measures approximately 3 inches in diameter.
Corner to Corner Scrubbie:

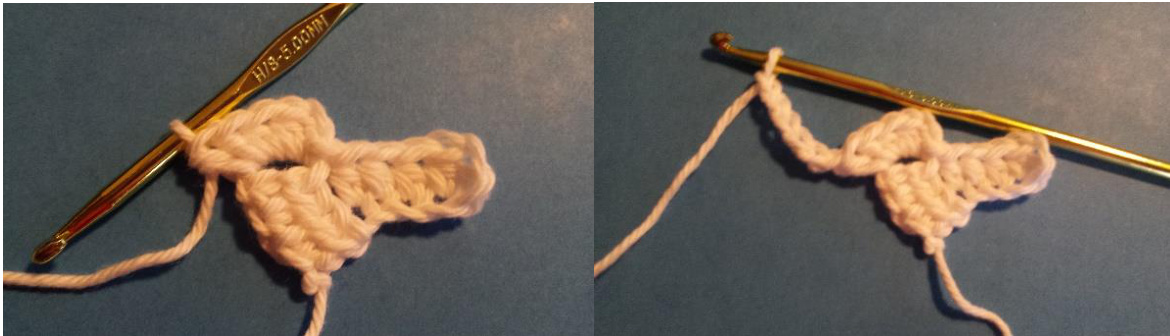
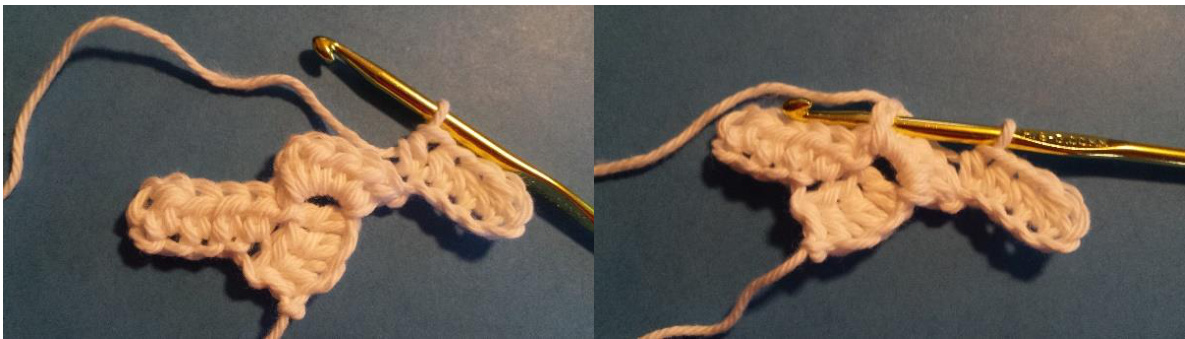
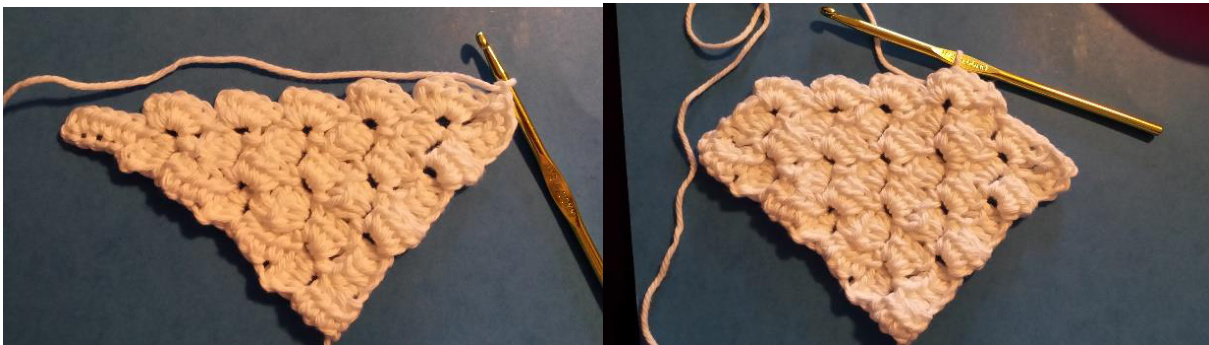
Ch 2 counts as 1 st and ch 6 counts as 6 sts in the st count at the end of each row. Please refer to pictures at the end of the pattern for help if needed. This pattern is worked with the larger hook. Increase rows: Rw1:ch 6, hdc in 3rd ch from hook, hdc in remaining 3 sts, ch 6, turn (11 sts) Rw2: hdc in 3rd ch from hook, hdc in next 3 sts, slst in ch 2 sp of cluster created in rw 1, (ch2, 4 hdc) in ch 2 sp, ch 6, turn (16 sts) Rw3: hdc in 3rd ch from hook, hdc in next 3 sts, \*slst in ch2 sp of next cluster, (ch2, 4 hdc) in ch2 sp\*, repeat \* to \* in remaining cluster, ch 6, turn (21) Rw4: hdc in 3rd ch from hook, hdc in next 3 sts, \*slst in ch2 sp of next cluster, (ch2,4hdc) ch2 sp, repeat \* to \* in the remaining 2 clusters, ch6, turn. (26) Rw5: hdc in 3rd ch from hook, hdc in next 3 sts, \*slst in ch2 sp of next cluster, (ch 2, 4 hdc) in ch 2 sp\*, repeat \* to \* in remaining 3 clusters, ch 6, turn. (31) Rw6: hdc in 3rd ch from hook, hdc in next 3 sts, \*slst in ch2 sp of next cluster, (ch2,4 hdc) in ch2 sp\*, repeat \* to \* in remaining 4 clusters, ch6, turn. (36) Decrease Rows: Rw7: hdc in 3rd ch from hook, hdc in next 3 sts, \*slst in ch2 sp of next cluster, (ch 2, 4 dc) in ch2 sp\*, repeat \* to \* in next 4 clusters, slst in ch2 sp of last cluster, ch1,turn. (30 sts) Rw8: sk 1 st, slst in next 3 sts, \*slst in ch 2 sp, (ch 2, 4 hdc ) in ch 2 sp,\*, repeat \* to \* in next 4 clusters, slst in ch 2 sp of last cluster, ch 1, turn. (25 sts) Rw9: sk 1 st, slst in next 3 sts, \*slst in ch 2 sp, (ch 2, 4 hdc) in ch 2 sp \*, repeat \* to \* in next 3 clusters, slst in ch 2 sp of last cluster, ch 1, turn. (20 sts) Rw10: sk 1 st, slst in next 3 sts, \*slst in ch 2 sp, (ch 2, 4hdc) in ch 2 sp\*, repeat \* to \* in next 2 clusters, slst in ch 2 sp of last cluster, ch 1, turn. (15 sts) Rw11: sk 1 st, slst in next 3 sts,\* slst in ch 2 sp, (ch 2, 4hdc) in ch 2 sp, repeat in \* to \* in next cluster, slst in ch 2 sp of last cluster, ch1, turn. (10 sts) Rw12: sk 1 st, slst in next 3 sts, slst in ch 2 sp, (ch 2, 4 hdc) in ch 2 sp, slst in last cluster, fasten off and weave in ends. (5 sts) Finished product measures approximately 3 x 4 4 inches. First row First cluster of second row
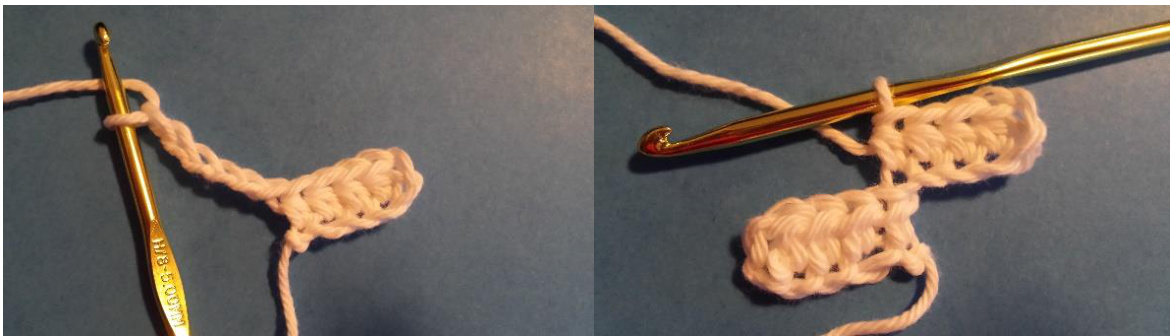
Insert hook in ch 2 of cluster made in first row. Ch 2
4 hdc in ch 2 sp (second cluster on row 2), Ch 6, turn
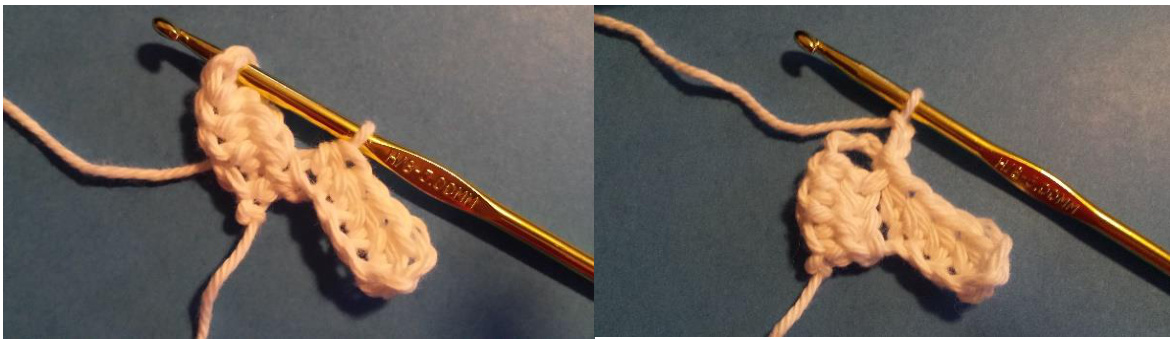
hdc in 3rd ch from hook, hdc in next 3 ch, slst in ch 2 sp of next cluster.
Slst in ch 2 of next cluster, ch 2, 4 hdc, ch 6. (Each increase row is worked this way)
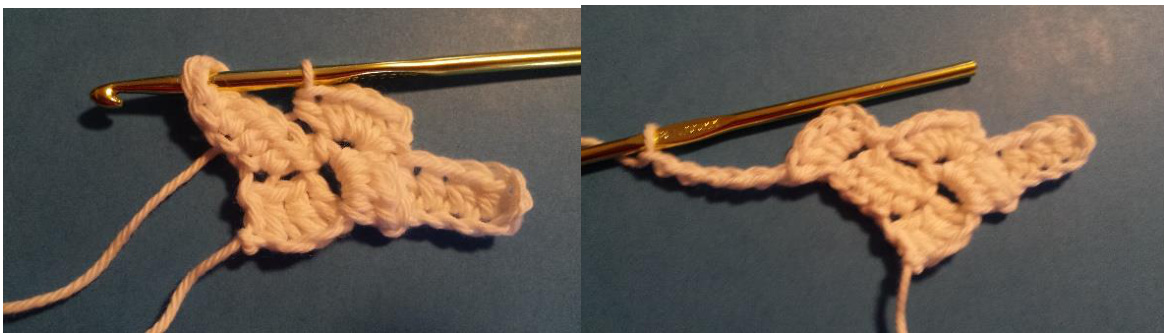
For the decrease rows, slst in last cluster's ch 2 sp, turn, slst in next 3 sts, slst in ch 2 of cluster, then continue working in pattern. The second picture is after working 2 decrease rows.
Seedy Scrubbie:
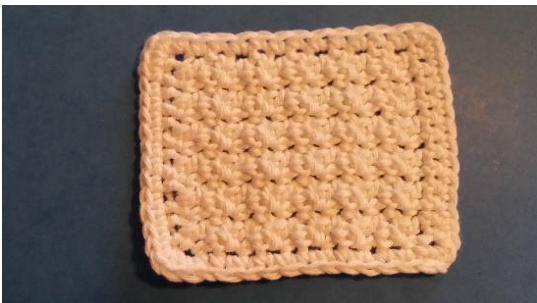
Be sure to begin and end each row with a sc. With the larger hook. Rw1: 13 foundation sc, ch1,turn (13) Rw2-12: sc in same sp as ch 1, \*dc in next st, sc in next st\* repeat \* to \* to the end of the row, ch 1, turn Rw13: sc in same sp as ch1, sc in each st across, ch1, turn Rw14: sc in each st around putting 3 sc in each corner, fasten off and weave in ends. Finished product measures approximately 3 x 4 inches.


